Virsa Firefighter InstallGuideWAS700
32
Installation Guide Virsa Firefighter™ for SAP Version 5.2 for SAP WAS 700
-
Upload
bhaskar-sharma -
Category
Documents
-
view
52 -
download
1
description
Virsa Firefighter InstallGuideWAS700
Transcript of Virsa Firefighter InstallGuideWAS700

Installation Guide
Virsa Firefighter™ for SAP Version 5.2for SAP WAS 700
COPYRIGHT
© Copyright 2006 SAP AG. All rights reserved.
SAP Library document classification: PUBLIC
No part of this publication may be reproduced or transmitted in any form or for any purpose without the express permission of SAP AG. The information contained herein may be changed without prior notice.
Some software products marketed by SAP AG and its distributors contain proprietary software components of other software vendors.
Microsoft, Windows, Outlook, and PowerPoint are registered trademarks of Microsoft Corporation.
IBM, DB2, DB2 Universal Database, OS/2, Parallel Sysplex, MVS/ESA, AIX, S/390, AS/400, OS/390, OS/400, iSeries, pSeries, xSeries, zSeries, z/OS, AFP, Intelligent Miner, WebSphere, Netfinity, Tivoli, and Informix are trademarks or registered trademarks of IBM Corporation in the United States and/or other countries.
Oracle is a registered trademark of Oracle Corporation.
UNIX, X/Open, OSF/1, and Motif are registered trademarks of the Open Group.
Citrix, ICA, Program Neighborhood, MetaFrame, WinFrame, VideoFrame, and MultiWin are trademarks or registered trademarks of Citrix Systems, Inc.
HTML, XML, XHTML, and W3C are trademarks or registered trademarks of W3C®, World Wide Web Consortium, Massachusetts Institute of Technology.
Java is a registered trademark of Sun Microsystems, Inc.
JavaScript is a registered trademark of Sun Microsystems, Inc., used under license for technology invented and implemented by Netscape.
MaxDB is a trademark of MySQL AB, Sweden.
Virsa, Virsa Systems, Access Enforcer, ComplianceOne, Compliance Calibrator, Confident Compliance, Continuous Compliance, Firefighter, Risk Terminator, Role Expert, the respective taglines, logos and service marks are trademarks of SAP Governance, Risk and Compliance, Inc., which may be registered in certain jurisdictions.
SAP, R/3, mySAP, mySAP.com, xApps, xApp, SAP NetWeaver, and other SAP products and services mentioned herein as well as their respective logos are trademarks or registered trademarks of SAP AG in Germany and in several other countries all over the world. All other product and service names mentioned are the trademarks of their respective companies. Data contained in this document serves information purposes only. National product specifications may vary.
These materials are subject to change without notice. These materials are provided by SAP AG and its affiliated companies (“SAP Group”) for informational purposes only, without representation or warranty of any kind, and SAP Group shall not be liable for errors or omissions with respect to the materials. The only warranties for SAP Group products and services are those that are set forth in the express warranty statements accompanying such products and services, if any. Nothing herein should be construed as constituting an additional warranty.
2

SAP—Important Disclaimers
SAP Library document classification: PUBLIC
This document is for informational purposes only. Its content is subject to change without notice, and SAP does not warrant that it is error‐free. SAP MAKES NO WARRANTIES, EXPRESS OR IMPLIED, OR OF MERCHANTABILITY, OR FITNESS FOR A PARTICULAR PURPOSE.
Coding Samples
Any software coding and/or code lines/strings (“Code”) included in this documentation are only examples and are not intended to be used in a productive system environment. The Code is only intended to better explain and visualize the syntax and phrasing rules of certain coding. SAP does not warrant the correctness and completeness of the Code given herein, and SAP shall not be liable for errors or damages caused by the usage of the Code, except if such damages were caused by SAP intentionally or were grossly negligent.
Internet Hyperlinks
The SAP documentation may contain hyperlinks to the Internet. These hyperlinks are intended to serve as a hint where to find supplementary documentation. SAP does not warrant the availability and correctness of such supplementary documentation or the ability to serve for a particular purpose. SAP shall not be liable for any damages caused by the use of such documentation unless such damages have been caused by SAP’s gross negligence or willful misconduct.
Accessibility
The information contained in the SAP Library documentation represents SAP’s current view of accessibility criteria as of the date of publication; it is in no way intended to be a binding guideline on how to ensure accessibility of software products. SAP specifically disclaims any liability with respect to this document and no contractual obligations or commitments are formed either directly or indirectly by this document. This document is for internal use only and may not be circulated or distributed outside your organization without SAP’s prior written authorization.
3

4

CONTENTS
Preface
About this Guide . . . . . . . . . . . . . . . . . . . . . . . . . . . . . . . . . . . . . . . . . . . . . . . . . . . . . . . . . . . . . . . . . . . . . . . . . . . . .8Conventions . . . . . . . . . . . . . . . . . . . . . . . . . . . . . . . . . . . . . . . . . . . . . . . . . . . . . . . . . . . . . . . . . . . . . . . . . .8
Alert Statements . . . . . . . . . . . . . . . . . . . . . . . . . . . . . . . . . . . . . . . . . . . . . . . . . . . . . . . . . . . . . . . . . . . . . .8
Product Documentation . . . . . . . . . . . . . . . . . . . . . . . . . . . . . . . . . . . . . . . . . . . . . . . . . . . . . . . . . . . . . . . . . . . . . . .9Documentation Formats . . . . . . . . . . . . . . . . . . . . . . . . . . . . . . . . . . . . . . . . . . . . . . . . . . . . . . . . . . . . . . .9
Installation Guide, User Guide, and Release Notes . . . . . . . . . . . . . . . . . . . . . . . . . . . . . . . . . . . . . . . .9
Contacting SAP GRC . . . . . . . . . . . . . . . . . . . . . . . . . . . . . . . . . . . . . . . . . . . . . . . . . . . . . . . . . . . . . . . . . . . . . . . .10
1 Installation Overview
How to Use This Guide . . . . . . . . . . . . . . . . . . . . . . . . . . . . . . . . . . . . . . . . . . . . . . . . . . . . . . . . . . . . . . . . . . . . . .12Installation Pre‐requisites . . . . . . . . . . . . . . . . . . . . . . . . . . . . . . . . . . . . . . . . . . . . . . . . . . . . . . . . . . . . . . . . . . . .13
Hardware Requirements . . . . . . . . . . . . . . . . . . . . . . . . . . . . . . . . . . . . . . . . . . . . . . . . . . . . . . . . . . . . . .13
Software Requirements . . . . . . . . . . . . . . . . . . . . . . . . . . . . . . . . . . . . . . . . . . . . . . . . . . . . . . . . . . . . . . .13
Configuration Requirements . . . . . . . . . . . . . . . . . . . . . . . . . . . . . . . . . . . . . . . . . . . . . . . . . . . . . . . . . .13
Memory Settings . . . . . . . . . . . . . . . . . . . . . . . . . . . . . . . . . . . . . . . . . . . . . . . . . . . . . . . . . . . . .13
2 Firefighter Installation
Pre‐installation Procedures . . . . . . . . . . . . . . . . . . . . . . . . . . . . . . . . . . . . . . . . . . . . . . . . . . . . . . . . . . . . . . . . . . .16Firefighter Installation Procedures . . . . . . . . . . . . . . . . . . . . . . . . . . . . . . . . . . . . . . . . . . . . . . . . . . . . . . . . . . . . .17
Before You Begin! . . . . . . . . . . . . . . . . . . . . . . . . . . . . . . . . . . . . . . . . . . . . . . . . . . . . . . . . . . . . . . . . . . . .17
Deploying the Firefighter .sda and .ear Files . . . . . . . . . . . . . . . . . . . . . . . . . . . . . . . . . . . . . . . . . . . . .18
Restarting the NetWeaver J2EE Server . . . . . . . . . . . . . . . . . . . . . . . . . . . . . . . . . . . . . . . . . . . . . . . . . .19
3 Post-installation Configuration
Firefighter Post‐installation Tasks . . . . . . . . . . . . . . . . . . . . . . . . . . . . . . . . . . . . . . . . . . . . . . . . . . . . . . . . . . . . .22Creating the Firefighter Administrator Role . . . . . . . . . . . . . . . . . . . . . . . . . . . . . . . . . . . . . . . . . . . . .22
Assigning the Administrator Role to the Administrator User . . . . . . . . . . . . . . . . . . . . . . . . . . . . . . .25
Choosing the Language Setting . . . . . . . . . . . . . . . . . . . . . . . . . . . . . . . . . . . . . . . . . . . . . . . . . . . . . . . .26
Specifying a Language with the User Management Engine . . . . . . . . . . . . . . . . . . . . . . . . .27
Connecting a Stand‐alone J2EE System to the Remote SAP Server . . . . . . . . . . . . . . . . . . . . . . . . . .31
5

Firefighter Version 5.2Installation Guide
6

PREFACE
TOPICS COVERED IN THIS PREFACE
About this Guide
Conventions
Alert Statements
Product Documentation
Documentation Formats
Installation Guide, User Guide, and Release Notes
Contacting SAP GRC
7
Firefighter Version 5.2Installation Guide
About this Guide
Conventions
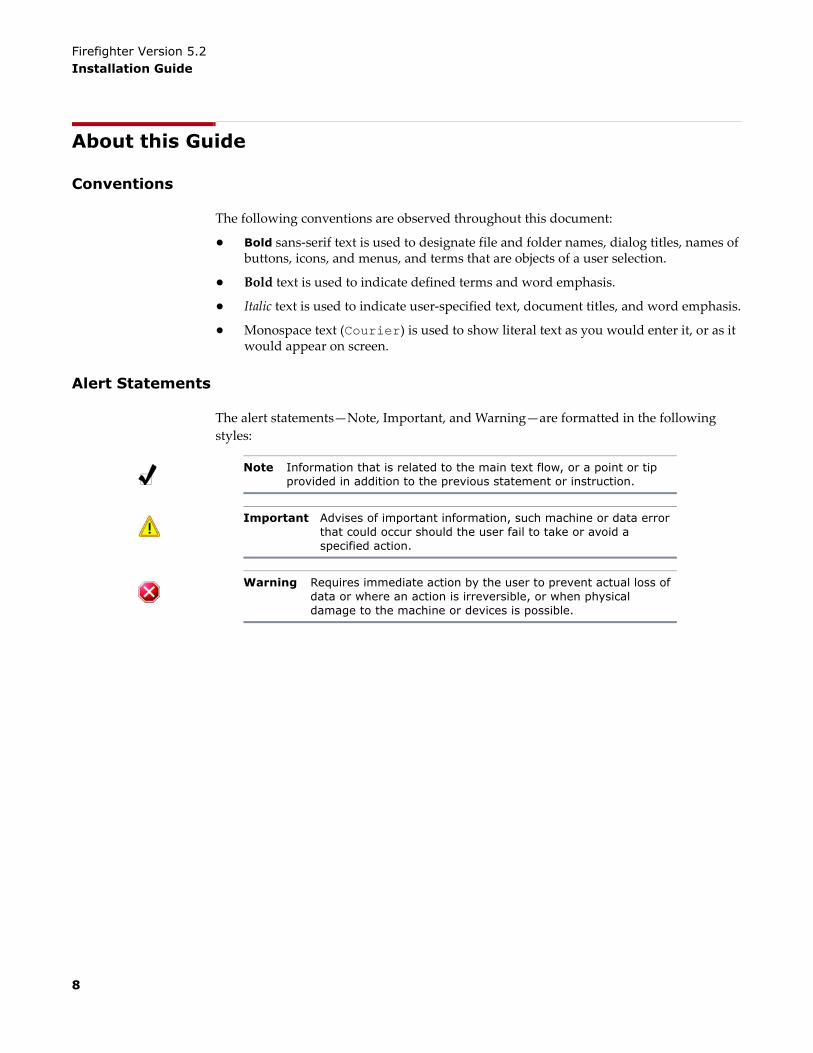
The following conventions are observed throughout this document:
• Bold sans‐serif text is used to designate file and folder names, dialog titles, names of buttons, icons, and menus, and terms that are objects of a user selection.
• Bold text is used to indicate defined terms and word emphasis.
• Italic text is used to indicate user‐specified text, document titles, and word emphasis.
• Monospace text (Courier) is used to show literal text as you would enter it, or as it would appear on screen.
Alert Statements
The alert statements—Note, Important, and Warning—are formatted in the following styles:
Note Information that is related to the main text flow, or a point or tip provided in addition to the previous statement or instruction.
Important Advises of important information, such machine or data error that could occur should the user fail to take or avoid a specified action.
Warning Requires immediate action by the user to prevent actual loss of data or where an action is irreversible, or when physical damage to the machine or devices is possible.
8
Product DocumentationPreface
Product Documentation
Documentation Formats
Documentation is provided in the following electronic formats:
• Adobe® Acrobat® PDF files
You must have Adobe® Reader® installed to read the PDF files. Adobe Reader installation programs for common operating systems are available for free download from the Adobe Web site at www.adobe.com.
Installation Guide, User Guide, and Release Notes
You can download the Installation Guide, User Guide, and Release Notes in PDF format.
9

Firefighter Version 5.2Installation Guide
Contacting SAP GRC
For information on contacting SAP Governance, Risks, and Compliance (SAP GRC), go to the SAP Support Portal which can be found on the SAP Service Marketplace at: service.sap.com.
In order to use the SAP Support Portal you will need to log in using your SAP user account. If you do not already have an existing SAP user account, you must first create a new account. At the bottom right area of the SAP Service Marketplace page, under the “Questions Regarding Login?” heading, click the “New User? Register here!” link. You will be prompted for a Customer Number or Installation Number which you can get from your SAP Basis Administrator. (In an SAP system you can find your installation number under System ‐> Status ‐> SAP System data.)
To submit your support request(s) from the SAP Support Portal, use the quick‐link “Messages” and follow the “SAP Message Wizard” procedure. Log all support requests under the following SAP GRC support components:
• GRC‐SAE Virsa Access Enforcer
• GRC‐SCC Virsa Compliance Calibrator
• GRC‐SFF Virsa Firefighter for SAP
• GRC‐SRE Virsa Role Expert
• GRC‐SPC SAP GRC Process Control
For more information on the SAP Support Portal, use the quick‐links provided below:
• SAP Notes Search Here you can search for reference material and possible solutions for any questions regarding the GRC components.
• Messages Here you can create Support Messages for the GRC components.
• Software Download Here you can download installations, upgrades, and support packages.
• SAP Service Channel ‐ Your Inbox Here you can monitor the status of your open messages.
10

1INSTALLATION OVERVIEW
TOPICS COVERED IN THIS CHAPTER
How to Use This Guide
Installation Pre-requisites
Hardware Requirements
Software Requirements
Configuration Requirements
11

Firefighter Version 5.2Installation Guide
How to Use This Guide
This guide is designed to simplify the Firefighter installation process. It identifies the steps you need to follow, specifies the order in which those steps must be performed, and guides you through the process. There are three phases to the process, each represented by a chapter in the guide:
• This chapter (“Installation Overview”) lays the groundwork for the installation. It provides an overview of the Firefighter implementation process, of which the installation itself is only a part.
• Chapter 2, “Firefighter Installation” guides you through the installation process. Once you have completed the procedure, you will have a running instance of Firefighter.
• Chapter 3, “Post‐installation Configuration” lists the procedures you must perform after installation. These are one‐time administrative tasks you must complete to make Firefighter ready for use.
If you follow the process described in this guide, you will be able to install Firefighter simply and directly. For upgrading from previous versions of Firefighter, see SAP Note 1004241.
12

Installation Pre-requisitesChapter 1 Installation Overview
Installation Pre-requisites
Before you begin installing Firefighter, you need to ensure that your system meets the necessary requirements:
Hardware Requirements
Machine = Server basedDual Processors = 2.4–3.2 GHz or fasterRAM = 2‐4 GBHard Disk = 40 GB Minimum (120 GB Recommended)
Software Requirements
Operating Systems:
• Windows 2000 Server
• Windows 2000 Advanced Server
• Windows 2003 Server (Standard/Enterprise/Web)
• Linux Enterprise Server 4.0
Java Runtime Environment = JRE version 1.4.x
Web/Application server = SAP Web Application Server 700 – SP8 or above, with Java/J2EE Stack.
Configuration Requirements
In addition to the basic hardware and software requirements, Firefighter installation also requires certain configuration settings.
Memory Settings
To ensure that Firefighter installation does not encounter an out of memory condition, you need to set your memory parameters. You do this using the ConfigTool installed along with NetWeaver. The command you use to launch the ConfigTool depends on your operating system:
• If you are running a UNIX or LINUX OS, use:
/usr/sap/<SID>/DVEBMGS00/j2ee/configtool/configtool.sh
• If you are running a Windows OS, use:
\usr\sap\<SID>\JC00\j2ee\configtool\configtool.bat
Note For hard disk capacity, 40 GB is adequate. However, depending on how many roles you maintain, Firefighter can consume 40 GB of storage in approximately a year. Once the drive is full, you would need to either archive the data, or migrate to a larger drive. For this reason, you are recommended to install Firefighter on a drive of at 120 GB or larger.
13

Firefighter Version 5.2Installation Guide
To set your memory parameters:
1 In the ConfigTool, navigate to the server instance for which you wish to set the memory parameters, and select the server by its server number.
2 Add or change the memory parameters as required.
You do this using the General Tab. If the parameters don’t exist on this server, you need to add them. If the parameters already exist, you need to change them.
In either case, you need to set your memory parameters according to the settings described in SAP Note 723909 for your operating system.
14
2FIREFIGHTER INSTALLATION
TOPICS COVERED IN THIS CHAPTER
Pre-installation Procedures
Firefighter Installation Procedures
Before You Begin!
Deploying the Firefighter .sda and .ear Files
Restarting the NetWeaver J2EE Server
15
Firefighter Version 5.2Installation Guide
Pre-installation Procedures
The Firefighter™ application files are available on the SAP Service Marketplace at: service.sap.com.
To download the Firefighter files:
1 From the SAP Support Portal section, click the Software Download quick link.
2 From the SAP Installations & Upgrades page, in the navigation bar on the left, click Entry by Application Group.
3 From the Installations & Upgrades page, click the SAP Solutions for Governance, Risk, and Compliance link.
4 Under the SAP Solutions for Governance, Risk, and Compliance area, click the SAP GRC Access Control link, then the VIRSA FIREFIGHTER FOR SAP link.
5 Under the VIRSA FIREFIGHTER FOR SAP area, click the link for your particular version where you plan to install Firefighter.
6 Click the Installation link, then the Downloads tab, and follow the instructions under this tab to download the files.
To proceed with the Firefighter pre-installation:
1 Create a folder on your system with no spaces in the folder name. An example of a good folder name is FF_Install.
2 Go to the SAP Service Marketplace and download the Firefighter installation file into the folder you have created on your local system. Depending on the speed of your network, it can take up to four hours to download the application files.
3 Unzip the setup files that you have downloaded.
4 Verify whether your download was successful.
To verify a successful download, compare the list of files in your download directory (for example, FF_Install) to the list of files in the distribution list that accompanies the download. If all of the files listed in the distribution list are present, the download was successful.
Important Do not create your folder on your desktop, or copy the Firefighter Installation Package onto your desktop. The installation process will not function properly if executed from your desktop.
16

Firefighter Installation ProceduresChapter 2 Firefighter Installation
Firefighter Installation Procedures
The installation procedures detailed in this chapter are all required. Perform the steps in the order they appear.
Firefighter installation procedures include:
• “Deploying the Firefighter .sda and .ear Files” on page 18
• “Restarting the NetWeaver J2EE Server” on page 19
Before You Begin!
Firefighter has specific system requirements, and cannot run successfully unless these requirements are met. The section “Installation Pre‐requisites” on page 13 lists all system pre‐requisites. Do not attempt to install Firefighter until you are certain that your target system meets these requirements.
Installation Checklist
Before you begin installing Firefighter, you need to ensure that:
Important You must have system administrator privileges to successfully install Firefighter.
___ The SAP NetWeaver J2EE Server 700 is installed and configured.
___ The SAP database exists.
___ The User Management Engine (UME) is installed and configured.
___ Memory settings for SAP 700 Web Application Server (WAS) are configured. For more information about memory settings, see “Memory Settings” on page 13.
17
Firefighter Version 5.2Installation Guide
Deploying the Firefighter .sda and .ear Files
The first step in installing Firefighter is to deploy the .sda and .ear files:
• sapgrc~ffdb.sda contains the Firefighter Data Dictionary.
• firefighterlib.sda contains the Firefighter libraries.
• sapgrc~ffume.sda contains the actions required by Firefighter.
• sapgrc~ffappcomp.ear contains Firefighter executables
Use the Software Deployment Manager (SDM) to deploy the .sda and .ear files.
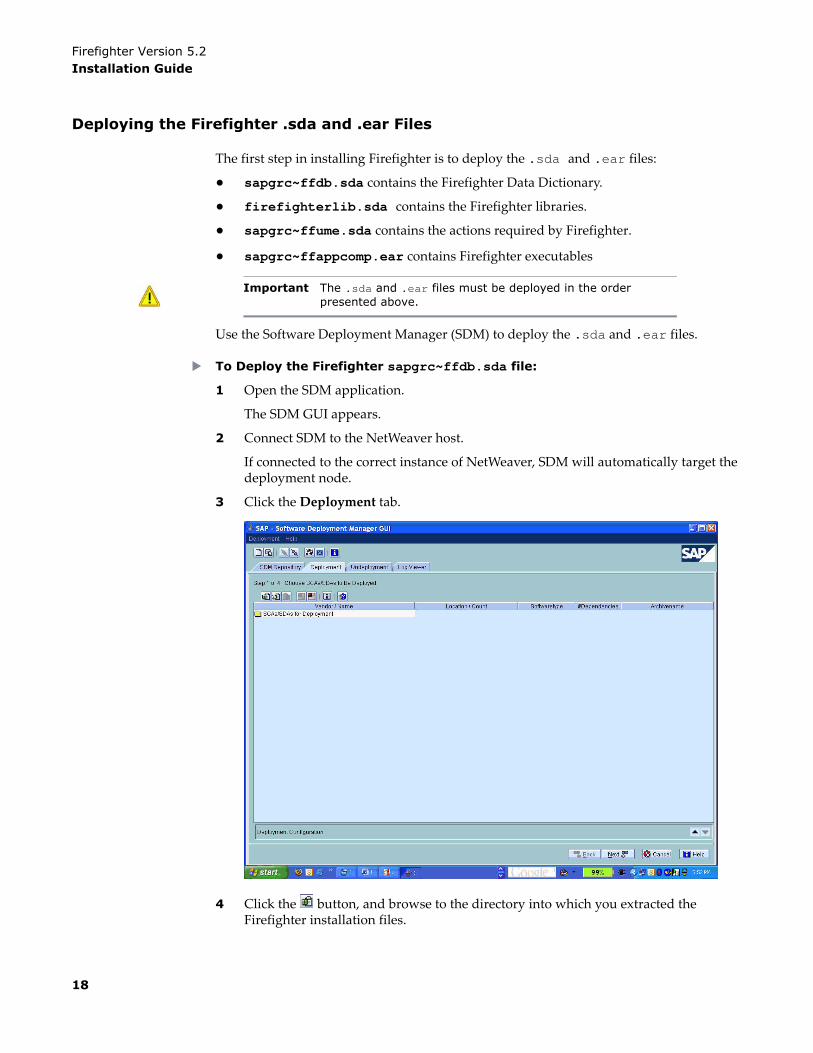
To Deploy the Firefighter sapgrc~ffdb.sda file:
1 Open the SDM application.
The SDM GUI appears.
2 Connect SDM to the NetWeaver host.
If connected to the correct instance of NetWeaver, SDM will automatically target the deployment node.
3 Click the Deployment tab.
4 Click the button, and browse to the directory into which you extracted the Firefighter installation files.
Important The .sda and .ear files must be deployed in the order presented above.
18
Firefighter Installation ProceduresChapter 2 Firefighter Installation
5 In the Browse window, double‐click sapgrc~ffdb.sda, and then in SDM click Next.
6 Complete the wizard to deploy the Firefighter data dictionary.
Follow the same procedure to deploy firefighterlib.sda, sapgrc~ffume.sda. and sapgrc~ffappcomp.ear files.
Restarting the NetWeaver J2EE Server
At this point, you need to restart the NetWeaver J2EE server.
To verify that your installation was successful, launch a Web browser and enter the following URL in the address field:
http://<server>:<port>/webdynpro/dispatcher/sapgrc/ffappcomp/Firefighter
where:
server = the name or IP address of the NetWeaver J2EE server on which Firefighter resides.
port = the port number on which Firefighter listens.
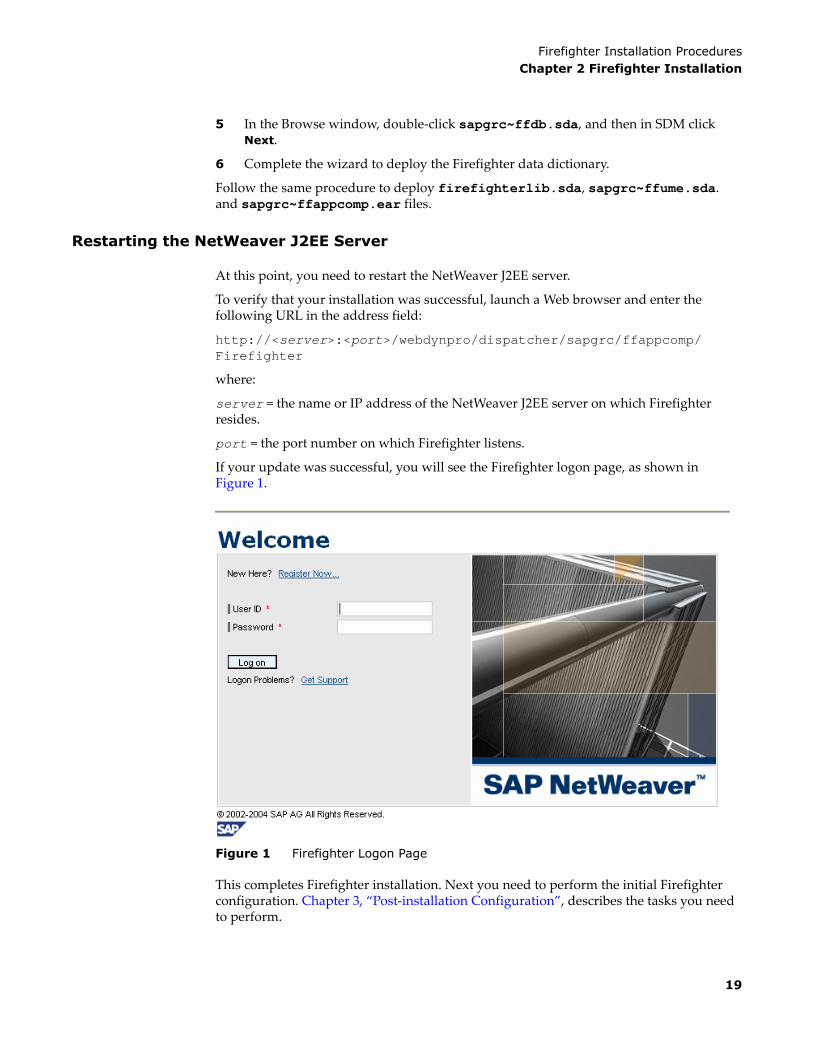
If your update was successful, you will see the Firefighter logon page, as shown in Figure 1.
Figure 1 Firefighter Logon Page
This completes Firefighter installation. Next you need to perform the initial Firefighter configuration. Chapter 3, “Post‐installation Configuration”, describes the tasks you need to perform.
19

Firefighter Version 5.2Installation Guide
20
3POST-INSTALLATION
CONFIGURATION
TOPICS COVERED IN THIS CHAPTER
Firefighter Post-installation Tasks
Creating the Firefighter Administrator Role
Assigning the Administrator Role to the Administrator User
Choosing the Language Setting
Connecting a Stand-alone J2EE System to the Remote SAP Server
21

Firefighter Version 5.2Installation Guide
Firefighter Post-installation Tasks
The configuration procedures are detailed in this chapter. Perform the steps in the order they appear. The first two bullets are required.
Firefighter post‐installation configuration includes:
• “Creating the Firefighter Administrator Role” on page 22
• “Assigning the Administrator Role to the Administrator User” on page 25
• “Choosing the Language Setting” on page 26
• “Connecting a Stand‐alone J2EE System to the Remote SAP Server” on page 31
Creating the Firefighter Administrator Role
Once you have completed the installation procedures described in Chapter 2 “Firefighter Installation” and restarted the NetWeaver J2EE server, Firefighter is installed and running. However, before you can use Firefighter, you must create the administrator role and an initial user account. The first step is to create the Firefighter administrator role. Use the User Management Engine (UME) to do this.
To create the Firefighter administrator role:
1 Use your Web browser to connect and log in to the NetWeaver J2EE server, and on the Index page, click User Management. This will produce the User Management screen.
22
Firefighter Post-installation TasksChapter 3 Post-installation Configuration
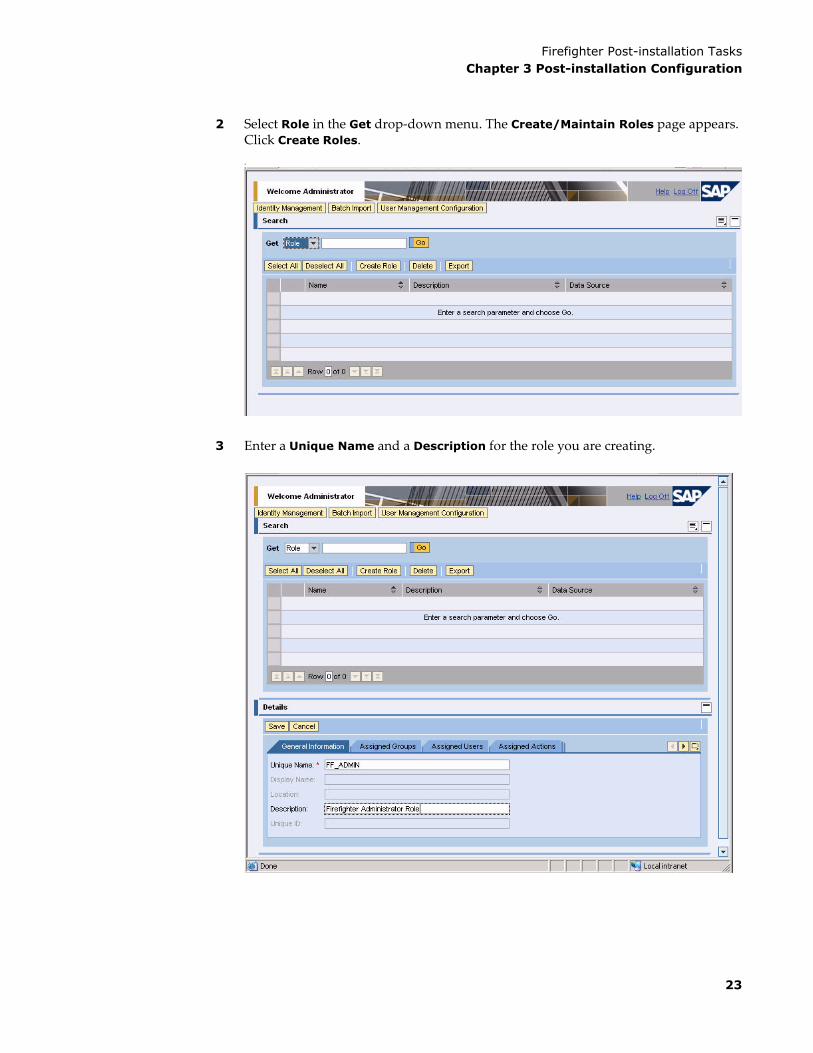
2 Select Role in the Get drop‐down menu. The Create/Maintain Roles page appears. Click Create Roles..
3 Enter a Unique Name and a Description for the role you are creating.
23
Firefighter Version 5.2Installation Guide
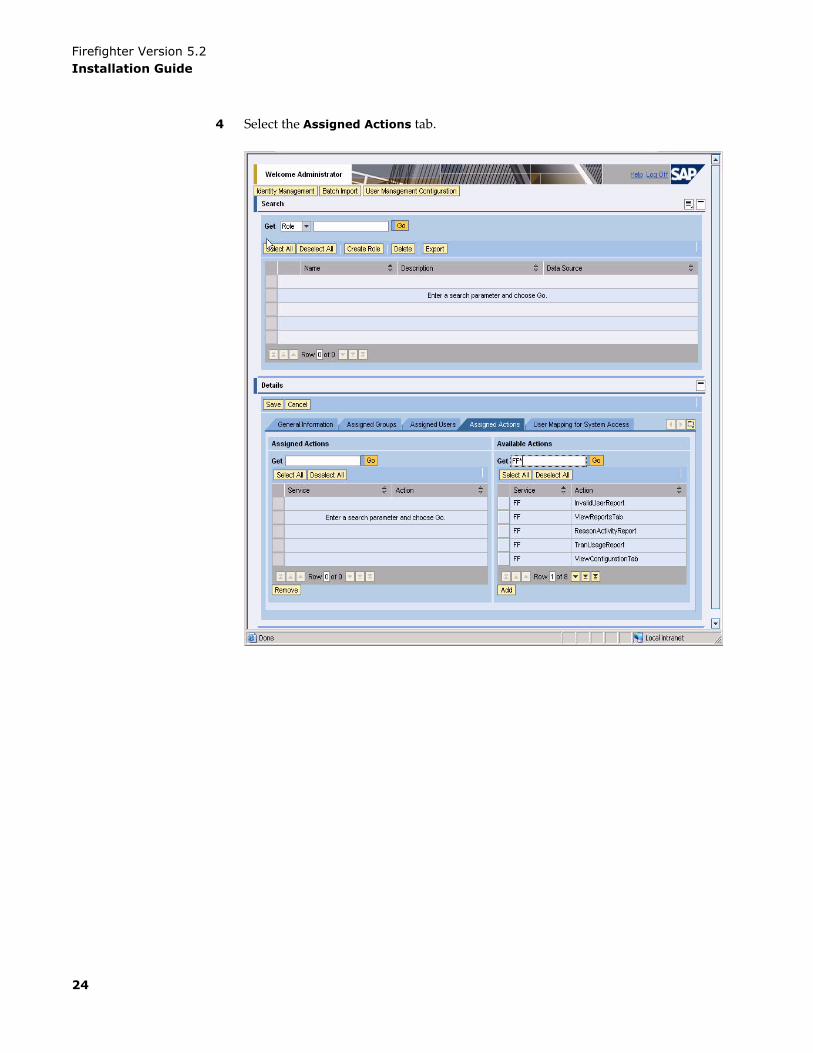
4 Select the Assigned Actions tab.
24
Firefighter Post-installation TasksChapter 3 Post-installation Configuration
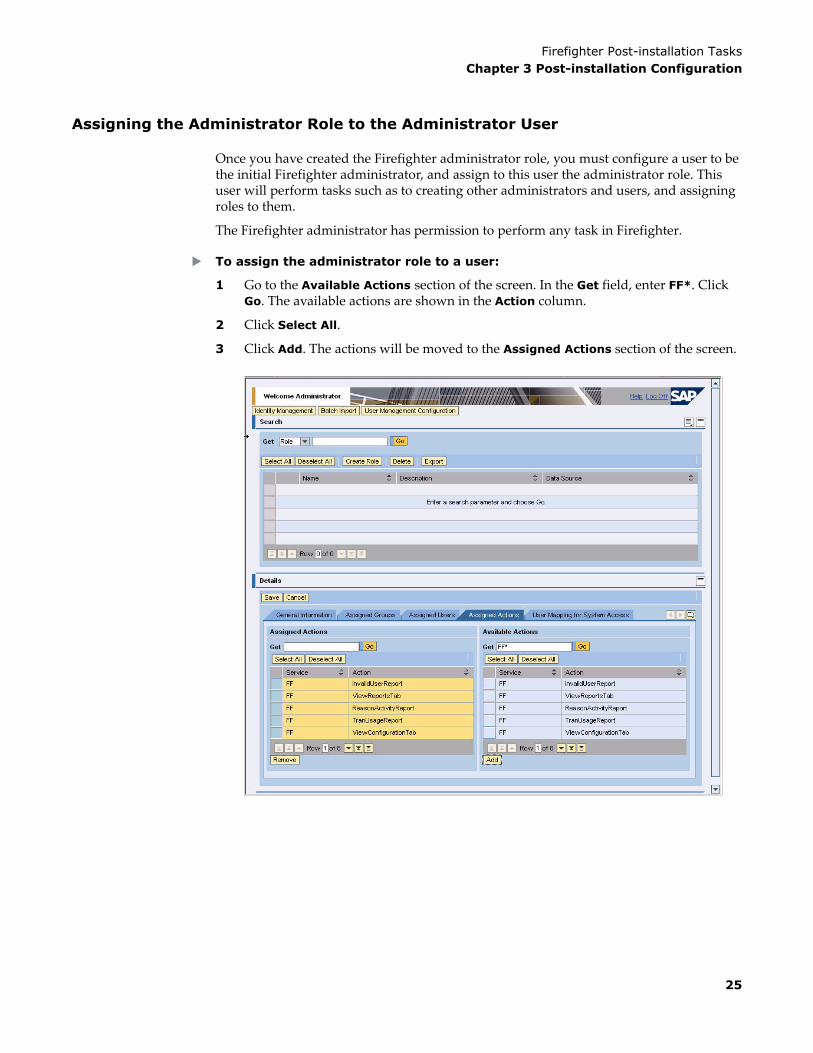
Assigning the Administrator Role to the Administrator User
Once you have created the Firefighter administrator role, you must configure a user to be the initial Firefighter administrator, and assign to this user the administrator role. This user will perform tasks such as to creating other administrators and users, and assigning roles to them.
The Firefighter administrator has permission to perform any task in Firefighter.
To assign the administrator role to a user:
1 Go to the Available Actions section of the screen. In the Get field, enter FF*. Click Go. The available actions are shown in the Action column.
2 Click Select All.
3 Click Add. The actions will be moved to the Assigned Actions section of the screen.
25
Firefighter Version 5.2Installation Guide
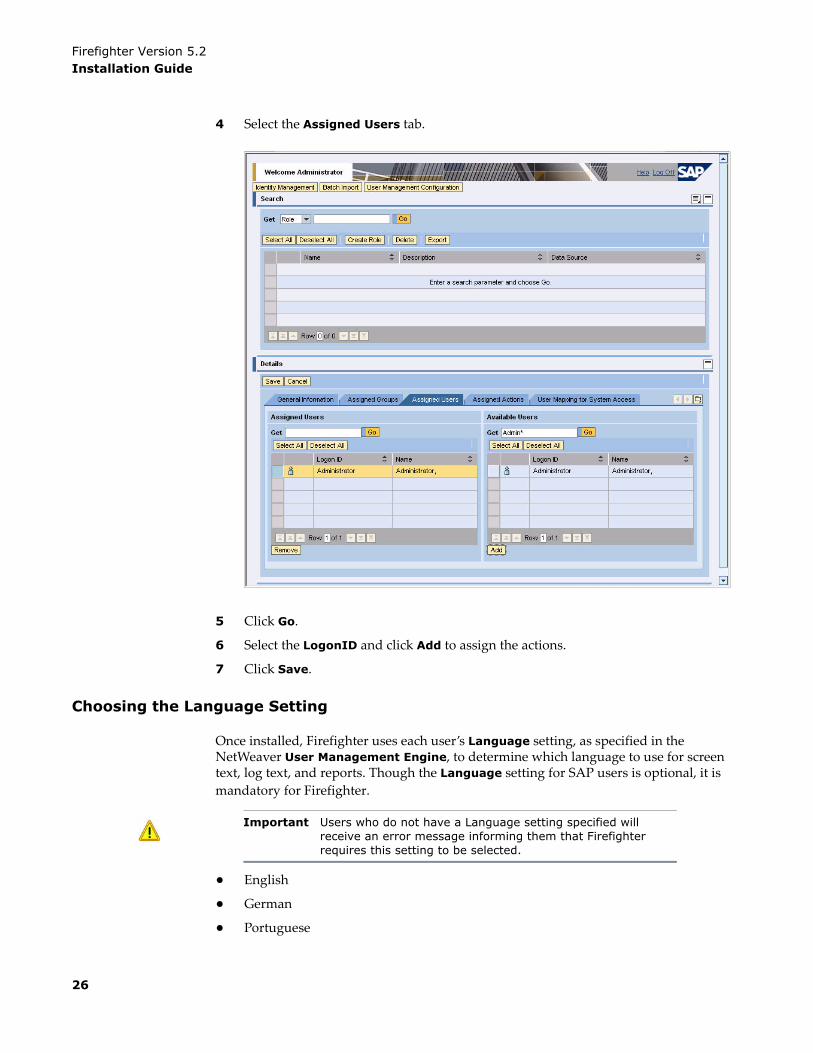
4 Select the Assigned Users tab.
5 Click Go.
6 Select the LogonID and click Add to assign the actions.
7 Click Save.
Choosing the Language Setting
Once installed, Firefighter uses each user’s Language setting, as specified in the NetWeaver User Management Engine, to determine which language to use for screen text, log text, and reports. Though the Language setting for SAP users is optional, it is mandatory for Firefighter.
• English
• German
• Portuguese
Important Users who do not have a Language setting specified will receive an error message informing them that Firefighter requires this setting to be selected.
26

Firefighter Post-installation TasksChapter 3 Post-installation Configuration
• Japanese
• French
• Spanish
Specifying a Language with the User Management Engine
Use the following instructions to specify a Language setting using the NetWeaver User Management Engine. Choose the appropriate procedure for your NetWeaver installation: Java only, or both a Java and an ABAP stack.
To specify a user’s Language setting on a Java-only Web Application Server:
1 Launch the NetWeaver Web Application Server by entering the following URL in a web browser Address toolbar:
http://<server_name>:50000
where:
server_name is the name of your SAP Web Application Server.
2 From the SAP Web Application Server page, choose User Management.
3 On the NetWeaver Welcome page, enter your User ID and Password. The browser displays the User Management form.
27
Firefighter Version 5.2Installation Guide
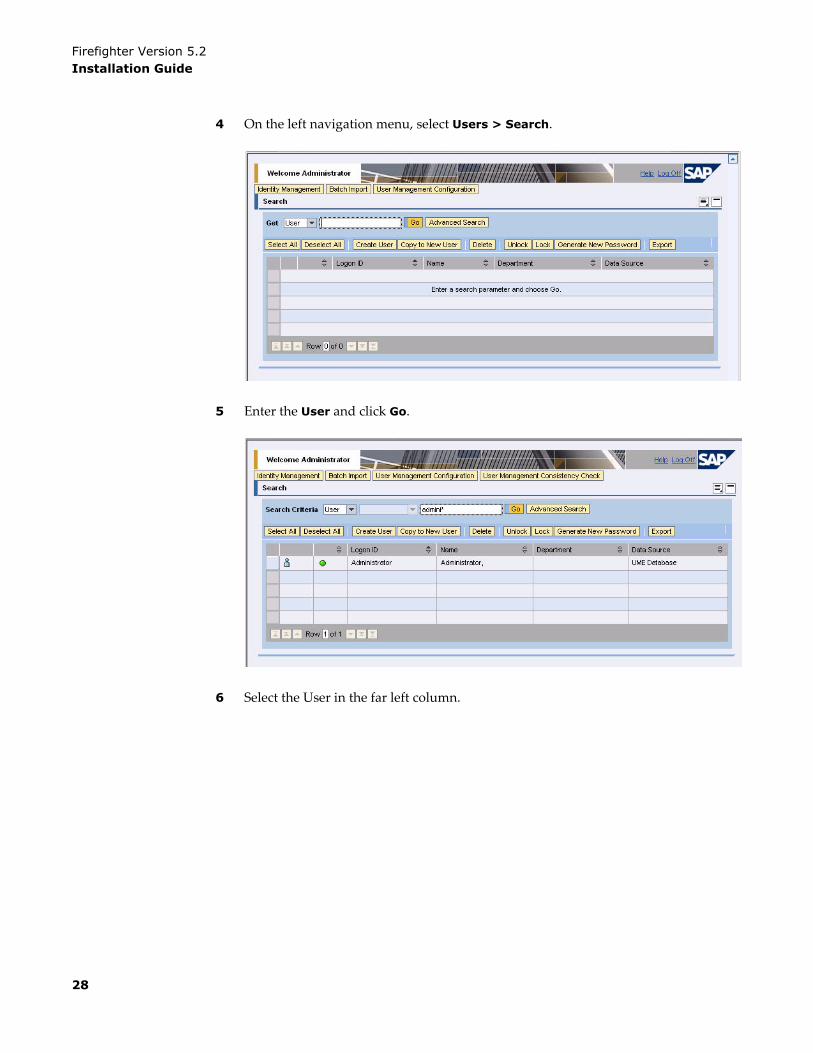
4 On the left navigation menu, select Users > Search.
5 Enter the User and click Go.
6 Select the User in the far left column.
28
Firefighter Post-installation TasksChapter 3 Post-installation Configuration
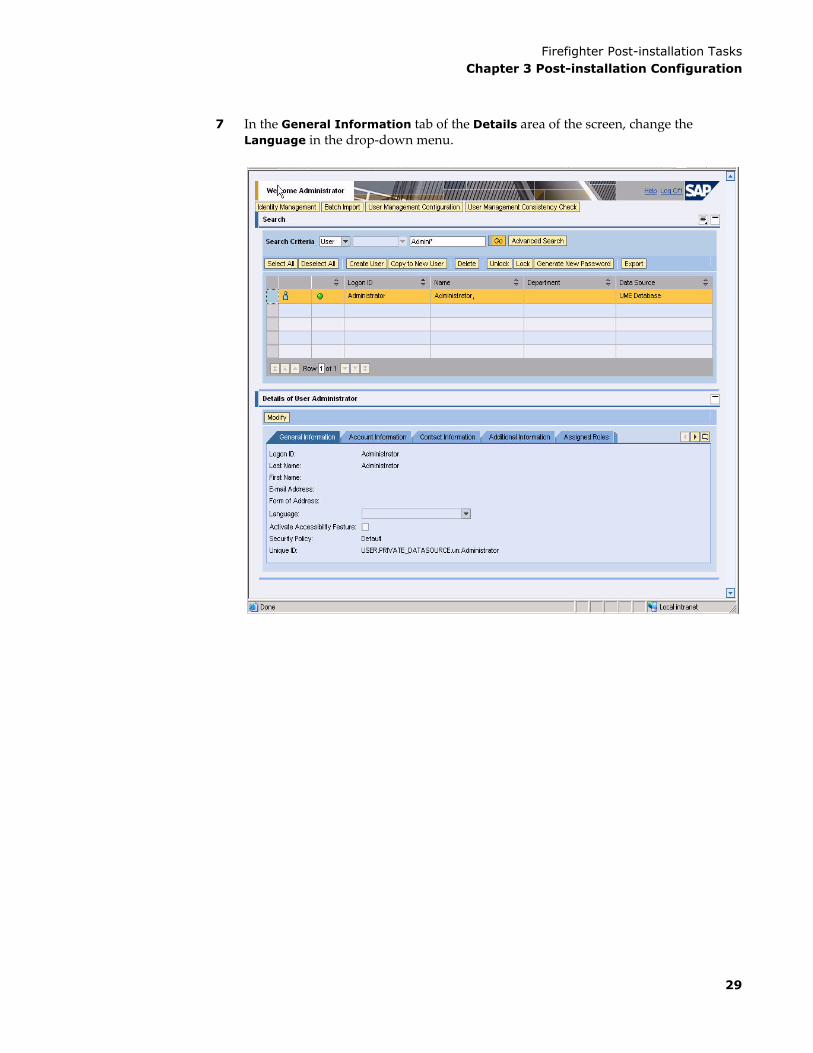
7 In the General Information tab of the Details area of the screen, change the Language in the drop‐down menu.
29

Firefighter Version 5.2Installation Guide
8 Click Modify.
9 Click Save.
To specify a user’s language setting on a Web Application Server with both a Java and an ABAP stack:
1 Log into the SAP system and execute transaction SUO1.
2 In the User field of the User Maintenance: Initial Screen, enter the account you want to change. The Maintain User page appears, with the Address tab in front.
3 In the Communication area of the Address tab, choose a supported language using the Language drop‐down menu and click Save. The user account you modified now has the required language setting.
30

Firefighter Post-installation TasksChapter 3 Post-installation Configuration
Connecting a Stand-alone J2EE System to the Remote SAP Server
If you are performing a “stand‐alone” J2EE system installation, you need to connect it to the back‐end SAP server.
Use the following procedures to connect your J2EE system to a remote SAP server.
To add the required entry to your services file:
1 Open the Windows services file in a text editor, such as WordPad. Use the following path and file name:
c:\WINDOWS\system32\drivers\etc\services
The services file opens.
Note The following steps are for Windows installations. For UNIX installations, open your etc/services file with a text editor, and add an entry as described in Step 2 on page 32, for your particular environment. Add also the following entry:
sapgw00 3200/tcp
(You do not need to restart your UNIX system after performing this procedure.)
31
Firefighter Version 5.2Installation Guide
2 Add an entry in the services file in the following format:
sapms<sap_sid> 36<instance>/tcp
where:
sapms identifies the SAP message service
sap_sid is the name of your SAP server (always uppercase)
36 is the standard message port for SAP
instance is the SAP server instance number
tcp is the message protocol
For example:
sapmsSNW 3600/tcp
3 Add also the following entry:
sapgw00 3300/tcp
4 Save your changes and close the services file.
5 Restart Windows.
For more information regarding the services file, see SAP Notes 723562 and 52959.
This completes the Firefighter post‐installation configuration. Firefighter is now running and ready for use. See SAP Note 1007554 for additional information.
The next step in the process is to set up your Firefighter environment and attributes. These tasks are described in the Virsa Firefighter™ for SAP Version 5.2 User Guide.
Note Do not forget to terminate each line (and also the last one) with [CR] (carriage return) when editing the services file.
32