Steps in Disease Diagnosis - CTAHR Website · Steps in Disease Diagnosis ... practices, etc.) •...
38
Transcript of Steps in Disease Diagnosis - CTAHR Website · Steps in Disease Diagnosis ... practices, etc.) •...

Steps in Disease Diagnosis
• Identify the host plant• Assemble useful information (host vigor,
cropping history, management and cultural practices, etc.)
• Determine the signs and symptoms of the disease
• Identify the pathogen (laboratory)• Identify the disease• Prove pathogenicity
Types of plant problems
• Parasitic or infectious problems– Insects and mites– Pathogens (e.g., viruses, bacteria, fungi, nematodes,
phytoplasmas, algae, viroids)– Parasitic seed plants
• Non-parasitic / non-infectious problems and disorders, caused by environmental factors (such as chemicals, drought, flooding, nutritional deficiency, physiological problems, etc.)

Example of infectious problem: Example of infectious problem: PhytophthoraPhytophthora diseases (diseases (root rot)root rot)
SYMPTOMS: plant stunting, chlorosis, wilting and death; black, soft and discolored roots; leaf scorch.
CAUSE: Phytophthora spp.; Pythium spp.
CONTROL: water management; good drainage; rogue diseased plants; fungicide sprays (copper products; metalaxyl, phosphorous acid); clean plants and seed source; clean nursery sanitation.
Phytophthora root rot Phytophthora root rot onon HoweaHowea forsteranaforsterana
Roots infected with Roots infected with P. P. palmivorapalmivora
Root cortex strips off Root cortex strips off easilyeasily
Collecting Plant Samples
Examine the entire plant for symptoms
- Roots- Stems- Leaves, flowers, fruits
A plant may have more than one disease, or expressdisease symptoms on different plant organs.
Plants often display a range of symptoms as disease progresses
Root disease expresses itself in the roots, but especially in the foliage (wilting, yellowing, etc.).
I generally consider root health first.
Collect several plant specimens
A single plant may not be enough to allow a correct diagnosis (depends on stage of disease development, host response).
Plant samples should be typical and representative of the overall problem...which may be expressed in a number of ways.
The best samples show the problem in various stages of development (early, middle, late), and include healthy tissue that is adjacent to diseased tissue.

Collect the entire plant wherever possible
If the wrong part of a plant is submitted, a problem cannot be diagnosed with confidence.
For example, leaf symptoms (yellowing, wilting) may be the result of diseased or damaged roots.
DIG plants from ground, do not PULL them out.
If plants are potted, submit the plant in its pot.
When the entire plant cannot be collected, collect the largest plant sample possible.
Branch specimens should include the diseased area and part of the healthy area.
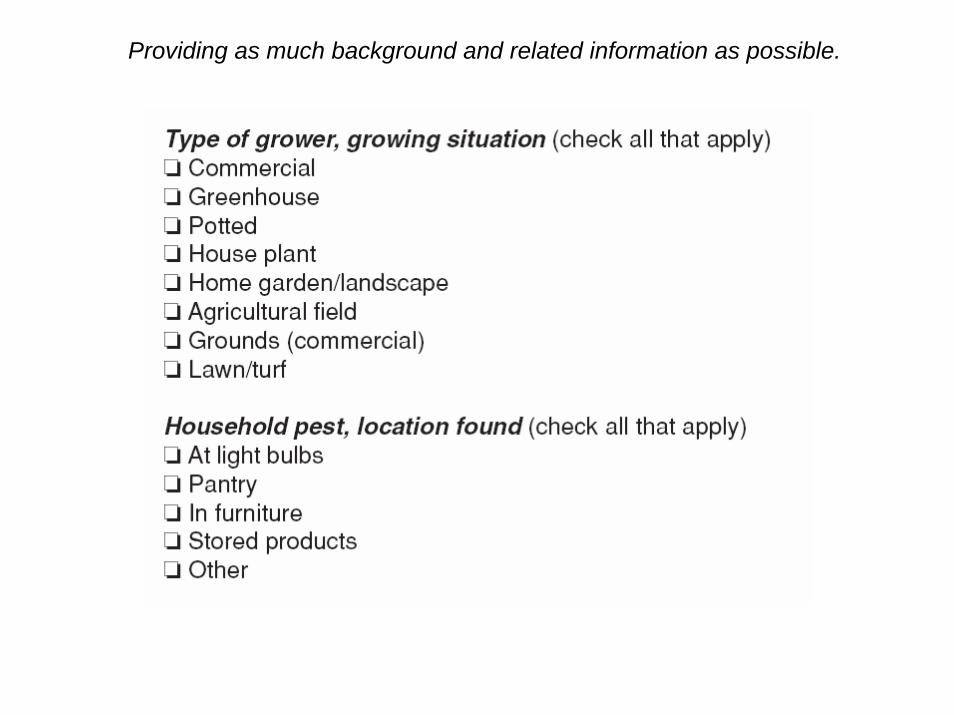
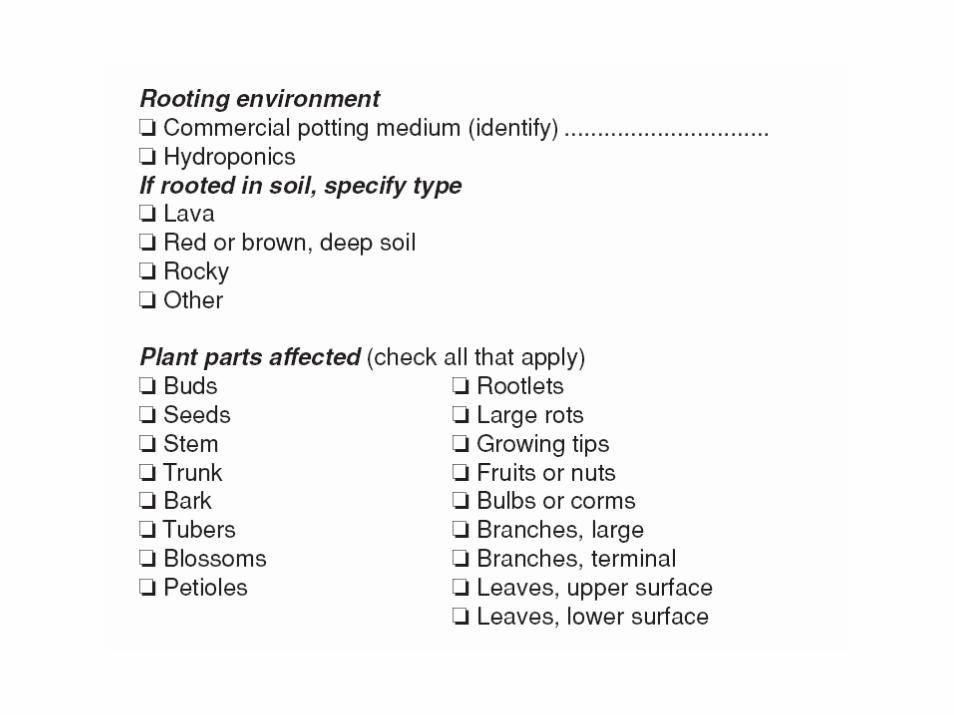
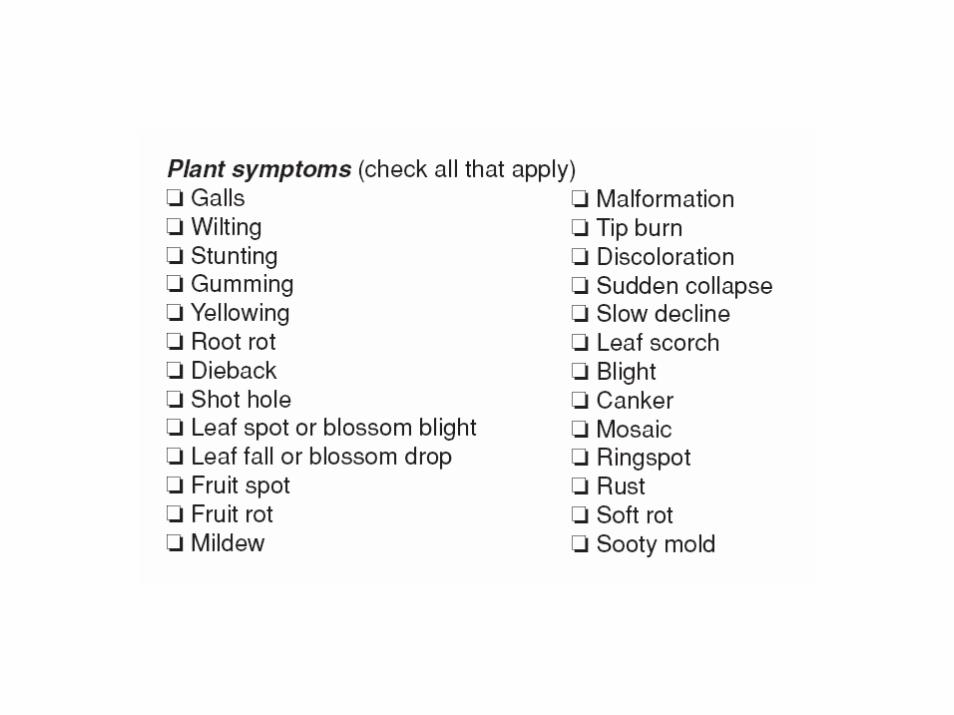
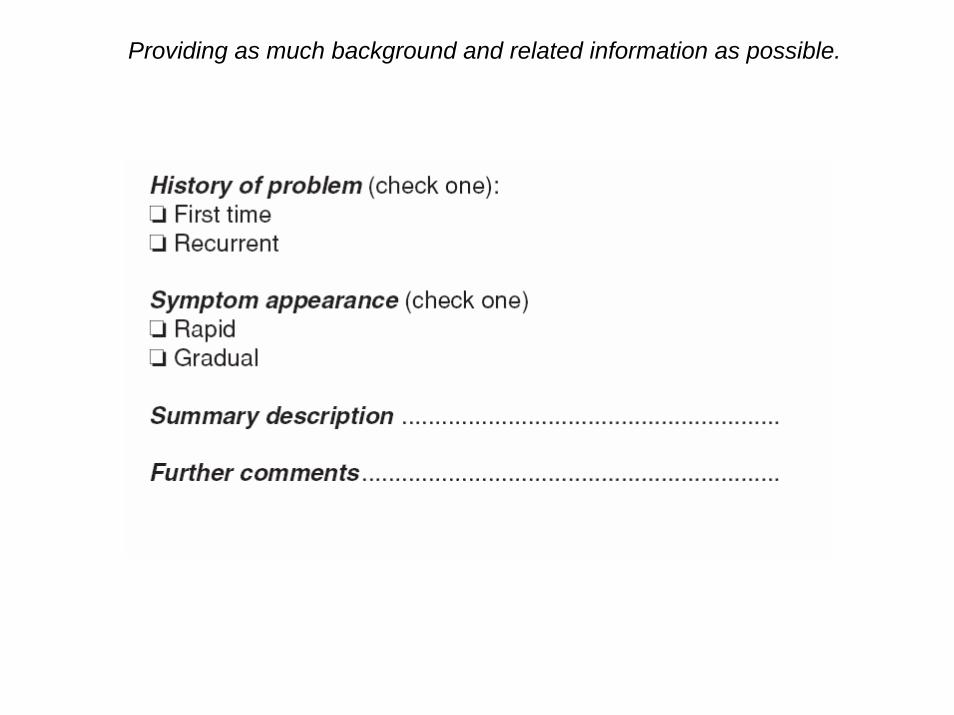
Provide as much background and related information as possible.
Good information contributes to a better understanding of the problem and usually is a key piece of the puzzle.
A complete description of the problem and the crop’s history should accompany the sample.
Use the worksheet associated with our publication.
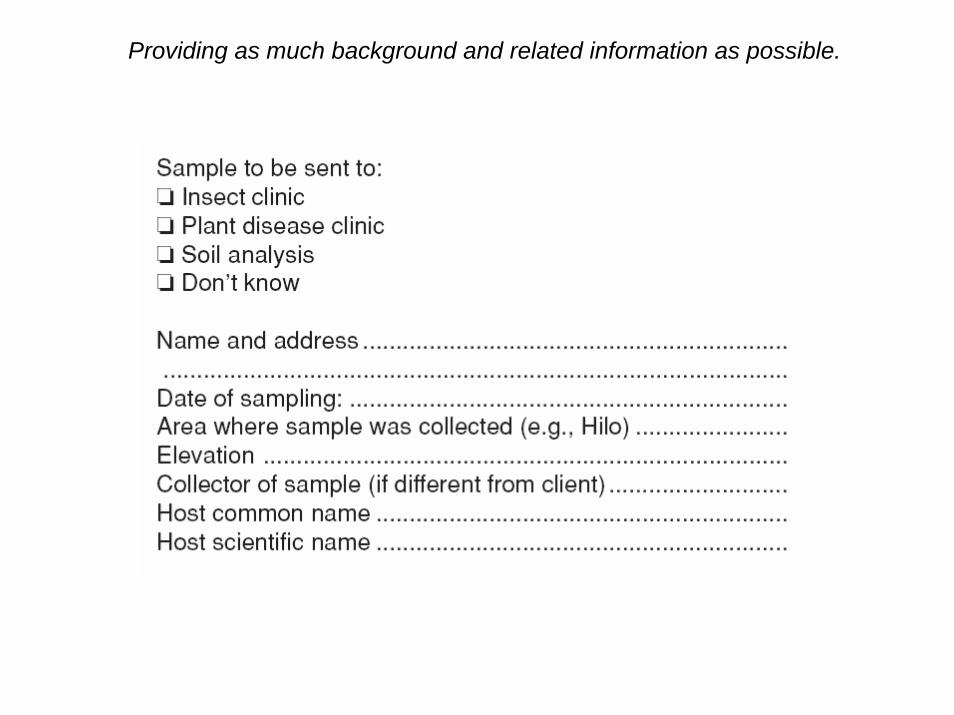
Providing as much background and related information as possible.
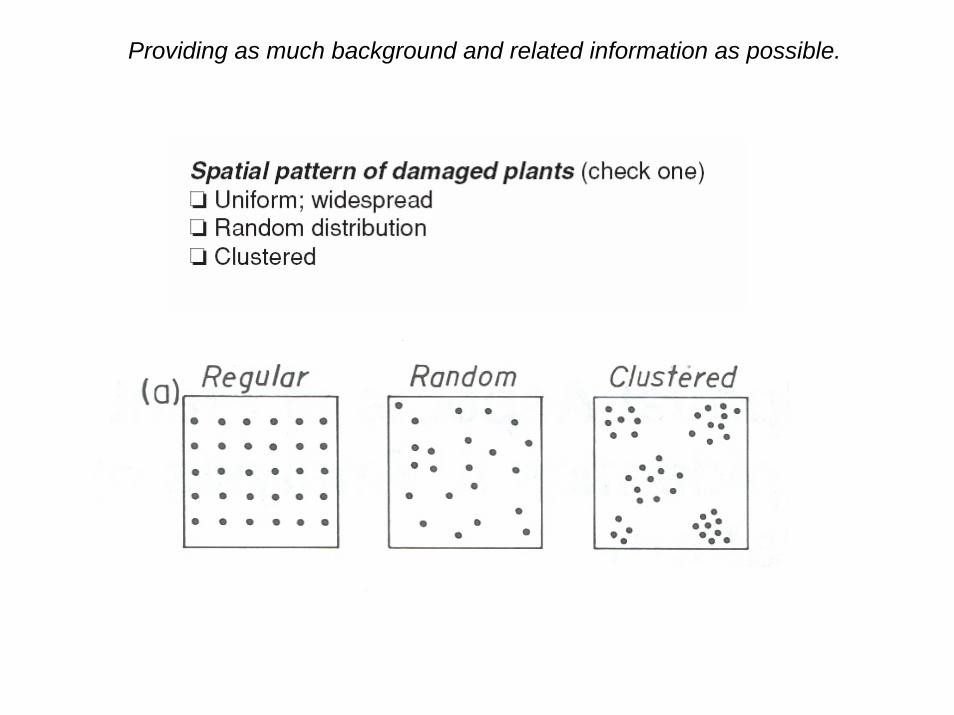
Providing as much background and related information as possible.
Providing as much background and related information as possible.

Providing as much background and related information as possible.
Providing as much background and related information as possible.

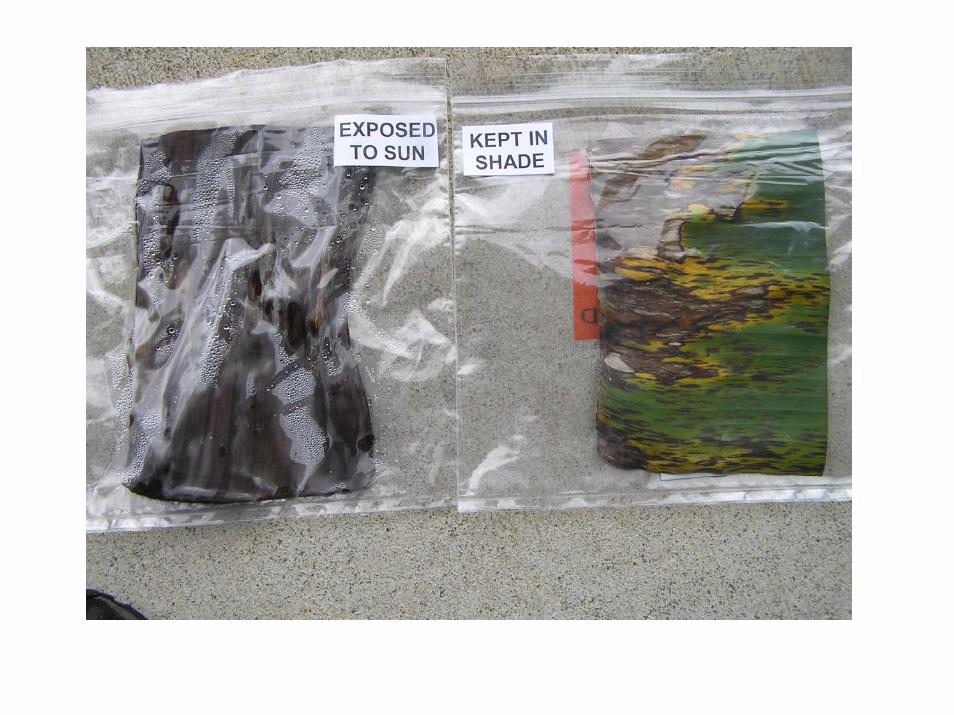
Preserving plant samples
Well-preserved samples are critical to avoid confused diagnosis.
Do not expose samples to direct sunlight or high temperatures. Keep them cool and do not allow them to dry out or cook.
Place samples in plastic bags in the shade or in a cooler if you are in the field. Use the worksheet associated with our publication. “On ice” is okay, but do not freeze the samples.
Leaves may be pressed between the pages of a book or magazine and wrapped in tissue.

Collecting insect samples
A good insect sample consists of a range of the organism’s life stages, if possible, presented in a well-preserved, undamaged condition.
Avoid touching insects with fingers (minimize potential injury to humans and to the specimen).
Collect different life stages of the insect. Adults may be needed to identify the pest.
Collect multiple specimens.
Time of day matters. Many leaf-feeding insects may hide from predators during the daylight hours.

Preserving insect specimens
Well-preserved specimens are usually required for accurate identification.
Preserve most insects in isopropyl rubbing alcohol (roaches, termites, bugs, beetles, flies, wasps, ants. Maggots, spiders, etc.)
Mites, scales, aphids, thrips, caterpillars: collect and submit alive on the infested plant tissue, place in plastic bag,keep cool.
Butterflies and moths: kill specimens by freezing, wrap lightly in tissue paper, and place in a crush-proof box.
Grubs: collect and send in alive in a pint or two of soil, enclosed in a plastic bag.

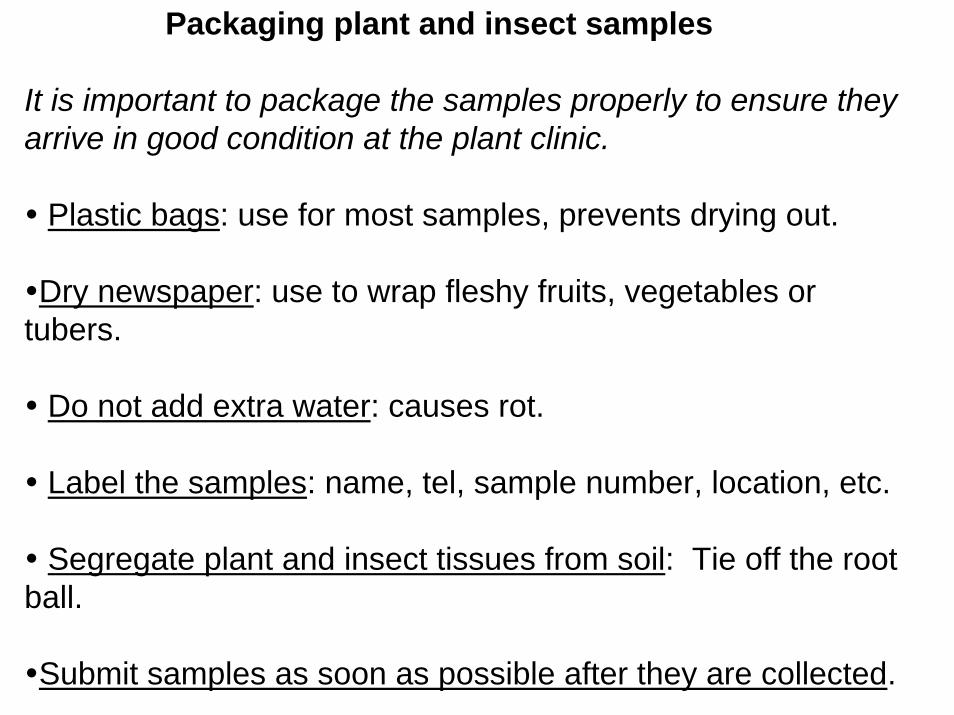
Packaging plant and insect samples
It is important to package the samples properly to ensure they arrive in good condition at the plant clinic.
Plastic bags: use for most samples, prevents drying out.
Dry newspaper: use to wrap fleshy fruits, vegetables or tubers.
Do not add extra water: causes rot.
Label the samples: name, tel, sample number, location, etc.
Segregate plant and insect tissues from soil: Tie off the root ball.
Submit samples as soon as possible after they are collected.
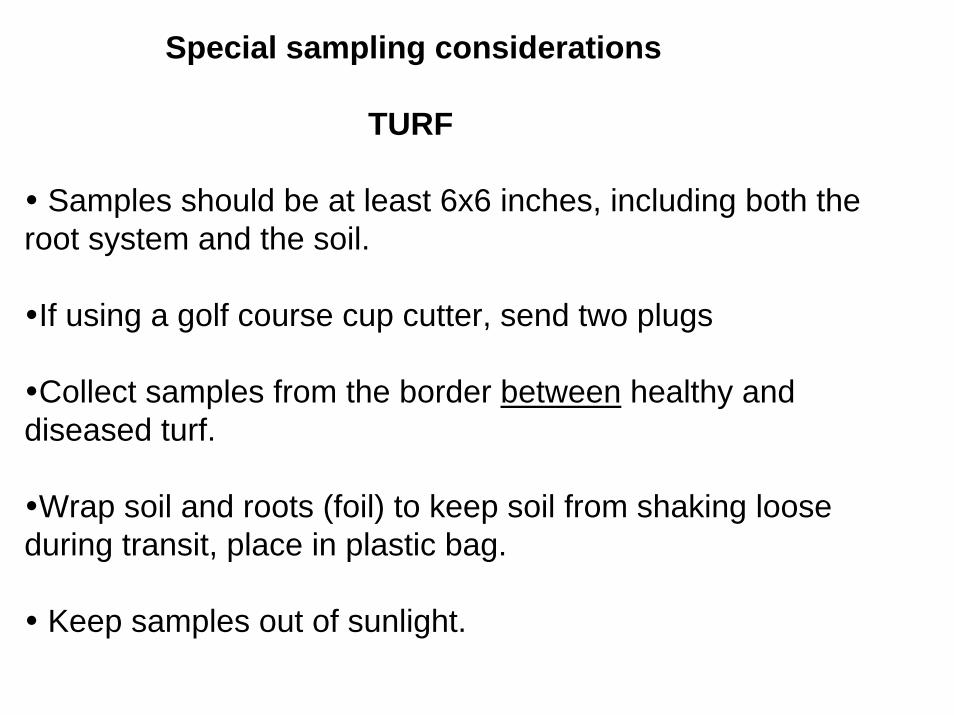
Special sampling considerations
TURF
Samples should be at least 6x6 inches, including both the root system and the soil.
If using a golf course cup cutter, send two plugs
Collect samples from the border between healthy and diseased turf.
Wrap soil and roots (foil) to keep soil from shaking loose during transit, place in plastic bag.
Keep samples out of sunlight.
Special sampling considerationsWOODY PLANTS (trees, shrubs, vines)
Dieback: collect large handful of feeder roots and one quart of soil from the root zone. Do not submit dead plants. Place roots and soil n plastic bag and include some affected branches in a separate plastic bag.
Cankers, swellings: Cut the branch several inches beyond each end of the affected area, including some live wood.
Greenhouse plants: submit plants in their original pots whenever possible.
Nematodes: collect both soil and roots from around affected plant, be careful no to collect the roots of the weeds nearby. For foliar nematodes, treat the samples as described earlier for general plant tissue samples.
Plant problem photographs
Can be sent to Scot Nelson for [email protected]
Dr. Nelson also has a wide range of internet materials available for diagnosis of diseases of:
PalmsCoffeeBanana
KavaNoni
KoaPapaya

Symptom: Galls
Pathogen: Root-knot nematodes
Disease name: Root-knot
Host: Noni

Symptom: Canker
Pathogen: Fungus
Host: Shower tree
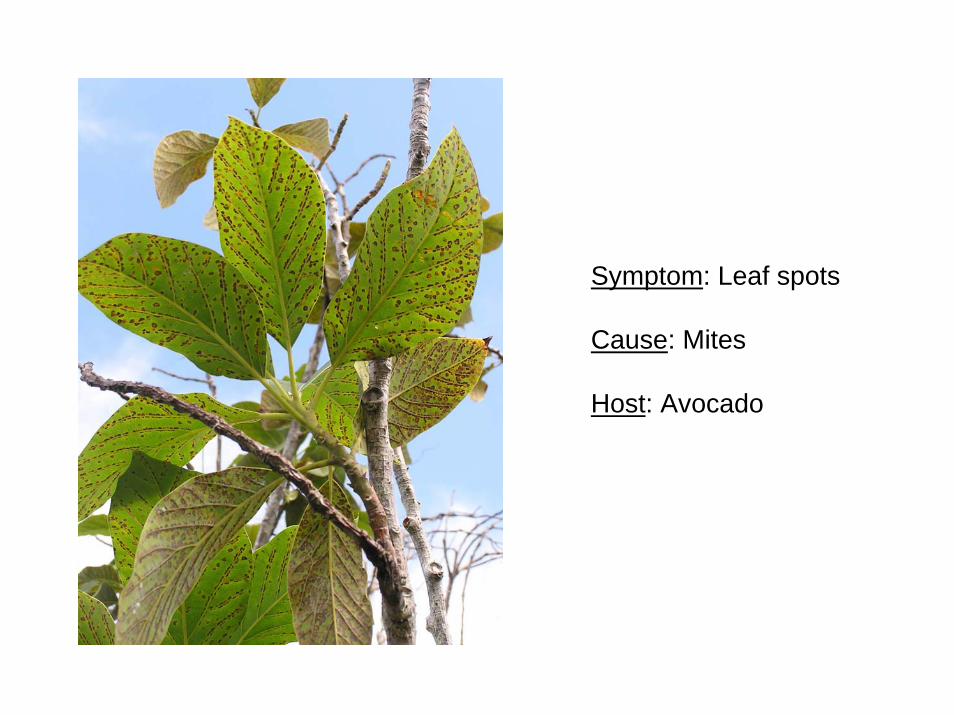
Symptom: Leaf spots
Cause: Mites
Host: Avocado
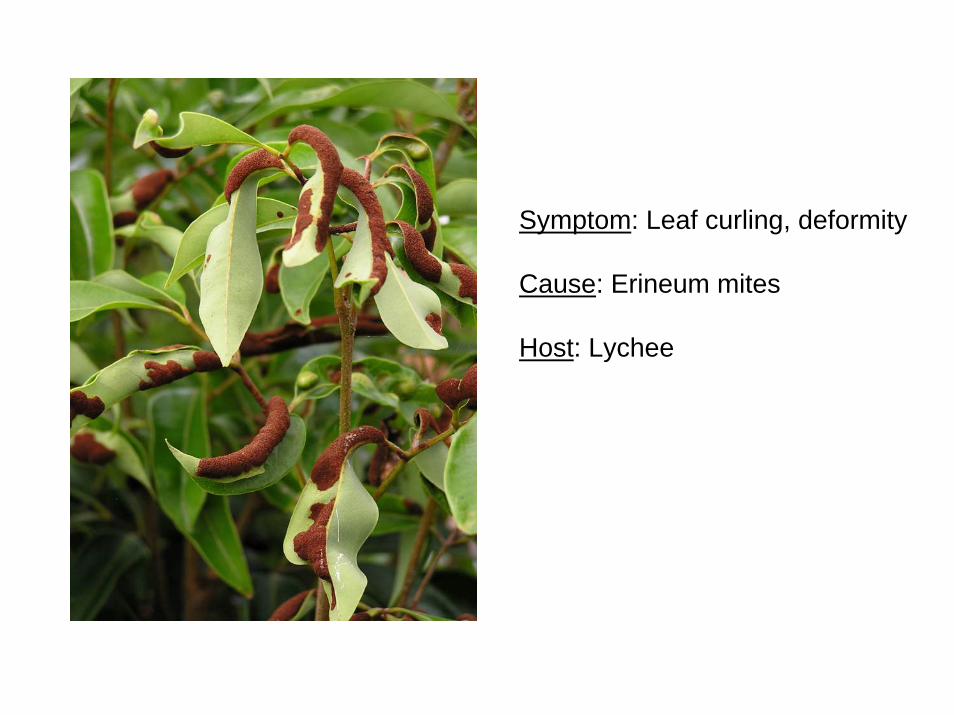
Symptom: Leaf curling, deformity
Cause: Erineum mites
Host: Lychee

Symptom: Galls
Cause: Erineum mites
Host: Hibiscus
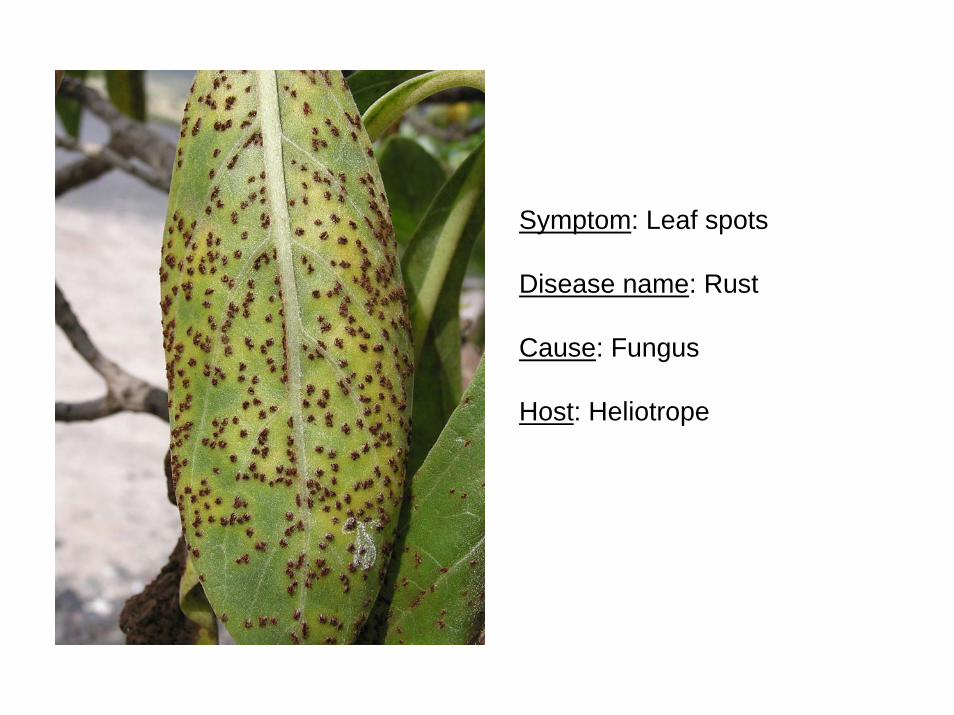
Symptom: Leaf spots
Disease name: Rust
Cause: Fungus
Host: Heliotrope
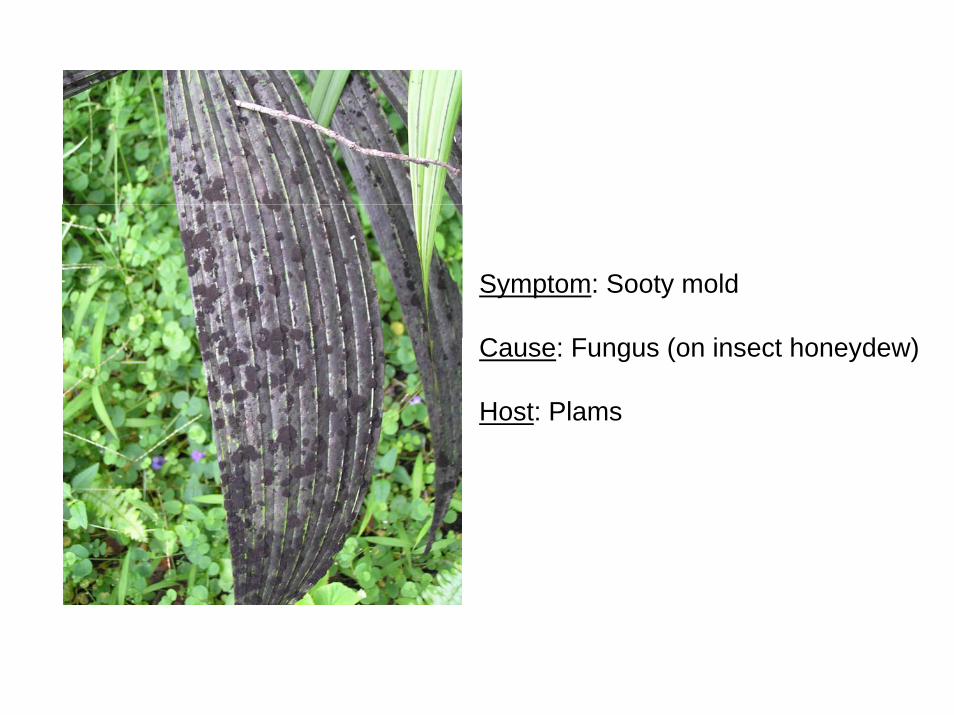
Symptom: Sooty mold
Cause: Fungus (on insect honeydew)
Host: Plams

Symptom: Wilt, dieback
Disease name: Naupaka dieback
Cause: Fungus
Host: Naupaka
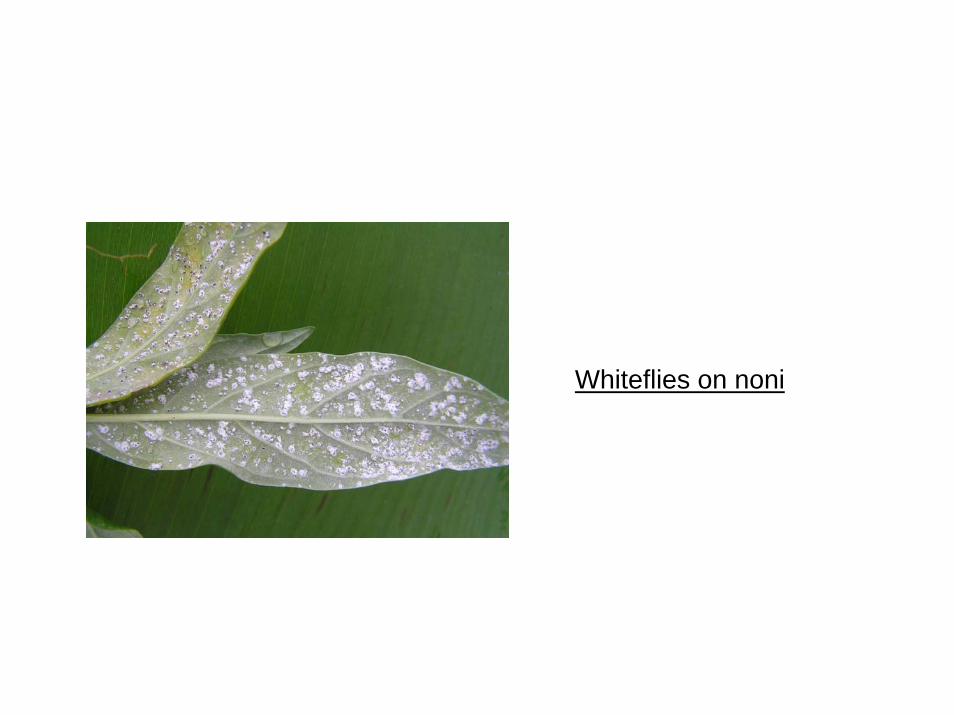
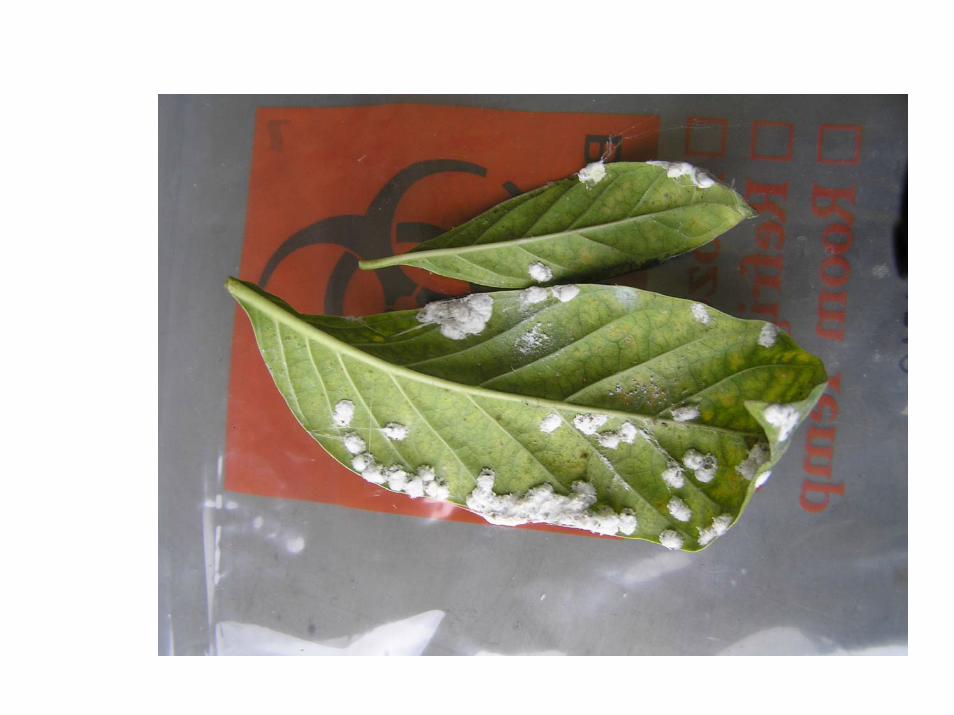
Whiteflies on noni
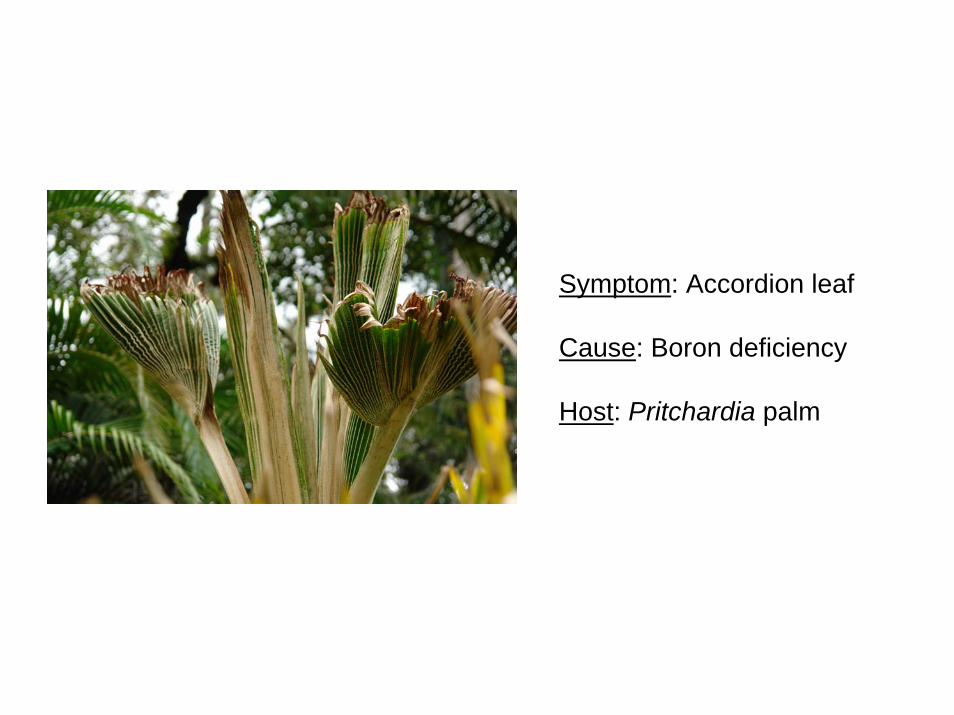
Symptom: Accordion leaf
Cause: Boron deficiency
Host: Pritchardia palm

PAU!
MAHALO!
Dr. Scot [email protected]
University of Hawaii at ManoaCooperative Extension Service875 Komohana St.Hilo, HI 96720

![Liver disease in pregnancy: diagnosis and treatment disease in pregnancy: diagnosis and treatment XIII Falk Liver Week, ... Lucena et al. Gastroenterology 2003; ... CA [µmol/l] CDCA](https://static.fdocument.pub/doc/165x107/5af19da87f8b9a8b4c8efb74/liver-disease-in-pregnancy-diagnosis-and-treatment-disease-in-pregnancy-diagnosis.jpg)