Pertemuan 5 Roll a Ball (Part 4) - WordPress.com · Pertemuan 5 Roll a Ball (Part 4) Mata Kuliah...
20
Pertemuan 5 Roll a Ball (Part 4) Mata Kuliah Logika Game Program Studi Teknologi Permainan Sekolah Tinggi Multi Media Yogyakarta Tri Anggraeni, S.Kom., M.Sc.
Transcript of Pertemuan 5 Roll a Ball (Part 4) - WordPress.com · Pertemuan 5 Roll a Ball (Part 4) Mata Kuliah...

Pertemuan 5Roll a Ball (Part 4)
Mata Kuliah Logika GameProgram Studi Teknologi PermainanSekolah Tinggi Multi Media YogyakartaTri Anggraeni, S.Kom., M.Sc.
Menampilkan pesan ketika semua cube telah diambil• Di Hierarchy Unity:
Klik
Rename jadi Win Text
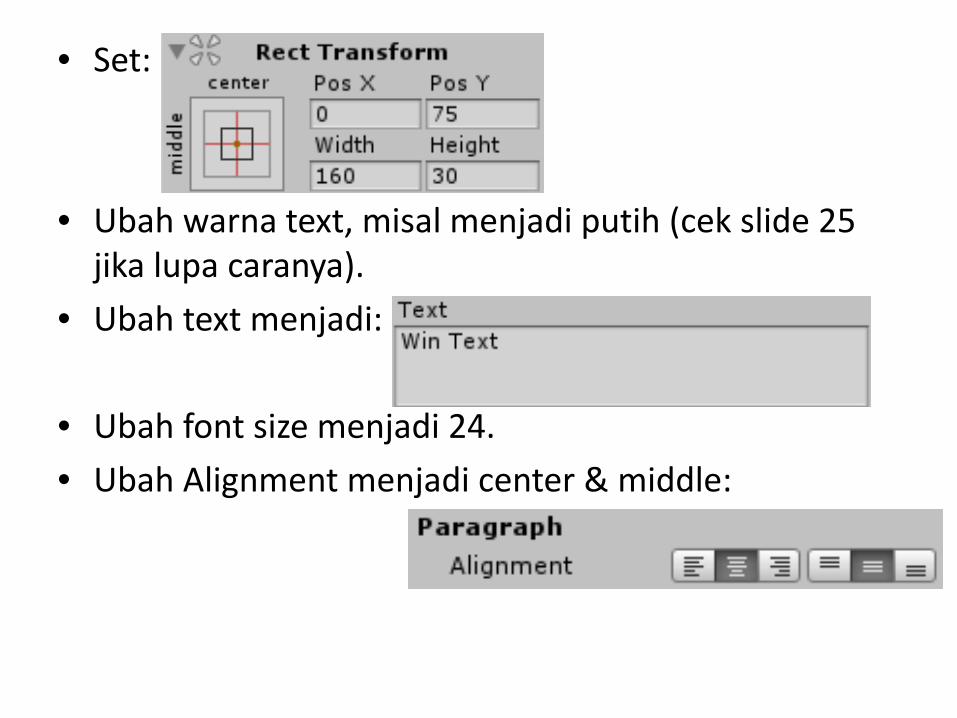
• Set:
• Ubah warna text, misal menjadi putih (cek slide 25 jika lupa caranya).
• Ubah text menjadi:
• Ubah font size menjadi 24.• Ubah Alignment menjadi center & middle:
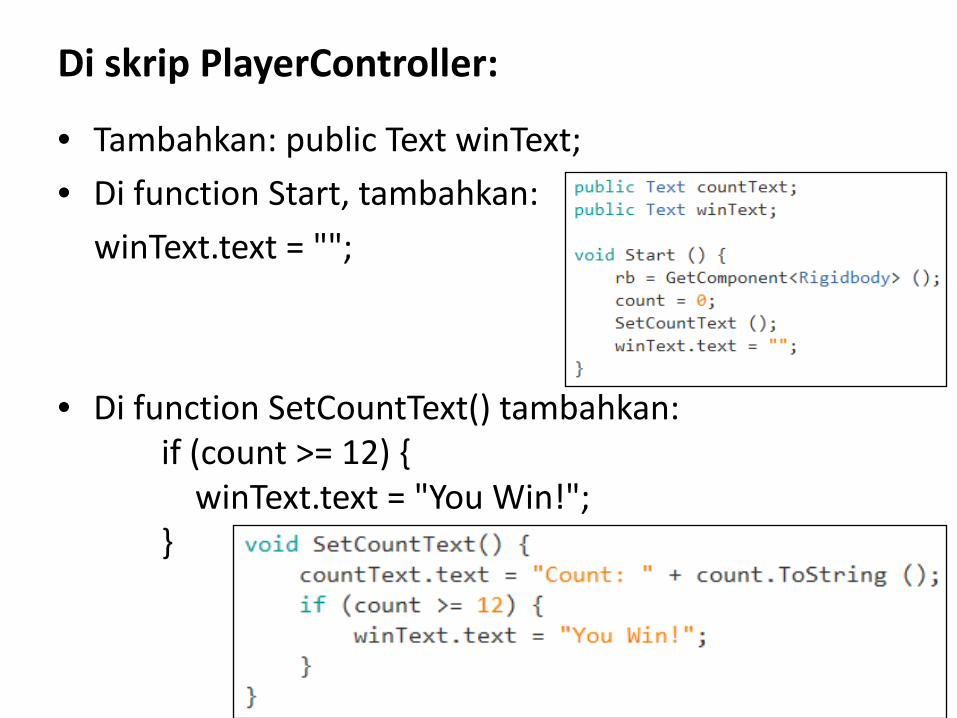
Di skrip PlayerController:
• Tambahkan: public Text winText; • Di function Start, tambahkan:
winText.text = "";
• Di function SetCountText() tambahkan:if (count >= 12) {
winText.text = "You Win!";}
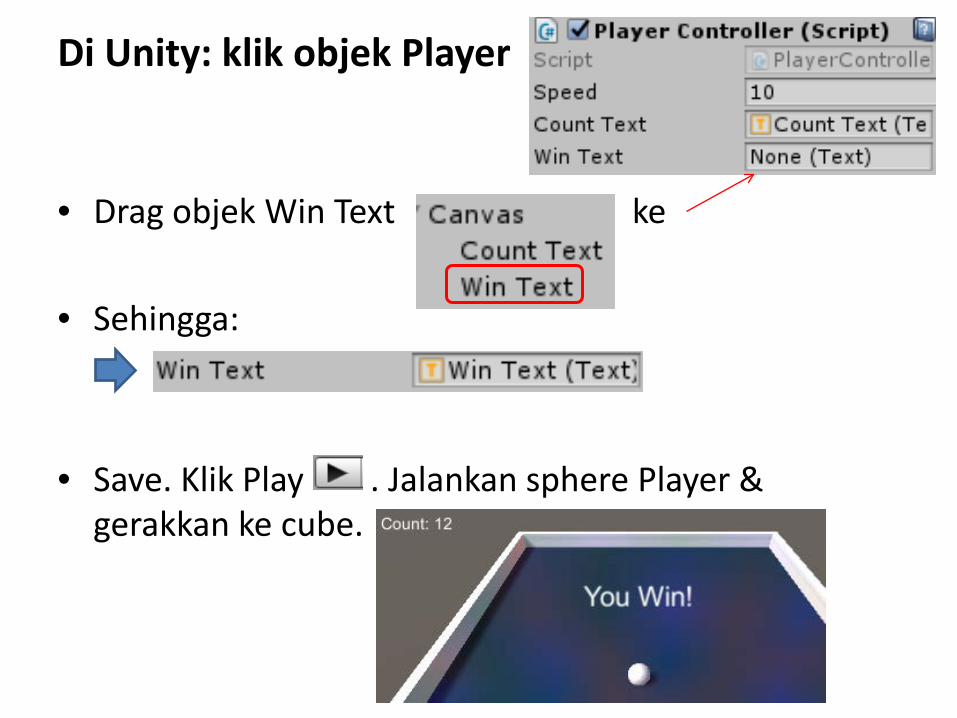
Di Unity: klik objek Player
• Drag objek Win Text ke
• Sehingga:
• Save. Klik Play . Jalankan sphere Player & gerakkan ke cube.
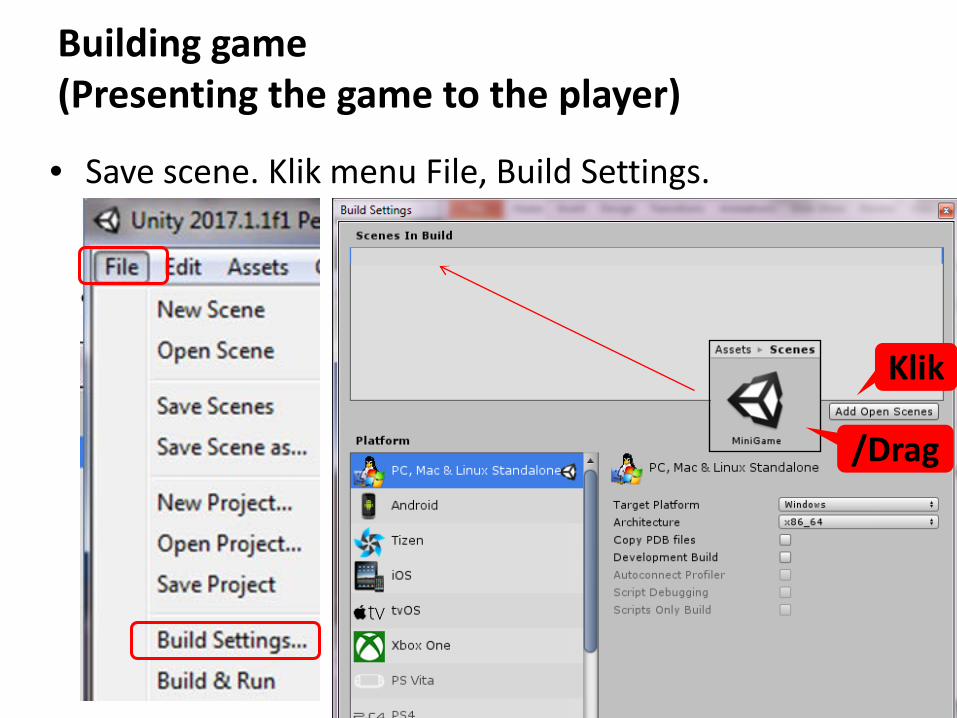
Building game (Presenting the game to the player)
• Save scene. Klik menu File, Build Settings.
Klik
/Drag
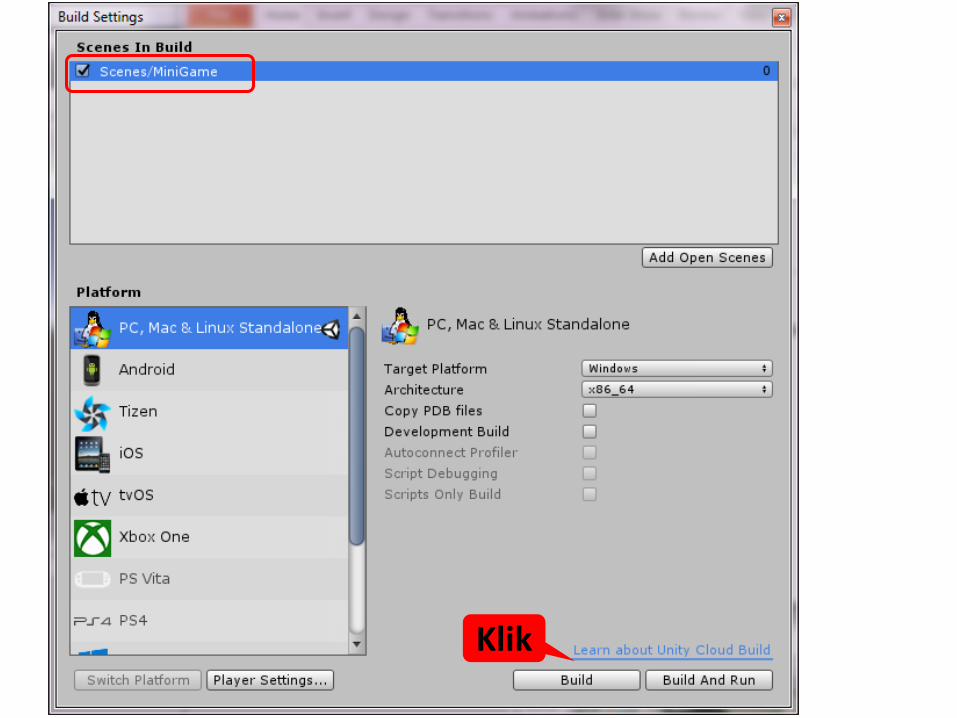
Klik
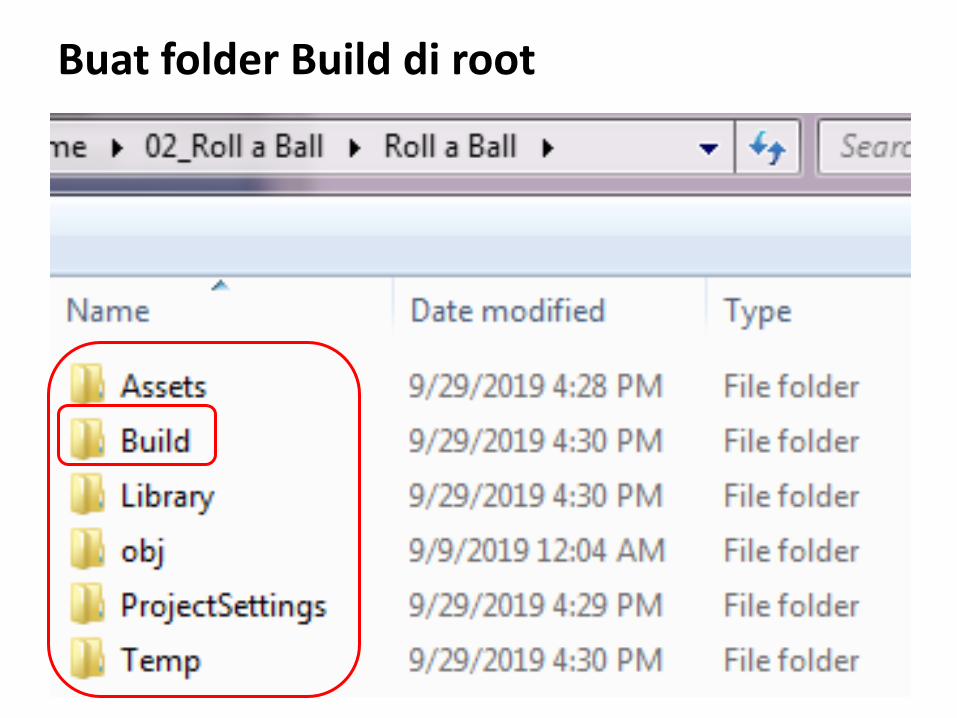
Buat folder Build di root
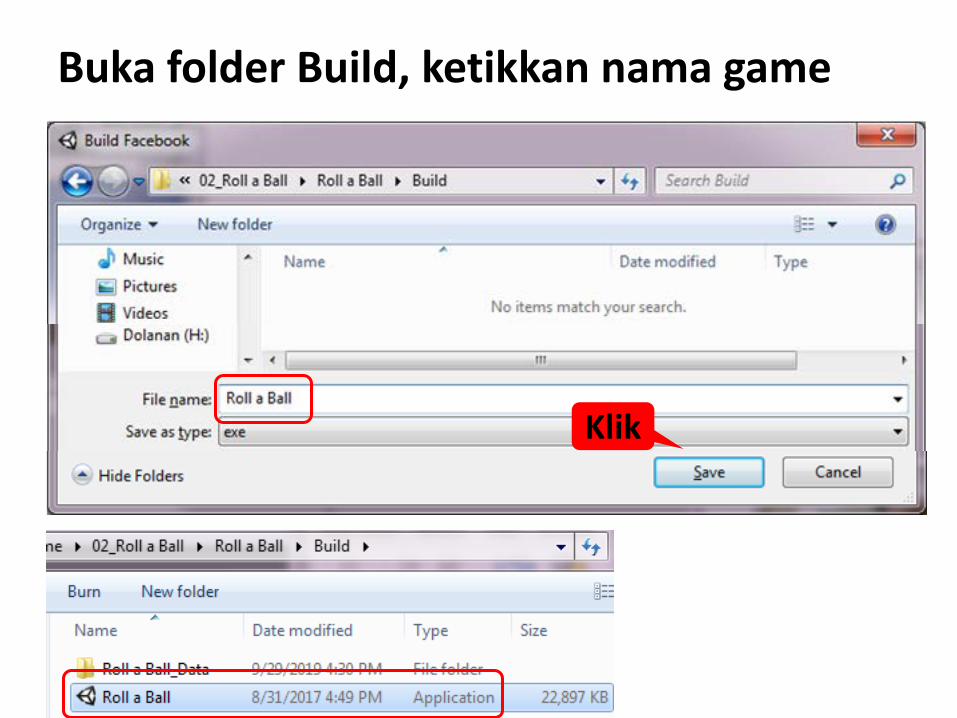
Buka folder Build, ketikkan nama game
Klik

Pertemuan 5Runner Game Sederhana
Mata Kuliah Logika GameProgram Studi Teknologi PermainanSekolah Tinggi Multi Media YogyakartaTri Anggraeni, S.Kom., M.Sc.
Referensi: mammothinteractive.com

Runner Game Sederhana
• Untuk membuat endless run game.• Yang terbaru buatan mahasiswa skripsi TP: Game
Care in the Space (buatan Dhia Irfan).
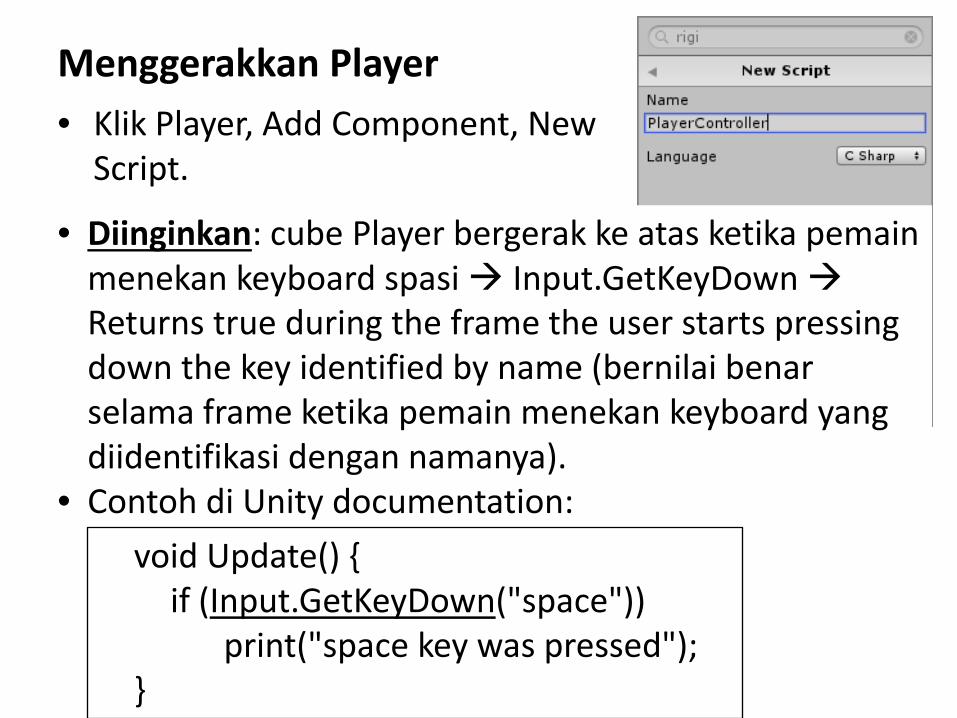
Menggerakkan Player• Klik Player, Add Component, New
Script.
• Diinginkan: cube Player bergerak ke atas ketika pemain menekan keyboard spasi Input.GetKeyDown Returns true during the frame the user starts pressing down the key identified by name (bernilai benar selama frame ketika pemain menekan keyboard yang diidentifikasi dengan namanya).
• Contoh di Unity documentation: void Update() {
if (Input.GetKeyDown("space")) print("space key was pressed");
}
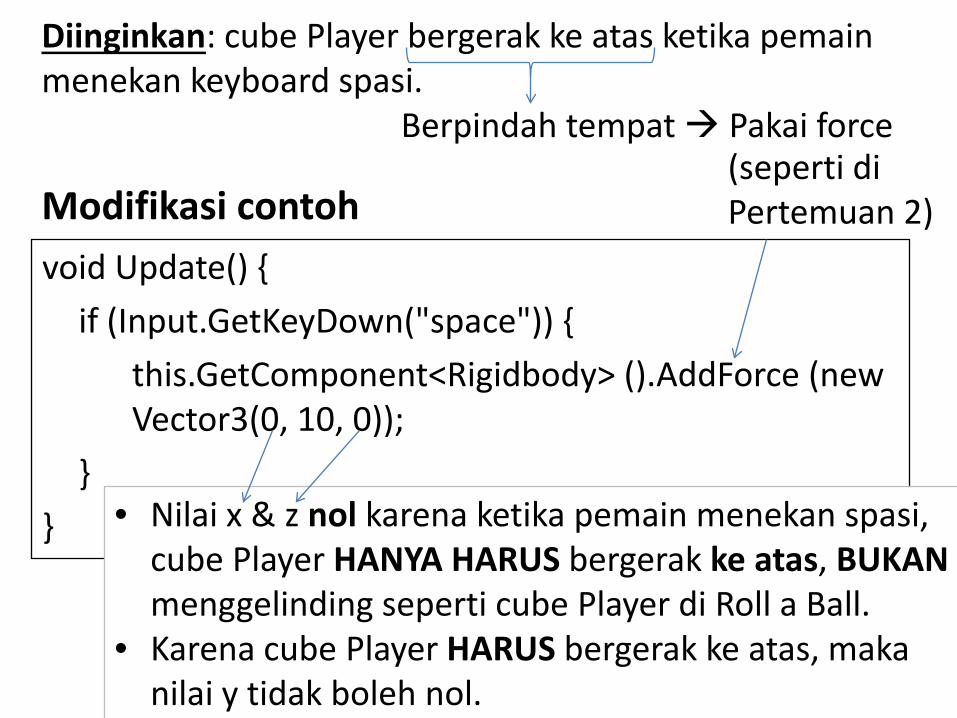
Modifikasi contohvoid Update() {
if (Input.GetKeyDown("space")) {this.GetComponent<Rigidbody> ().AddForce (newVector3(0, 10, 0));
}}
Diinginkan: cube Player bergerak ke atas ketika pemain menekan keyboard spasi.
Berpindah tempat Pakai force
• Nilai x & z nol karena ketika pemain menekan spasi, cube Player HANYA HARUS bergerak ke atas, BUKAN menggelinding seperti cube Player di Roll a Ball.
• Karena cube Player HARUS bergerak ke atas, maka nilai y tidak boleh nol.
(seperti di Pertemuan 2)

Di game ini: void Update () {if (Input.GetKeyDown ("space")) {
this.GetComponent<Rigidbody> ().AddForce(new Vector3(0, jumpForce, 0));
a
}}
Di game Roll a Ball:private Rigidbody rb;void Start () {
rb = GetComponent<Rigidbody>();}void FixedUpdate () {
float moveHorizontal = Input.GetAxis ("Horizontal");float moveVertical = Input.GetAxis ("Vertical");Vector3 movement = new Vector3(moveHorizontal , 0.0f, moveVertikal);rb.AddForce (movement);
}
Di game ini: Rigidbody-nya tidak disimpan di variabel khusus rb.
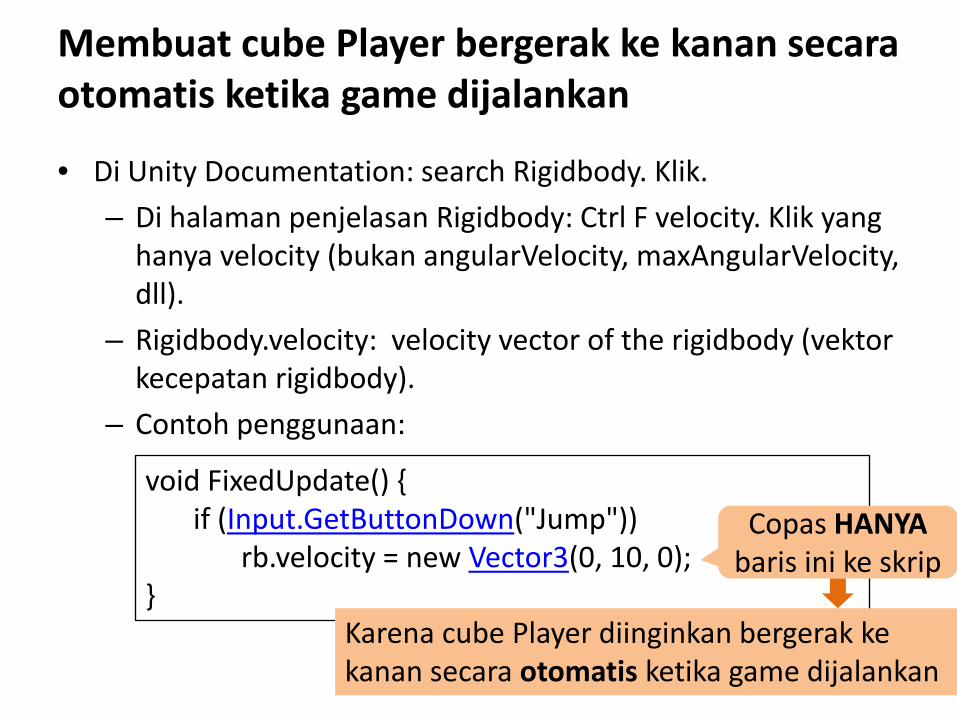
Membuat cube Player bergerak ke kanan secara otomatis ketika game dijalankan
• Di Unity Documentation: search Rigidbody. Klik.– Di halaman penjelasan Rigidbody: Ctrl F velocity. Klik yang
hanya velocity (bukan angularVelocity, maxAngularVelocity, dll).
– Rigidbody.velocity: velocity vector of the rigidbody (vektor kecepatan rigidbody).
– Contoh penggunaan:
void FixedUpdate() { if (Input.GetButtonDown("Jump"))
rb.velocity = new Vector3(0, 10, 0); }
Karena cube Player diinginkan bergerak ke kanan secara otomatis ketika game dijalankan
Copas HANYA baris ini ke skrip
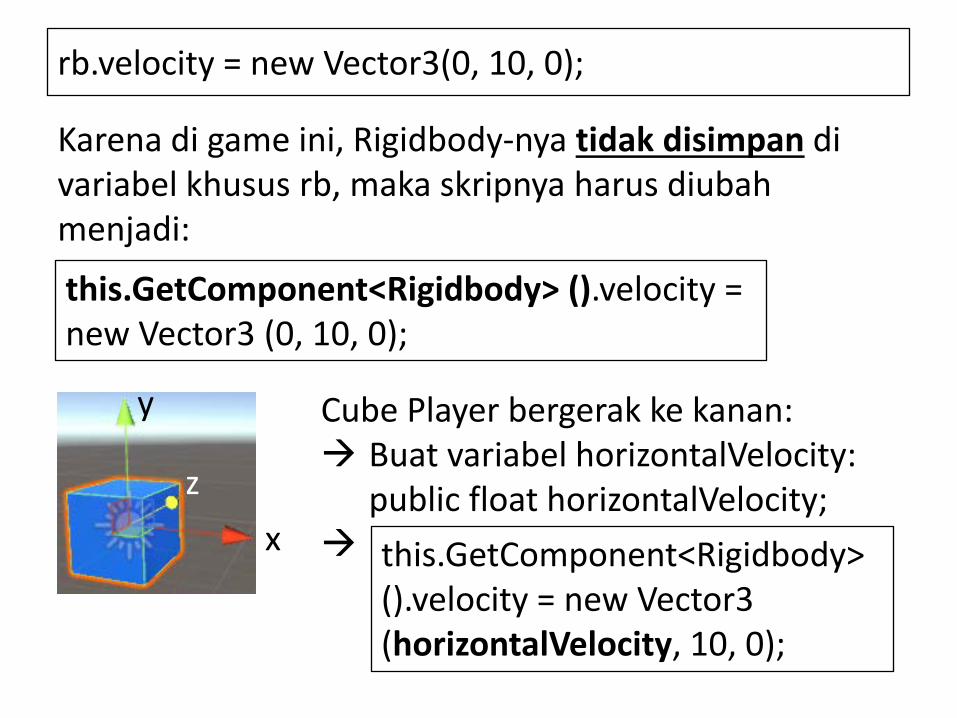
rb.velocity = new Vector3(0, 10, 0);
Karena di game ini, Rigidbody-nya tidak disimpan di variabel khusus rb, maka skripnya harus diubah menjadi:
this.GetComponent<Rigidbody> ().velocity =new Vector3 (0, 10, 0);
xz
y Cube Player bergerak ke kanan: Buat variabel horizontalVelocity:
public float horizontalVelocity; this.GetComponent<Rigidbody>
().velocity = new Vector3(horizontalVelocity, 10, 0);
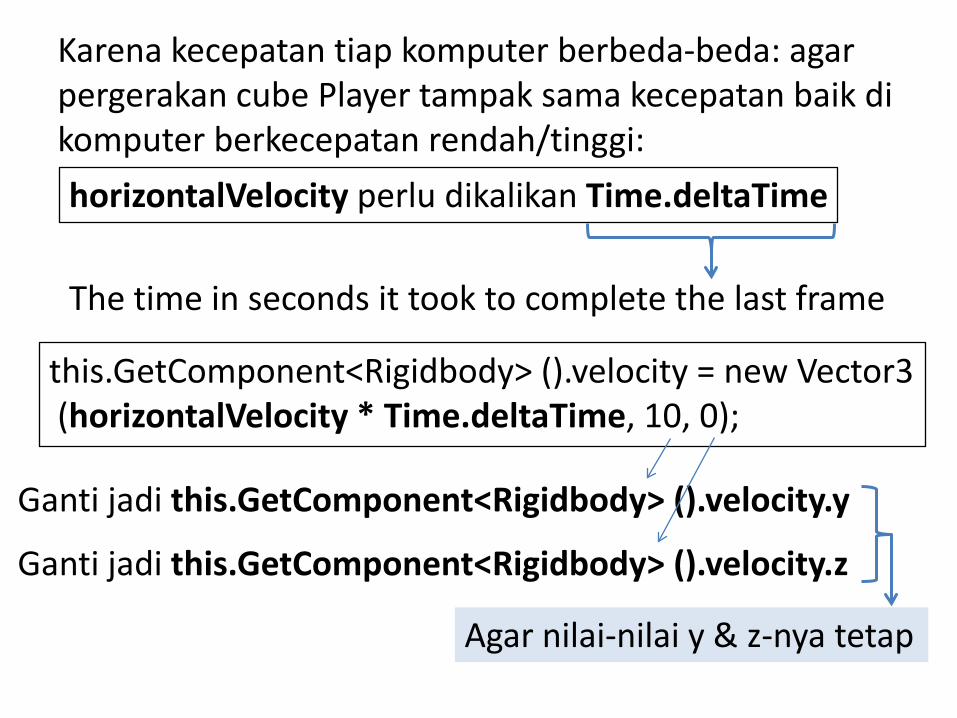
Karena kecepatan tiap komputer berbeda-beda: agar pergerakan cube Player tampak sama kecepatan baik di komputer berkecepatan rendah/tinggi:
this.GetComponent<Rigidbody> ().velocity = new Vector3(horizontalVelocity * Time.deltaTime, 10, 0);
horizontalVelocity perlu dikalikan Time.deltaTime
The time in seconds it took to complete the last frame
Ganti jadi this.GetComponent<Rigidbody> ().velocity.y
Ganti jadi this.GetComponent<Rigidbody> ().velocity.z
Agar nilai-nilai y & z-nya tetap
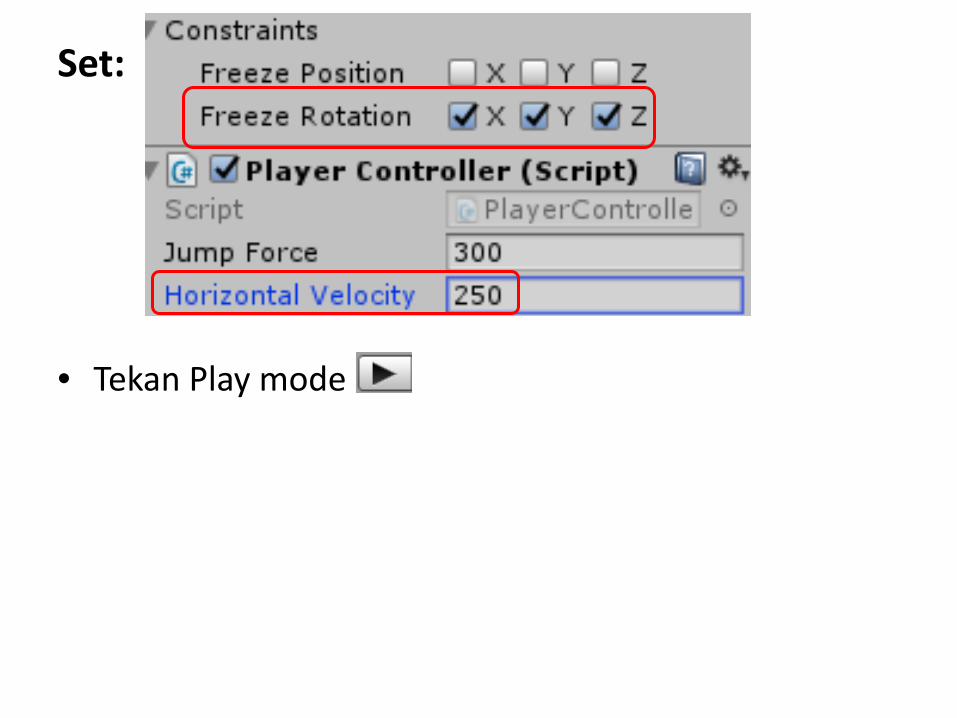
Set:
• Tekan Play mode
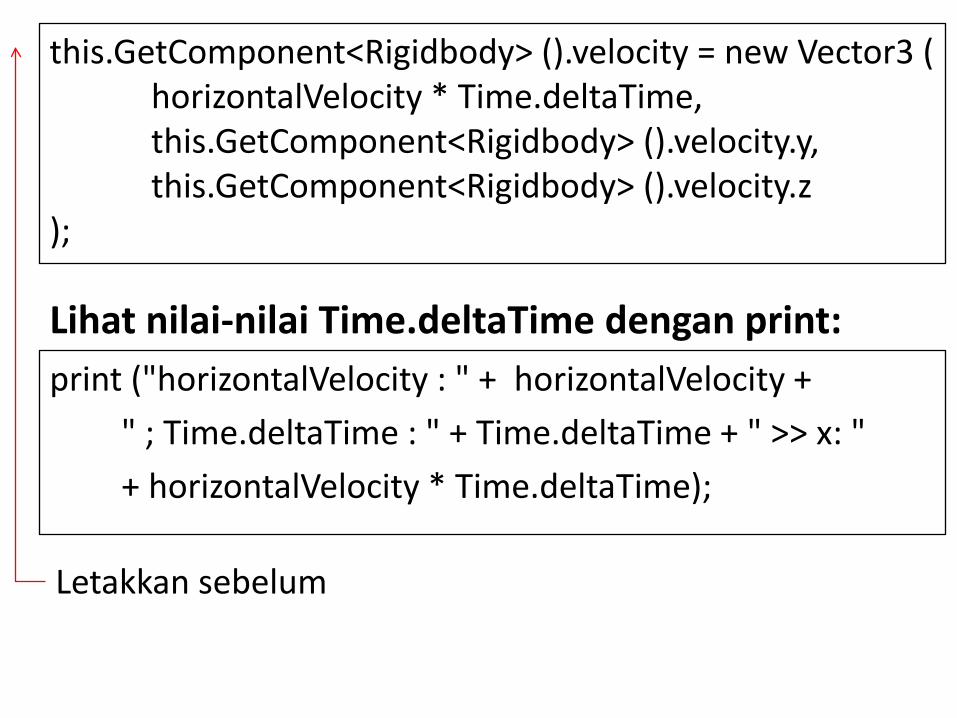
Lihat nilai-nilai Time.deltaTime dengan print:
this.GetComponent<Rigidbody> ().velocity = new Vector3 (horizontalVelocity * Time.deltaTime,this.GetComponent<Rigidbody> ().velocity.y,this.GetComponent<Rigidbody> ().velocity.z
);
print ("horizontalVelocity : " + horizontalVelocity +" ; Time.deltaTime : " + Time.deltaTime + " >> x: " + horizontalVelocity * Time.deltaTime);
Letakkan sebelum
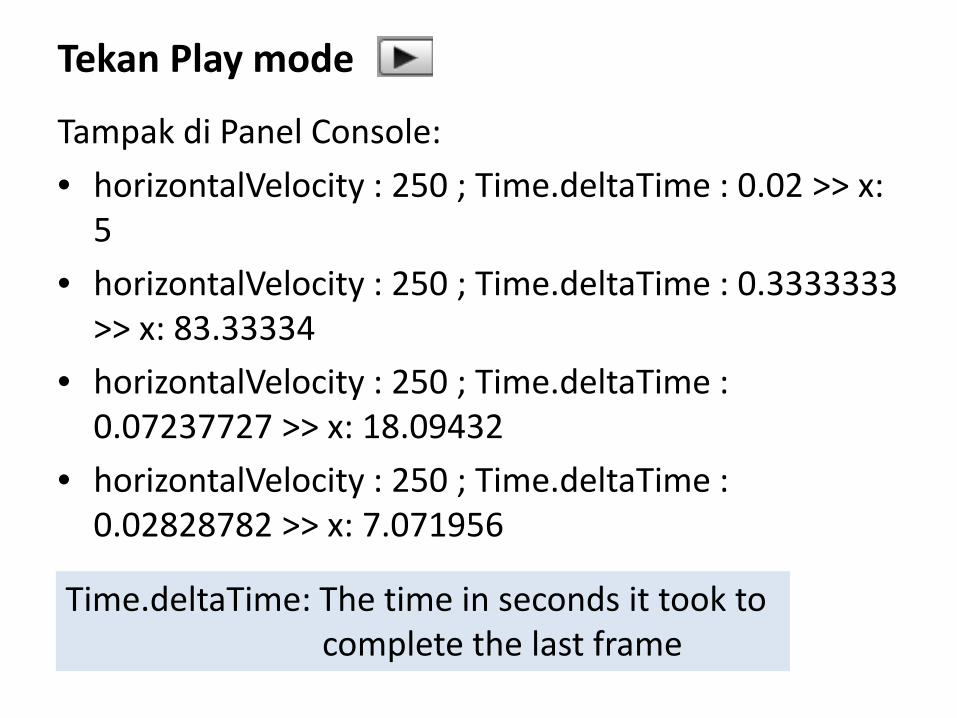
Tekan Play mode
Tampak di Panel Console:• horizontalVelocity : 250 ; Time.deltaTime : 0.02 >> x:
5• horizontalVelocity : 250 ; Time.deltaTime : 0.3333333
>> x: 83.33334• horizontalVelocity : 250 ; Time.deltaTime :
0.07237727 >> x: 18.09432• horizontalVelocity : 250 ; Time.deltaTime :
0.02828782 >> x: 7.071956
Time.deltaTime: The time in seconds it took to complete the last frame