
Nodejs 프로그래밍 ch.3
25
Node.js 프로그래밍 ch.3 Node의 코어 아꿈사 cecil
-
Upload
hyeonseok-choi -
Category
Technology
-
view
318 -
download
11
Transcript of Nodejs 프로그래밍 ch.3
Node.js����������� ������������������ 프로그래밍����������� ������������������ ch.3����������� ������������������ Node의����������� ������������������ 코어
아꿈사����������� ������������������ ����������� ������������������ cecil
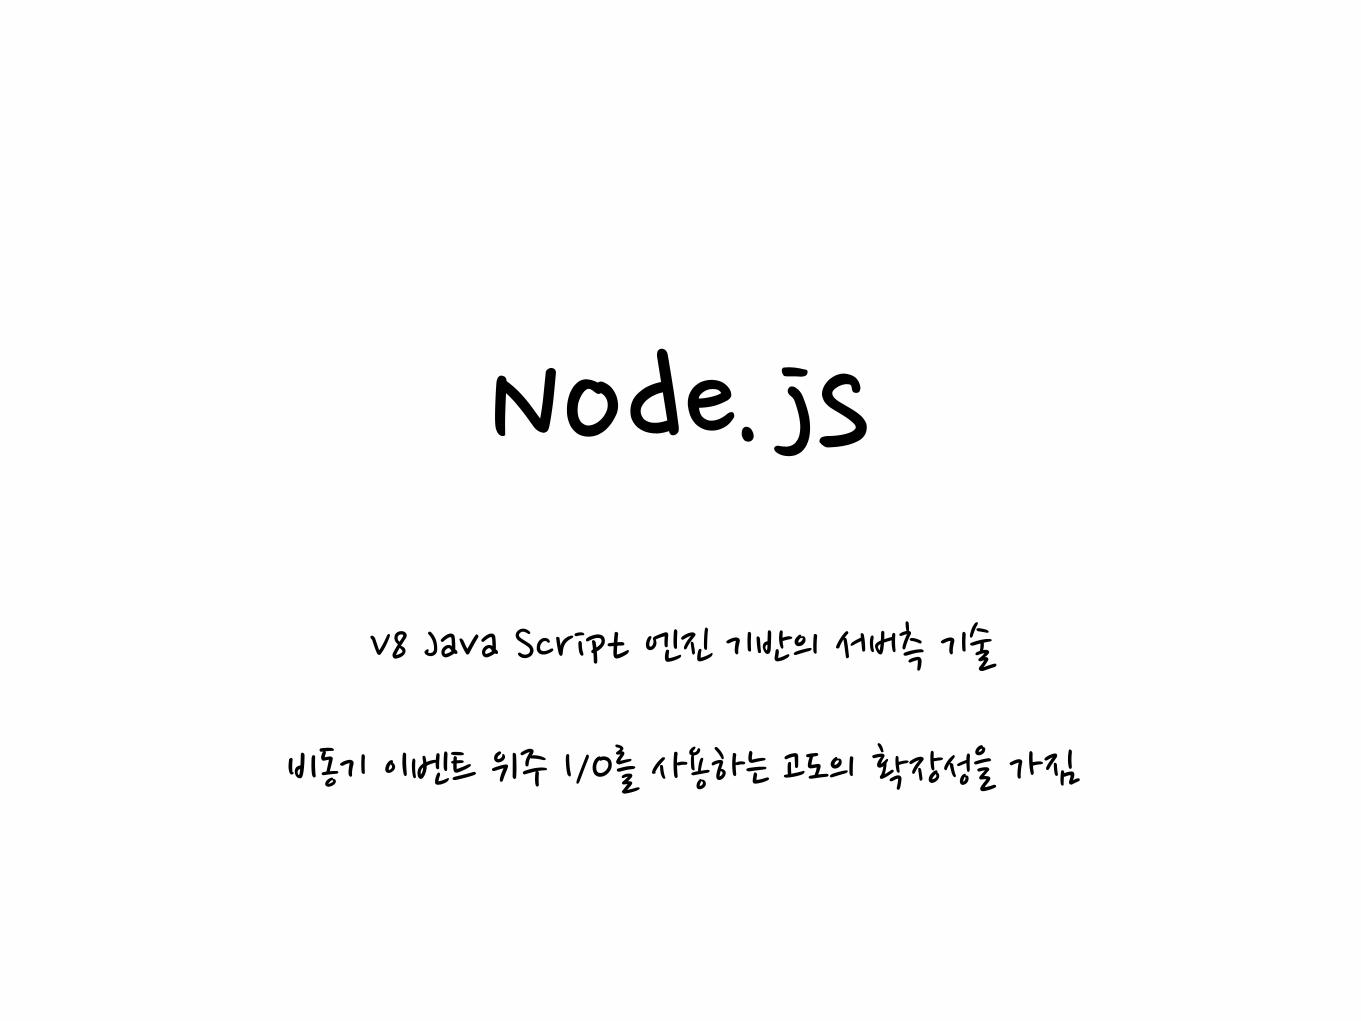
Node.js
V8����������� ������������������ Java����������� ������������������ Script����������� ������������������ 엔진����������� ������������������ 기반의����������� ������������������ 서버측����������� ������������������ 기술����������� ������������������ !
비동기����������� ������������������ 이벤트����������� ������������������ 위주����������� ������������������ I/O를����������� ������������������ 사용하는����������� ������������������ 고도의����������� ������������������ 확장성을����������� ������������������ 가짐
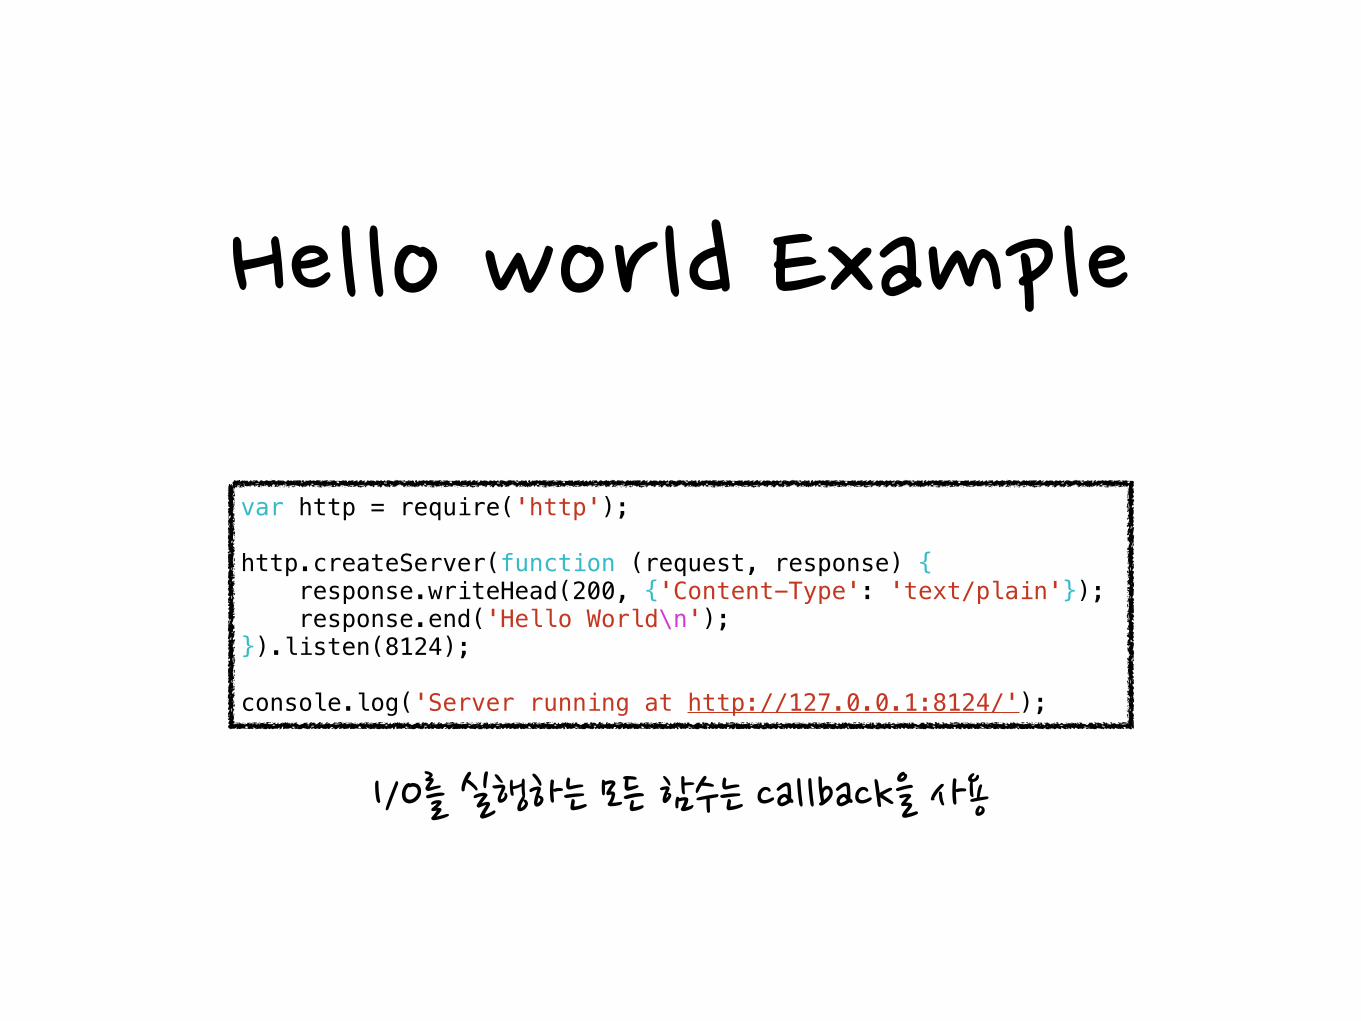
Hello����������� ������������������ world����������� ������������������ Example
var http = require('http'); !http.createServer(function (request, response) { response.writeHead(200, {'Content-Type': 'text/plain'}); response.end('Hello World\n'); }).listen(8124); !console.log('Server running at http://127.0.0.1:8124/');
I/O를����������� ������������������ 실행하는����������� ������������������ 모든����������� ������������������ 함수는����������� ������������������ callback을����������� ������������������ 사용
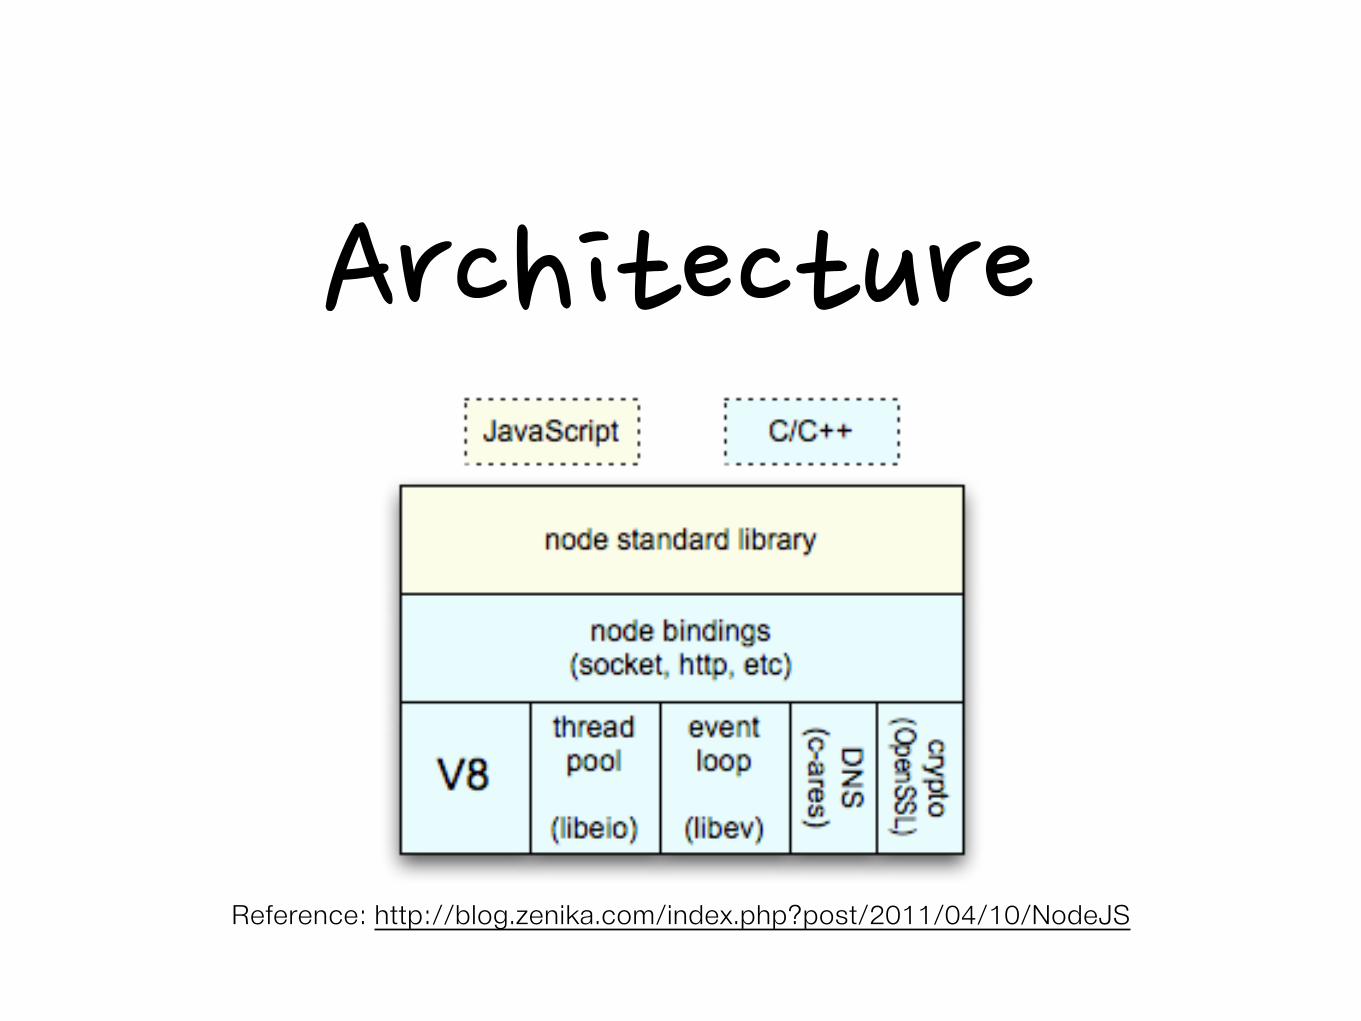
Architecture
Reference: http://blog.zenika.com/index.php?post/2011/04/10/NodeJS

This����������� ������������������ Chapter
전역����������� ������������������ 객체,����������� ������������������ 타이머����������� ������������������ 메소드����������� ������������������ 소켓����������� ������������������ 및����������� ������������������ 스트림,����������� ������������������ 유틸리티,����������� ������������������ 이벤트����������� ������������������ 객체
이번����������� ������������������ 장은����������� ������������������ 정말����������� ������������������ 내용이����������� ������������������ 없습니다.
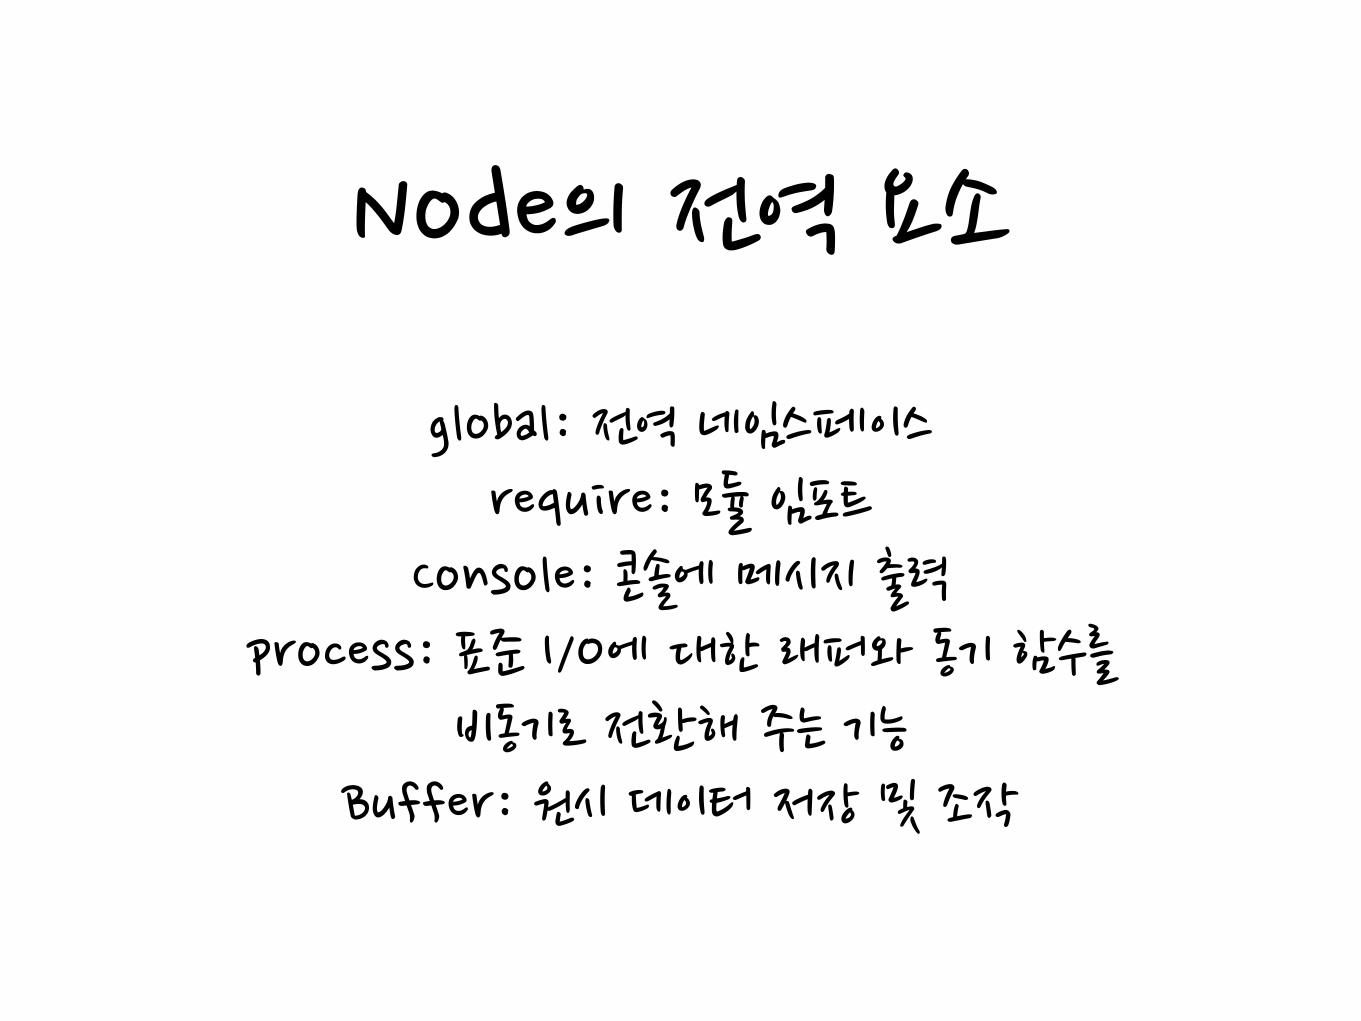
Node의����������� ������������������ 전역����������� ������������������ 요소
global:����������� ������������������ 전역����������� ������������������ 네임스페이스����������� ������������������ require:����������� ������������������ 모듈����������� ������������������ 임포트����������� ������������������
Console:����������� ������������������ 콘솔에����������� ������������������ 메시지����������� ������������������ 출력����������� ������������������ process:����������� ������������������ 표준����������� ������������������ I/O에����������� ������������������ 대한����������� ������������������ 래퍼와����������� ������������������ 동기����������� ������������������ 함수를����������� ������������������ ����������� ������������������
비동기로����������� ������������������ 전환해����������� ������������������ 주는����������� ������������������ 기능����������� ������������������ Buffer:����������� ������������������ 원시����������� ������������������ 데이터����������� ������������������ 저장����������� ������������������ 및����������� ������������������ 조작
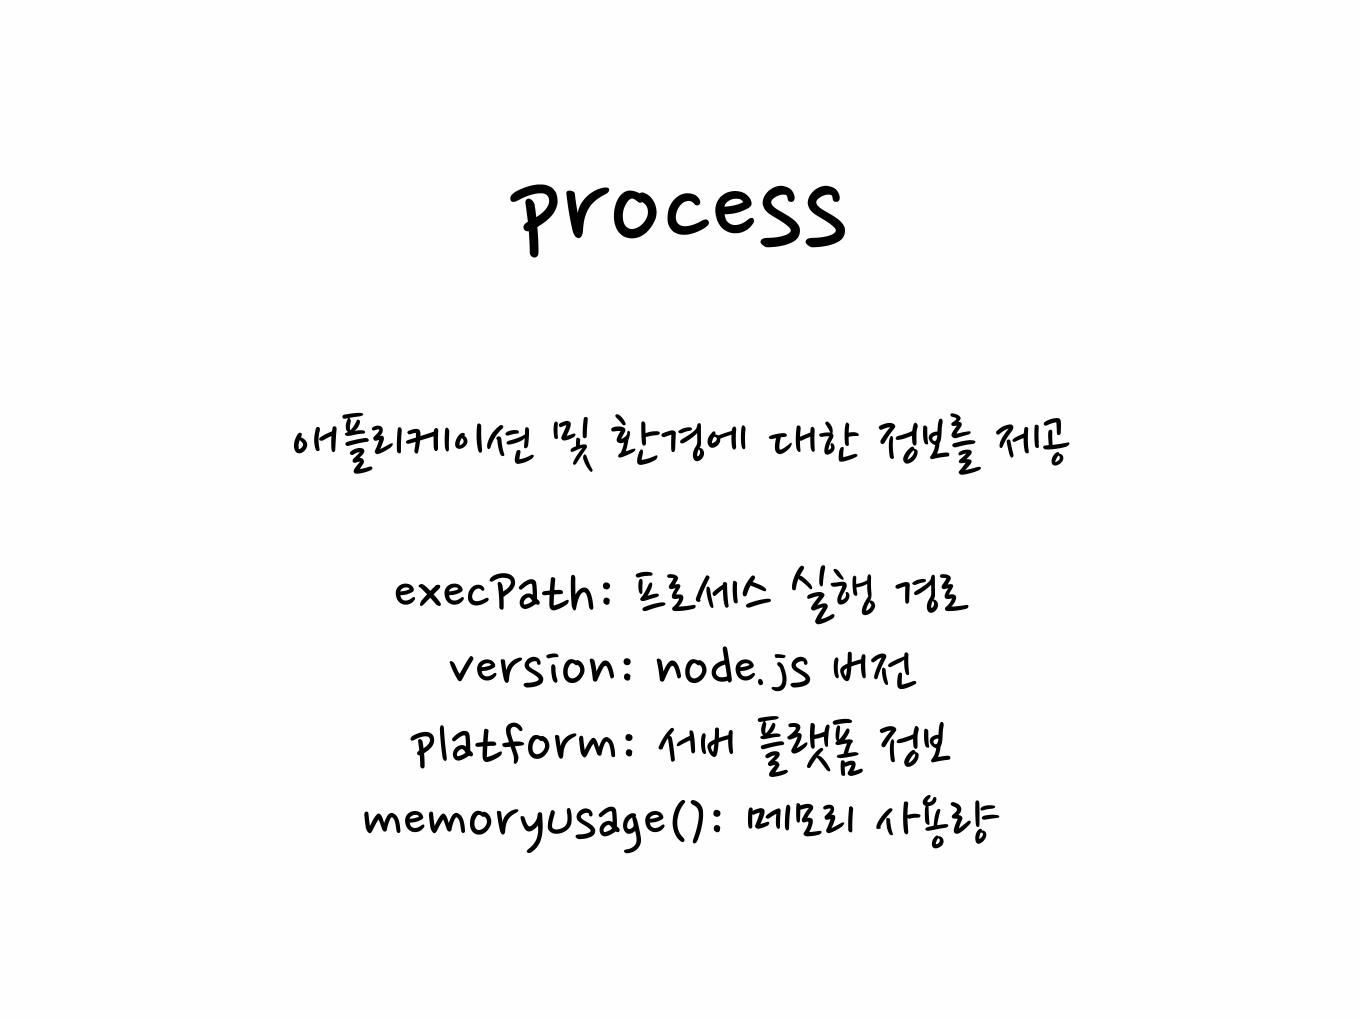
process
애플리케이션����������� ������������������ 및����������� ������������������ 환경에����������� ������������������ 대한����������� ������������������ 정보를����������� ������������������ 제공����������� ������������������ !
execPath:����������� ������������������ 프로세스����������� ������������������ 실행����������� ������������������ 경로����������� ������������������ version:����������� ������������������ node.js����������� ������������������ 버전����������� ������������������ platform:����������� ������������������ 서버����������� ������������������ 플랫폼����������� ������������������ 정보����������� ������������������ memoryUsage():����������� ������������������ 메모리����������� ������������������ 사용량
Buffer
바이너리����������� ������������������ 데이터를����������� ������������������ 처리할때����������� ������������������ 사용����������� ������������������ !
문자열로����������� ������������������ 변환하기����������� ������������������ 위해서는����������� ������������������ setEncoding을����������� ������������������ ����������� ������������������ 사용해서����������� ������������������ 인코딩����������� ������������������ 변경
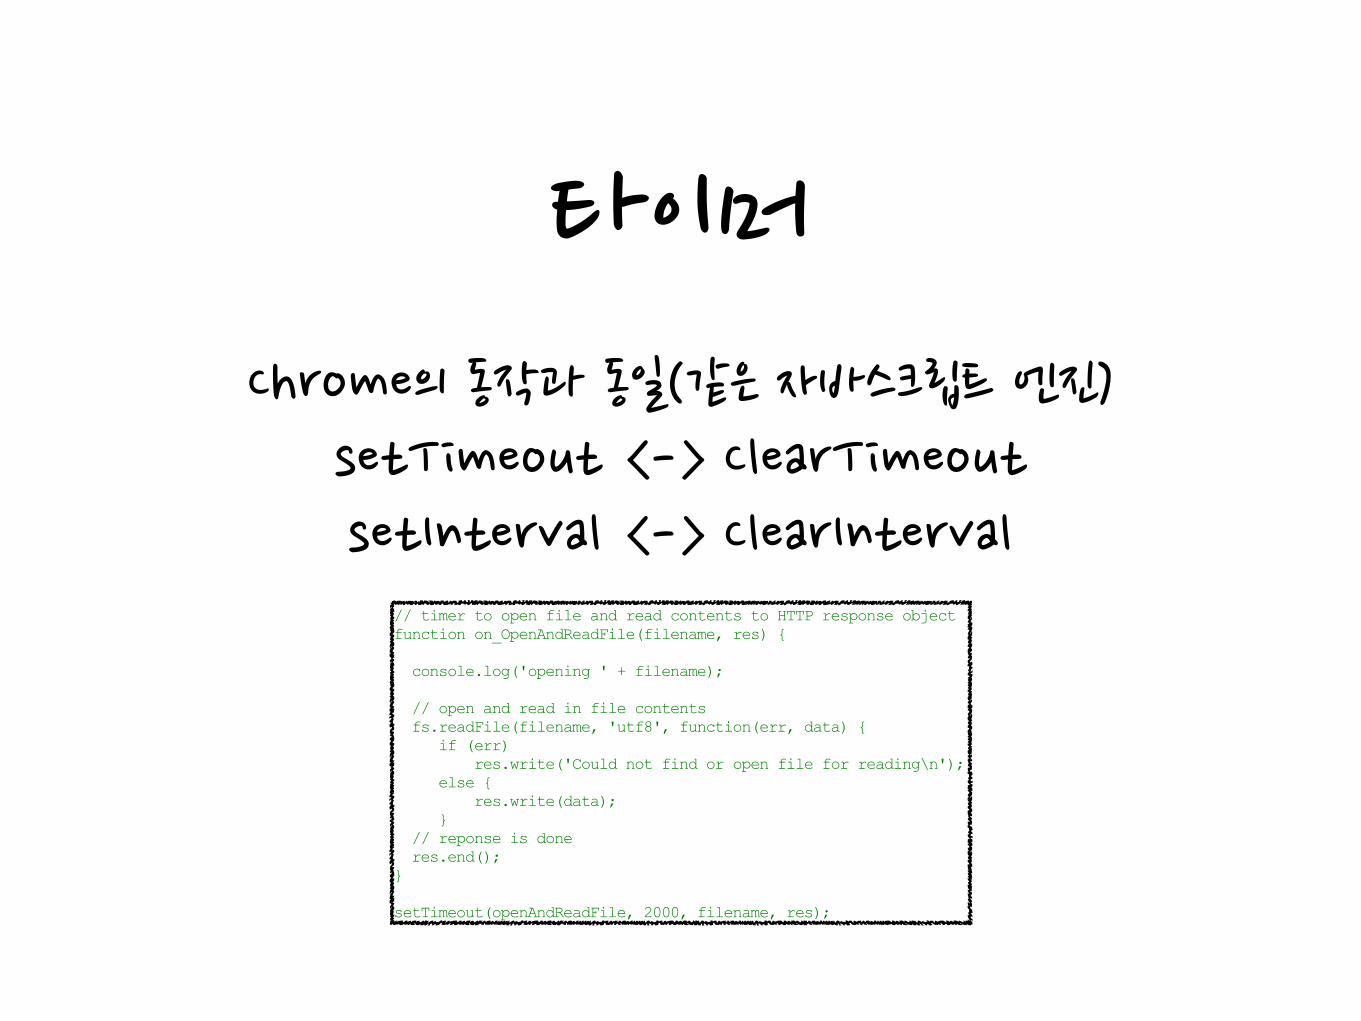
타이머Chrome의����������� ������������������ 동작과����������� ������������������ 동일(같은����������� ������������������ 자바스크립트����������� ������������������ 엔진)����������� ������������������ setTimeout����������� ������������������ <->����������� ������������������ ClearTimeout����������� ������������������ setInterval����������� ������������������ <->����������� ������������������ ClearInterval
writes to the socket. By default, the TCP socket.write method does set the second parameter to 'utf8' by default, but the socket returned in the connectionListener callback to the TCP createServer function sends the data as a buffer, not a string.
There are several methods for reading and writing various types of data to the buffer, such as buffer. readInt8, and buffer.writeUInt8.
The Timers: setTimeout, clearTimeout, setInterval, clearInterval
The timer functions in client-side JavaScript are part of the global windows object. They're not part of JavaScript, but have become such an ubiquitous part of JavaScript development that the Node developers incorporated them into the Node core API.
The timer functions operate in Node just like they operate in the browser. In fact, they operate in Node exactly the same as they would in Chrome, since Node is based on Chrome's V8 JavaScript engine.
The Node setTimeout function takes a callback function as first parameter, the delay time (in milliseconds) as second parameter, and an optional list of arguments:
// timer to open file and read contents to HTTP response object function on_OpenAndReadFile(filename, res) { console.log('opening ' + filename); // open and read in file contents fs.readFile(filename, 'utf8', function(err, data) { if (err) res.write('Could not find or open file for reading\n'); else { res.write(data); } // reponse is done res.end(); } setTimeout(openAndReadFile, 2000, filename, res);
In the code, the callback function on_OpenAndReadFile opens and reads a file to the HTTP response when the function is called after approximately 2000 milliseconds have passed.
As the Node documentation carefully notes, there's no guarantee that the callback function will be invoked in exactly n milliseconds (whatever n is). This is no different than the use of setTimeout in a browser--we don't have absolute control over the environment, and factors could slightly delay the timer.
The function clearTimeout clears a preset setTimeout. If you need to have a repeating timer, you can use setInterval to call a function for every n milliseconds, n being the second parameter passed to the function. Clear the interval with clearInterval.
Servers, Streams, and Sockets Much of the Node core API has to do with creating services that listen to specific types of communications. In the examples in Chapter 1, we used the HTTP module to create an HTTP web server. Other methods can create a TCP server, a TLS (Transport Layer Security) server, and a UDP/datagram socket. I'll cover TLS later, in Chapter 13 covering security, but in this section I want to introduce the TCP and UDP Node core functionality. First, though, a brief introduction to the terms used in this section.
www.it-ebooks.info

서버,����������� ������������������ 스트림,����������� ������������������ 소켓
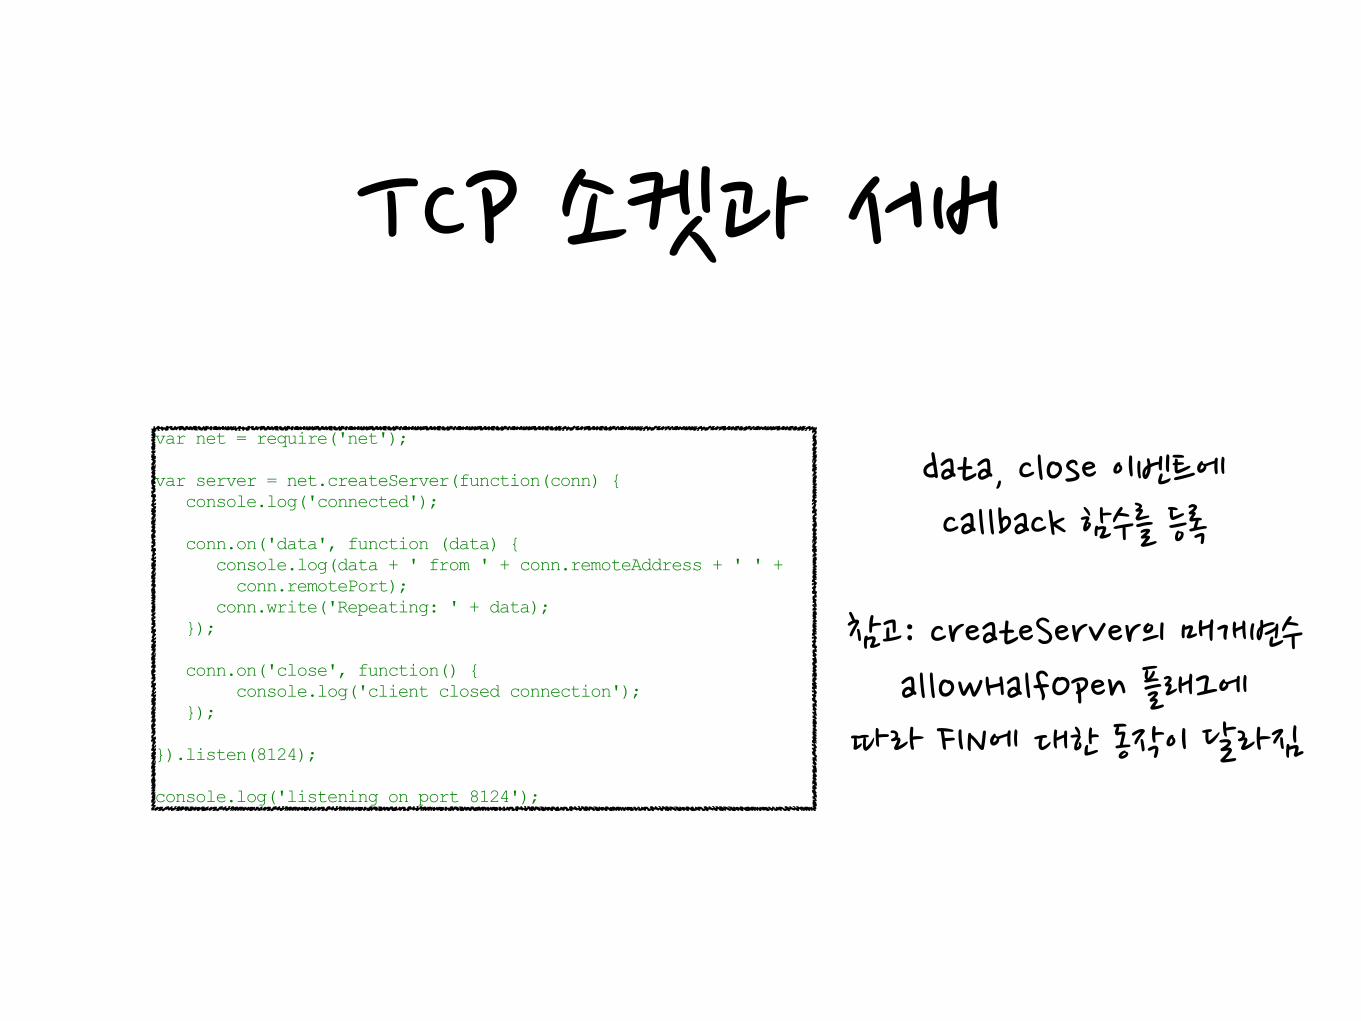
TCP����������� ������������������ 소켓과����������� ������������������ 서버
A socket is an end point in a communication, and a network socket is an end point in a communication between applications running on two different computers running on the network. The data that flows between the sockets is known as the stream. The data in the stream can be transmitted as binary data, in a buffer, or in Unicode, as a string. Both types of data are transmitted as packets: parts of the data split off into specifically sized pieces. There is a special kind of packet, a FIN, or finish packet, that is sent by a socket to signal that it is done. How the communication is managed, and how reliable the stream, is a consideration of the type of socket created.
TCP Sockets and Servers We can create a basic TCP (Transmission Control Protocol) server and client with the Net module. TCP forms the basis for most internet applications, such as web service and email. It provides a way of reliably transmitting data between client and server sockets.
Creating the TCP server is little different than creating the HTTP server in Example 1-1 in Chapter 1. We create the server, passing in a callback function. The TCP server differs from the HTTP server, in that rather than passing a requestListener, the TCP callback function's sole argument is an instance of a socket, listening for incoming connections.
Example 3-2 contains the code to create a TCP server. Once the server socket is created, it listens for two events: when data is received, and when the client closes the connection.
Example 3-2. A simple TCP server, with a socket listening for client communication on port 8124 var net = require('net'); var server = net.createServer(function(conn) { console.log('connected'); conn.on('data', function (data) { console.log(data + ' from ' + conn.remoteAddress + ' ' + conn.remotePort); conn.write('Repeating: ' + data); }); conn.on('close', function() { console.log('client closed connection'); }); }).listen(8124); console.log('listening on port 8124');
There is an optional parameter for createServer: allowHalfOpen. Setting this parameter to true instructs the socket not to send a FIN when it receives a FIN packet from the client. Doing this keeps the socket open for writing (not reading). To close the socket, you'd then need to explicitly use the end method. By default, allowHalfOpen is false.
Notice how a callback function is attached to the two events via the on method. Many objects in Node that emit events provide a way to attach a function as event listener via the use of the on method. This method takes the name of the event as first parameter, and the function listener, as the second.
The TCP client is just as simple to create as the server, as shown in Example 3-3. The call to the setEncoding method on the client changes the encoding for the received data. As discussed in the section earlier in the chapter on the Buffer object, data is transmitted as a non-humanly readable buffer, but we can use setEncoding to read it as a string. The socket's write method is used to transmit the data. It also attaches listener functions to two events: data, for received data, and close, in case the server closes the connection.
Example 3-3. Client Socket sending data to TCP server var net = require('net');
www.it-ebooks.info
data,����������� ������������������ close����������� ������������������ 이벤트에����������� ������������������ ����������� ������������������ callback����������� ������������������ 함수를����������� ������������������ 등록����������� ������������������
!참고:����������� ������������������ createServer의����������� ������������������ 매개변수����������� ������������������ ����������� ������������������ allowHalfOpen����������� ������������������ 플래그에����������� ������������������ ����������� ������������������
따라����������� ������������������ FIN에����������� ������������������ 대한����������� ������������������ 동작이����������� ������������������ 달라짐
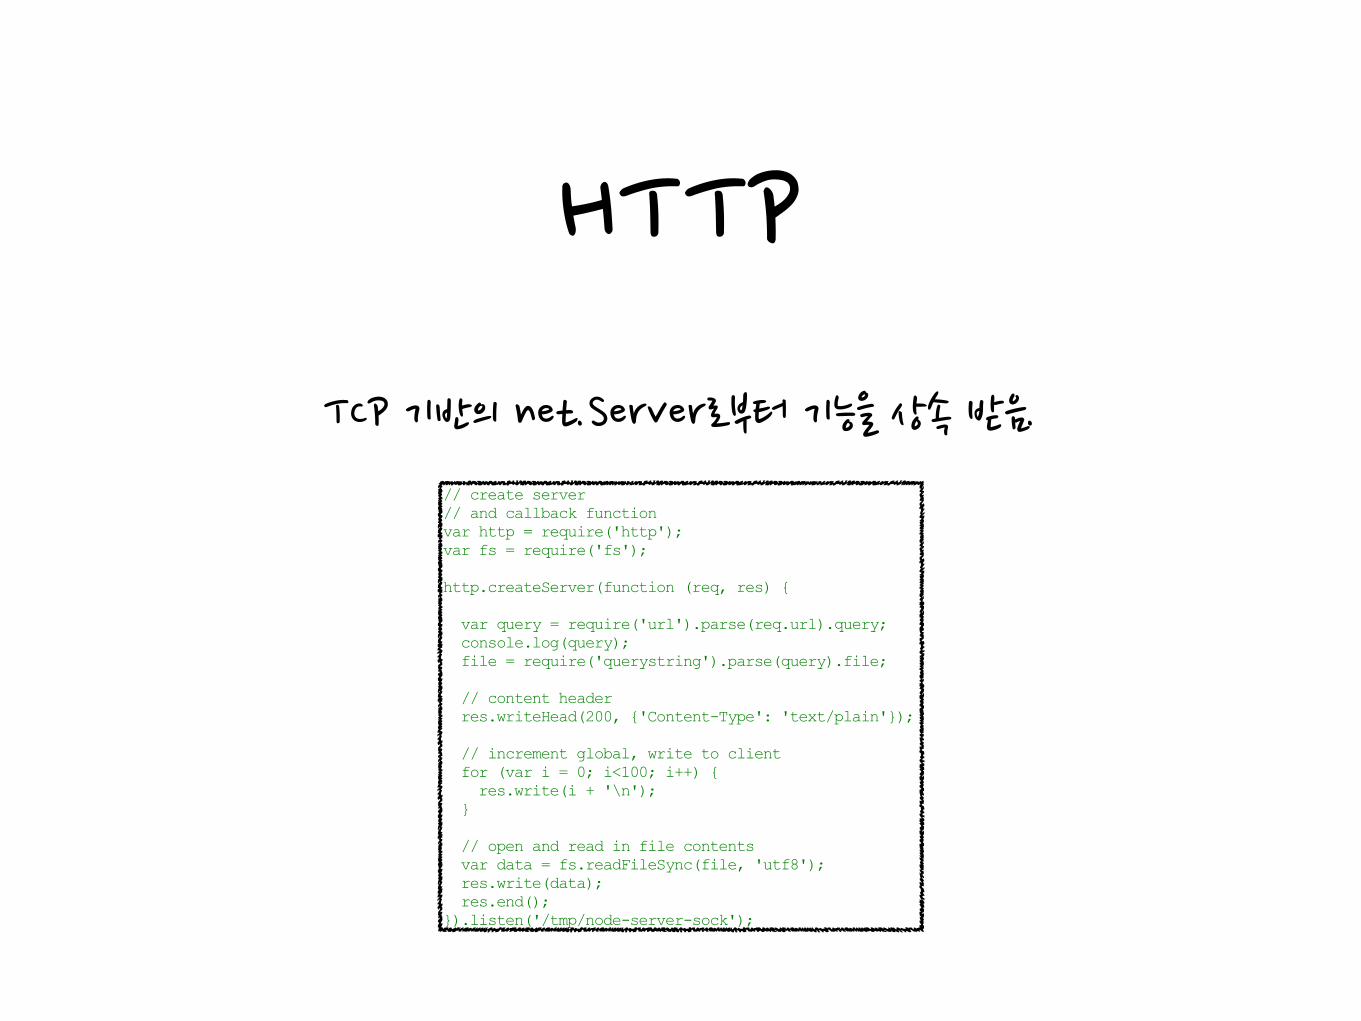
HTTP
TCP����������� ������������������ 기반의����������� ������������������ net.Server로부터����������� ������������������ 기능을����������� ������������������ 상속����������� ������������������ 받음.
For the HTTP server, the requestListener is a socket, while the http.ServerRequest object is a readable stream and the http.ServerResponse is a writable stream. The HTTP protocol adds an additional level of complexity because of the chunked transfer encoding supported by HTTP. The chunked transfer encoding allows transfer of data when the exact size of the response isn't known until fully processed. Instead, a zero sized chunk is sent to indicate the end of a query. This type of encoding is useful when processing a request such as a large database query output to an HTML table: writing the data can begin before the rest of the query data has been received.
More on streams in the section titled, appropriately enough, "Streams".
The TCP examples earlier, and the HTTP examples in Chapter 1, were both coded to work with network sockets. However, all of the server/socket modules can also connect to a Unix socket, rather than a specific network port. Unlike a network socket, a Unix or IPC (inter-process communication) enables communication between processes within the same system.
To demonstrate Unix socket communication, I duplicated Example 1-3's code, but instead of binding to a port, the new server binds to a Unix socket, as shown in Example 3-4. The application also makes use of readFileSync, the synchronous version of the function to open a file and read its contents.
Example 3-4. HTTP Server bound to a Unix Socket // create server // and callback function var http = require('http'); var fs = require('fs'); http.createServer(function (req, res) { var query = require('url').parse(req.url).query; console.log(query); file = require('querystring').parse(query).file; // content header res.writeHead(200, {'Content-Type': 'text/plain'}); // increment global, write to client for (var i = 0; i<100; i++) { res.write(i + '\n'); } // open and read in file contents var data = fs.readFileSync(file, 'utf8'); res.write(data); res.end(); }).listen('/tmp/node-server-sock');
The client is based on a code sample provided in documentation of the Node core at the Node.js site for the http.request object. The http.request object, by default, makes use of http.globalAgent, which supports pooled sockets. The size of this pool is five sockets by default, which can be adjusted by changing the agent.maxSockets value.
The client accepts the chunked data returned from the server, printing out to the console. It also triggers a response on the server with a couple of minor writes, as shown in Example 3-5.
Example 3-5. Connecting to the Unix Socket and printing out received data var http = require('http'); var options = { method: 'GET', socketPath: '/tmp/node-server-sock', path: "/?file=main.txt" };
www.it-ebooks.info
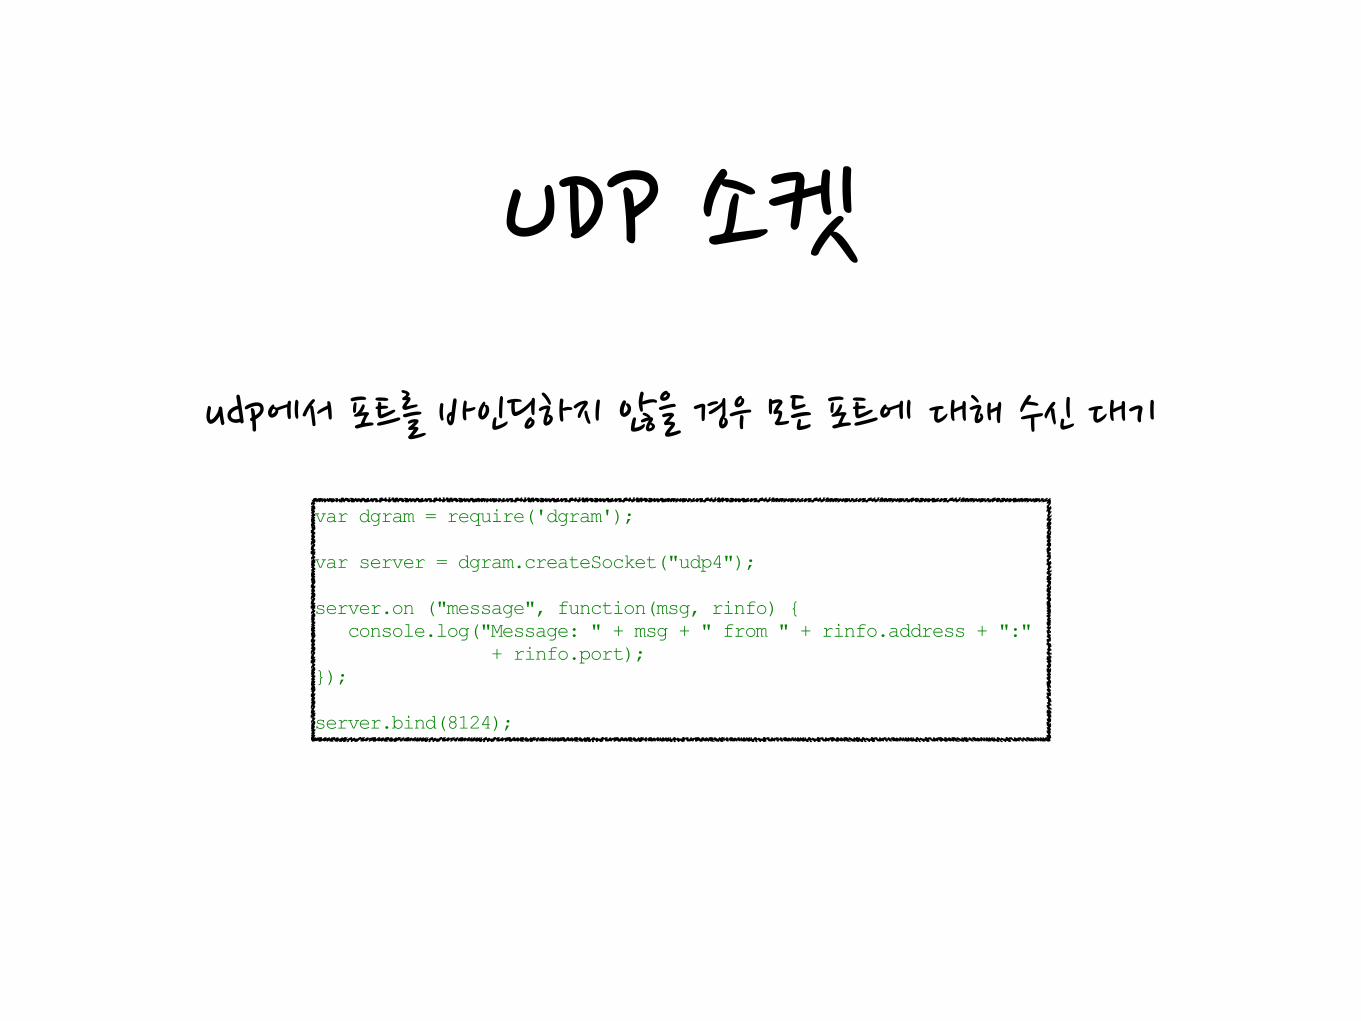
UDP����������� ������������������ 소켓
udp에서����������� ������������������ 포트를����������� ������������������ 바인딩하지����������� ������������������ 않을����������� ������������������ 경우����������� ������������������ 모든����������� ������������������ 포트에����������� ������������������ 대해����������� ������������������ 수신����������� ������������������ 대기
// prepare for input from terminal process.stdin.resume(); process.stdin.on('data', function (data) { console.log(data.toString('utf8')); client.send(data, 0, data.length, 8124, "examples.burningbird.net", function (err, bytes) { if (err) console.log('error: ' + err); else console.log('successful'); }); });
The UDP server, in Example 3-7, is even more simple than the client. All the server application does is create the socket, bind it to a specific port (8124), and listen for the message event. When a message arrives, the application prints it out using console.log, along with the IP address and port of the sender. Especially note that no encoding is necessary to print out the message—it's automatically converted from a buffer to a string.
We didn't have to bind the socket to a port. However, without the binding, the socket would attempt to listen in on every port.
Example 3-7. A UDP Socket Server, bound to port 8124, listening for messages var dgram = require('dgram'); var server = dgram.createSocket("udp4"); server.on ("message", function(msg, rinfo) { console.log("Message: " + msg + " from " + rinfo.address + ":" + rinfo.port); }); server.bind(8124);
I didn't call the close method on either the client or the server after sending/receiving the message. However, no connection is being maintained between the client and server—just the sockets capable of sending a message, and receiving communication.
Streams, Pipes, and Readline The communication stream between the sockets discussed in the previous sections is an implementation of the underlying abstract stream interface. Streams can be readable, writable, or both, and all streams are instances of EventEmitter, discussed in the section titled "Events and the EventEmitter".
It's important to take away with you from this section that all of these communication streams, including process.stdin and process.stdout are all implementations of the abstract stream interface. Because of this underlying interface, there is basic functionality available in all streams in Node:
x You can change the encoding for the stream data with setEncoding
x You can check whether the stream is readable, writable, or both
x You can capture stream events, such as data received or connection closed, and attach callback functions for each
x You can pause and resume the stream
x You can pipe data from a readable stream to a writable stream
The last capability is one we haven't covered to this point. A simple way to demonstrate a pipe is to open a REPL session and type in the following:
> process.stdin.resume();
www.it-ebooks.info
스트림,����������� ������������������ 파이프,����������� ������������������ Readline
소켓����������� ������������������ 간의����������� ������������������ 통신은����������� ������������������ 하부에����������� ������������������ 있는����������� ������������������ stream����������� ������������������ 추상����������� ������������������ 인터페이스를����������� ������������������ 구현한����������� ������������������ 것����������� ������������������ 모든����������� ������������������ 스트림은����������� ������������������ EventEmitter의����������� ������������������ 인스턴스
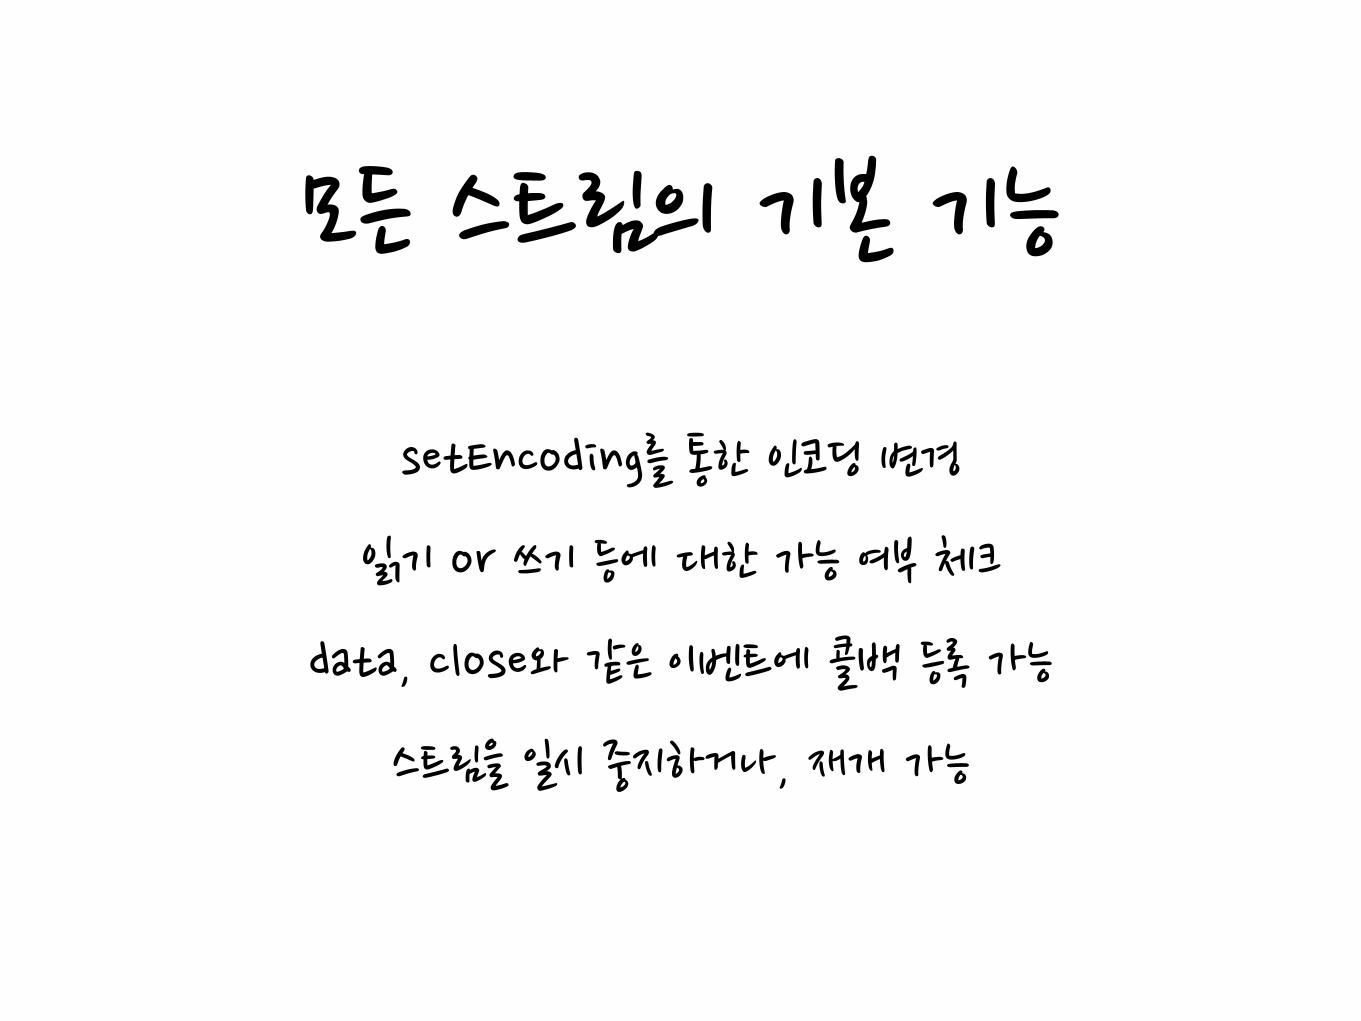
모든����������� ������������������ 스트림의����������� ������������������ 기본����������� ������������������ 기능
setEncoding를����������� ������������������ 통한����������� ������������������ 인코딩����������� ������������������ 변경����������� ������������������
읽기����������� ������������������ or����������� ������������������ 쓰기����������� ������������������ 등에����������� ������������������ 대한����������� ������������������ 가능����������� ������������������ 여부����������� ������������������ 체크����������� ������������������
data,����������� ������������������ close와����������� ������������������ 같은����������� ������������������ 이벤트에����������� ������������������ 콜백����������� ������������������ 등록����������� ������������������ 가능����������� ������������������
스트림을����������� ������������������ 일시����������� ������������������ 중지하거나,����������� ������������������ 재개����������� ������������������ 가능
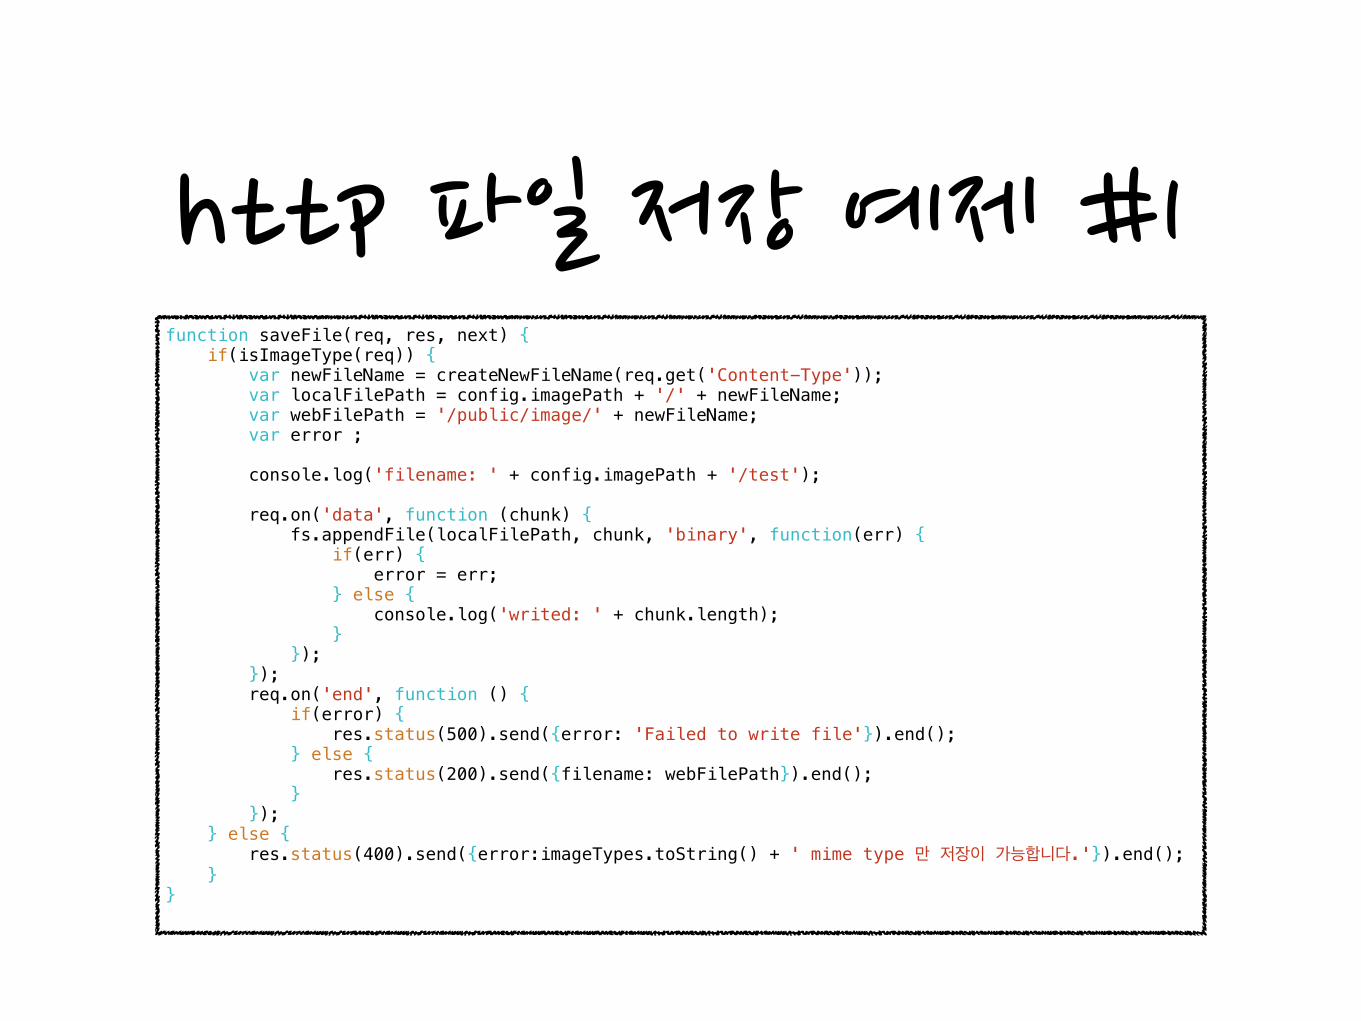
http����������� ������������������ 파일����������� ������������������ 저장����������� ������������������ 예제����������� ������������������ #1function saveFile(req, res, next) { if(isImageType(req)) { var newFileName = createNewFileName(req.get('Content-Type')); var localFilePath = config.imagePath + '/' + newFileName; var webFilePath = '/public/image/' + newFileName; var error ; ! console.log('filename: ' + config.imagePath + '/test'); ! req.on('data', function (chunk) { fs.appendFile(localFilePath, chunk, 'binary', function(err) { if(err) { error = err; } else { console.log('writed: ' + chunk.length); } }); }); req.on('end', function () { if(error) { res.status(500).send({error: 'Failed to write file'}).end(); } else { res.status(200).send({filename: webFilePath}).end(); } }); } else { res.status(400).send({error:imageTypes.toString() + ' mime type 만 저장이 가능합니다.'}).end(); } }
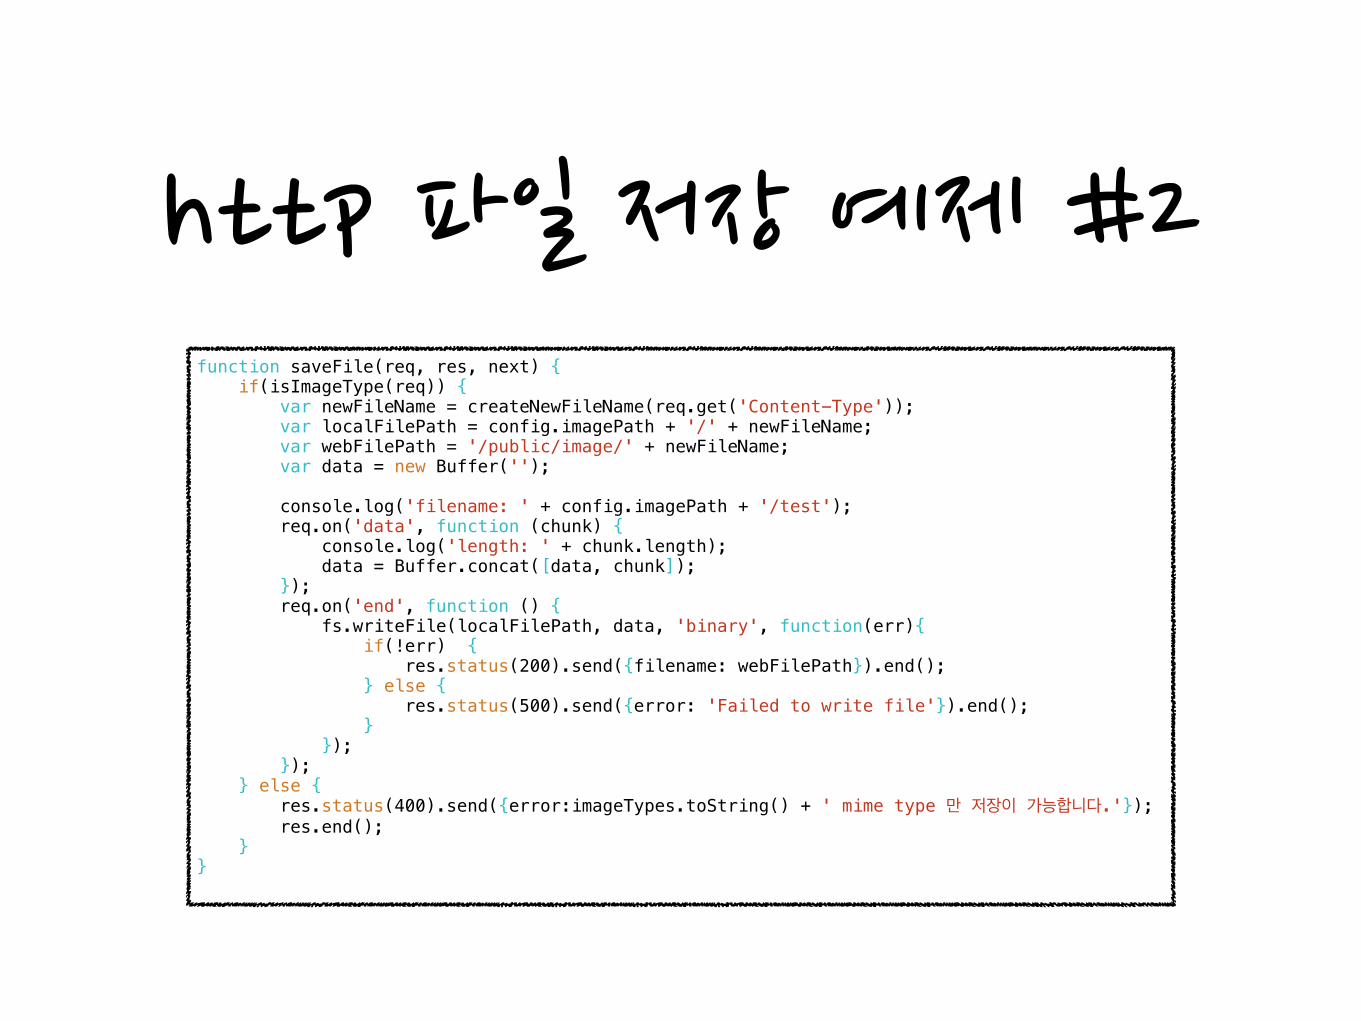
http����������� ������������������ 파일����������� ������������������ 저장����������� ������������������ 예제����������� ������������������ #2function saveFile(req, res, next) { if(isImageType(req)) { var newFileName = createNewFileName(req.get('Content-Type')); var localFilePath = config.imagePath + '/' + newFileName; var webFilePath = '/public/image/' + newFileName; var data = new Buffer(''); ! console.log('filename: ' + config.imagePath + '/test'); req.on('data', function (chunk) { console.log('length: ' + chunk.length); data = Buffer.concat([data, chunk]); }); req.on('end', function () { fs.writeFile(localFilePath, data, 'binary', function(err){ if(!err) { res.status(200).send({filename: webFilePath}).end(); } else { res.status(500).send({error: 'Failed to write file'}).end(); } }); }); } else { res.status(400).send({error:imageTypes.toString() + ' mime type 만 저장이 가능합니다.'}); res.end(); } }
자식����������� ������������������ 프로세스
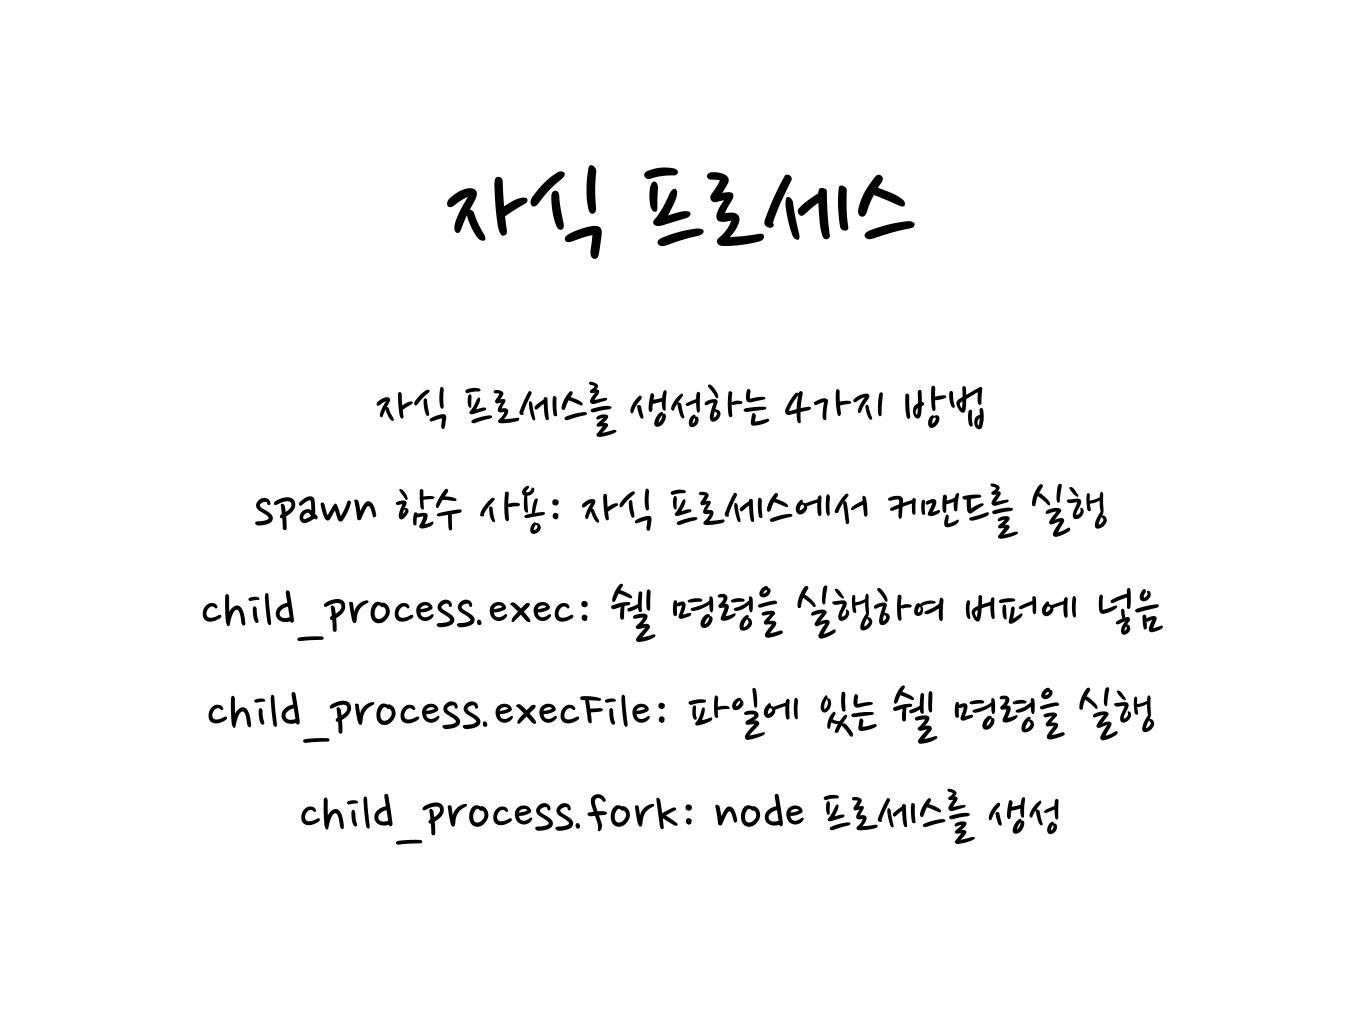
자식����������� ������������������ 프로세스를����������� ������������������ 생성하는����������� ������������������ 4가지����������� ������������������ 방법����������� ������������������
spawn����������� ������������������ 함수����������� ������������������ 사용:����������� ������������������ 자식����������� ������������������ 프로세스에서����������� ������������������ 커맨드를����������� ������������������ 실행����������� ������������������
child_process.exec:����������� ������������������ 쉘����������� ������������������ 명령을����������� ������������������ 실행하여����������� ������������������ 버퍼에����������� ������������������ 넣음����������� ������������������
child_process.execFile:����������� ������������������ 파일에����������� ������������������ 있는����������� ������������������ 쉘����������� ������������������ 명령을����������� ������������������ 실행����������� ������������������
child_process.fork:����������� ������������������ node����������� ������������������ 프로세스를����������� ������������������ 생성
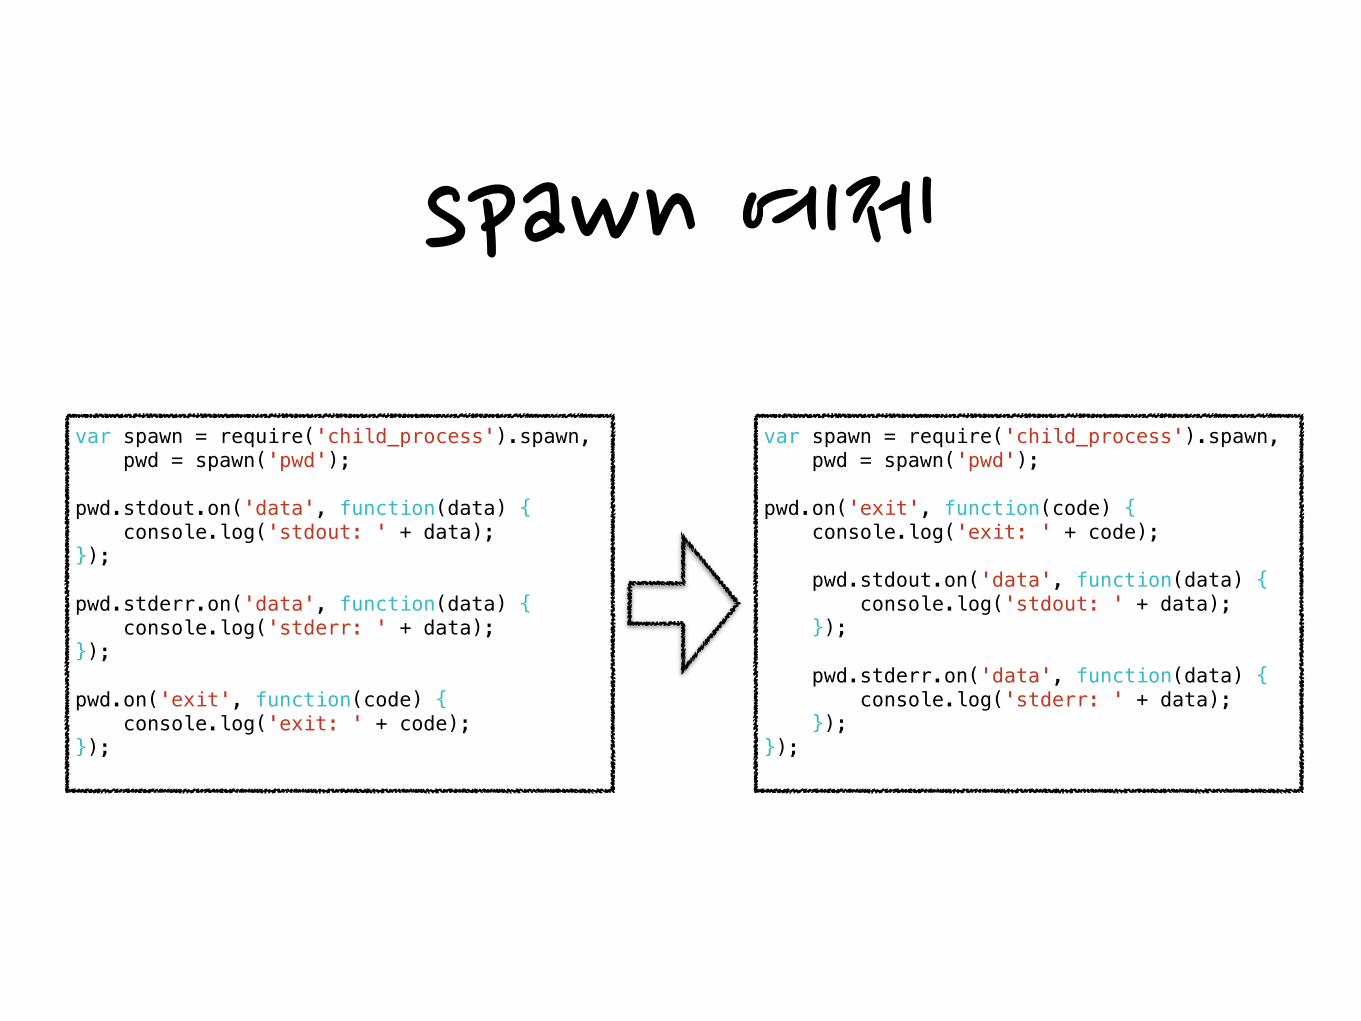
spawn����������� ������������������ 예제
var spawn = require('child_process').spawn, pwd = spawn('pwd'); !pwd.stdout.on('data', function(data) { console.log('stdout: ' + data); }); !pwd.stderr.on('data', function(data) { console.log('stderr: ' + data); }); !pwd.on('exit', function(code) { console.log('exit: ' + code); });
var spawn = require('child_process').spawn, pwd = spawn('pwd'); !pwd.on('exit', function(code) { console.log('exit: ' + code); ! pwd.stdout.on('data', function(data) { console.log('stdout: ' + data); }); ! pwd.stderr.on('data', function(data) { console.log('stderr: ' + data); }); });
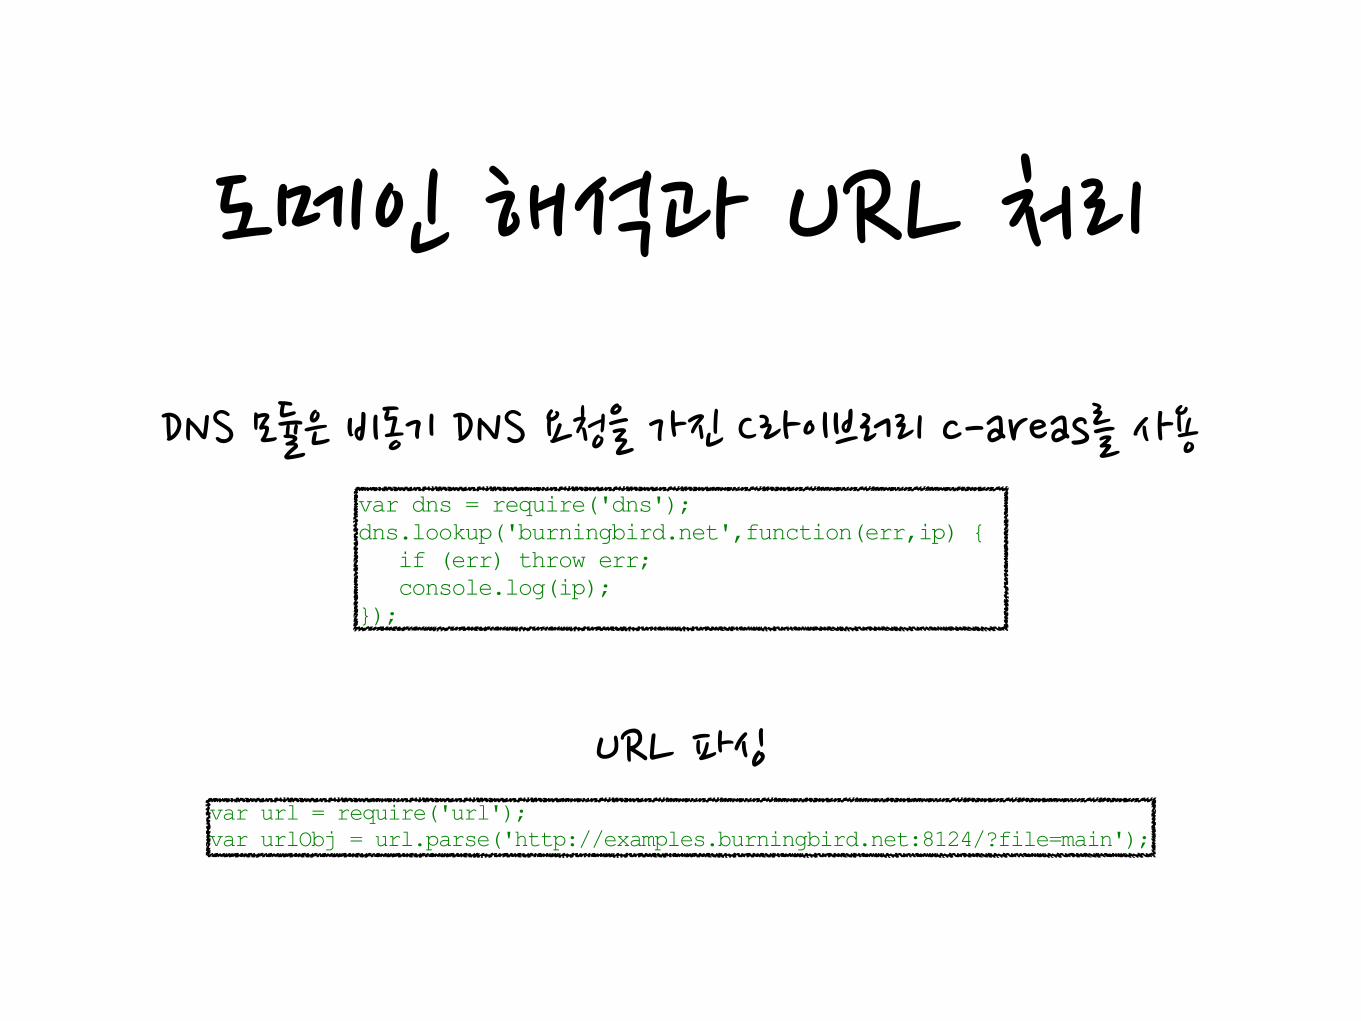
도메인����������� ������������������ 해석과����������� ������������������ URL����������� ������������������ 처리
DNS����������� ������������������ 모듈은����������� ������������������ 비동기����������� ������������������ DNS����������� ������������������ 요청을����������� ������������������ 가진����������� ������������������ C라이브러리����������� ������������������ c-areas를����������� ������������������ 사용
console.log('stderr: ' + data); }); cmd.on('exit', function (code) { console.log('child process exited with code ' + code); });
The /c flag passed as the first argument to the cmd.exe instructs it to carry out the command and then terminate. The application doesn't work without this flag. You especially don't want to pass in the /K flag, which tells cmd.exe to execute the application and then remain because your application won't terminate.
Domain Resolution and URL Processing The DNS module provides DNS resolution using C-Ares, a C library that provides asynchronous DNS requests. It's used by Node with some of its other modules, and can be useful for our applications that need to be able to discover domains or IP address.
To discover the IP address given a domain, use the dns.lookup method and print out the returned IP address:
var dns = require('dns'); dns.lookup('burningbird.net',function(err,ip) { if (err) throw err; console.log(ip); });
The dns.reverse method returns an array of domain names for a given IP address:
dns.reverse('173.255.206.103', function(err,domains) { domains.forEach(function(domain) { console.log(domain); }); });
The dns.resolve method returns an array of record types by a given type, such as A, MX, NS, and so on. In the following code, I'm looking for the name server domains for my domain name:
var dns = require('dns'); dns.resolve('burningbird.net', 'NS', function(err,domains) { domains.forEach(function(domain) { console.log(domain); }); });
Which returns:
ns1.linode.com ns3.linode.com ns5.linode.com ns4.linode.com
We used the URL module in Example 1-3 in Chapter 1. This simple module provides a way of parsing a URL and returning an object with all of the URL components. Passing in the following URL:
var url = require('url'); var urlObj = url.parse('http://examples.burningbird.net:8124/?file=main');
Returns the following JavaScript object:
{ protocol: 'http:', slashes: true, host: 'examples.burningbird.net:8124', port: '8124', hostname: 'examples.burningbird.net', href: 'http://examples.burningbird.net:8124/?file=main',
www.it-ebooks.info
URL����������� ������������������ 파싱

Utilities����������� ������������������ 모듈
여러가지����������� ������������������ 유틸성����������� ������������������ 기능을����������� ������������������ 제공����������� ������������������
!
개체가����������� ������������������ 배열이거나����������� ������������������ 정규식인지����������� ������������������ 검사����������� ������������������
문자열을����������� ������������������ 형식화,����������� ������������������ 개체를����������� ������������������ 문자열로����������� ������������������ 변환(inspect)
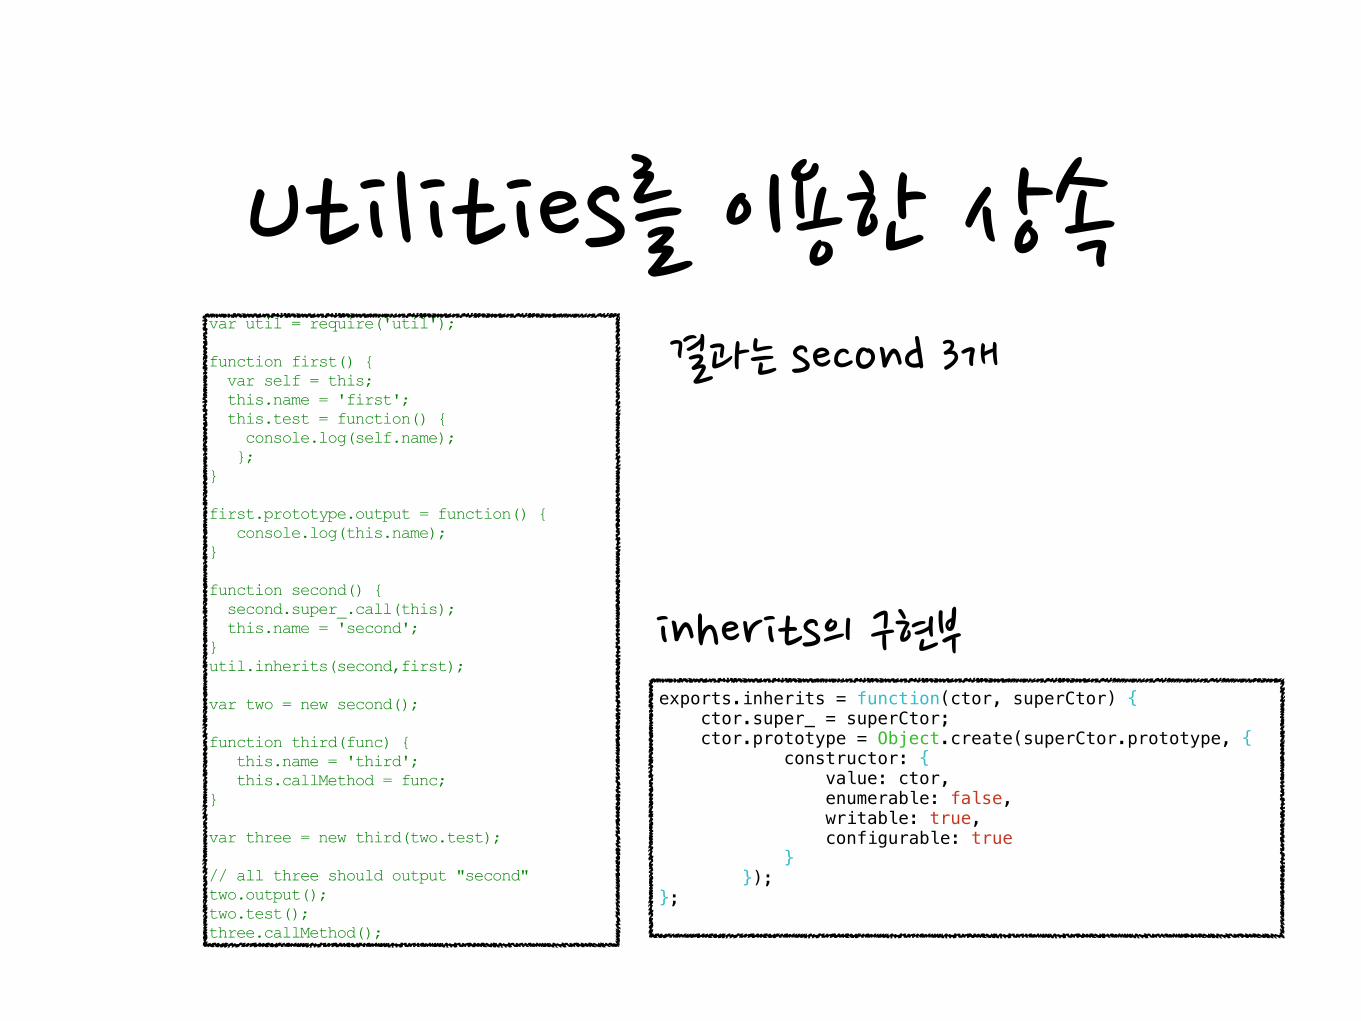
Utilities를����������� ������������������ 이용한����������� ������������������ 상속
Now you can inspect and re-inspect the object interface at your leisure. Again, if you use null for depth, expect a large output file.
The Utilities modules provides several other methods, but the one you're most likely to use is util.inherits. The util.inherits function takes two parameters, constructor and superconstructor. The result is the constructor will inherit the functionality from the superconstructor.
The example and its explanation cover some core JavaScript functionality you might already be familiar with. However, it's important that all readers come away from this section with the same understanding of what's happening.
Example 3-11 demonstrates all the nuances associated with using util.inherits. The explanation of the code follows.
Example 3-11. Enabling object inheritance via the util.inherits method var util = require('util'); function first() { var self = this; this.name = 'first'; this.test = function() { console.log(self.name); }; } first.prototype.output = function() { console.log(this.name); } function second() { second.super_.call(this); this.name = 'second'; } util.inherits(second,first); var two = new second(); function third(func) { this.name = 'third'; this.callMethod = func; } var three = new third(two.test); // all three should output "second" two.output(); two.test(); three.callMethod();
The first object is named first, and has two properties: a name and a method called test that outputs the name to the console. The second object is named second, and also assigns a value to its name property. This second object also invokes the call method on super_. If we look under the hood of util.inherits, we see where super_ is defined:
exports.inherits = function(ctor, superCtor) { ctor.super_ = superCtor; ctor.prototype = Object.create(superCtor.prototype, { constructor: { value: ctor, enumerable: false, writable: true, configurable: true
www.it-ebooks.info
결과는����������� ������������������ second����������� ������������������ 3개
exports.inherits = function(ctor, superCtor) { ctor.super_ = superCtor; ctor.prototype = Object.create(superCtor.prototype, { constructor: { value: ctor, enumerable: false, writable: true, configurable: true } }); };
inherits의����������� ������������������ 구현부
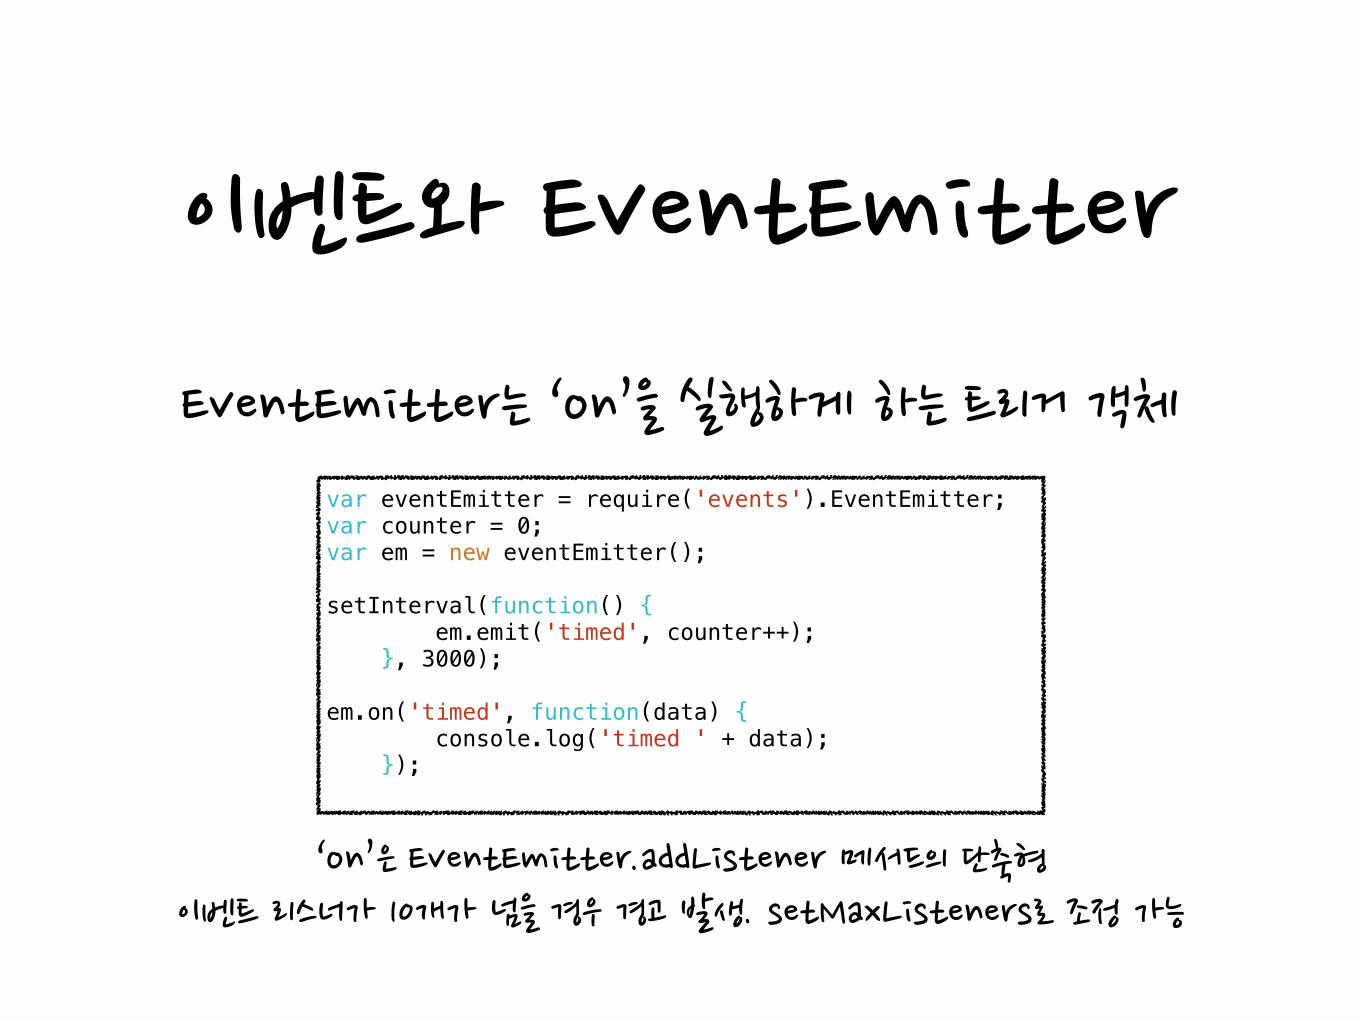
이벤트와����������� ������������������ EventEmitter
EventEmitter는����������� ������������������ ‘on’을����������� ������������������ 실행하게����������� ������������������ 하는����������� ������������������ 트리거����������� ������������������ 객체var eventEmitter = require('events').EventEmitter; var counter = 0; var em = new eventEmitter(); !setInterval(function() { em.emit('timed', counter++); }, 3000); !em.on('timed', function(data) { console.log('timed ' + data); });
‘on’은����������� ������������������ EventEmitter.addListener����������� ������������������ 메서드의����������� ������������������ 단축형����������� ������������������ 이벤트����������� ������������������ 리스너가����������� ������������������ 10개가����������� ������������������ 넘을����������� ������������������ 경우����������� ������������������ 경고����������� ������������������ 발생.����������� ������������������ setMaxListeners로����������� ������������������ 조정����������� ������������������ 가능
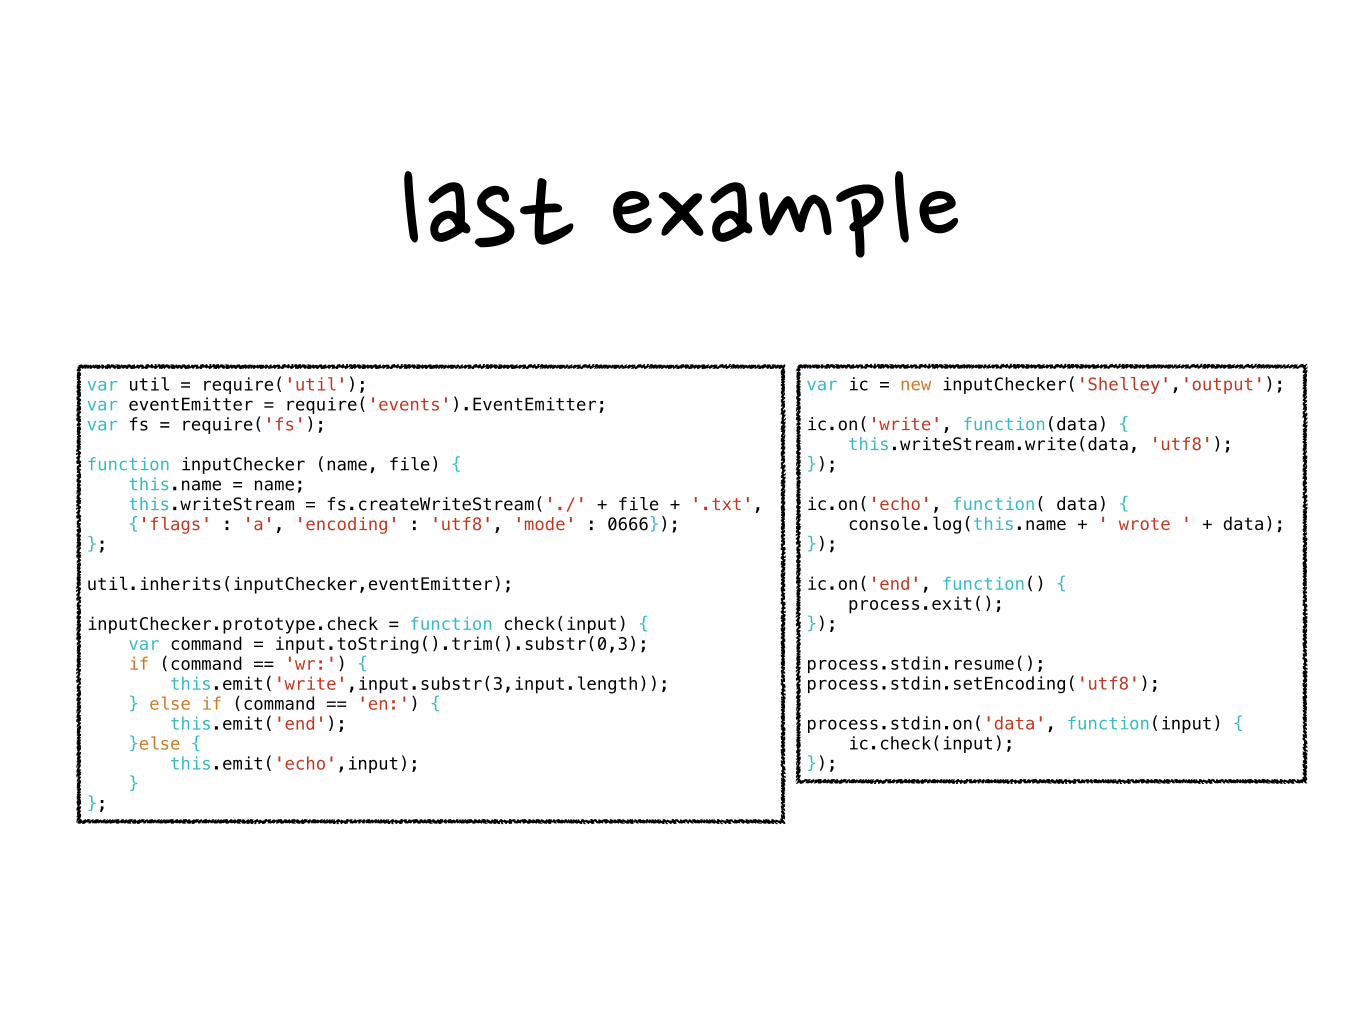
var util = require('util'); var eventEmitter = require('events').EventEmitter; var fs = require('fs'); !function inputChecker (name, file) { this.name = name; this.writeStream = fs.createWriteStream('./' + file + '.txt', {'flags' : 'a', 'encoding' : 'utf8', 'mode' : 0666}); }; !util.inherits(inputChecker,eventEmitter); !inputChecker.prototype.check = function check(input) { var command = input.toString().trim().substr(0,3); if (command == 'wr:') { this.emit('write',input.substr(3,input.length)); } else if (command == 'en:') { this.emit('end'); }else { this.emit('echo',input); } };
var ic = new inputChecker('Shelley','output'); !ic.on('write', function(data) { this.writeStream.write(data, 'utf8'); }); !ic.on('echo', function( data) { console.log(this.name + ' wrote ' + data); }); !ic.on('end', function() { process.exit(); }); !process.stdin.resume(); process.stdin.setEncoding('utf8'); !process.stdin.on('data', function(input) { ic.check(input); });
last����������� ������������������ example
References
•Shelly����������� ������������������ Powers����������� ������������������ (2013).����������� ������������������ Learning����������� ������������������ Node.����������� ������������������ (안재우,����������� ������������������ 옮김).����������� ������������������ 서울시:����������� ������������������ 비제이퍼블릭.����������� ������������������ (원서출판����������� ������������������ 2012)