Managing Home Energy Use · The amount of water used in your home also impacts the amount of energy...
28
Managing Home Energy Use OFF A guide to measuring energy consumption, using audit tools, and implementing conservation practices in the home. 2019-2020
Transcript of Managing Home Energy Use · The amount of water used in your home also impacts the amount of energy...

Managing Home Energy Use
OFF
A guide to measuring energy consumption, using audit tools, and implementing conservation practices in the home.
2019-2020
2 ©2019 The NEED Project Managing Home Energy Use www.NEED.org
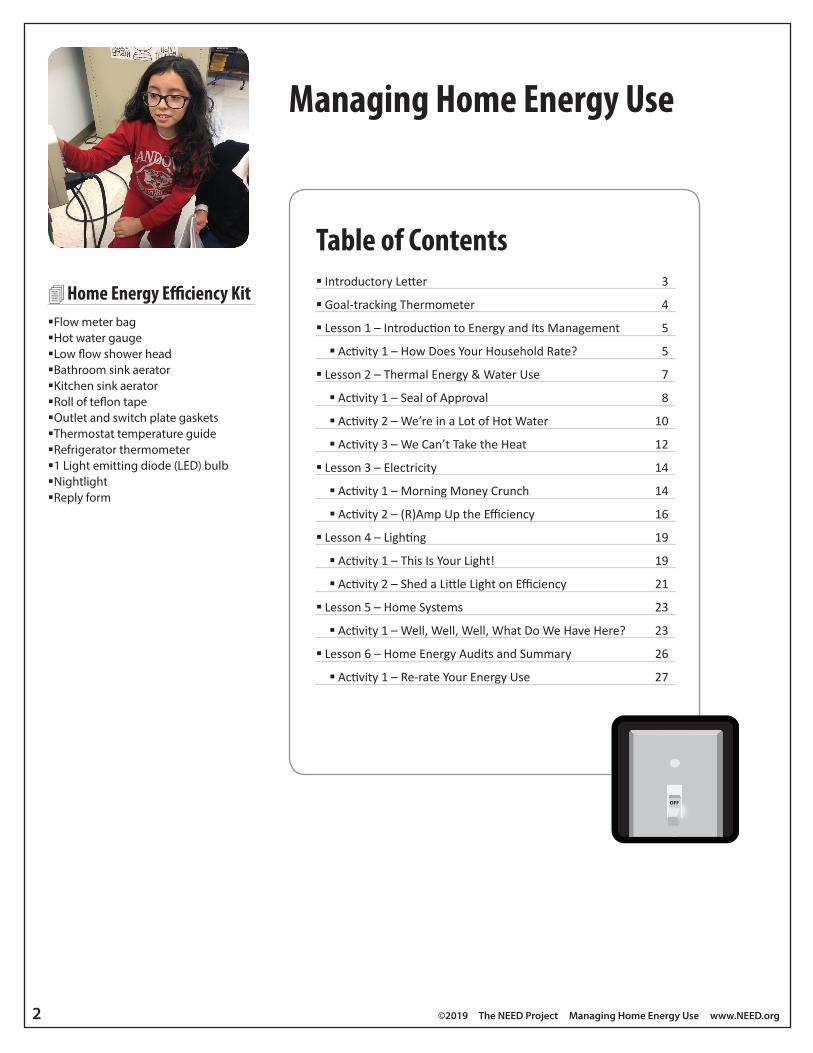
Table of Contents�� Introductory Letter 3
�� Goal-tracking Thermometer 4
�� Lesson 1 – Introduction to Energy and Its Management 5
�� Activity 1 – How Does Your Household Rate? 5
�� Lesson 2 – Thermal Energy & Water Use 7
�� Activity 1 – Seal of Approval 8
�� Activity 2 – We’re in a Lot of Hot Water 10
�� Activity 3 – We Can’t Take the Heat 12
�� Lesson 3 – Electricity 14
�� Activity 1 – Morning Money Crunch 14
�� Activity 2 – (R)Amp Up the Efficiency 16
�� Lesson 4 – Lighting 19
�� Activity 1 – This Is Your Light! 19
�� Activity 2 – Shed a Little Light on Efficiency 21
�� Lesson 5 – Home Systems 23
�� Activity 1 – Well, Well, Well, What Do We Have Here? 23
�� Lesson 6 – Home Energy Audits and Summary 26
�� Activity 1 – Re-rate Your Energy Use 27
Managing Home Energy Use
OFF
�Flow meter bag �Hot water gauge �Low flow shower head �Bathroom sink aerator �Kitchen sink aerator �Roll of teflon tape �Outlet and switch plate gaskets �Thermostat temperature guide �Refrigerator thermometer �1 Light emitting diode (LED) bulb �Nightlight �Reply form
Home Energy Efficiency Kit

©2019 The NEED Project Managing Home Energy Use www.NEED.org 3
Your child is learning about energy use at school. This guide is designed to build upon and reinforce the school lessons while applying his/her observations to home energy use and teaching the household about their knowledge gains.
Working with your child, as a household, you will conduct a step-by-step audit of your energy consumption and discover ways you can save money on your energy bills right away – many without any additional cost.
If you are interested in more information, the U.S. Department of Energy’s Energy Saver website has tips and information about all areas of energy use in the home. Furthermore, many utility companies offer free or low-cost energy audits conducted by a professional who can demonstrate tasks and develop a plan to save money on your energy bills. You can find the Energy Saver website by navigating to https://energy.gov/energysaver/energy-saver.
Teachers often encourage their students to set goals, and write them down. In that light, we encourage you, at the start of this unit, to write down a goal for your family. Decide how much money you would like to save on a monthly basis, or annually, and write it on a piece of paper. Include steps you might follow to help get you there. For example, “By January 1, of this school year, we want to save a total of $500 combined on our electricity, gas, and water bills by taking shorter showers, using only cold water in the washing machine, and turning off lights when we leave each room.” Have everyone in the family sign the goal statement so everyone can work together to achieve the goal.
A fun way to track progress toward your goal is to make a chart, such as an empty thermometer, and fill it in as you progress toward your goal. An example tracking chart can be found on page 4. Another great way to concretely demonstrate how saving energy translates into saving money is to compare your current energy bills to those of the same month from last year. Add up the savings, and put that much cash into a small bank or jar. As the jar fills with cash, your household will be more excited and motivated to save more energy and money. At the end of your goal period, count the money in the jar, and decide as a group what you will do with it.
INTRODUCTORY LETTER
Home Energy Efficiency KitsYour child may be participating in a program through school that provides a home efficiency kit with supplies to help you use less energy at home. Activities that use these items have them listed in the materials section of each activity.
If you do not have a kit you can still do most of the activities in this guide with little to no modification. Simply skip the steps that utilize an item from the kit. You will still be able to learn how to use less energy and save money by going through the activities in this book. Furthermore, many of the items in the kit are available for sale at your local home improvement store at a nominal or very low cost. Another option might be to obtain the items through your electric utility company, so give them a call, or check out their website for options.

4 ©2019 The NEED Project Managing Home Energy Use www.NEED.org
GOAL-TRACKING THERMOMETER
Track Your Progress!
OUR GOAL!
©2019 The NEED Project Managing Home Energy Use www.NEED.org 5
Lesson 1 | Introduction to Energy and Its ManagementIn school, your child learned about how we use energy. When electricity is factored in, the residential and commercial sectors of the economy (homes and businesses) use the most energy.
Energy efficiency is related to the equipment we select to do a certain job. For example, a 4-door sedan and pickup truck will both carry us to the store, but the sedan will probably do so using less fuel. It is more efficient. Using efficient appliances, electronics, and lighting can help reduce energy use and cost at home, while still performing the same tasks.
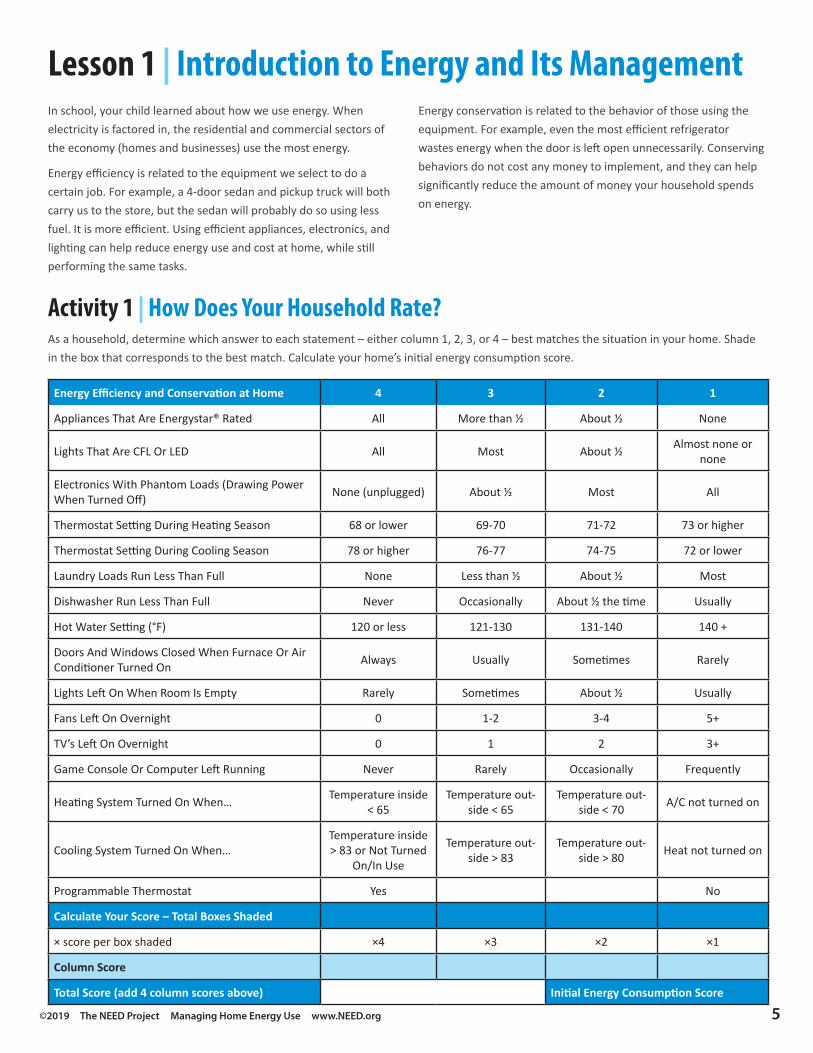
Activity 1 | How Does Your Household Rate?As a household, determine which answer to each statement – either column 1, 2, 3, or 4 – best matches the situation in your home. Shade in the box that corresponds to the best match. Calculate your home’s initial energy consumption score.
Energy Efficiency and Conservation at Home 4 3 2 1
Appliances That Are Energystar® Rated All More than ½ About ½ None
Lights That Are CFL Or LED All Most About ½ Almost none or none
Electronics With Phantom Loads (Drawing Power When Turned Off) None (unplugged) About ½ Most All
Thermostat Setting During Heating Season 68 or lower 69-70 71-72 73 or higher
Thermostat Setting During Cooling Season 78 or higher 76-77 74-75 72 or lower
Laundry Loads Run Less Than Full None Less than ½ About ½ Most
Dishwasher Run Less Than Full Never Occasionally About ½ the time Usually
Hot Water Setting (°F) 120 or less 121-130 131-140 140 +
Doors And Windows Closed When Furnace Or Air Conditioner Turned On Always Usually Sometimes Rarely
Lights Left On When Room Is Empty Rarely Sometimes About ½ Usually
Fans Left On Overnight 0 1-2 3-4 5+
TV’s Left On Overnight 0 1 2 3+
Game Console Or Computer Left Running Never Rarely Occasionally Frequently
Heating System Turned On When… Temperature inside < 65
Temperature out-side < 65
Temperature out-side < 70 A/C not turned on
Cooling System Turned On When…Temperature inside > 83 or Not Turned
On/In Use
Temperature out-side > 83
Temperature out-side > 80 Heat not turned on
Programmable Thermostat Yes No
Calculate Your Score – Total Boxes Shaded
× score per box shaded ×4 ×3 ×2 ×1
Column Score
Total Score (add 4 column scores above) Initial Energy Consumption Score
Energy conservation is related to the behavior of those using the equipment. For example, even the most efficient refrigerator wastes energy when the door is left open unnecessarily. Conserving behaviors do not cost any money to implement, and they can help significantly reduce the amount of money your household spends on energy.
6 ©2019 The NEED Project Managing Home Energy Use www.NEED.org
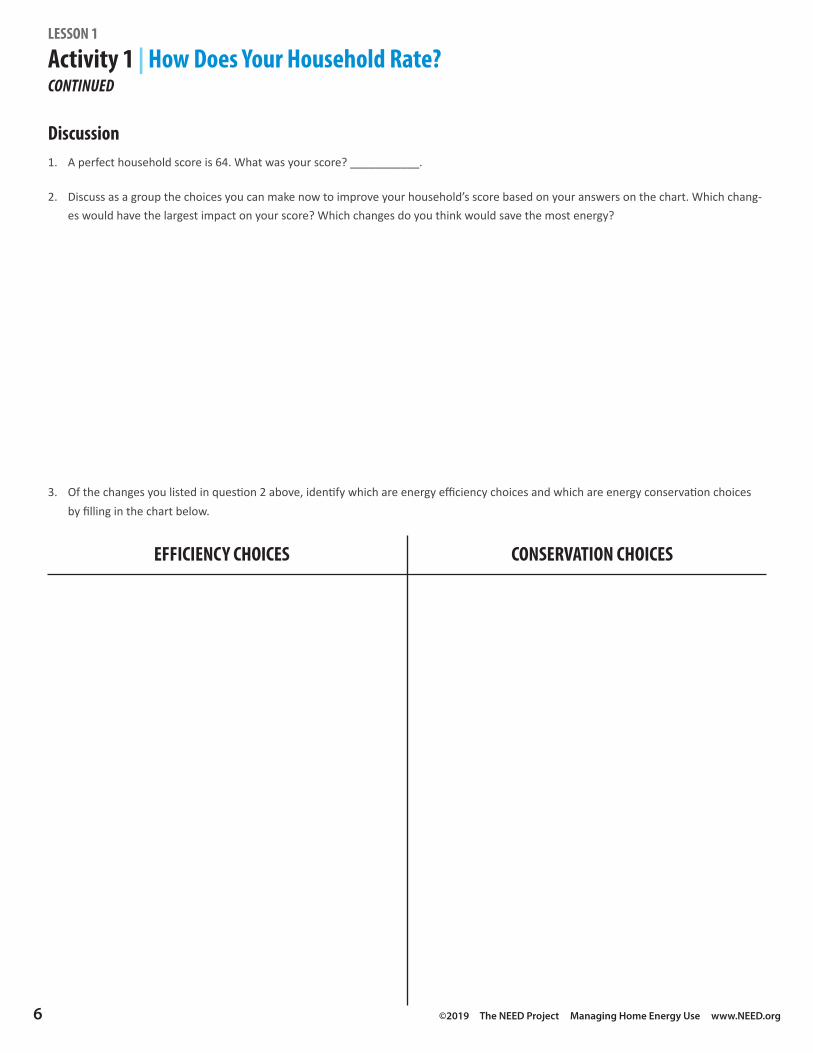
Discussion1. A perfect household score is 64. What was your score? ___________.
2. Discuss as a group the choices you can make now to improve your household’s score based on your answers on the chart. Which chang-es would have the largest impact on your score? Which changes do you think would save the most energy?
3. Of the changes you listed in question 2 above, identify which are energy efficiency choices and which are energy conservation choices by filling in the chart below.
Activity 1 | How Does Your Household Rate?CONTINUED
EFFICIENCY CHOICES CONSERVATION CHOICES
LESSON 1

©2019 The NEED Project Managing Home Energy Use www.NEED.org 7
Lesson 2 | Thermal Energy & Water UseThermal energy is the energy that gives substances their warmth. Steam has more thermal energy than liquid water, and water has more thermal energy than ice. When thermal energy is transferred, it moves from higher temperature to lower temperature. Thermal energy is transferred through conduction (direct contact), convection (flowing fluid), and radiation (waves of energy). Most home heating systems use convection to transfer thermal energy and heat rooms. Heating and cooling accounts for more than 40 percent the energy used in a home, and water heating is another 16 percent.
Heating and cooling systems are controlled by a thermostat. The temperature is set so that the heating system turns on if the air temperature falls below the setting. Programmable thermostats allow the homeowner to adjust the temperature for different times of the day, or when a cooler temperature is acceptable such as when everyone is away at work or school, or everyone is asleep under warm blankets. The program can be adjusted to begin warming the home just before the first person arrives, and to reduce the temperature after the last person is asleep or has left for the day. Programmable thermostats are available for all types of systems that will help you save money on your energy bill.
If you cannot install a programmable thermostat, you can adjust the temperature at night and when no one is home. If you do not set the temperature above 68 °F in the winter or below 78 °F in the summer, you will still be comfortable, yet make your energy bills more affordable.
Water heating is another large energy user, so using hot water wisely will help control this expense. Setting the temperature of the water heater to 120 °F will allow for hot showers, prevent accidental scalding, and save money. In addition, using a low-flow shower head and washing clothes in cold or cool water will help use less hot water. A tankless water heater is the most efficient way to deliver hot water when you need it. It does not have a tank of water to keep hot when it’s not being used, so the heater only runs when hot water is needed.
The amount of water used in your home also impacts the amount of energy used by your home. Beyond heating the water, extensive amounts of energy are put into extracting, treating, distributing, and disposing of the water you use. The average American household of four uses about 400 gallons of water every day. Here are some great ways you can reduce the amount of water you use at home:
1. Turn off the water while brushing your teeth. You don’t need running water to do a good job on those pearly whites!
2. Take showers instead of baths. Most showers use significantly less water than filling the tub with water. Try to limit your showers to conserve water and energy.
3. Don’t use more water than needed when cooking. A box of macaroni and cheese does not need a giant stock pot full of water, and many things that are cooked on the stove in water can instead be microwaved, saving both electricity and water.
4. Use a high efficiency washing machine, which minimizes the amount of water used to clean clothes. Also, you can probably select the water level to match the amount of laundry you have placed in the machine, or even better, only run the washing machine with full loads.
5. Only run your dishwasher on pot scrubber when the dishes are really, really dirty. Instead, select “normal” for ordinary dish dirt.
6. Scrape your plates into the trash with a fork or knife instead of running them under a strong steam of water. Even better, scrape those food wastes into a bucket to use in composting or vermiculture (worm farming).
7. Keep a cover on your swimming pool or hot tub when it’s not being used. Evaporating water must be replaced; this is especially important if you live in a dry climate.
How Water is Used in the Home
Indoors 70%Outdoors 30%
Other 8%Leaks 12%
Clothes Washer 17%
Faucets 19%
Shower 20%
Toilets 24%
Data: EPA

8 ©2019 The NEED Project Managing Home Energy Use www.NEED.org
Activity 1 | Seal of ApprovalAdjusting the thermostat doesn’t always save energy well if your home is not insulated or sealed properly. Poorly insulated attic spaces result in tremendous amounts of energy being wasted through the roof. Furthermore, air can leak or filter out through small cracks and gaps in walls and around windows and doors. This can add up to leaving a door wide open all day, every day. Sealing those gaps with caulking and weatherstripping will reduce air infiltration. Adding insulation in the attic to achieve the recommended R-value will ensure that your energy saving behaviors are not counteracted by a leaky attic. Insulation is helpful in warm and temperate climates!
Materials• Outlet and light switch gaskets from kit
• Tissue paper strip or strip of plastic wrap
• Pencil
• Tape
• Sticky notes
• Ruler
• Screwdriver
Procedure1. Tape the short edge of the tissue paper strip to
the pencil, so it extends away from the pencil.
2. Make sure all fans are turned off and windows and outside doors are closed. Turn off the heating or air conditioning system while you do this test, if possible.
3. Moving from room to room, hold the pencil so the paper hangs from the pencil. Hold it up to places where air could leak. Test all windows, outside doors, and any electrical outlets or light switches that are on outside walls. Anywhere you notice significant air movement, place a sticky note (or tape) on the wall or near the crack, and keep tally on the data sheet.
4. Windows and doors with air leaking in should be sealed with caulking or weatherstripping.
5. Any electrical outlets or light switches can be sealed by using the screwdriver to remove the cover, inserting the gasket from the kit, and replacing the cover.
6. After corrections have been made, re-test with the tissue paper.
7. Go into the attic (if able to safely do so) and measure the thickness of the insulation if you see it. Record information about your insulation on the data sheet.
8. Use the R-value graphic to determine how much insulation you should have.
LESSON 2

©2019 The NEED Project Managing Home Energy Use www.NEED.org 9
1
22
2 33
3
4 4
44
4
4
4
5
5
5
5
5
6
6 6
6
6
7
7
7
All of Alaska is in Zone 7 except for the following boroughs in Zone 8:Bethel Northwest Arctic, Dellingham Southeast Fairbanks, Fairbanks N. Star Wade Hampton, Nome Yukon-Koyukuk, North Slope
Zone 1 includes Hawaii, Guam, Puerto Rico, and the Virgin Islands.
ZONE
1
2
3
45
6
7
8
ATTIC
R30 to R49
R30 to R60
R30 to R60
R38 to R60
R38 to R60
R49 to R60
R49 to R60
R49 to R60
CATHEDRALCEILING
R22 to R38
R22 to R38
R22 to R38
R30 to R38
R30 to R60
R30 to R60
R30 to R60
R30 to R60
CAVITY
R13 to R15
R13 to R15
R13 to R15
R13 to R15
R13 to R21
R13 to R21
R13 to R21
R13 to R21
INSULATIONSHEATHING
None
None
R2.5 to R5
R2.5 to R6
R2.5 to R6
R5 to R6
R5 to R6
R5 to R6
FLOOR
R13
R13, R19 to R25
R25
R25 to R30
R25 to R30
R25 to R30
R25 to R30
R25 to R30
WALL INSULATION
Data: U.S. Department of Energy
Recommended R-Values for New Wood-framed Homes
Activity 1 | Seal of ApprovalCONTINUED
LESSON 2

10 ©2019 The NEED Project Managing Home Energy Use www.NEED.org
Activity 2 | We’re in a Lot of Hot Water
DataResults of Air Infiltration Test:
_________ windows leaked ____________ doors leaked ___________ electrical outlets or switches leaked
Notes:
_________ windows sealed ____________ doors sealed ___________ electrical outlets or switches sealed
Notes:
Results of Attic Insulation Inspection:
Thickness of Insulation: _______________
Type of Insulation: ________________
R-value of this thickness and type of insulation (see chart) _________ inches thick × _________ R-value/inch = __________ R-value
Recommended R-value for your attic in your area: _______________
Discussion1. If your home is underinsulated, you can save energy costs immediately by adding insulation. The Energy Calculator from Lawrence
Berkeley National Laboratory can help you determine what you need to add: http://hes.lbl.gov/consumer/. Do you need additional insulation? How much do you need?
2. Homes should not be sealed up 100% air-tight. As a household, discuss why a small amount of fresh air is needed in your home.
3. Download the Insulation Fact Sheet from Oak Ridge National Laboratory for additional information and insulation pointers. http://web.ornl.gov/sci/buildings/docs/factSheets/Insulation-FactSheet-2008.pdf
What You See What It Probably Is
R-value / inch
Loos
e fibe
rs
Light-weight yellow, pink, or white Fiberglass 2.5
Dense gray or near-white, may have black specks
Rock wool 2.8
Small gray flat pieces or fibers (newsprint) Cellulose 3.7
Granules Light-weight Vermiculite or perlite 2.7
Batts Light-weight yellow, pink, or white Fiberglass 3.2
Source: Insulation Fact Sheet, Oak Ridge National Laboratory
Hot water in a tank requires energy to keep it at the set temperature. The higher the temperature setting, the more energy is needed to keep that water hot so it’s ready when needed. Serious injury in the form of scalding burns can occur when hot water is above 140 °F. Keeping the temperature at an energy-saving level can not only save money, it can keep everyone safe.
Materials• Flow meter bag from kit
• Hot water gauge from kit
• Faucet aerators from kit
• Low flow shower head from kit
• Teflon tape from kit
• Timer or stop watch
Activity 1 | Seal of ApprovalCONTINUED
LESSON 2
©2019 The NEED Project Managing Home Energy Use www.NEED.org 11
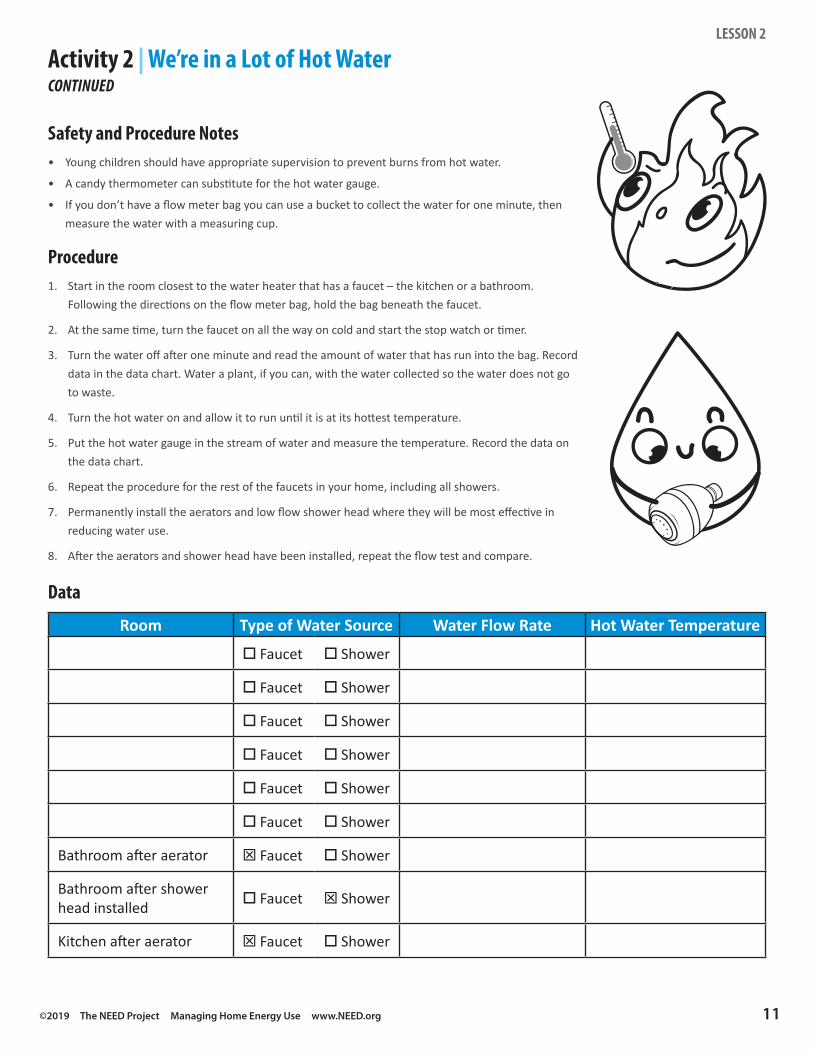
Safety and Procedure Notes• Young children should have appropriate supervision to prevent burns from hot water.
• A candy thermometer can substitute for the hot water gauge.
• If you don’t have a flow meter bag you can use a bucket to collect the water for one minute, then measure the water with a measuring cup.
Procedure1. Start in the room closest to the water heater that has a faucet – the kitchen or a bathroom.
Following the directions on the flow meter bag, hold the bag beneath the faucet.
2. At the same time, turn the faucet on all the way on cold and start the stop watch or timer.
3. Turn the water off after one minute and read the amount of water that has run into the bag. Record data in the data chart. Water a plant, if you can, with the water collected so the water does not go to waste.
4. Turn the hot water on and allow it to run until it is at its hottest temperature.
5. Put the hot water gauge in the stream of water and measure the temperature. Record the data on the data chart.
6. Repeat the procedure for the rest of the faucets in your home, including all showers.
7. Permanently install the aerators and low flow shower head where they will be most effective in reducing water use.
8. After the aerators and shower head have been installed, repeat the flow test and compare.
Activity 2 | We’re in a Lot of Hot WaterCONTINUED
Data
Room Type of Water Source Water Flow Rate Hot Water Temperature
o Faucet o Shower
o Faucet o Shower
o Faucet o Shower
o Faucet o Shower
o Faucet o Shower
o Faucet o Shower
Bathroom after aerator T Faucet o Shower
Bathroom after shower head installed o Faucet T Shower
Kitchen after aerator T Faucet o Shower
LESSON 2
12 ©2019 The NEED Project Managing Home Energy Use www.NEED.org
Activity 3 | We Can’t Take the Heat
Discussion1. On average, how long are showers in your household? _____________ minutes.
2. Using the flow rate for your shower before the low flow shower head was installed, calculate how many gallons of water are used for each shower. ____________ gallons.
3. Using the flow rate for your shower after the low flow shower head was installed, calculate how many gallons of water will now be used for each shower. __________ gallons.
4. How many gallons of water will now be saved for each shower of average length taken in your home? __________ gallons.
5. If your household pays its own water bill, use the rate charged by your water provider to calculate how much money you will save on each shower by using the low flow shower head. $______________.
6. A water heater jacket costs $20-30 and will save 7-16% on water heating costs. Use the Energy Saver website to review information about water heater jackets and discuss whether this would be a good investment for your home to help save money. Navigate to https://energy.gov/energysaver/projects/savings-project-insulate-your-water-heater-tank.
Activity 2 | We’re in a Lot of Hot WaterCONTINUED
Staying comfortable is an important part of why we use energy. However, in our quest for comfort, we can end up using more energy than is necessary. It’s always a balance between energy savings and individual comfort when setting the thermostat. The U.S. Department of Energy has determined that 68 °F is a good winter-time setting that keeps most people comfortable while keeping energy use low. The recommended summertime setting is 78 °F.
Keeping food fresh and safe from spoilage is another important reason we use energy. However, sometimes the refrigerator is set cooler than is necessary. To safely store food, the refrigerator should be 35-40 °F and the freezer attached to your refrigerator should be 0-5 °F. A stand-alone freezer should be at or below zero. The seal around the refrigerator and freezer doors should be tight, too, to keep the cold air in and the warm air out.
Materials• Thermostat guide from kit
• Fridge thermometer from kit
• Dollar bill
• Empty jar or large plastic cup
• Scrap paper
Procedure1. Open the refrigerator door, hold the dollar bill against the edge
of the door, and close the door so the dollar bill is trapped between the seal and the refrigerator. Pull on the dollar bill. Take note of how easily it moves towards you, if at all. Repeat in multiple areas of both the refrigerator and freezer doors. Test any refrigerators and freezers in your home.
2. Place the fridge thermometer in a glass of water inside the refrigerator and close the door. Leave it in the refrigerator at least three hours, then record the temperature. Repeat for the freezer, carefully chipping away the ice to read the thermometer if necessary.
3. Consult your refrigerator’s setting knob or display to adjust the temperature, if needed. Make small adjustments and wait 24 hours before re-checking the temperature. Adjust as often as necessary to reach the safety zone for food (35-40 degrees for refrigeration, 0-5 degrees for freezers).
4. Place the thermostat guide near the thermostat. Set the thermostat for 68 °F and wait a few hours, then compare that setting to the temperature on the guide. If the actual temperature is above or below the thermostat setting, adjust the thermostat accordingly. You can also have your thermostat recalibrated by your heating and cooling professional.
LESSON 2

©2019 The NEED Project Managing Home Energy Use www.NEED.org 13
5. Hold a contest for a week. The prize can be something as simple as not having to help with dishes for the weekend. Set the thermostat to 68 °F. Every time you put on a sweater or a warm pair of socks or slippers, or wrap up with a blanket, instead of turning up the heat or turning on a space heater, write your name on a piece of scrap paper and place it in the jar or cup. The person whose name is in the jar the most at the end of the week wins! If you are in a warm climate, conduct the same competition by keeping the air conditioner set at 78 °F and recording how many times you change into cooler clothes, use a small fan, or drink a cold drink to cool off.
Activity 3 | We Can’t Take the HeatCONTINUED
Discussion1. How easily did the dollar bill pull out from the refrigerator door(s)? If it slips out easily, the seal needs replacing. Most manufacturers sell
replacement seals for their appliances. A local appliance parts store, or online retailers of appliance parts, can provide a replacement if you have the brand name and model number. Your appliance retailer will tell you how to locate the model number, which is often on the inside of the door.
2. Who won your thermostat contest? How long did it take during the week before the temperature felt comfortable? What else can you do to use less energy on heating or cooling?
LESSON 2
14 ©2019 The NEED Project Managing Home Energy Use www.NEED.org
Lesson 3 | Electricity
Activity 1 | Morning Money Crunch
Electricity accounts for almost 70 percent of a home’s energy use. While much of that electrical energy is used to run large appliances like refrigerators and air conditioners, the multitude of small appliances and electronics that we use every day can add up to big energy expenditures if we are not careful about how we use them.
The electric power used by a device is measured in watts, which is calculated by multiplying the current by the voltage. Most household electrical devices run on 120 V circuits; the exceptions are big items like stoves and clothes dryers. The wattage of electrical devices and electronics can be determined by looking at the Underwriter Laboratories (UL) label on the device. It will list the maximum energy consumed, often in watts but sometimes as current and volts.
Electric utilities meter the energy we use by charging us for kilowatt-hours. A kilowatt is a thousand watts; therefore a kilowatt-hour is the energy needed to power 1,000 watts for one hour. The national average residential electricity rate is roughly $0.13 per kilowatt-hour ($0.129), but your rate may be higher or lower. You can determine your electricity rate by looking at your utility bill. Determining how much it costs to run devices is easily accomplished when the power of the device and your electricity rate are known.
Some devices use electricity even when turned “off.” Electronics with a remote control, such as a DVD player or television, use power all the time. Microwave ovens with LED clocks, and any other device with an internal clock, also use power constantly. These are called phantom loads because while the device appears to be turned off, it is actually using energy. A smart power strip can eliminate phantom loads by turning off the power to everything plugged into it. Phantom loads are also eliminated by unplugging the device when it is not in use.
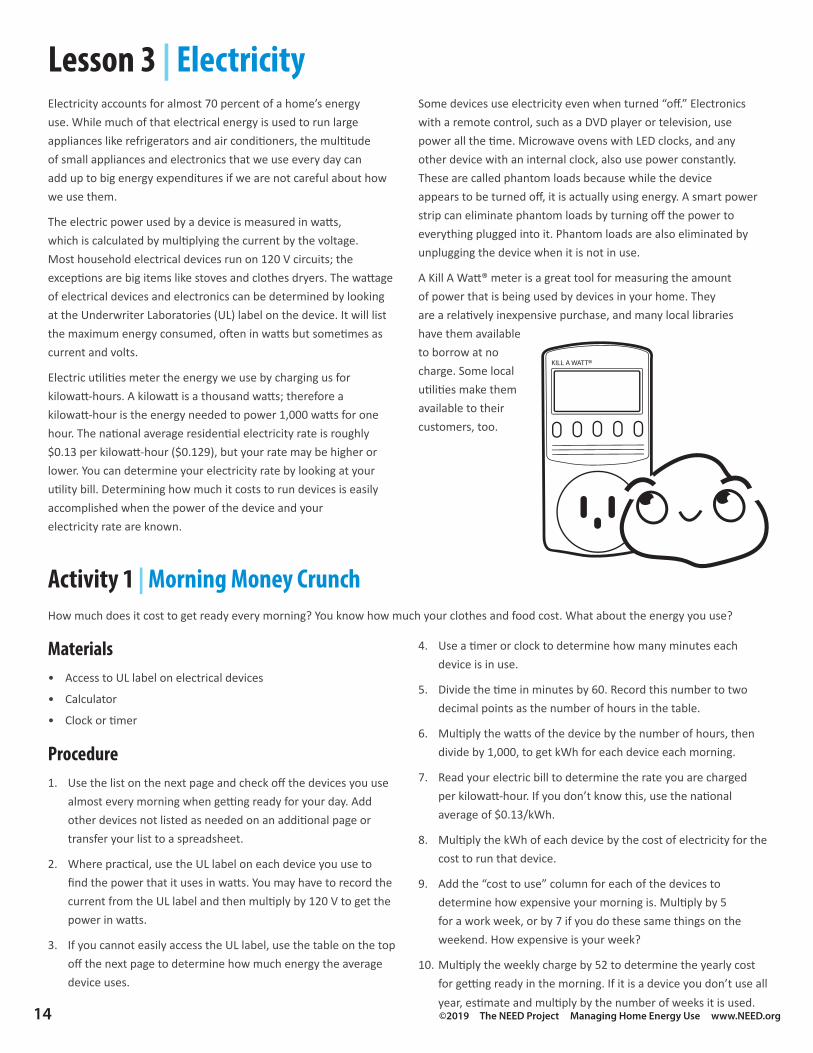
A Kill A Watt® meter is a great tool for measuring the amount of power that is being used by devices in your home. They are a relatively inexpensive purchase, and many local libraries have them available to borrow at no charge. Some local utilities make them available to their customers, too.
How much does it cost to get ready every morning? You know how much your clothes and food cost. What about the energy you use?
Materials• Access to UL label on electrical devices
• Calculator
• Clock or timer
Procedure1. Use the list on the next page and check off the devices you use
almost every morning when getting ready for your day. Add other devices not listed as needed on an additional page or transfer your list to a spreadsheet.
2. Where practical, use the UL label on each device you use to find the power that it uses in watts. You may have to record the current from the UL label and then multiply by 120 V to get the power in watts.
3. If you cannot easily access the UL label, use the table on the top off the next page to determine how much energy the average device uses.
4. Use a timer or clock to determine how many minutes each device is in use.
5. Divide the time in minutes by 60. Record this number to two decimal points as the number of hours in the table.
6. Multiply the watts of the device by the number of hours, then divide by 1,000, to get kWh for each device each morning.
7. Read your electric bill to determine the rate you are charged per kilowatt-hour. If you don’t know this, use the national average of $0.13/kWh.
8. Multiply the kWh of each device by the cost of electricity for the cost to run that device.
9. Add the “cost to use” column for each of the devices to determine how expensive your morning is. Multiply by 5 for a work week, or by 7 if you do these same things on the weekend. How expensive is your week?
10. Multiply the weekly charge by 52 to determine the yearly cost for getting ready in the morning. If it is a device you don’t use all year, estimate and multiply by the number of weeks it is used.

©2019 The NEED Project Managing Home Energy Use www.NEED.org 15
Device Estimated Energy UsageAlarm clock 3 kWh / monthCell phone 0.08 kWh / monthClothes dryer 3.2 kWh / loadClothes washer 3.5 kWh / loadCoffee maker 0.4 kWh / hrComputer 0.05 kWh / hrCurling iron 0.05 kWh / hrDishwasher 1.5 kWh / loadElectric toothbrush 0.08 kWh / monthFan 0.03 kWh / hrFitbit 0.08 kWh / monthFreezer 90 kWh / month
Device Estimated Energy UsageGarage door opener 0.01 kWh / up-down cycleHair dryer 1.5 kWh / hrInternet router or modem 0.15 kWh / dayiPod 0.08 kWh / monthIron 1.08 kWh / hrMicrowave 0.12 kWh / 5 minRadio 0.02 kWh / hrRefrigerator 150 kWh / monthStove 1.25 kWh / hrStraightening iron 0.05 kWh / hrToaster 0.04 kWh / useTV 0.2 kWh / hrWell pump (2 HP) 1.5 kWh / hr
Source: Silicon Valley Power, National GridData Table—Your MorningDevice Power (W) Minutes used Hours used kWh total Electricity rate Cost to use
Alarm clock (example) 2.0 60 1.00 0.002 $0.13 $0.0003
Cell phone
Clothes dryer
Clothes washer
Coffee maker
Computer
Curling iron
Dishwasher
Electric toothbrush
Fan
Fitness tracker
Freezer
Garage door opener
Hair dryer
Internet router or modem
iPod
Iron
Microwave
Radio
Refrigerator
Stove
Straightening iron
Toaster
TV
Well pump (if you have a well)
Average Kilowatt-hour Consumption for Common Household Devices
LESSON 3
Activity 1 | Morning Money Crunch CONTINUED

16 ©2019 The NEED Project Managing Home Energy Use www.NEED.org
Activity 2 | (R)Amp Up the Efficiency
Discussion1. How much does it cost to get ready every morning? $_____________.
How much does it cost to get ready every morning for a year? $_____________.
2. What is the most expensive part of your morning?
3. Which parts of your morning are more expensive than you thought they would be?
4. Which parts of your morning are less expensive than you thought they would be?
5. Are there items you didn’t include on the list? List these below. How do you think they compare in cost to others on the list?
6. Name three things you can do to reduce the cost of your morning. Calculate how much money you can save.
Activity 1 | Morning Money CrunchCONTINUED
There are some things that use energy that nearly all of us must do. We all wash clothes, keep perishable food cold, and cook raw foods before eating them. All of these things require energy, but we don’t all use energy equally. The amount of energy used to do a task is related to the efficiency of the machine doing the task. Essentially, efficiency is the proportion of useful energy out of a machine compared the amount of energy going in. More efficient machines do the same work as less efficient machines, but use less energy to do the work.
EnergyGuide labels are large, yellow and black stickers on devices that allow you to compare the efficiency of different appliances and electronics. Often the more efficient appliances have a higher purchase price, and this may mislead some into thinking they’re more expensive overall. However, as an EnergyGuide label often shows, a more efficient appliance is less expensive to operate, and over time the difference in operating cost can more than make up for the difference in purchase price. This is called the payback period, and it is the amount of time required for the lower operating cost to make up for the higher purchase price. This is an important factor to consider when shopping for an appliance.
ENERGY STAR® rated appliances and electronics are the most effi-cient of their class. When you purchase an ENERGY STAR® device, you know that you are buying the most efficient product available.
Materials• Internet access to an appliance retailer or a trip to an appliance
store
• Calculator
Procedure1. Decide what appliance or electronic device you want to
comparison shop. Some good suggestions are refrigerators, water heaters, washing machines, televisions, and computers.
2. Find two very similar appliances to compare. Make sure they are the same size or capacity. For example, the same number of gallons for a water heater, or the same style and size of refrigerator. Make sure one is ENERGY STAR® rated, and the other is not.
3. Record the purchase price for each item.
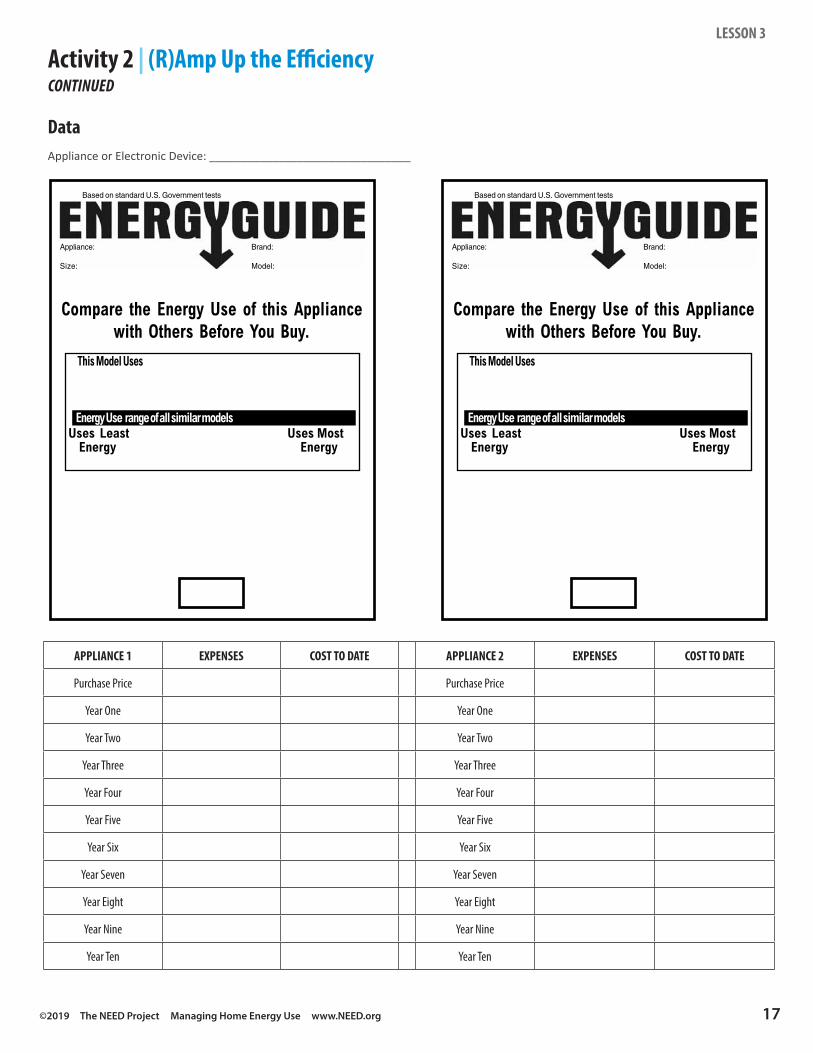
4. Locate the EnergyGuide label for each item and record the annual energy use and operating cost for each.
5. Calculate the life cycle cost for both devices through ten years of operation.
LESSON 3
©2019 The NEED Project Managing Home Energy Use www.NEED.org 17
DataAppliance or Electronic Device: ________________________________
APPLIANCE 1 EXPENSES COST TO DATE APPLIANCE 2 EXPENSES COST TO DATE
Purchase Price Purchase Price
Year One Year One
Year Two Year Two
Year Three Year Three
Year Four Year Four
Year Five Year Five
Year Six Year Six
Year Seven Year Seven
Year Eight Year Eight
Year Nine Year Nine
Year Ten Year Ten
PAGE 56 Saving Energy Student Guide © 2009 THE NEED PROJECT • P.O. BOX 10101 • MANASSAS, VA 20108 • 1-800-875-5029
Appliance 1 Expenses Cost to date Appliance 2 Expenses Cost to date
Purchase Price Purchase Price
Year One Year One
Year Two Year Two
Year Three Year Three
Year Four Year Four
Year Five Year Five
Year Six Year Six
Year Seven Year Seven
Year Eight Year Eight
Year Nine Year Nine
Year Ten Year Ten
TYPE OF APPLIANCE: ______________________________________________
Appliance: Brand:
Size: Model:
Based on standard U.S. Government tests
Compare the Energy Use of this Appliancewith Others Before You Buy.
This Model Uses
Energy Use range of all similar modelsUses Least Uses Most Energy Energy
Appliance: Brand:
Size: Model:
Based on standard U.S. Government tests
Compare the Energy Use of this Appliancewith Others Before You Buy.
This Model Uses
Energy Use range of all similar modelsUses Least Uses Most Energy Energy
Lesson 10
PAYBACK PERIODS 10
Activity 2 | (R)Amp Up the EfficiencyCONTINUED
LESSON 3

18 ©2019 The NEED Project Managing Home Energy Use www.NEED.org
Discussion1. What is the payback period for the device you selected? ____________________
2. How long do most people own this device before replacing it? Does this payback period make sense for you and your household?
3. What are some other factors, besides purchase price, that you should consider when shopping for appliances or electronics?
Activity 2 | (R)Amp Up the EfficiencyCONTINUED
LESSON 3

©2019 The NEED Project Managing Home Energy Use www.NEED.org 19
Lesson 4 | LightingIn 1879, Thomas Edison perfected the incandescent light. For the next 100+ years, lighting did not change much. The materials and bulb life improved, but the functionality of light bulbs in American households went largely unchanged for more than a century. However, incandescent light bulbs are exceptionally inefficient light makers, using only 10 percent of the electricity input to produce light! The other 90 percent of energy used by an incandescent is wasted as heat energy.
In 2007, the Energy Independence and Security Act was passed, and among other things it mandated improved efficiency in light bulbs sold in the United States. Today, CFL and LED lights are much more affordable and commonplace than they were even ten years ago. As technology has improved and production increased, the cost of these bulbs reduced to the point that now they are just as affordable as traditional, inefficient incandescent light bulbs.
When shopping for a light bulb, consider two important pieces of information, both of which are found on the Lighting Facts label of the bulbs. The first is how many watts of power the bulb uses to produce light. This will tell you how expensive the bulb will be to operate. The second is how many lumens of light are produced. Always compare lumens produced when comparing one bulb to another. You may also find it useful to look at color temperature, which indicates the color of the light produced. Higher temperatures are brighter, bluer light while lower color temperatures are softer, more reddish or yellow light.
Activity 1 | This Is Your Light!
Sometimes it’s easy to just grab the least expensive light bulb and be done with it. A light bulb is a light bulb, right? Well, not exactly. Some bulbs are a little more expensive than others, but they also last much longer, too. This activity will help you consider the entire life cycle cost of different light bulbs to use in your home.
Materials• Internet access to a light bulb retailer, a trip to a light bulb
retailer, or the packages of light bulbs you have already recently purchased
• Your home’s electricity cost per kilowatt-hour (from your electric bill)
• Calculator
Procedure1. Choose a halogen incandescent (halogen), a compact
fluorescent (CFL), and a light emitting diode (LED) bulb that each produce about the same number of lumens of light. You can find this information in the Lighting Facts label on the package.
2. Record the watts, lumens, expected life, and purchase price of each bulb.
3. Circle the life span for the bulb that will last the longest. This is the number to which you will standardize all of your other calculations. In other words, if the LED bulb will last 25,000 hours, and this is the longest life span of all of the bulbs, all other light bulbs must be calculated to 25,000 hours. This ensures a fair comparison.
4. Determine how many light bulbs of the other types are needed to equal the life of the longest-lasting bulb. Record this in the table.
5. Multiply the purchase price per bulb times the number of bulbs needed to give the standardized hours of light. This is the total purchase price.
6. Convert watts to kilowatts in the data table by dividing the wattage of each bulb by 1,000.
7. Multiply kilowatts by the life span to which you are standardizing (25,000 in the example). This is the total energy used in kilowatt-hours by each bulb.
8. Multiply kilowatt-hours by the rate your utility charges, rounding to the nearest cent. This is the operation cost of each bulb for the stated number of hours of light.
9. Add the operating cost to the purchase price to get the entire life cycle cost for each type of light bulb.

20 ©2019 The NEED Project Managing Home Energy Use www.NEED.org
Activity 1 | This Is Your Light!CONTINUED
Data
INCANDESCENT BULB HALOGEN COMPACT FLUORESCENT (CFL) LIGHT EMITTING DIODE (LED)
Lumens
Watts
Expected life span
Cost for one bulb
Number of bulbs needed
Purchase Price
Watts (copied from above)
Kilowatts
Hours of operation (copied from circled value above)
Total kilowatt-hours
Electricity rate (from utility bill)
Operating Cost
Purchase Price (copied from above)
Total Life Cycle Cost
Discussion1. Which light bulb is the least expensive when accounting for the entire life cycle cost?
2. Many utilities sell efficient light bulbs at a reduced cost. How many light bulbs can you replace in your home to use a more efficient light style?
3. If you change five light bulbs, each for a more efficient bulb, how much money will you save over the life of the efficient bulbs?
LESSON 4
©2019 The NEED Project Managing Home Energy Use www.NEED.org 21
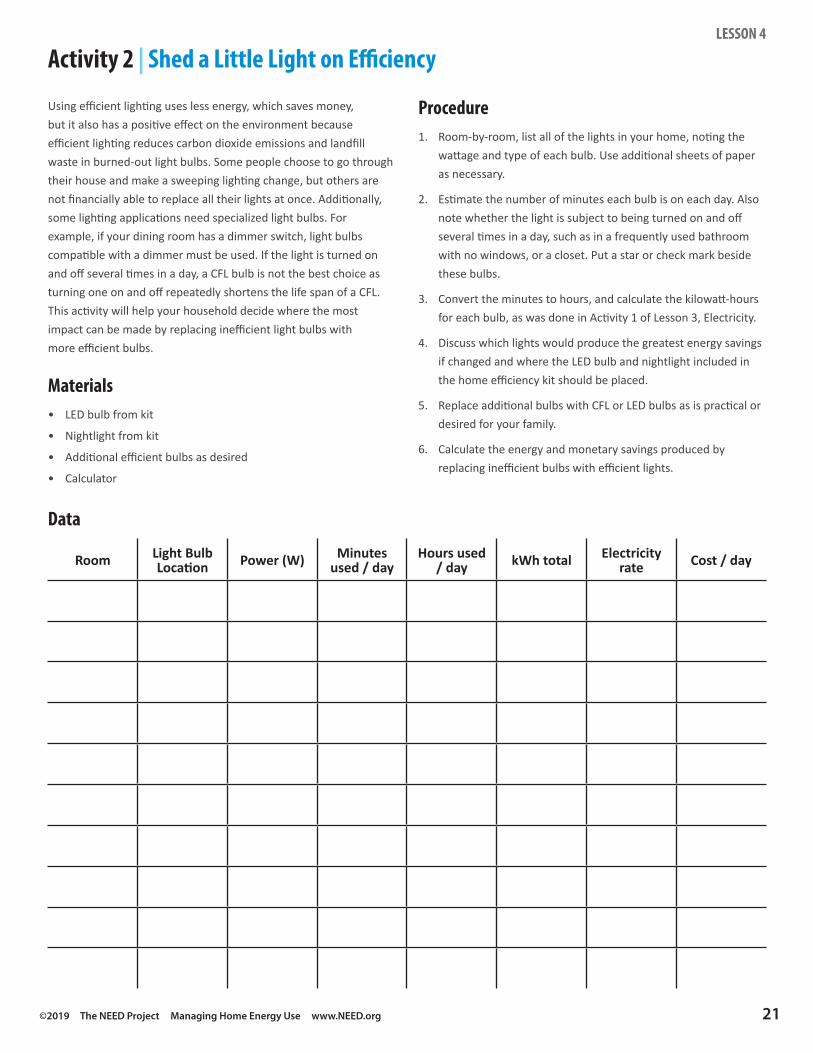
Activity 2 | Shed a Little Light on Efficiency
Using efficient lighting uses less energy, which saves money, but it also has a positive effect on the environment because efficient lighting reduces carbon dioxide emissions and landfill waste in burned-out light bulbs. Some people choose to go through their house and make a sweeping lighting change, but others are not financially able to replace all their lights at once. Additionally, some lighting applications need specialized light bulbs. For example, if your dining room has a dimmer switch, light bulbs compatible with a dimmer must be used. If the light is turned on and off several times in a day, a CFL bulb is not the best choice as turning one on and off repeatedly shortens the life span of a CFL. This activity will help your household decide where the most impact can be made by replacing inefficient light bulbs with more efficient bulbs.
Materials• LED bulb from kit
• Nightlight from kit
• Additional efficient bulbs as desired
• Calculator
Procedure1. Room-by-room, list all of the lights in your home, noting the
wattage and type of each bulb. Use additional sheets of paper as necessary.
2. Estimate the number of minutes each bulb is on each day. Also note whether the light is subject to being turned on and off several times in a day, such as in a frequently used bathroom with no windows, or a closet. Put a star or check mark beside these bulbs.
3. Convert the minutes to hours, and calculate the kilowatt-hours for each bulb, as was done in Activity 1 of Lesson 3, Electricity.
4. Discuss which lights would produce the greatest energy savings if changed and where the LED bulb and nightlight included in the home efficiency kit should be placed.
5. Replace additional bulbs with CFL or LED bulbs as is practical or desired for your family.
6. Calculate the energy and monetary savings produced by replacing inefficient bulbs with efficient lights.
Data
Room Light Bulb Location Power (W) Minutes
used / dayHours used
/ day kWh total Electricity rate Cost / day
LESSON 4

22 ©2019 The NEED Project Managing Home Energy Use www.NEED.org
Room Light Bulb Location Power (W) Minutes
used / dayHours used
/ day kWh total Electricity rate Cost / day
Discussion1. What are the top three places to upgrade the light to a more efficient bulb? Why do you think that is the case?
2. Are there any places where lights could be used less often, as a conserving effort, until the light can be upgraded to a more efficient bulb?
3. Which bulbs do not necessarily need to be changed right away, but can wait until the bulb burns out?
Activity 2 | Shed a Little Light on EfficiencyCONTINUED
LESSON 4

©2019 The NEED Project Managing Home Energy Use www.NEED.org 23
Lesson 5 | Home SystemsUp until this point we’ve had you looking at individual systems within your home separately from each other. However, the systems in your house all work together. The moisture level in your house can affect how warm or cool the house feels. Unless it’s a particularly hot day, you probably take a shower with heated water. Washing machines and dishwashers use electricity to run, and heated water to clean. Even the lights in your home can impact the heating and cooling system if they emit a lot of heat.
In this section, you will be evaluating each of the systems in your home, identifying their components, determining their approximate age where possible, and prioritizing which system(s) will get your attention first for an energy overhaul.
Some systems should be checked annually by a professional. Furnaces, air conditioners, and water heaters need periodic maintenance and inspection to make sure they are working properly and to ensure they continue to work when in high demand. There is nothing more miserable than a 90-degree day without air conditioning.
Other systems can be inspected and maintained by the homeowner. Water heaters need to be kept dust-free underneath so dust does not build up on vents. The coils of a refrigerator should also be vacuumed periodically to remove dust. Heating elements in an electric range should be replaced if damaged or misshapen. There are many other things you can do to extend the life of your appliances. Check appliance instruction manuals to see what you can do to make things run properly and last longer.
Activity 1 | Well, Well, Well, What Do We Have Here?
This activity has you checking all the systems in your house – heating, cooling, humidification, electrical appliances (large and small), electronics, and lighting – so that you can make decisions as a family about which require immediate attention and which can wait.
Materials• Pen or pencil
• Vacuum cleaner with hose attachment
• Eyes, ears, and big muscles to move heavy objects
Procedure1. Go through each section of the checklist on the next page and
fill in the information about each system in your home.
2. As you encounter a buildup of dust on any system, vent, or device, use the vacuum cleaner to eliminate it. Also look for dust clinging to the side of machines that you can vacuum or sweep away.

24 ©2019 The NEED Project Managing Home Energy Use www.NEED.org
Activity 1 | Well, Well, Well, What Do We Have Here?CONTINUED
ChecklistHeating System: ______ Central system _____ Individual room system
_____Forced air _____ Boiler/radiator system _____ Radiant floor heat
_____ Electric baseboard _____ Other system: ________________
Fuel of heating system (gas, electric, etc.): _________________________
Age of heating system: ___________________________ years
Date air filter was last replaced: ______________________
Date heating system was last serviced by HVAC professional: _____________________
Cooling System: _______ Central system ______ Individual room system (window units)
Age of cooling system: _________________ years
Date cooling system was last serviced by HVAC professional: ___________________
Humidification: _____ Central system attached to furnace _____ Room-sized system
_____ Central stand-alone system _____ None present
Date of last cleaning of humidifier: ___________________________
Water Heating System: Capacity of water heater: ____________ gallons or __________ tankless
Fuel of water heater: _____ gas _____ electric _____ solar _____ other
Water heater insulation: _____ none _____ blanket _____ other insulation
Date of last drain-and-fill of water heater (not for tankless systems): __________
Age of water heater: ___________________ years
Appliances: Age of refrigerator: ______________ years
Age of oven / cooktop / range: ____________ years Fuel: ____ gas _____ electric
Age of dishwasher: __________ years
Age of washing machine: ______ years Age of dryer: _____ years
Windows: Type of windows: _____ wood _____ vinyl _____ metal _______ other
Layers of glazing: _____ single _____ double _____ triple
Age of windows: __________ years
Condition of windows: _____ like new _____ some wear and tear _____ need work
Insulation: Type of attic insulation: _____ fiberglass _____ rock wool _____ vermiculite
_____ spray foam _____ cellulose _____ other
Type of wall insulation: _____ fiberglass _____ spray foam _____ polystyrene sheeting
_____ cellulose _____ other _____ unknown
Has the insulation been upgraded since the house was built? ____ yes _____ no
LESSON 5

©2019 The NEED Project Managing Home Energy Use www.NEED.org 25
Discussion1. What items could use replacing?
2. Which items or systems may have an impact on other systems in your home. Why? How could making upgrades improve their function?
3. What items need more immediate attention?
Activity 1 | Well, Well, Well, What Do We Have Here?CONTINUED
LESSON 5

26 ©2019 The NEED Project Managing Home Energy Use www.NEED.org
Lesson 6 | Home Energy Audits and SummaryIf you look back through the activities you have already done in this unit, you will find that you have been evaluating how energy is used in your home on a system-by-system basis. Essentially, you have been auditing your home’s energy use.
A trained Certified Energy Manager, or CEM, can conduct a professional audit of the energy use in your home. A professional energy audit begins with assessing how your home already uses energy. The CEM will use several tools to evaluate how much energy is being used, as well as looking at your utility bills and discussing with you the habits already in place. After making several observations and measurements, the CEM will then make a list of recommendations for reducing energy costs, starting with the least expensive to implement, working down to the most expensive. Included in the report is a calculated estimate of the energy savings, in dollars, if each recommendation is implemented.
Much of what you have done can be used as a very basic audit. However, a professional will take it a step further by looking at your home with an infrared imaging device to see where the walls may not be well insulated, as well as other tests to measure air infiltration, light levels, etc. Because you have already done some of the work of an energy audit, you can now also make some basic recommendations for your household to save money. Start with the least expensive, calculate how much money can be saved with each change, working your way to the most expensive to implement. Then decide as a group which of those recommendations you can actually put into practice.

©2019 The NEED Project Managing Home Energy Use www.NEED.org 27
Activity 1 | Re-rate Your Energy Use
At the beginning of this unit, you rated your energy use. Re-evaluate how you as a household use energy and see if your rating has improved. As a group, determine which answer to each statement – either column 1, 2, 3, or 4 – best matches the situation in your home now that you have learned how to be in more control of your energy use. Shade in the box that corresponds to the best match. Then calculate your home’s final energy consumption score.
Energy Efficiency and Conservation at Home 4 3 2 1
Appliances That Are Energystar Rated All More than ½ About ½ None
Lights That Are Cfl Or Led All Most About ½ Almost none or none
Electronics With Phantom Loads (Drawing Power When Turned Off) None (unplugged) About ½ Most All
Thermostat Setting During Heating Season 68 or lower 69-70 71-72 73 or higher
Thermostat Setting During Cooling Season 78 or higher 76-77 74-75 72 or lower
Laundry Loads Run Less Than Full None Less than ½ About ½ Most
Dishwasher Run Less Than Full Never Occasionally About ½ the time Usually
Hot Water Setting (°F) 120 or less 121-130 131-140 140 +
Doors And Windows Closed When Furnace Or Air Conditioner Turned On Always Usually Sometimes Rarely
Lights Left On When Room Is Empty Rarely Sometimes About ½ Usually
Fans Left On Overnight 0 1-2 3-4 5+
Tvs Left On Overnight 0 1 2 3+
Game Console Or Computer Left Running Never Rarely Occasionally Frequently
Heating System Turned On When… Temperature inside < 65
Temperature out-side < 65
Temperature out-side < 70 A/C not turned on
Cooling System Turned On When…Temperature inside > 83 or Not Turned
On/In Use
Temperature out-side > 83
Temperature out-side > 80 Heat not turned on
Programmable Thermostat Yes No
Calculate Your Score – Total Boxes Shaded
× score per box shaded ×4 ×3 ×2 ×1
Column Score
Total Score (add 4 column scores above) Final Energy Consumption Score
Discussion1. A perfect household score is 64. What was your initial household score (copied from Lesson 1)? _______ What is your final household
score? _______ By how many points did your score improve? _______
2. Has your score improved as much as it could? Why or why not? Where else can you improve as a group and further reduce the amount of energy you are using?
3. Develop a plan for improvements. List a timeline and perhaps place your plan in priority order by cost or importance, or both.
LESSON 6

Alaska Electric Light & Power CompanyAlbuquerque Public SchoolsAmerican Electric Power FoundationAmerican Fuel & Petrochemical ManufacturersArmstrong Energy CorporationRobert L. Bayless, Producer, LLCBG Group/ShellBP America Inc.Blue Grass EnergyCape Light Compact–MassachusettsCentral Alabama Electric CooperativeChugach Electric Association, Inc.CitgoClean Energy CollectiveCLEAResultClover Park School DistrictClovis Unified School DistrictColonial PipelineColumbia Gas of MassachusettsComEdConocoPhillipsConstellationCuesta CollegeDavid Petroleum CorporationDesk and Derrick of Roswell, NMDirect EnergyDominion Energy, Inc.Dominion Energy FoundationDonorsChooseDuke EnergyDuke Energy FoundationEast Kentucky PowerE.M.G. Oil PropertiesEnergy Trust of OregonErgodic Resources, LLCEscambia County Public School FoundationEversourceExelonExelon FoundationFirst Roswell CompanyFoundation for Environmental EducationFPLThe Franklin InstituteGeorge Mason University – Environmental Science and PolicyGerald Harrington, GeologistGovernment of Thailand–Energy MinistryGreen Power EMCGreenwired, Inc. Guilford County Schools–North CarolinaGulf PowerHarvard PetroleumHawaii EnergyIdaho National LaboratoryIdaho Power
Illinois Clean Energy Community FoundationIllinois International Brotherhood of Electrical Workers Renewable Energy FundIllinois Institute of TechnologyIndependent Petroleum Association of New MexicoInter-County EnergyJackson EnergyJames Madison UniversityKansas Corporation CommissionKentucky Department of Energy Development and IndependenceKentucky Environmental Education CouncilKentucky Power–An AEP CompanyKentucky Utilities CompanyLeague of United Latin American Citizens – National Educational Service CentersLeidosLet’s GO Boys and Girls, Inc. Linn County Rural Electric CooperativeLlano Land and ExplorationLouisville Gas and Electric CompanyMidwest Wind and SolarMinneapolis Public SchoolsMississippi Development Authority–Energy DivisionMississippi Gulf Coast Community FoundationMojave Environmental Education ConsortiumNational FuelNational GridNational Hydropower AssociationNational Ocean Industries AssociationNational Renewable Energy LaboratoryNC Green PowerNebraskans for Solar New Mexico Oil CorporationNew Mexico Landman’s AssociationNextEra Energy ResourcesNEXTrackerNicor GasNisource Charitable FoundationNoble EnergyNolin Rural Electric CooperativeNorthern Rivers Family ServicesNorth Carolina Department of Environmental QualityNorth Shore GasOffshore Technology ConferenceOhio Energy ProjectOklahoma Gas and Electric Energy CorportationOpterra EnergyPacific Gas and Electric CompanyPECOPecos Valley Energy CommitteePeoples Gas
PepcoPerformance Services, Inc.Petroleum Equipment and Services AssociationPhillips 66PNMPowerSouth Energy CooperativeProvidence Public SchoolsQuarto Publishing GroupRead & Stevens, Inc.Renewable Energy Alaska ProjectResource CentralRhode Island Office of Energy ResourcesRobert ArmstrongRoswell Geological SocietySalt River ProjectSalt River Rural Electric CooperativeSam Houston State UniversitySchlumbergerC.T. Seaver TrustSecure Futures, LLCShelby County RECCShellShell ChemicalSigora SolarSingapore Ministry of EducationSociety of Petroleum EngineersDavid SorensonSouth Kentucky RECCSouth Orange County Community College DistrictSports DimensionsSustainable Business Ventures CorpTaft Union High School DistrictTeslaTri-State Generation and TransmissionTXU EnergyUnited Way of Greater Philadelphia and Southern New JerseyUniversity of KentuckyUniversity of MaineUniversity of North CarolinaUniversity of Rhode IslandUniversity of TennesseeUniversity of Wisconsin – PlattevilleU.S. Department of EnergyU.S. Department of Energy–Office of Energy Efficiency and Renewable EnergyU.S. Department of Energy–Wind for SchoolsU.S. Energy Information AdministrationUnited States Virgin Islands Energy OfficeWayne County Sustainable EnergyWestern Massachusetts Electric Company - EversourceYates Petroleum Corporation
National Sponsors and Partners
©2018 The NEED Project www.NEED.org