Electrical Wiring Circuit Board Project. STEP 1 - Identify all Parts of the Project Saw Drill Driver...
10
Electrical Wiring Circuit Board Project
-
Upload
javon-center -
Category
Documents
-
view
219 -
download
0
Transcript of Electrical Wiring Circuit Board Project. STEP 1 - Identify all Parts of the Project Saw Drill Driver...
Electrical Wiring Circuit BoardProject

STEP 1 - Identify all Parts of the Project
• Saw• Drill Driver w/ bits• Drill w/bits (not pictured)• #2 Phillips Screwdriver• Straight Screwdriver• Pliers• Tape and/or Ruler/Square• Hammer• Pencil• 2 x 4 Douglass Fir Board• 2 x 4 Metal Enclosure• 2 x 4 Plastic Enclosure• 4” Octagon Enclosure• #8 x 1-1/4” Screws• Non-Metalic Cable Clamp

STEP 2 – Review Safety Rules & Gear
• Power Tool Safety• Hand Tool Safety• General Shop Safety & Working in Groups
• Safety Glasses• Coveralls• Appropriate shoes
•Have Safety Gear on Hand and WEAR IT!
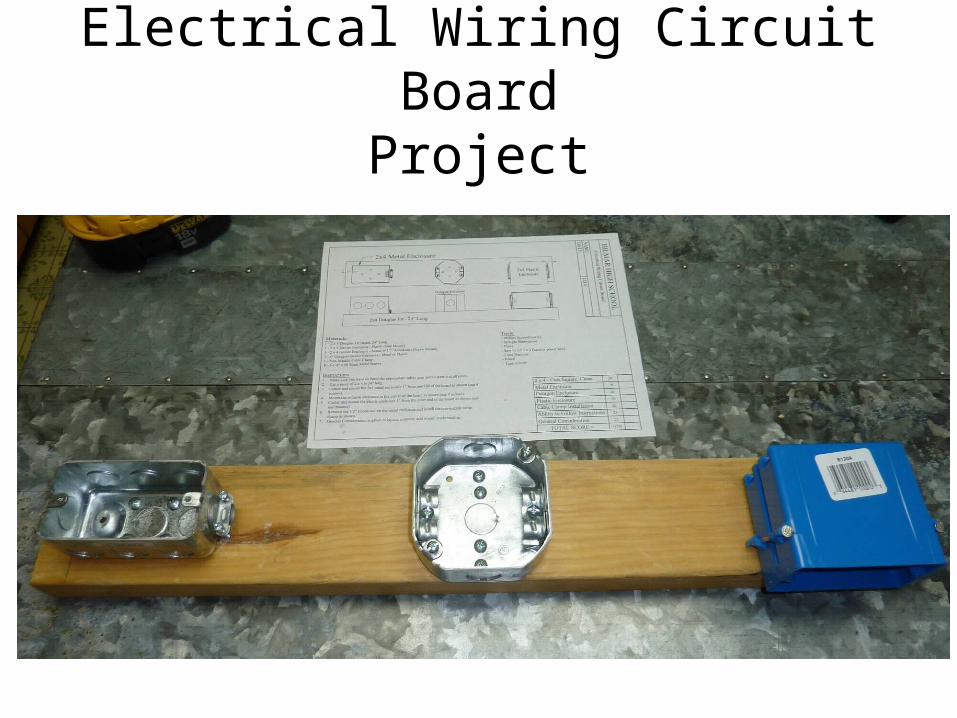
STEP 3 – Cut 2 x 4 to Length
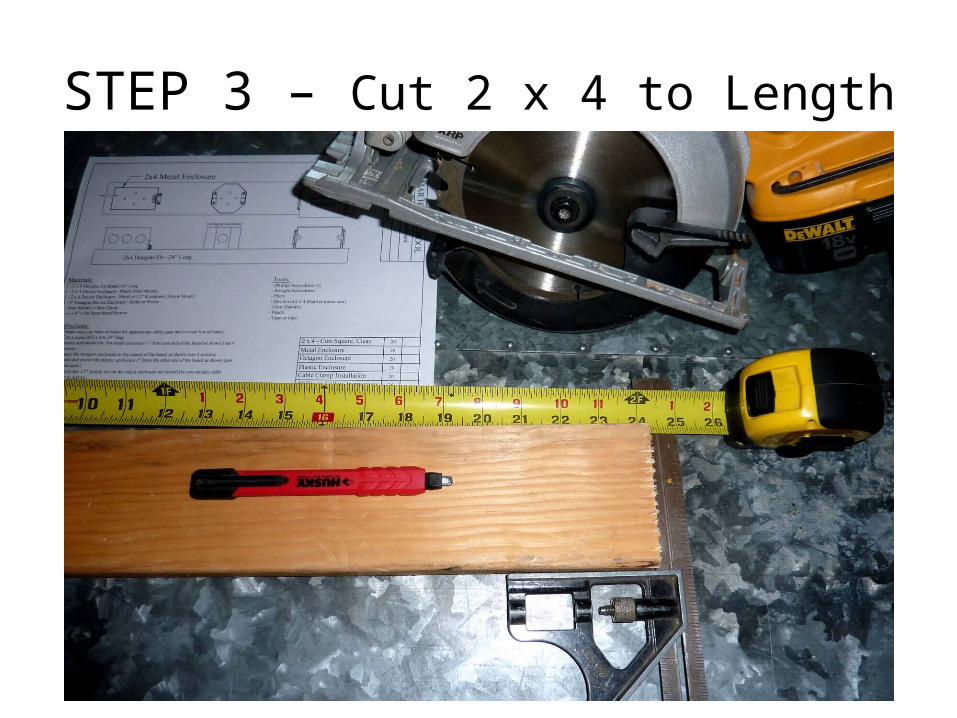
STEP 4 – Install Metal Enclosure

STEP 5 – Install 4” Octagon Enclosure1. Mark the center of the 2 x 4 (@12”), and draw a line2. Notice the screws that stick through the bottom of the
box. These screws are for securing the Romex cable that goes into this box.
3. Use a drill to make holes in the 2 x 4 to accommodate these screws.
4. Mount the 4” Octagon Enclosure with the 4 screws.
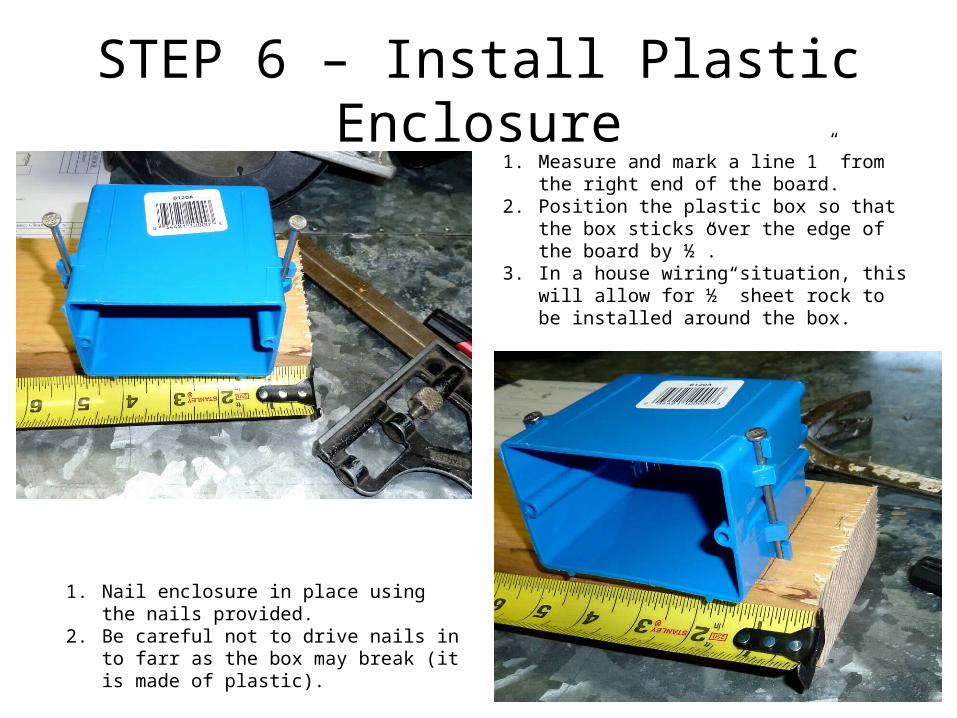
STEP 6 – Install Plastic Enclosure1. Measure and mark a line 1” from the right end of
the board.2. Position the plastic box so that the box sticks over
the edge of the board by ½”.3. In a house wiring situation, this will allow for ½”
sheet rock to be installed around the box.
1. Nail enclosure in place using the nails provided.2. Be careful not to drive nails in to farr as the box
may break (it is made of plastic).

STEP 7 – Install Cable Clamp1. Remove ½” knockout from the metal enclosure.2. Be sure to remove the right one.3. Install Cable Clamp with the retaining nut inside the box.

STEP 7 – Install Cable Clamp
1. Use pliers to tighten the retaining nut on the clamp. You should not be able to loosen the clamp by hand once it is installed.
2. The clamp should be horizontal when tight.
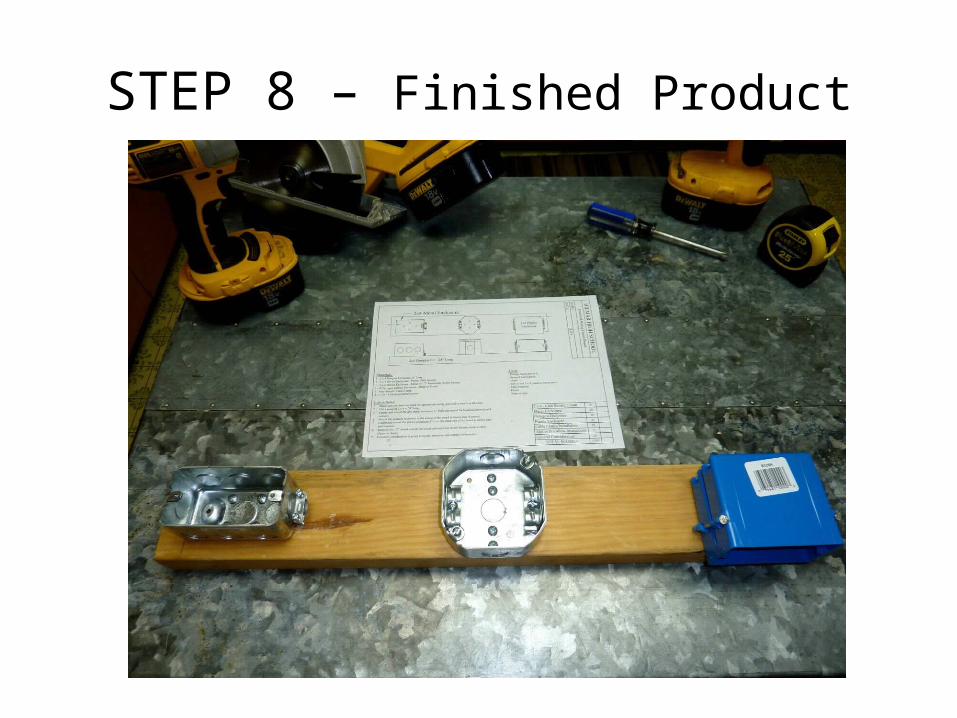
STEP 8 – Finished Product