Create Unique Web Buttons - Corel · Create Unique Web Buttons Page 2 5. Make sure the Retain...
7
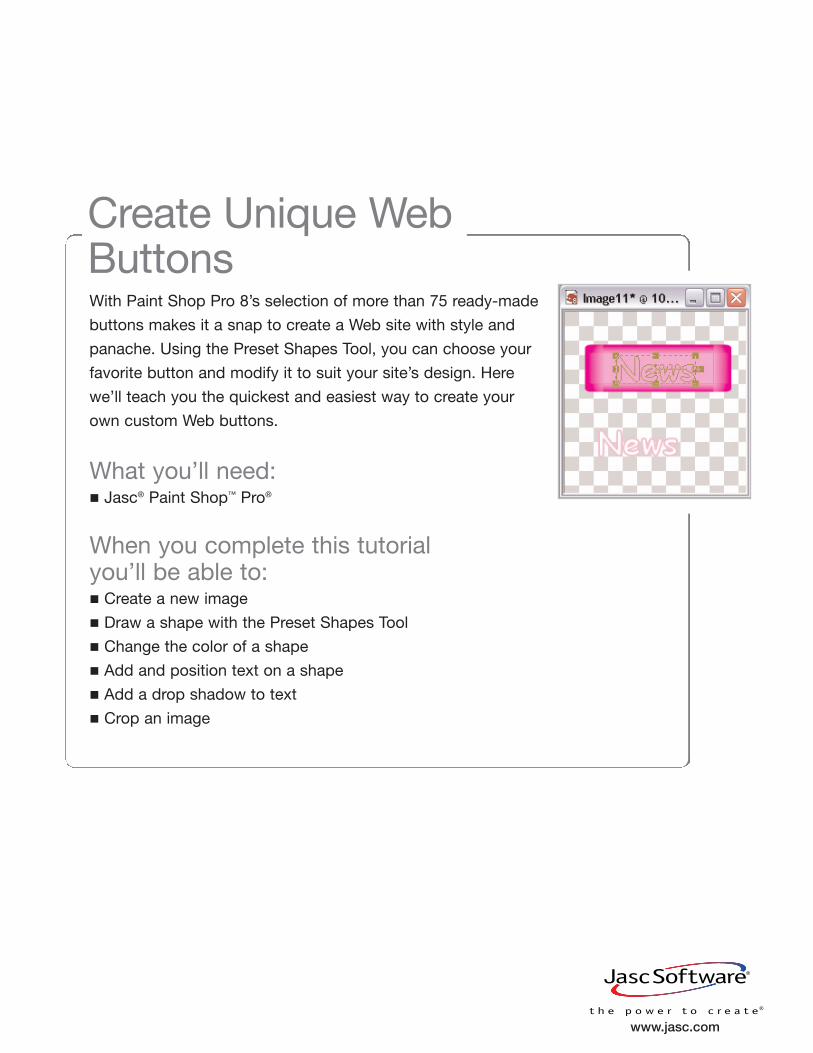
With Paint Shop Pro 8’s selection of more than 75 ready-made buttons makes it a snap to create a Web site with style and panache. Using the Preset Shapes Tool, you can choose your favorite button and modify it to suit your site’s design. Here we’ll teach you the quickest and easiest way to create your own custom Web buttons. Create Unique Web Buttons What you’ll need: Jasc ® Paint Shop ™ Pro ® When you complete this tutorial you’ll be able to: Create a new image Draw a shape with the Preset Shapes Tool Change the color of a shape Add and position text on a shape Add a drop shadow to text Crop an image www.jasc.com
Transcript of Create Unique Web Buttons - Corel · Create Unique Web Buttons Page 2 5. Make sure the Retain...
With Paint Shop Pro 8’s selection of more than 75 ready-made
buttons makes it a snap to create a Web site with style and
panache. Using the Preset Shapes Tool, you can choose your
favorite button and modify it to suit your site’s design. Here
we’ll teach you the quickest and easiest way to create your
own custom Web buttons.
Create Unique Web Buttons
What you’ll need:� Jasc® Paint Shop™ Pro®
When you complete this tutorial you’ll be able to:� Create a new image
� Draw a shape with the Preset Shapes Tool
� Change the color of a shape
� Add and position text on a shape
� Add a drop shadow to text
� Crop an image
www.jasc.com
Create Unique Web Buttons Page 1
Create a New Image
1. If Paint Shop Pro 8 isn’t already open on your computer, start it up by choosing
Start > Programs > Jasc Software > Jasc Paint Shop Pro or double click the
Paint Shop Pro 8 Icon on your desktop.
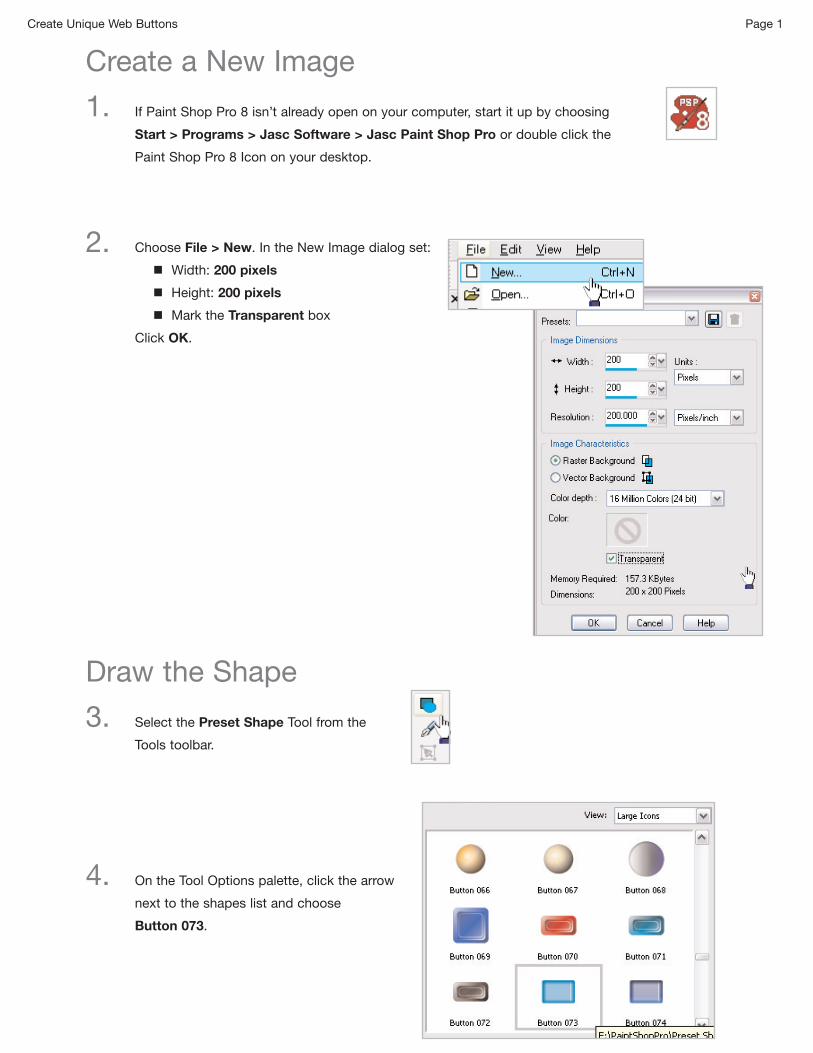
2. Choose File > New. In the New Image dialog set:
� Width: 200 pixels
� Height: 200 pixels
� Mark the Transparent box
Click OK.
Draw the Shape
3. Select the Preset Shape Tool from the
Tools toolbar.
4. On the Tool Options palette, click the arrow
next to the shapes list and choose
Button 073.
Create Unique Web Buttons Page 2
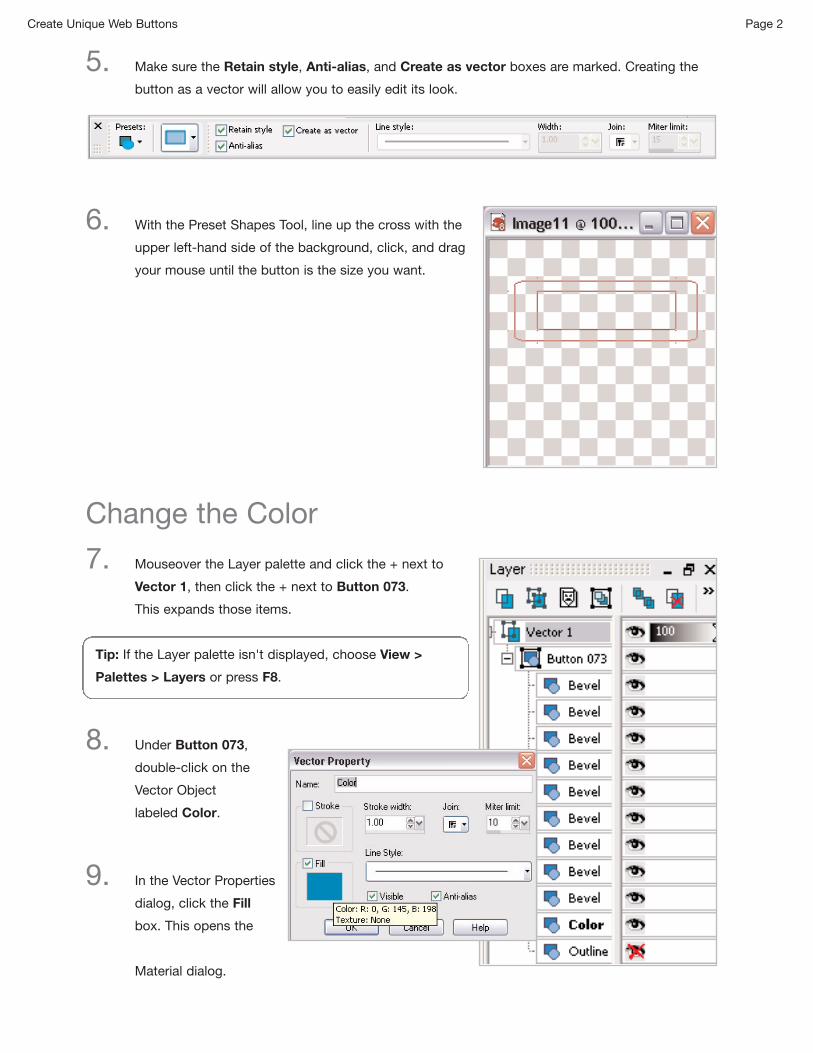
5. Make sure the Retain style, Anti-alias, and Create as vector boxes are marked. Creating the
button as a vector will allow you to easily edit its look.
6. With the Preset Shapes Tool, line up the cross with the
upper left-hand side of the background, click, and drag
your mouse until the button is the size you want.
Change the Color
7. Mouseover the Layer palette and click the + next to
Vector 1, then click the + next to Button 073.
This expands those items.
Tip: If the Layer palette isn't displayed, choose View >
Palettes > Layers or press F8.
8. Under Button 073,
double-click on the
Vector Object
labeled Color.
9. In the Vector Properties
dialog, click the Fill
box. This opens the
Material dialog.
Create Unique Web Buttons Page 3
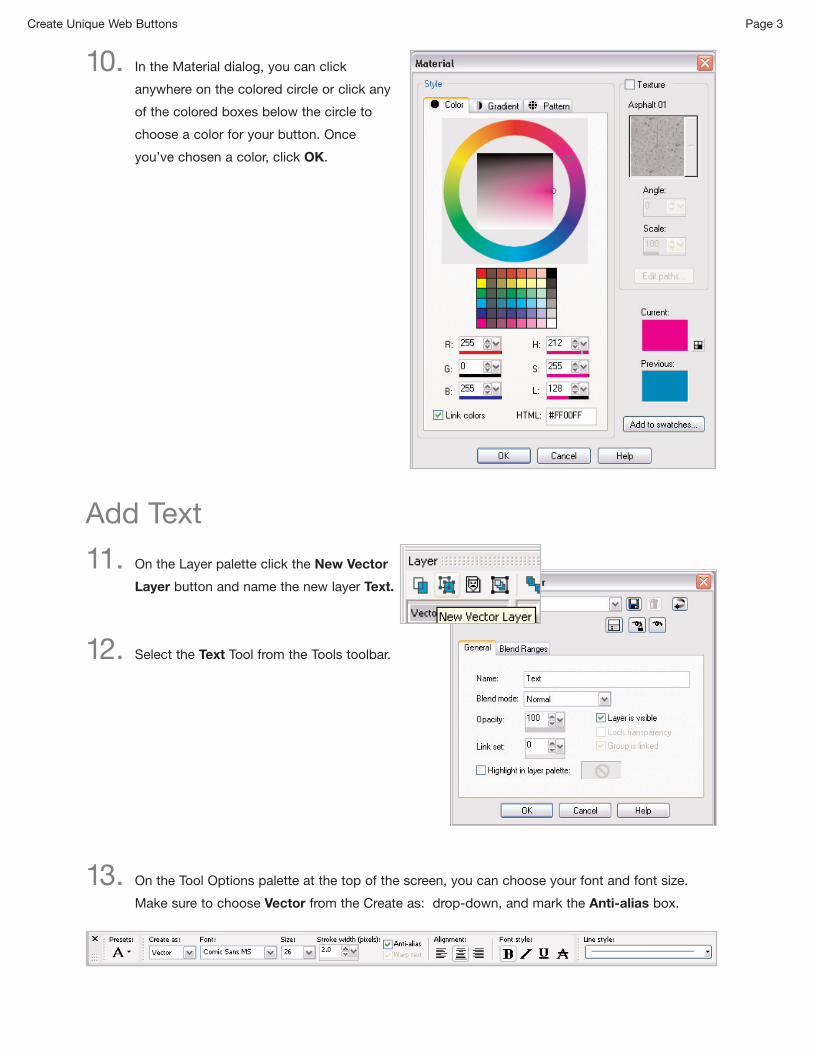
10. In the Material dialog, you can click
anywhere on the colored circle or click any
of the colored boxes below the circle to
choose a color for your button. Once
you’ve chosen a color, click OK.
Add Text
11. On the Layer palette click the New Vector
Layer button and name the new layer Text.
12. Select the Text Tool from the Tools toolbar.
13. On the Tool Options palette at the top of the screen, you can choose your font and font size.
Make sure to choose Vector from the Create as: drop-down, and mark the Anti-alias box.
Create Unique Web Buttons Page 4
Note: Creating the text as a vector will make it easier for you to manipulate the text.
For this example, we used Comic Sans at 26 points and a stroke width of 2. While Comic Sans works
well, you can use your favorite font and font size.
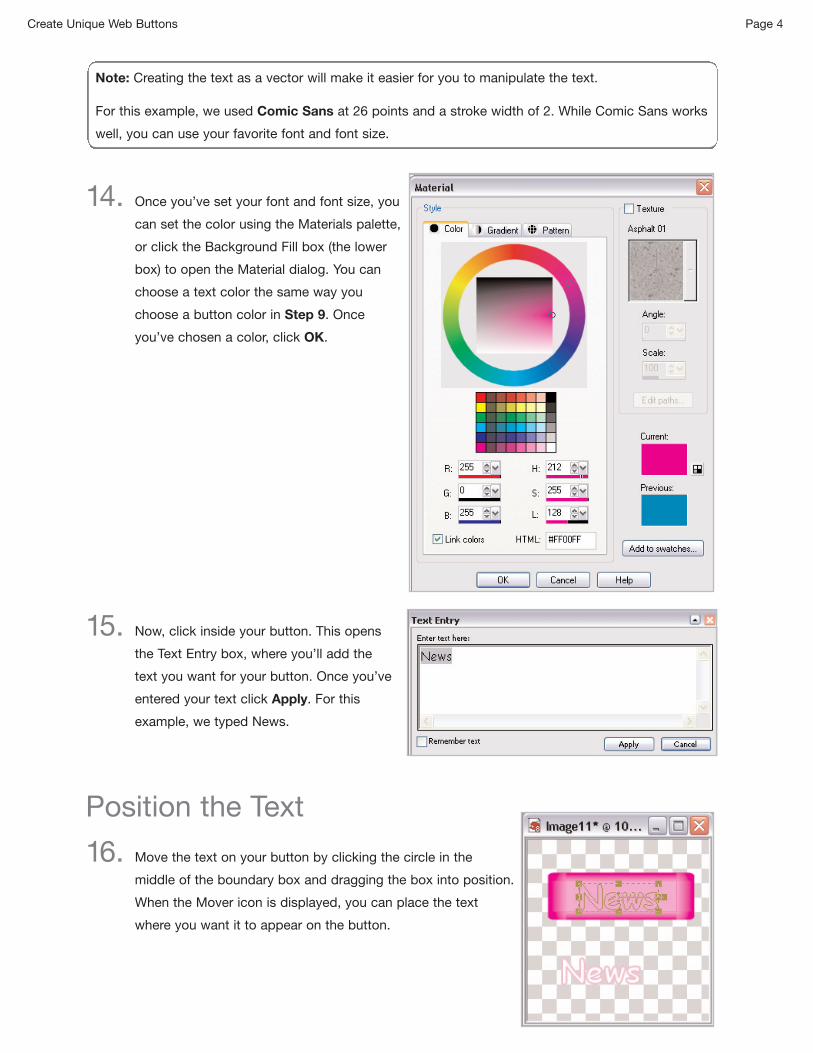
14. Once you’ve set your font and font size, you
can set the color using the Materials palette,
or click the Background Fill box (the lower
box) to open the Material dialog. You can
choose a text color the same way you
choose a button color in Step 9. Once
you’ve chosen a color, click OK.
15. Now, click inside your button. This opens
the Text Entry box, where you’ll add the
text you want for your button. Once you’ve
entered your text click Apply. For this
example, we typed News.
Position the Text
16. Move the text on your button by clicking the circle in the
middle of the boundary box and dragging the box into position.
When the Mover icon is displayed, you can place the text
where you want it to appear on the button.
Create Unique Web Buttons Page 5
Add a Drop Shadow
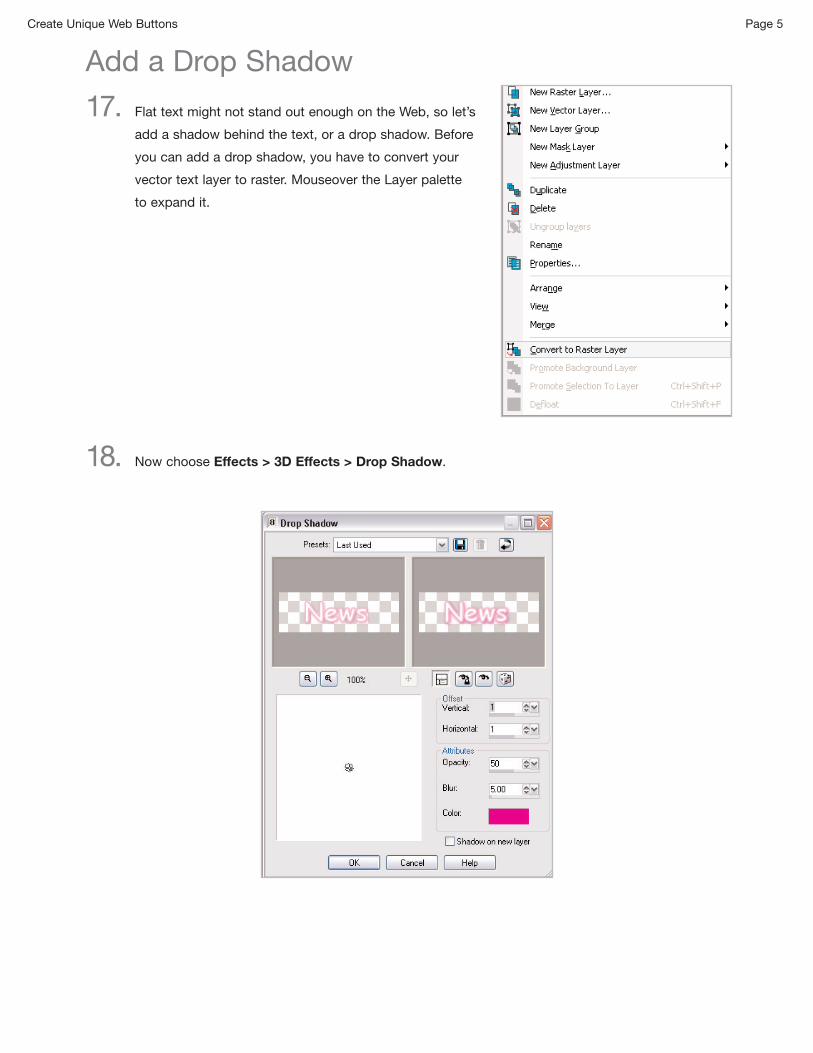
17. Flat text might not stand out enough on the Web, so let’s
add a shadow behind the text, or a drop shadow. Before
you can add a drop shadow, you have to convert your
vector text layer to raster. Mouseover the Layer palette
to expand it.
18. Now choose Effects > 3D Effects > Drop Shadow.
Create Unique Web Buttons Page 6
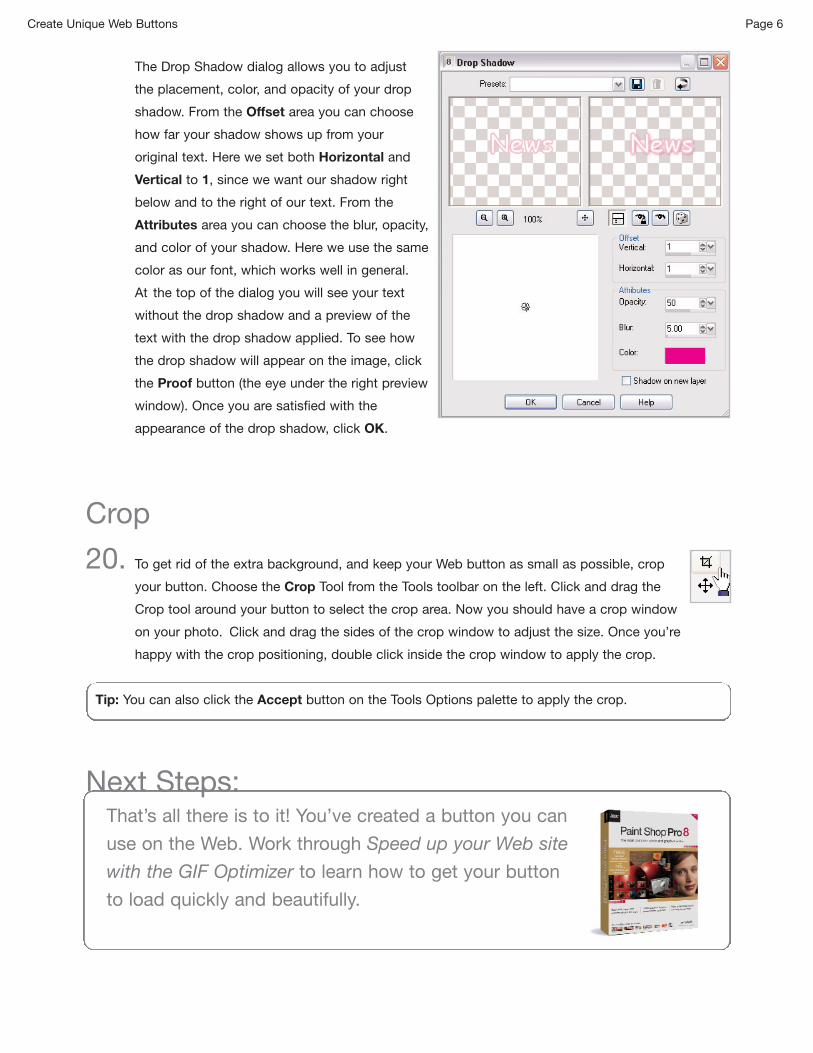
The Drop Shadow dialog allows you to adjust
the placement, color, and opacity of your drop
shadow. From the Offset area you can choose
how far your shadow shows up from your
original text. Here we set both Horizontal and
Vertical to 1, since we want our shadow right
below and to the right of our text. From the
Attributes area you can choose the blur, opacity,
and color of your shadow. Here we use the same
color as our font, which works well in general.
At the top of the dialog you will see your text
without the drop shadow and a preview of the
text with the drop shadow applied. To see how
the drop shadow will appear on the image, click
the Proof button (the eye under the right preview
window). Once you are satisfied with the
appearance of the drop shadow, click OK.
Crop
20. To get rid of the extra background, and keep your Web button as small as possible, crop
your button. Choose the Crop Tool from the Tools toolbar on the left. Click and drag the
Crop tool around your button to select the crop area. Now you should have a crop window
on your photo. Click and drag the sides of the crop window to adjust the size. Once you’re
happy with the crop positioning, double click inside the crop window to apply the crop.
Tip: You can also click the Accept button on the Tools Options palette to apply the crop.
Next Steps:That’s all there is to it! You’ve created a button you can
use on the Web. Work through Speed up your Web site
with the GIF Optimizer to learn how to get your button
to load quickly and beautifully.