
Comparing Narrow Diameter Implant Systems v2 - … · Live Patient Training 1988-89 • Advanced...
119
Dr. Peter A. Karsant DDS 1601 Alemany Blvd. San Francisco, CA 94112 415.333.3919 [email protected] Comparing Narrow Diameter Implant Systems: Which is best suited for your practice?
Transcript of Comparing Narrow Diameter Implant Systems v2 - … · Live Patient Training 1988-89 • Advanced...
Dr. Peter A. Karsant DDS1601 Alemany Blvd.
San Francisco, CA 94112
Comparing Narrow Diameter Implant Systems:
Which is best suited for your practice?
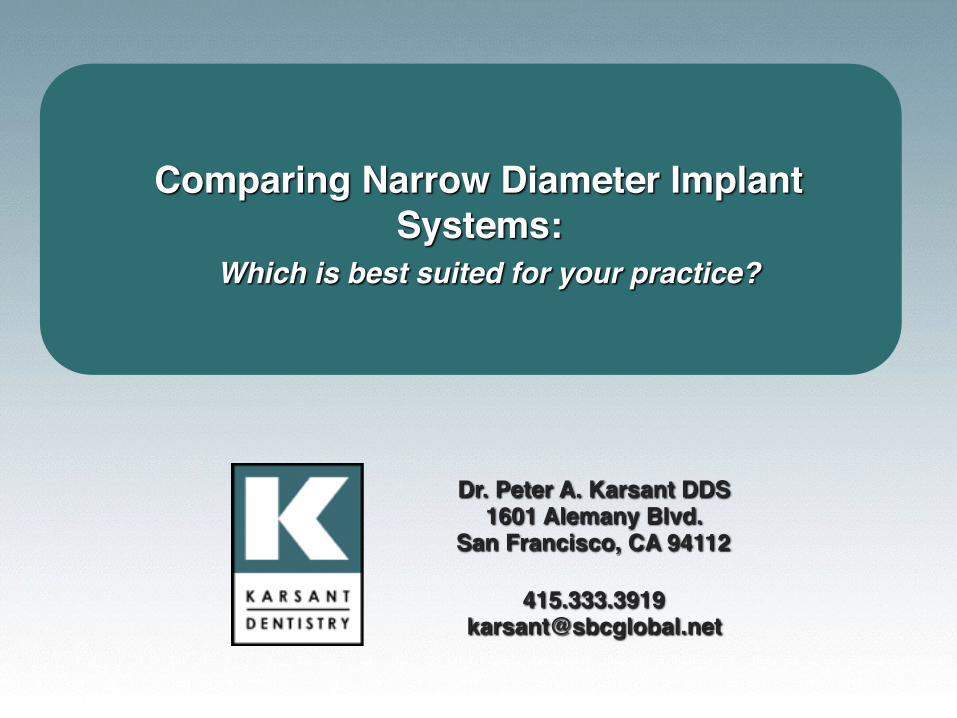
• Graduated University of the Pacific Dugoni School of Dentistry 1982
• Member AAE 1983- Present• Alumni of UOP’s Dr. Larry Lum Implant Study Club Hands-on
Live Patient Training 1988-89• Advanced Implant Study Club 1990-92• Patient Care Committee Board Member Physians
Reinbursment Fund 2008-Present Occurance Coverage• Board Member Opt-In Dental Group 2014-Present• Expert Witness / Case Reviewer Dental Board of California
1994-Present• Clinical Professor PreClinical Removable at UOP
Curriculum Vitae

Dr. Gene Labarre&
Dr. Dennis Shinbori
Many Thanks
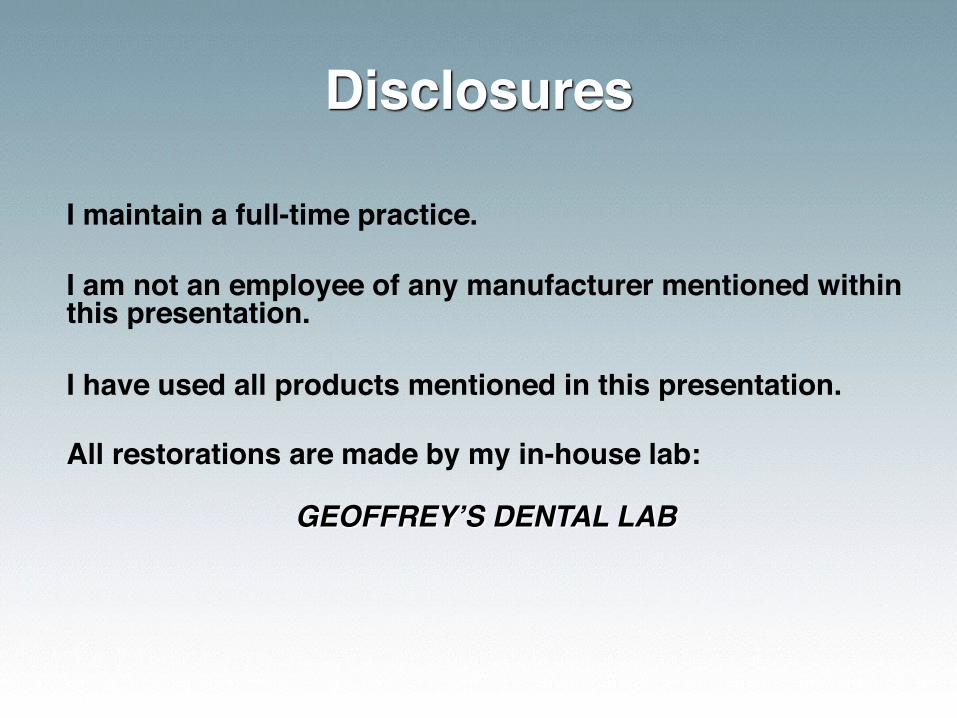
I maintain a full-time practice.
I am not an employee of any manufacturer mentioned within this presentation.
I have used all products mentioned in this presentation. All restorations are made by my in-house lab:
GEOFFREY’S DENTAL LAB
Disclosures

“Everything is theoretically impossible UNTIL IT IS DONE.”
-Robert A Heinlein
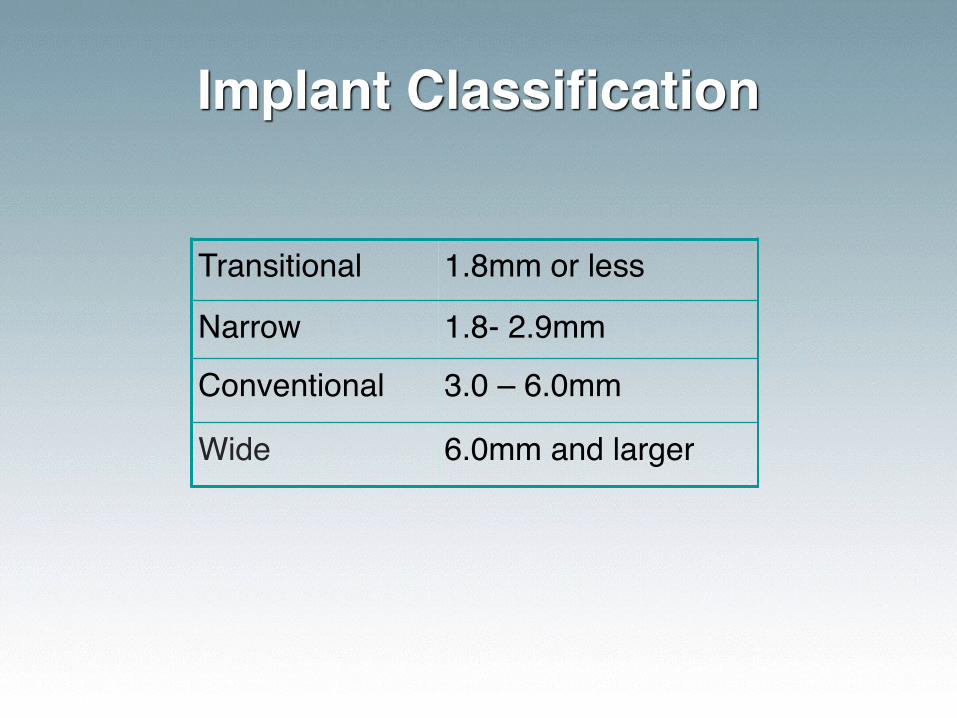
Implant Classification
Transitional 1.8mm or less
Narrow 1.8- 2.9mm
Conventional 3.0 – 6.0mm
Wide 6.0mm and larger
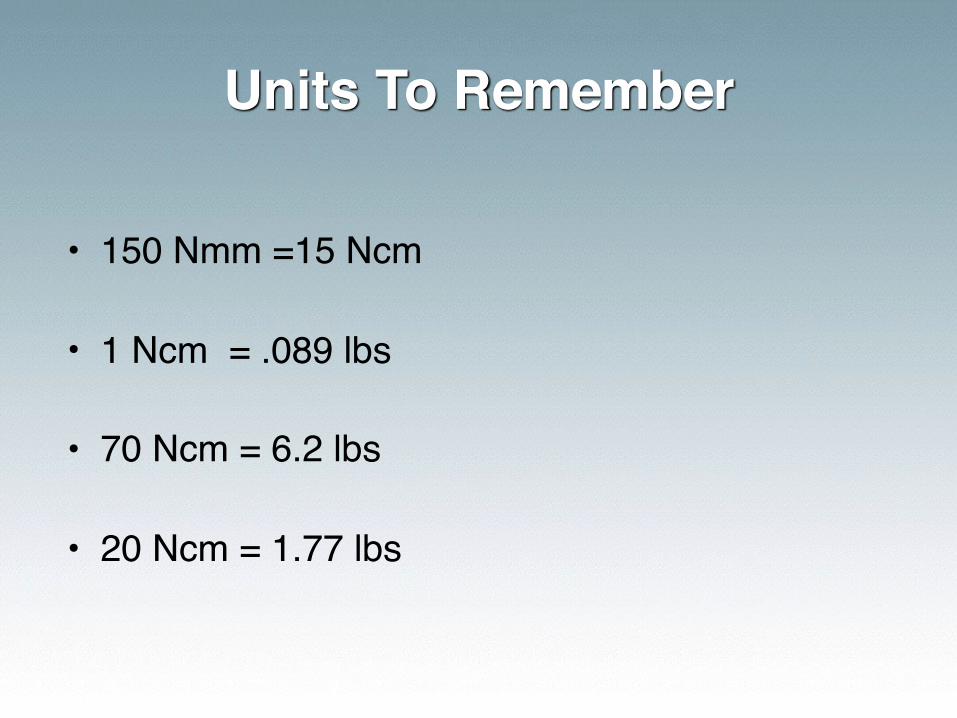
• 150 Nmm =15 Ncm • 1 Ncm = .089 lbs
• 70 Ncm = 6.2 lbs • 20 Ncm = 1.77 lbs
Units To Remember
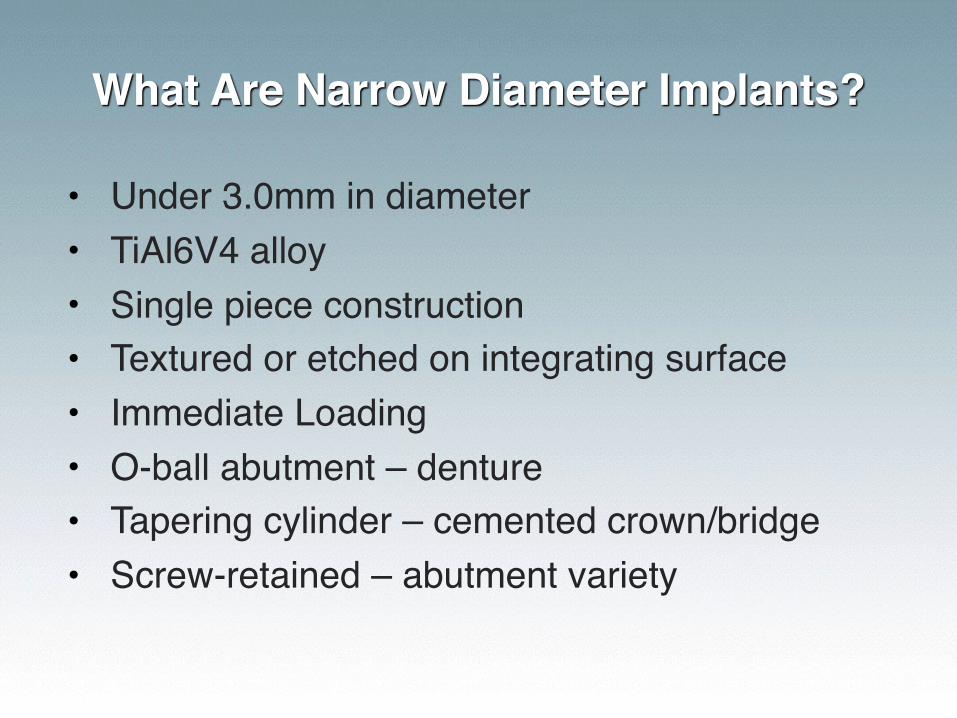
What Are Narrow Diameter Implants?
• Under 3.0mm in diameter• TiAl6V4 alloy• Single piece construction• Textured or etched on integrating surface• Immediate Loading• O-ball abutment – denture• Tapering cylinder – cemented crown/bridge• Screw-retained – abutment variety
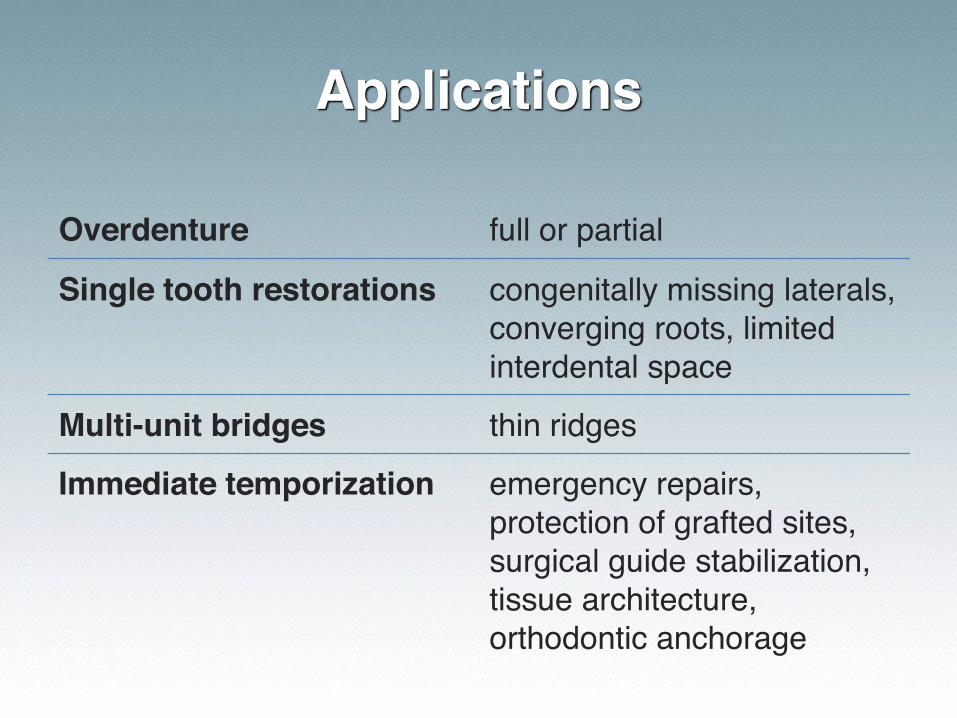
Applications
Overdenture full or partial
Single tooth restorations congenitally missing laterals, converging roots, limited interdental space
Multi-unit bridges thin ridges
Immediate temporization emergency repairs, protection of grafted sites, surgical guide stabilization, tissue architecture, orthodontic anchorage
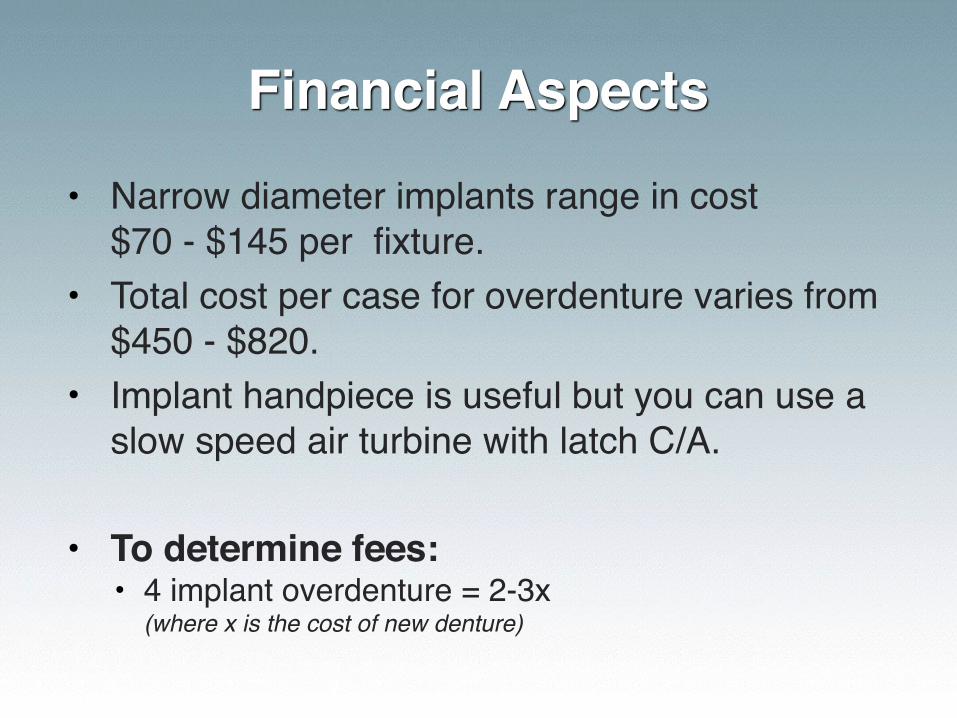
Financial Aspects
• Narrow diameter implants range in cost $70 - $145 per fixture.
• Total cost per case for overdenture varies from $450 - $820.
• Implant handpiece is useful but you can use a slow speed air turbine with latch C/A.
• To determine fees: • 4 implant overdenture = 2-3x
(where x is the cost of new denture)
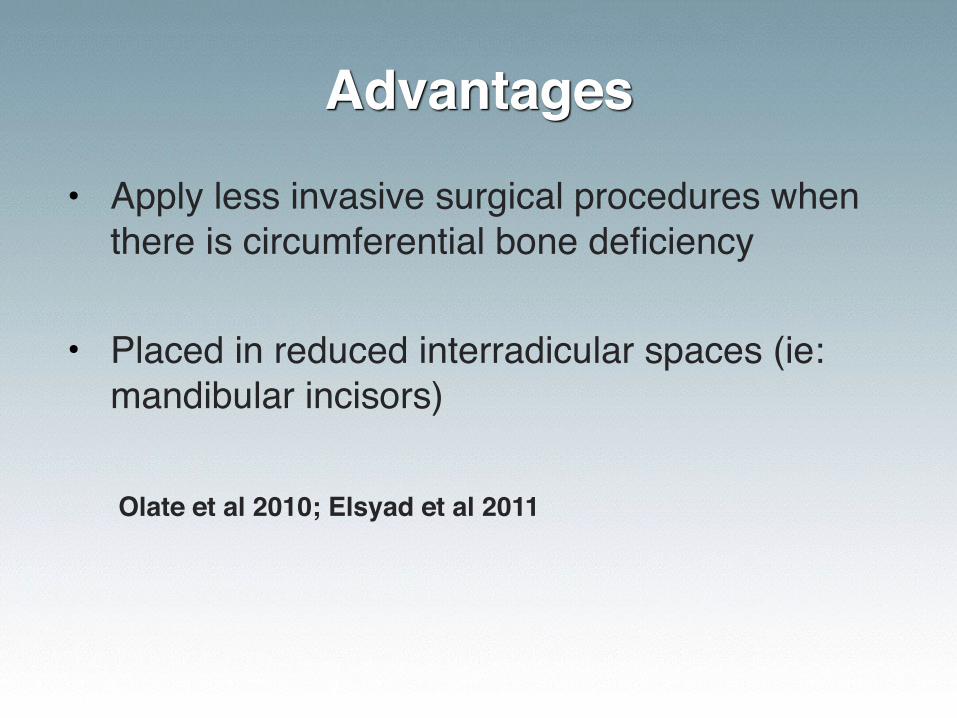
Advantages
• Apply less invasive surgical procedures when there is circumferential bone deficiency
• Placed in reduced interradicular spaces (ie: mandibular incisors)
Olate et al 2010; Elsyad et al 2011
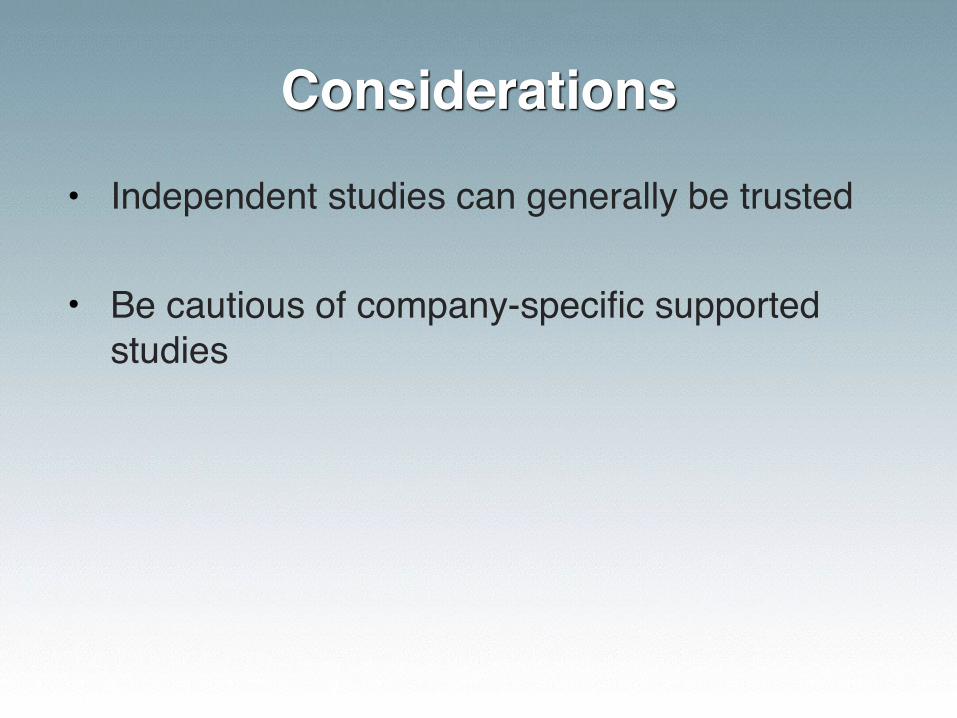
Considerations
• Independent studies can generally be trusted
• Be cautious of company-specific supported studies
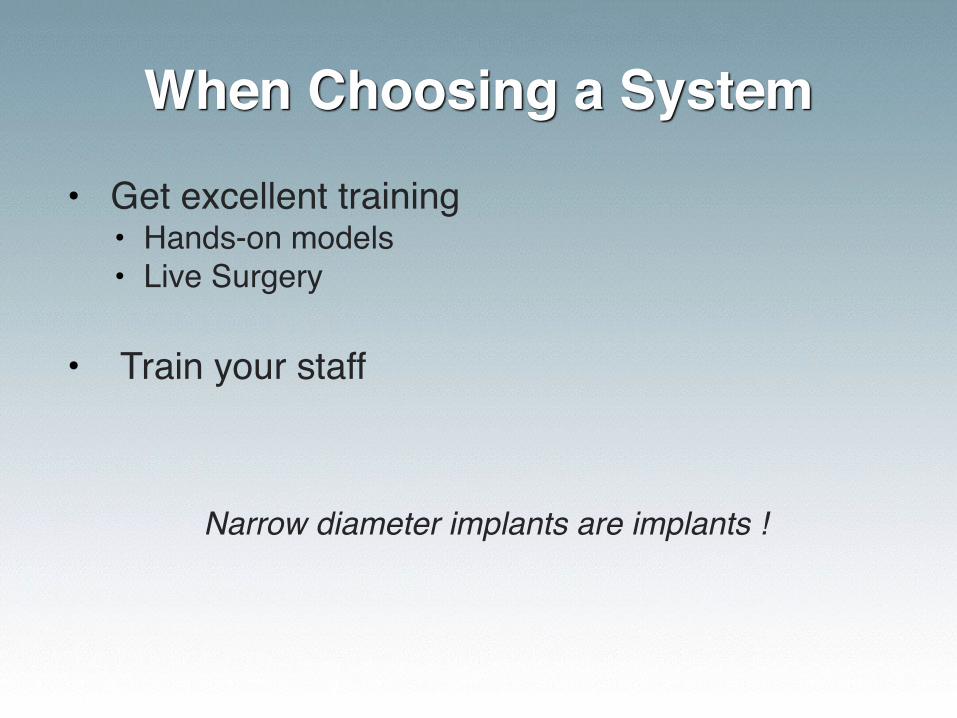
When Choosing a System
• Get excellent training • Hands-on models• Live Surgery
• Train your staff
Narrow diameter implants are implants !
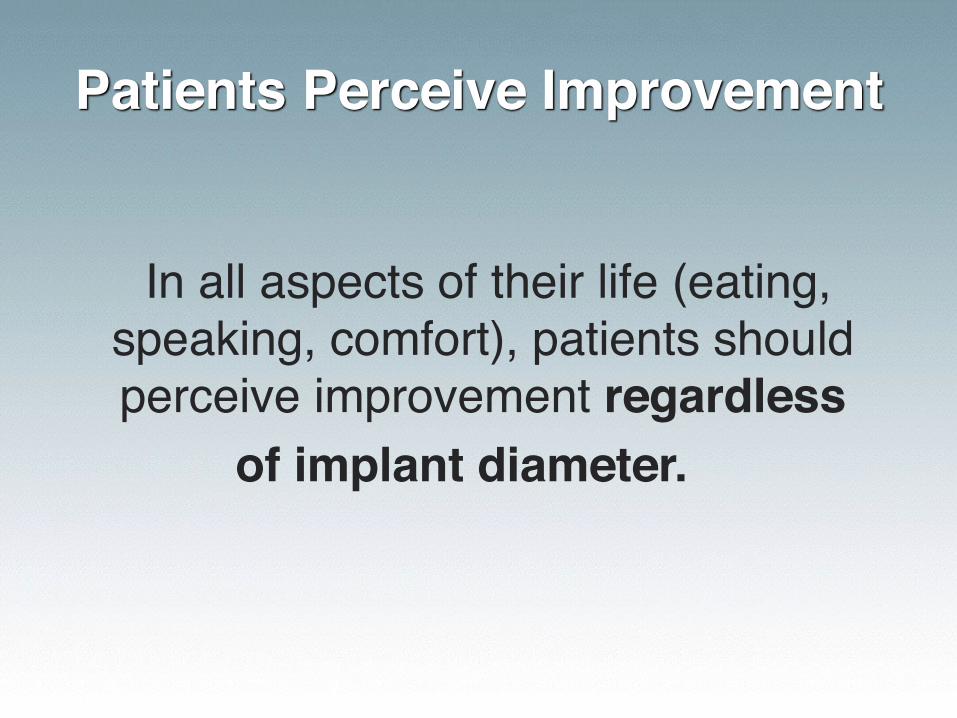
Patients Perceive Improvement
In all aspects of their life (eating, speaking, comfort), patients should perceive improvement regardless
of implant diameter.

Does Shape Matter?
Atlas -Dentatus
MDI – 3M ESPE
(formerly IMTEC)

Will the system you choose accomplish all things
for all patients, or just some things for
some patients?
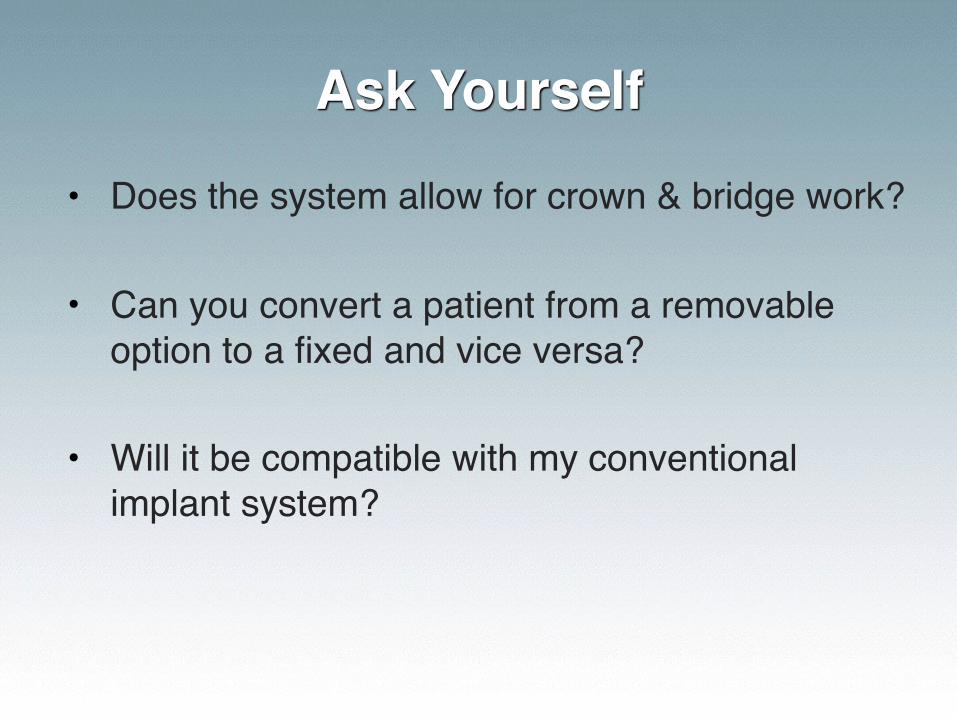
Ask Yourself
• Does the system allow for crown & bridge work?
• Can you convert a patient from a removable option to a fixed and vice versa?
• Will it be compatible with my conventional implant system?
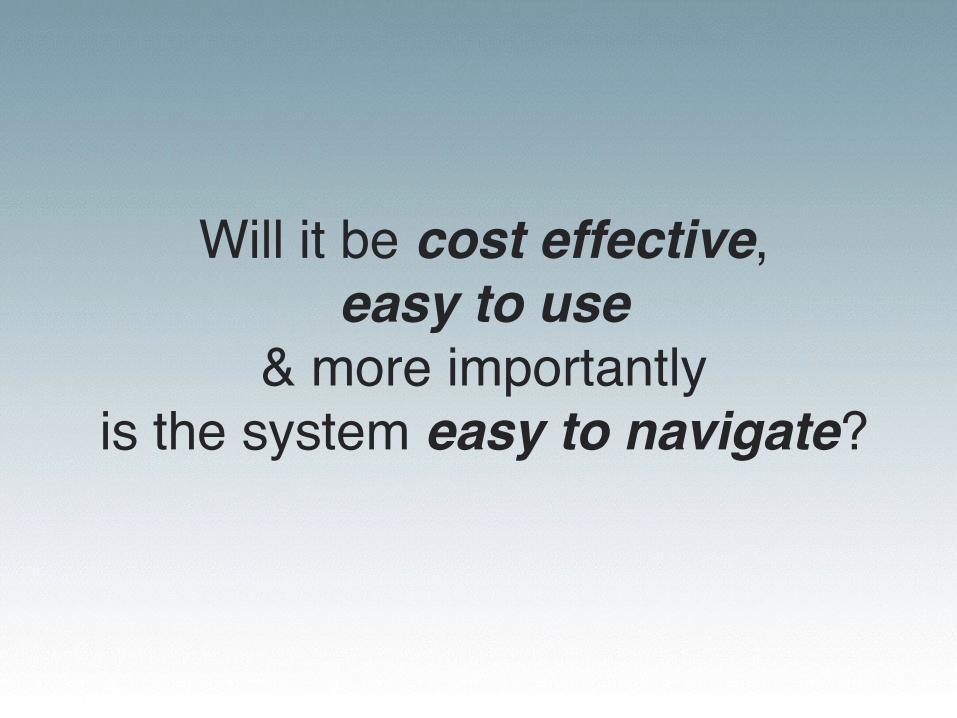
Will it be cost effective, easy to use
& more importantlyis the system easy to navigate?
Lab Considerations
• Success requires quality work and communication.
• Has your lab worked with the system before?• If not, it should be easy enough to guide them
through the process.
• Labs should not charge more for narrow diameter implants.
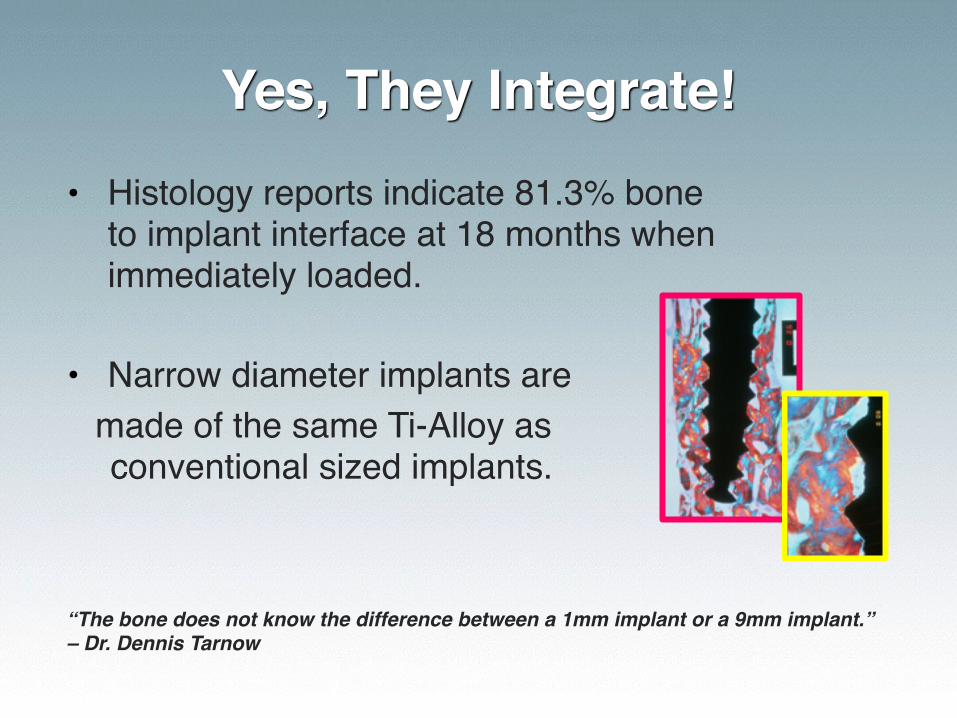
Yes, They Integrate!• Histology reports indicate 81.3% bone
to implant interface at 18 months when immediately loaded.
• Narrow diameter implants aremade of the same Ti-Alloy as conventional sized implants.
“The bone does not know the difference between a 1mm implant or a 9mm implant.”– Dr. Dennis Tarnow

Peer Reviewed Studies
Histological evaluation of immediately loaded transitional implants after 18 months reveal 81.3% bone to implant contact of the surface evaluated.
Proussaefs DDS, Loma Linda Univ Journal of Prosthetic Dentistry April 2003, 331-333
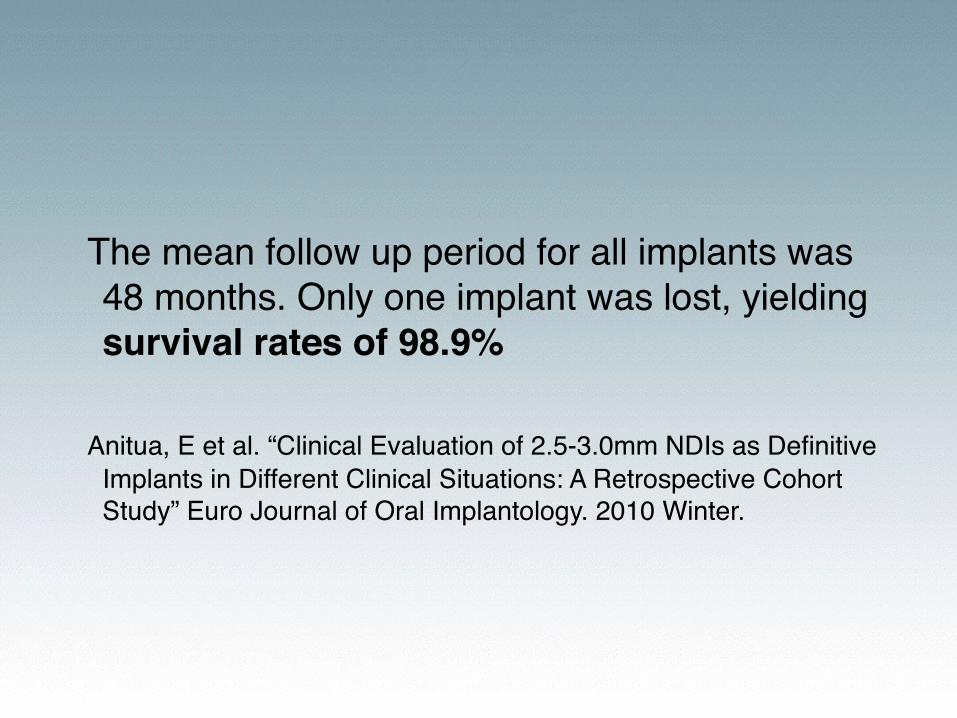
The mean follow up period for all implants was 48 months. Only one implant was lost, yielding survival rates of 98.9%
Anitua, E et al. “Clinical Evaluation of 2.5-3.0mm NDIs as Definitive Implants in Different Clinical Situations: A Retrospective Cohort Study” Euro Journal of Oral Implantology. 2010 Winter.
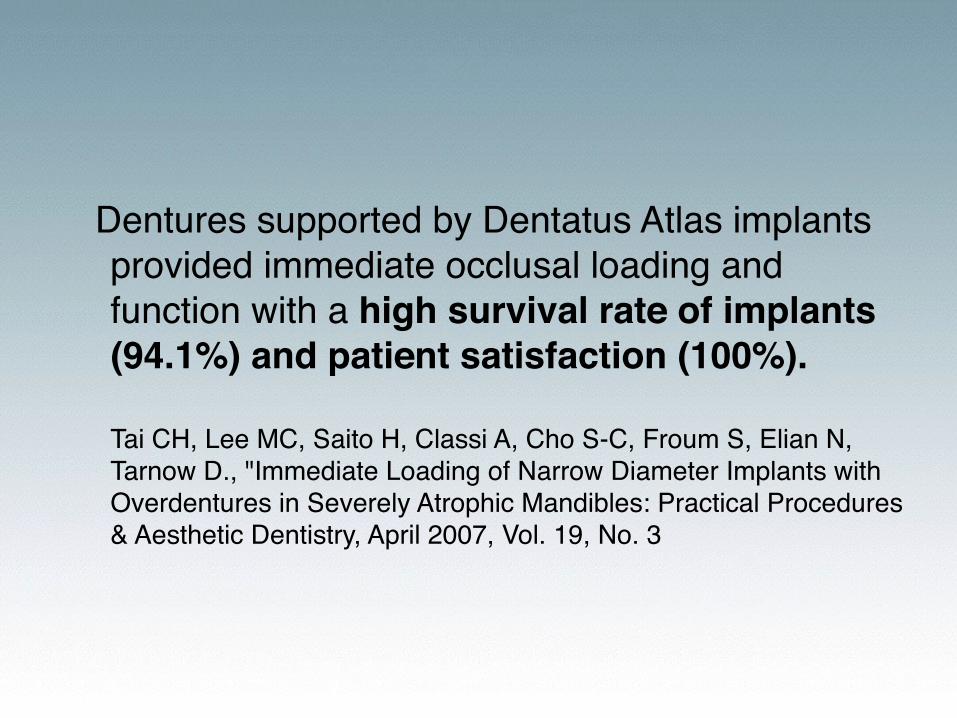
Dentures supported by Dentatus Atlas implants provided immediate occlusal loading and function with a high survival rate of implants (94.1%) and patient satisfaction (100%). Tai CH, Lee MC, Saito H, Classi A, Cho S-C, Froum S, Elian N, Tarnow D., "Immediate Loading of Narrow Diameter Implants with Overdentures in Severely Atrophic Mandibles: Practical Procedures & Aesthetic Dentistry, April 2007, Vol. 19, No. 3
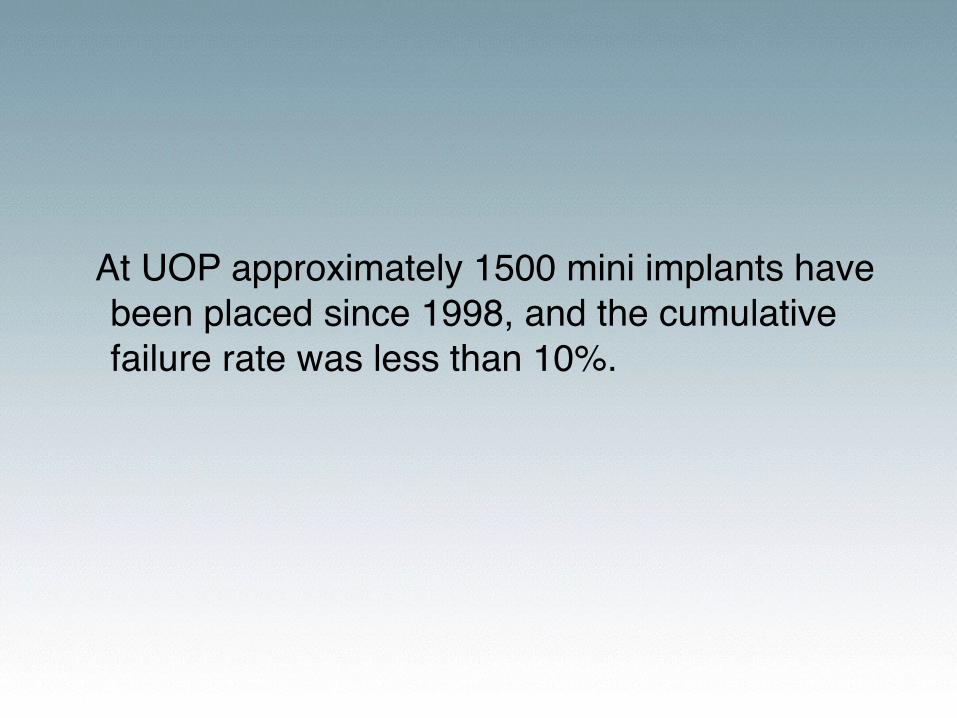
At UOP approximately 1500 mini implants have been placed since 1998, and the cumulative failure rate was less than 10%.
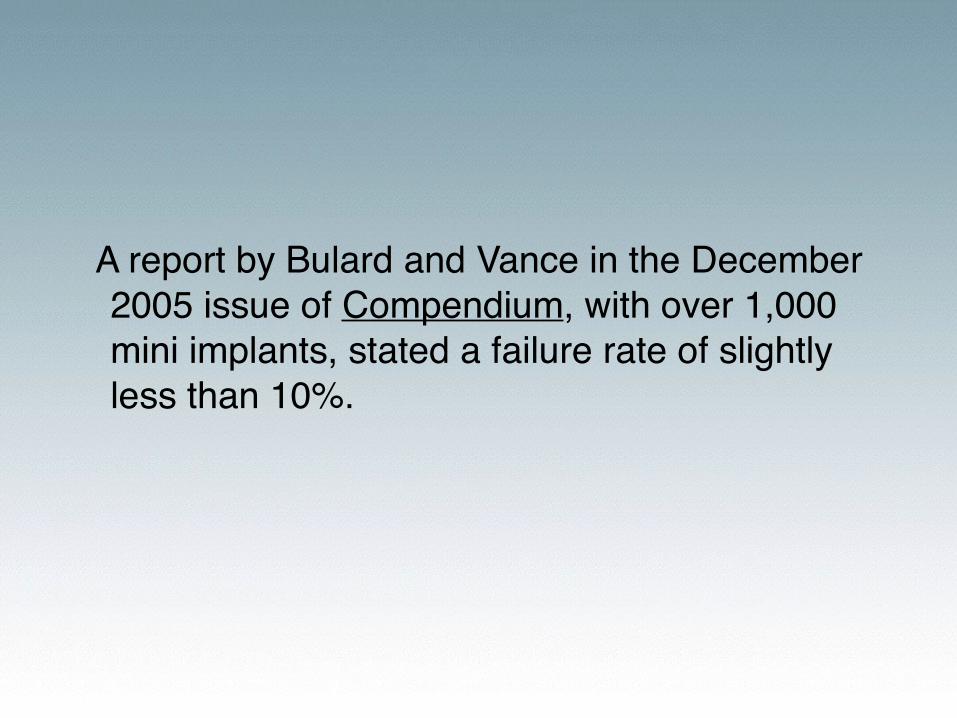
A report by Bulard and Vance in the December 2005 issue of Compendium, with over 1,000 mini implants, stated a failure rate of slightly less than 10%.
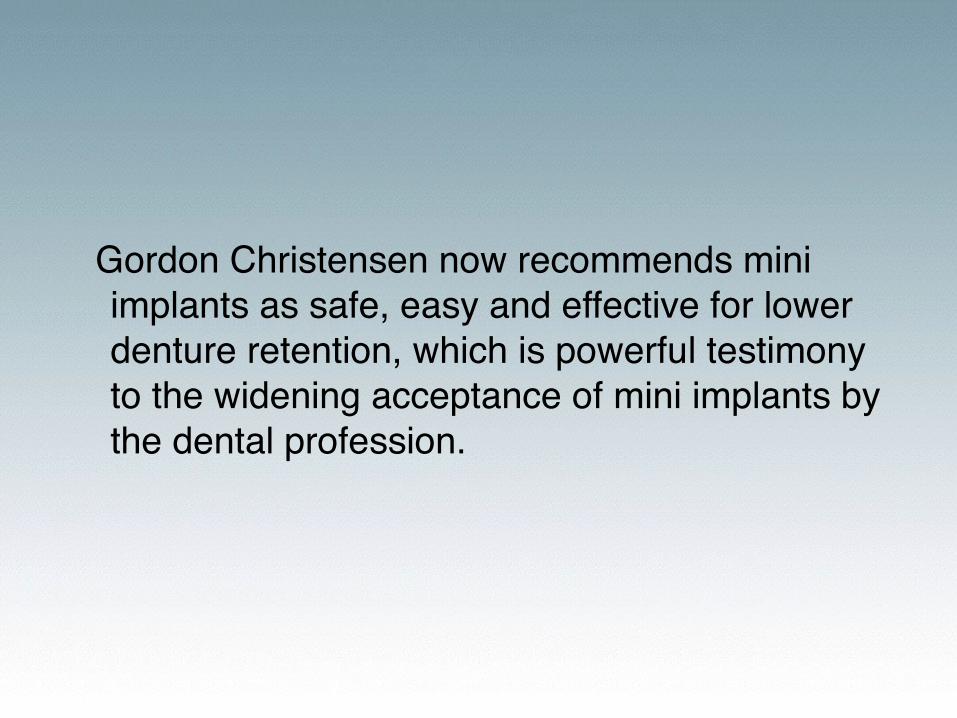
Gordon Christensen now recommends mini implants as safe, easy and effective for lower denture retention, which is powerful testimony to the widening acceptance of mini implants by the dental profession.
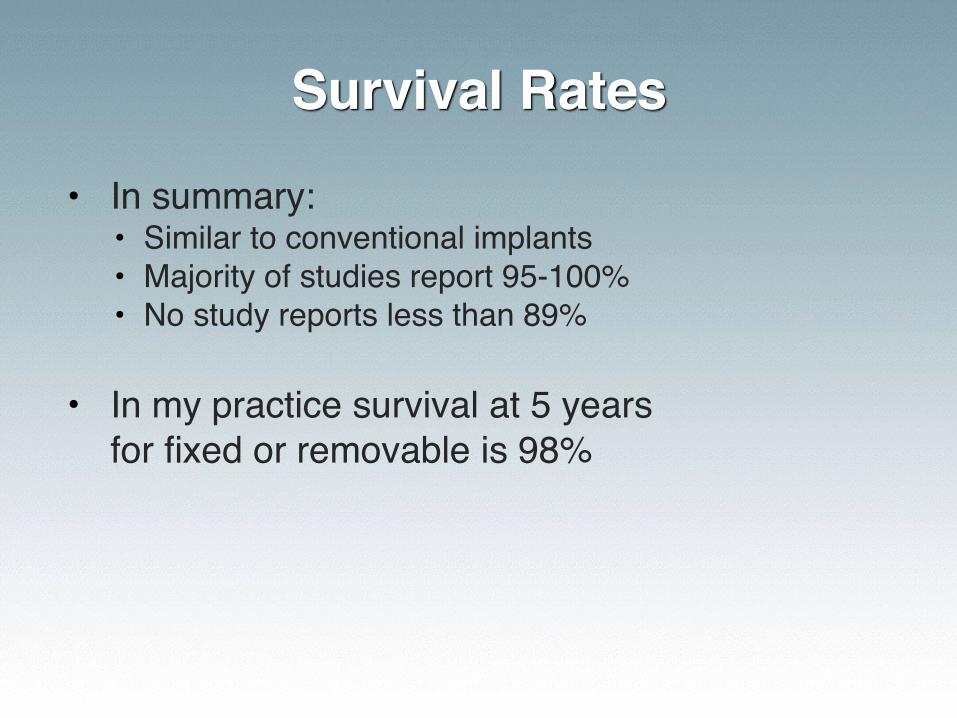
Survival Rates
• In summary:• Similar to conventional implants• Majority of studies report 95-100%• No study reports less than 89%
• In my practice survival at 5 years for fixed or removable is 98%
McGill Consensus
In 2002, an International symposium at McGill University concluded that the implant retained overdenture should become the first-choice prosthodontic treatment for patients with edentulous mandibles.
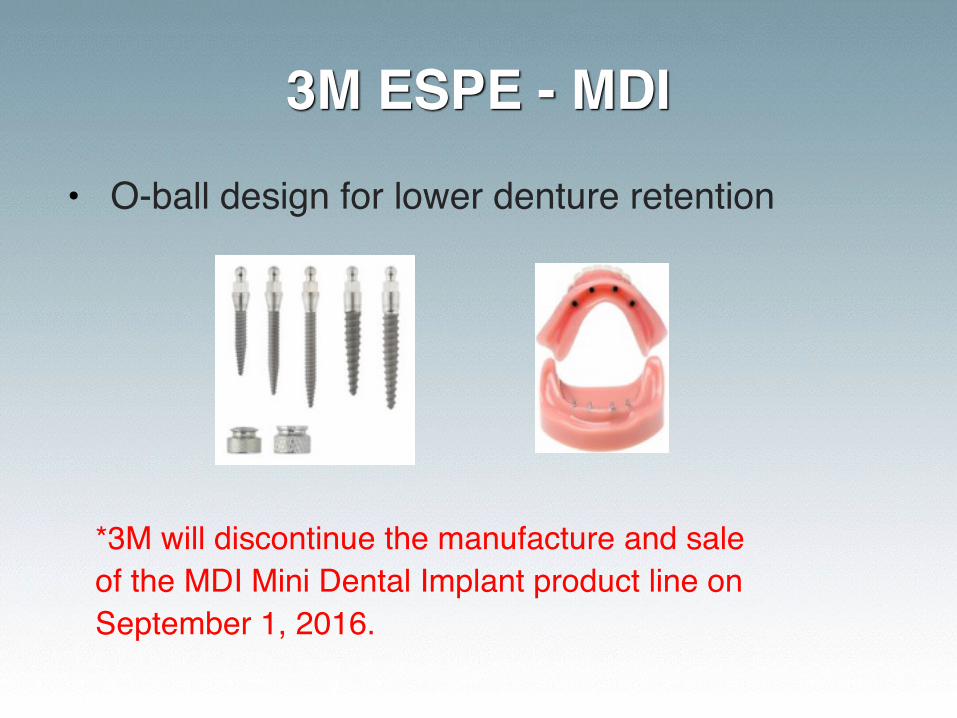
3M ESPE - MDI
• O-ball design for lower denture retention
*3M will discontinue the manufacture and sale of the MDI Mini Dental Implant product line on September 1, 2016.
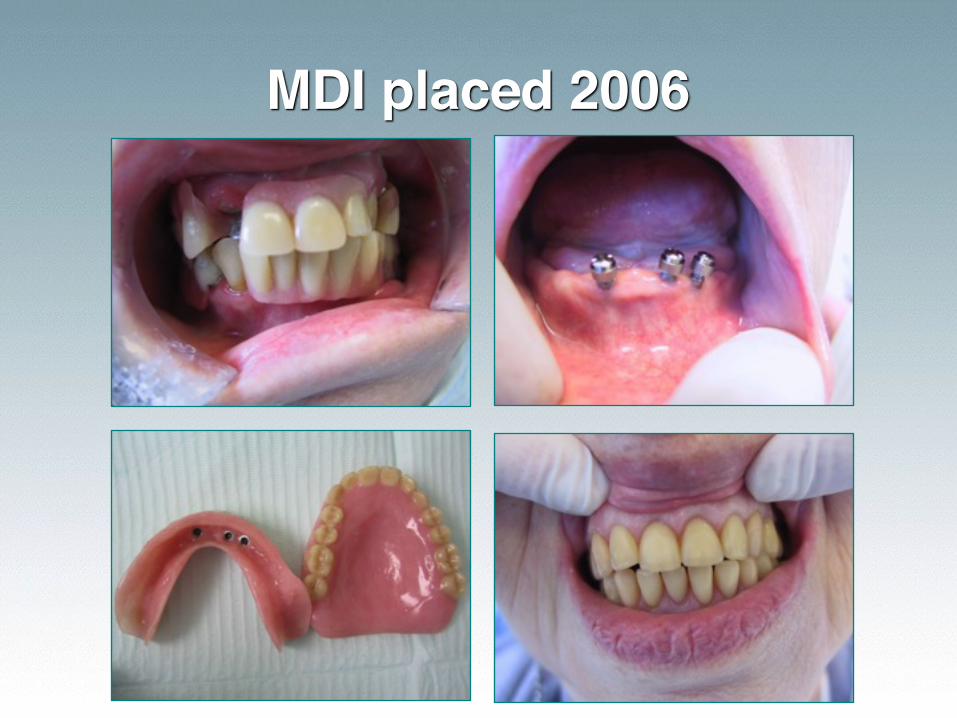
MDI placed 2006
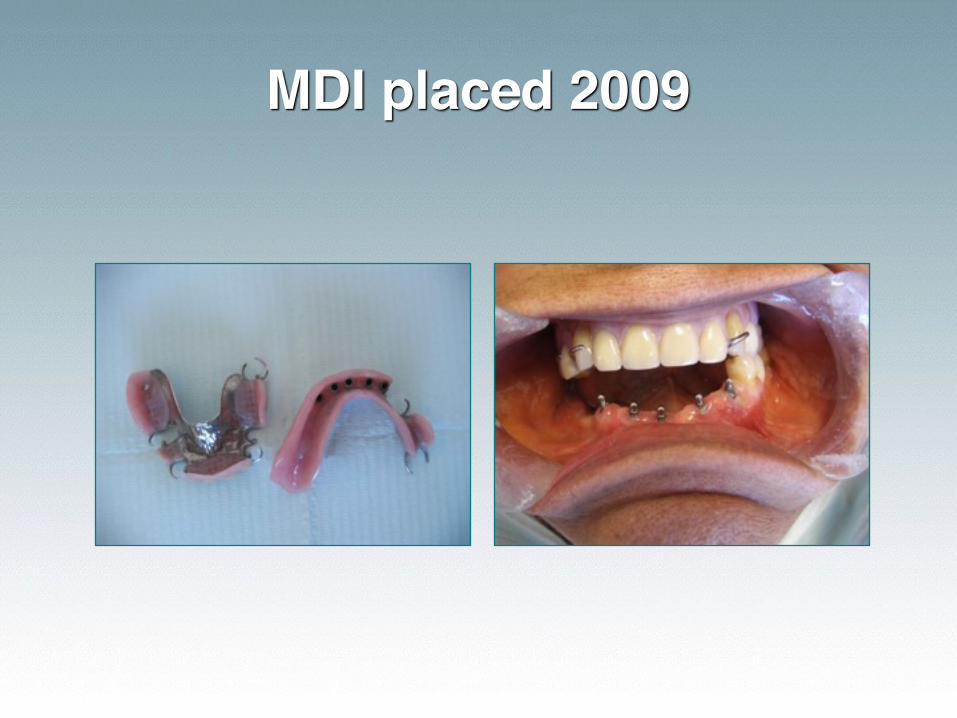
MDI placed 2009
MDI Advantages
• Easy to use with training• Retention is good over time• O-rings are easy to change• As good as any o-ball system
• BAD NEWS: 3M has discontinued product line
What Do Patients Think?
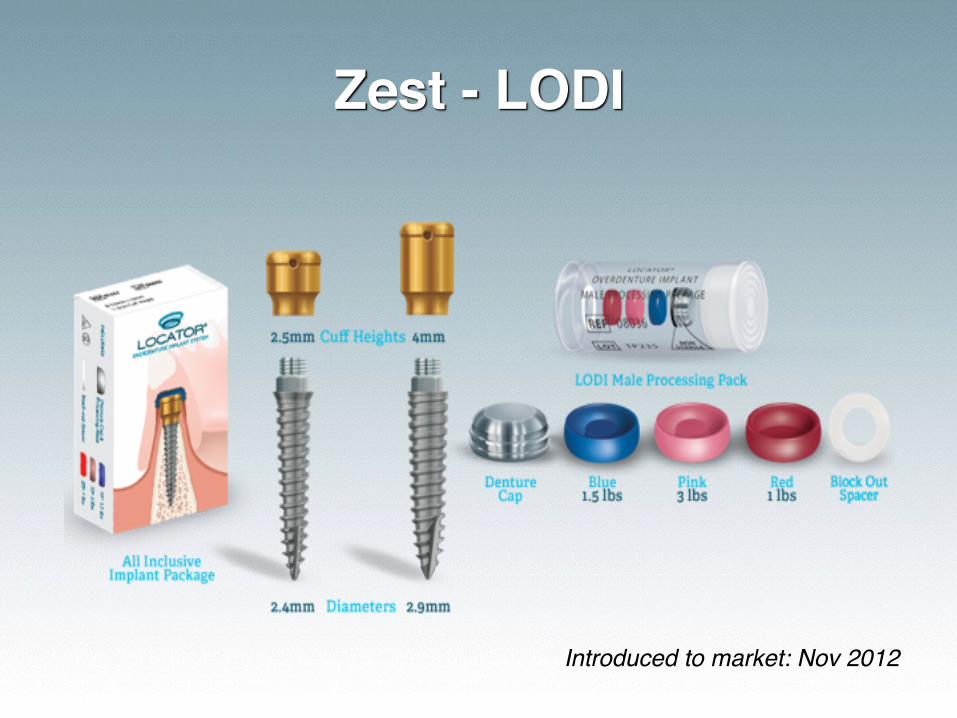
Zest - LODI
Introduced to market: Nov 2012
LODI Advantages
• Easy to use with training• Retentive element is long-lasting • Retentive element is adjustable
• DISADVANTAGE: implant requires 70Ncm of torque for immediate loading

Dentatus Narrow Diameter Implants
• Dentatus ANEW: Screw-retained system • Introduced 1999
• Atlas Denture Comfort with Tuf-Link Silicone • Introduced 2002
• MTI-Monorail Transitional Implant• Introduced 1993
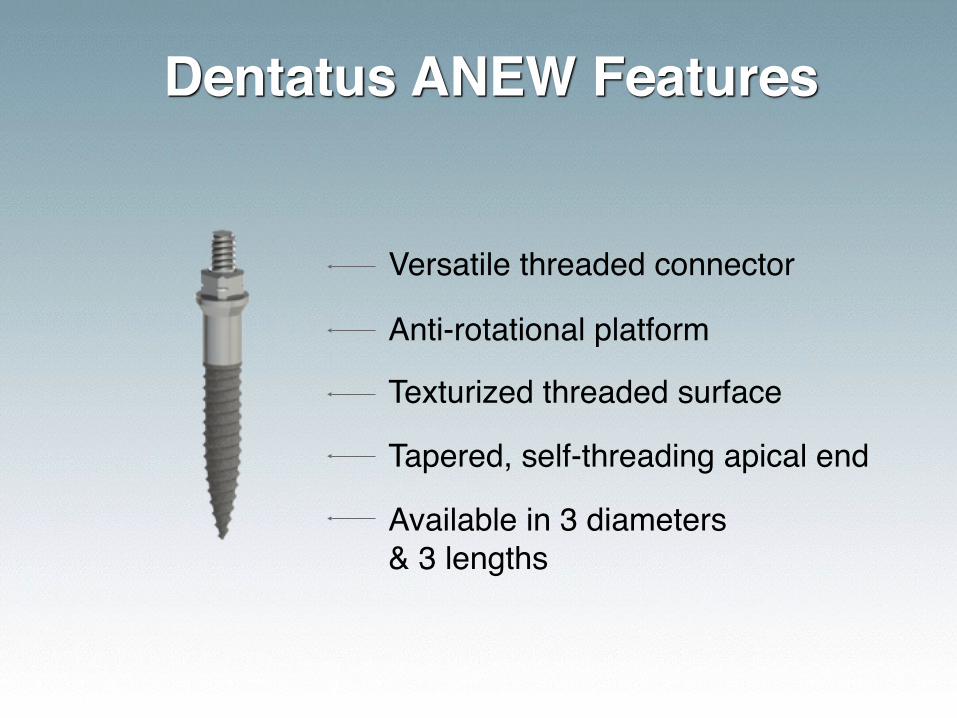
Texturized threaded surface
Anti-rotational platform
Dentatus ANEW Features
Available in 3 diameters & 3 lengths
Versatile threaded connector
Tapered, self-threading apical end
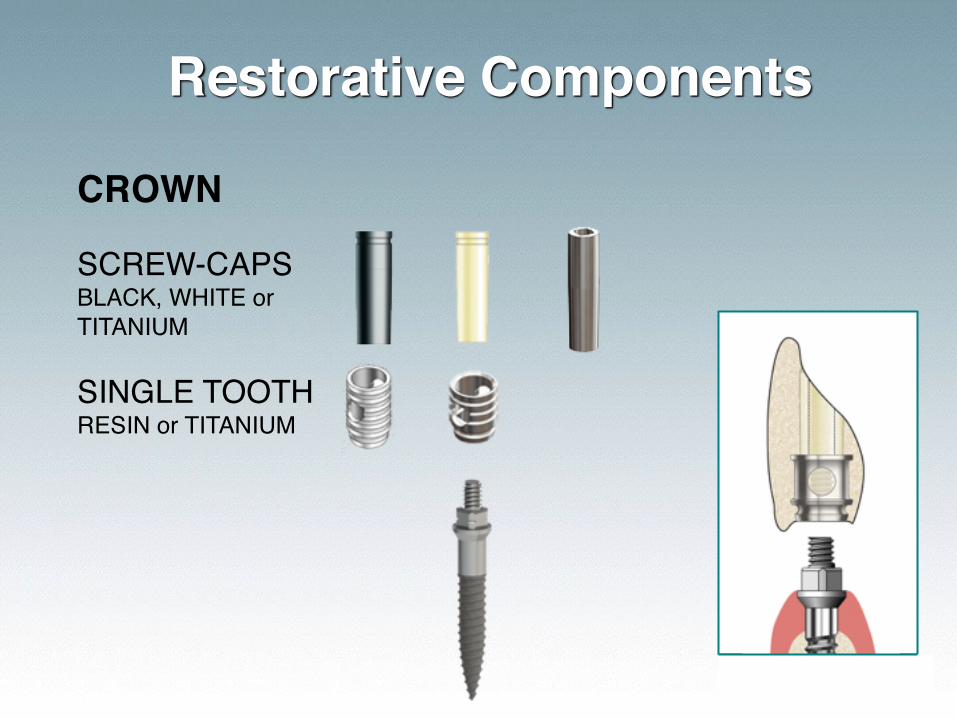
Restorative Components
CROWN
SINGLE TOOTH RESIN or TITANIUM
SCREW-CAPSBLACK, WHITE or TITANIUM
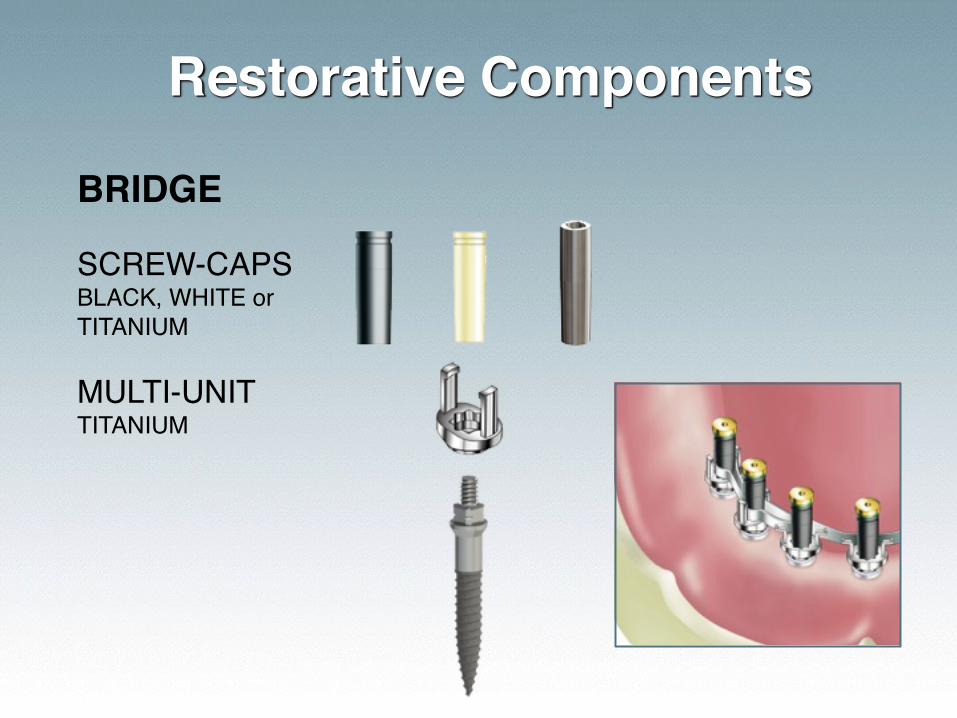
Restorative Components
BRIDGE
MULTI-UNITTITANIUM
SCREW-CAPSBLACK, WHITE or TITANIUM
Restorative Components
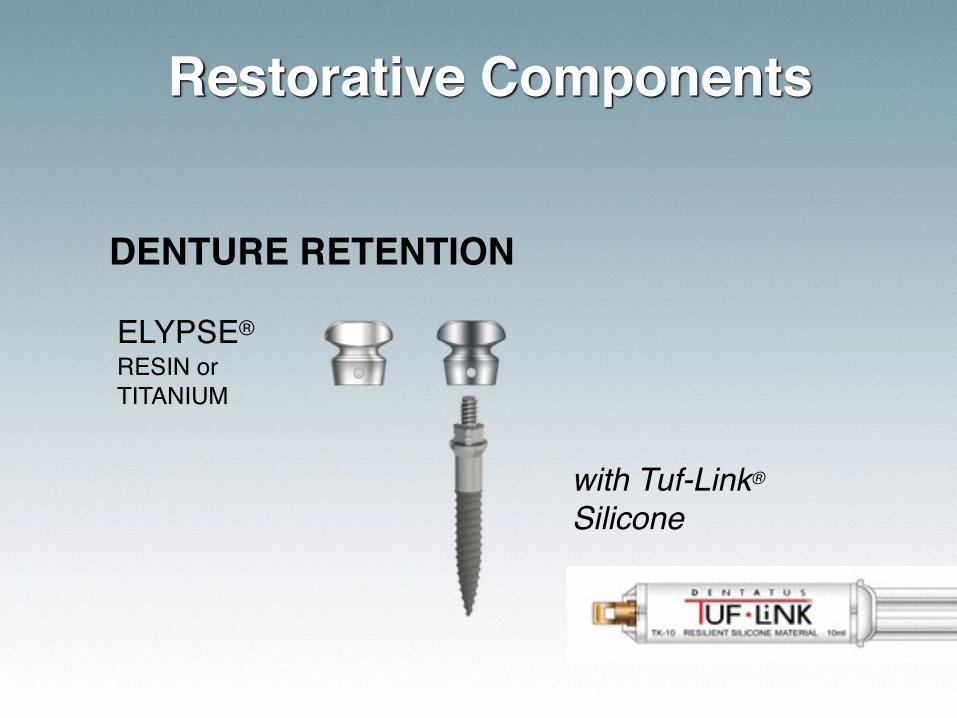
DENTURE RETENTION
ELYPSE® RESIN or TITANIUM
with Tuf-Link®
Silicone
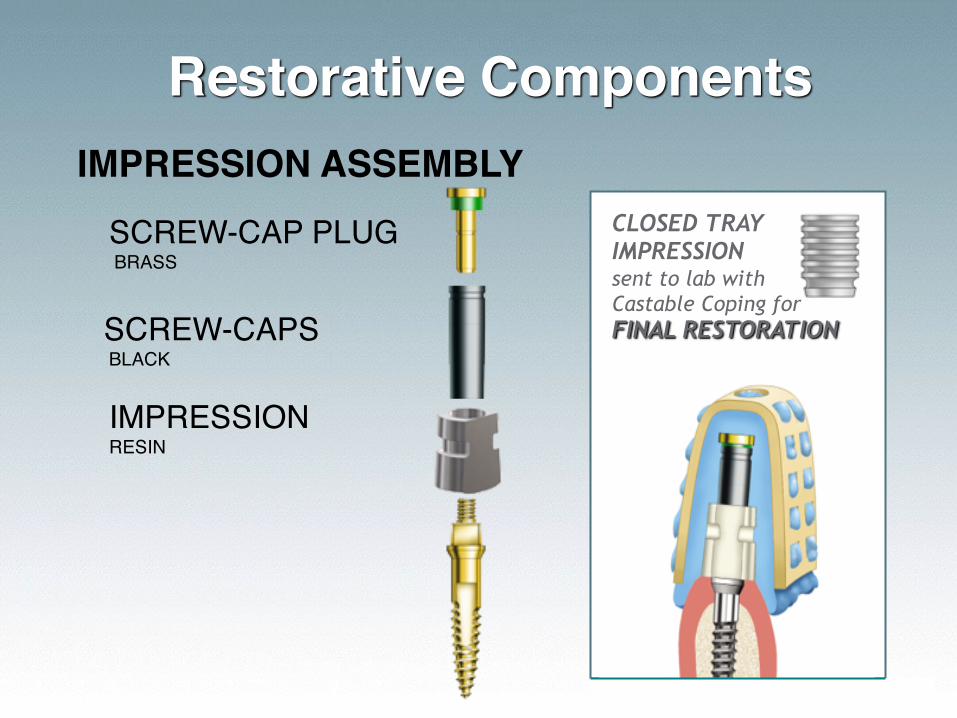
Restorative ComponentsIMPRESSION ASSEMBLY
IMPRESSION RESIN
SCREW-CAPS BLACK
SCREW-CAP PLUG BRASS
CLOSED TRAY IMPRESSION sent to lab with Castable Coping for FINAL RESTORATION
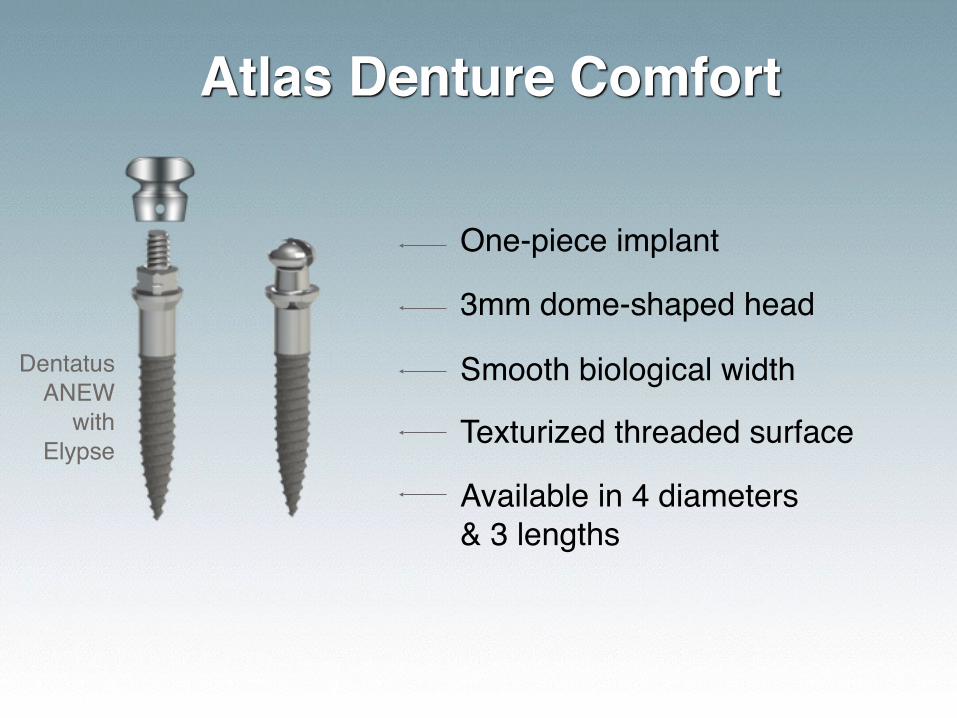
Texturized threaded surface
Smooth biological width
Atlas Denture Comfort
Available in 4 diameters & 3 lengths
3mm dome-shaped head
One-piece implant
Dentatus ANEW
with Elypse

What Do Patients Think?

The King & His DenturesExcellent denture techniques are a MUST in attachment dentistry
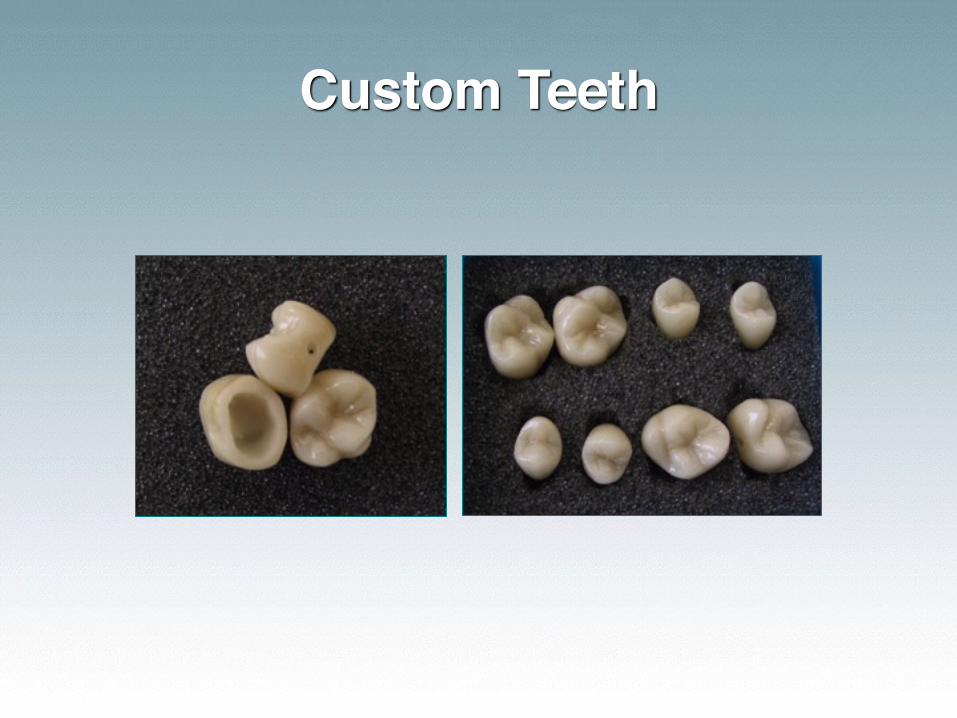
Custom Teeth
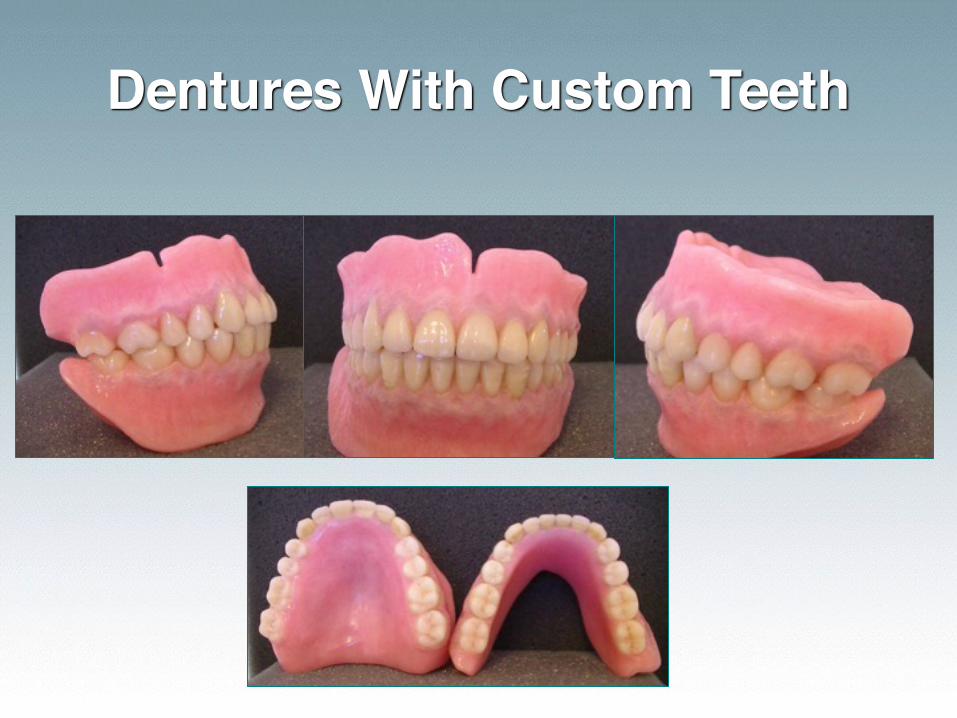
Dentures With Custom Teeth
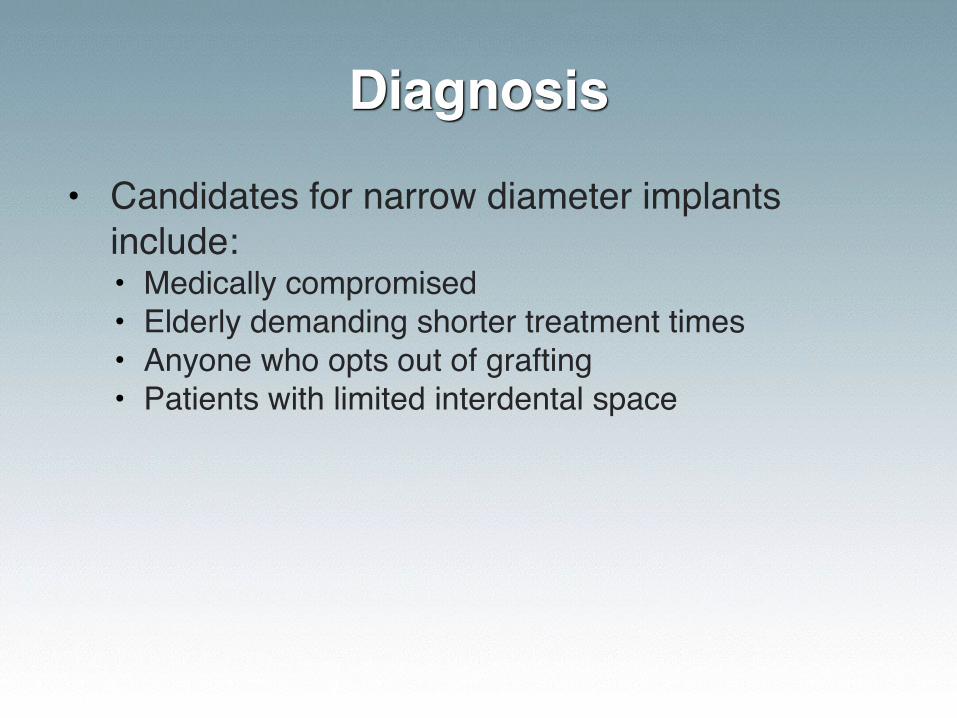
Diagnosis
• Candidates for narrow diameter implants include:• Medically compromised• Elderly demanding shorter treatment times• Anyone who opts out of grafting• Patients with limited interdental space
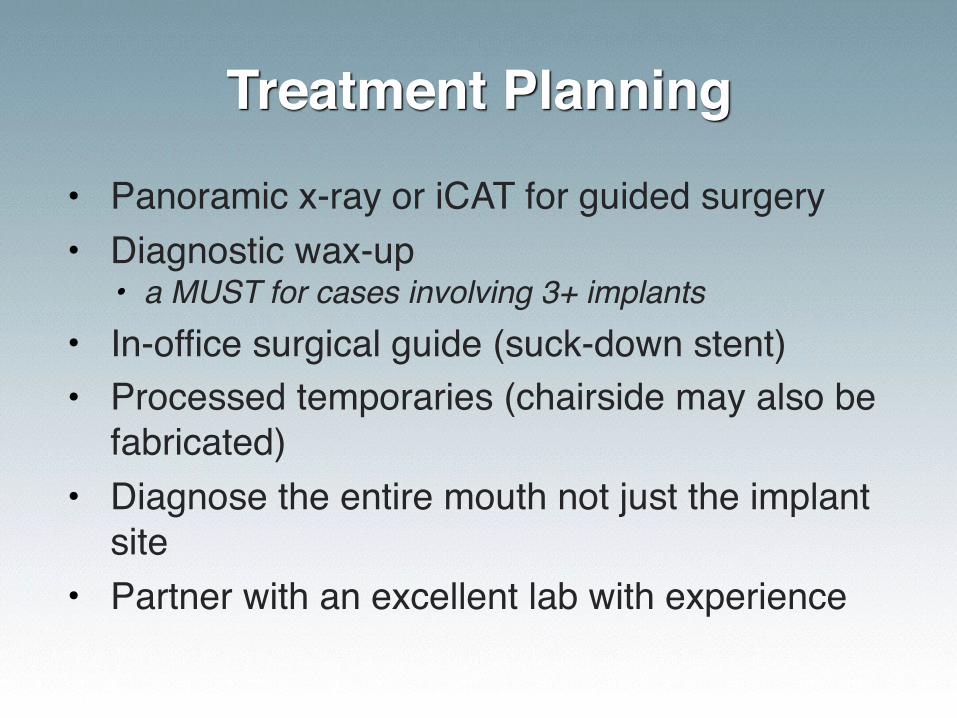
Treatment Planning
• Panoramic x-ray or iCAT for guided surgery• Diagnostic wax-up
• a MUST for cases involving 3+ implants• In-office surgical guide (suck-down stent)• Processed temporaries (chairside may also be
fabricated)• Diagnose the entire mouth not just the implant
site• Partner with an excellent lab with experience
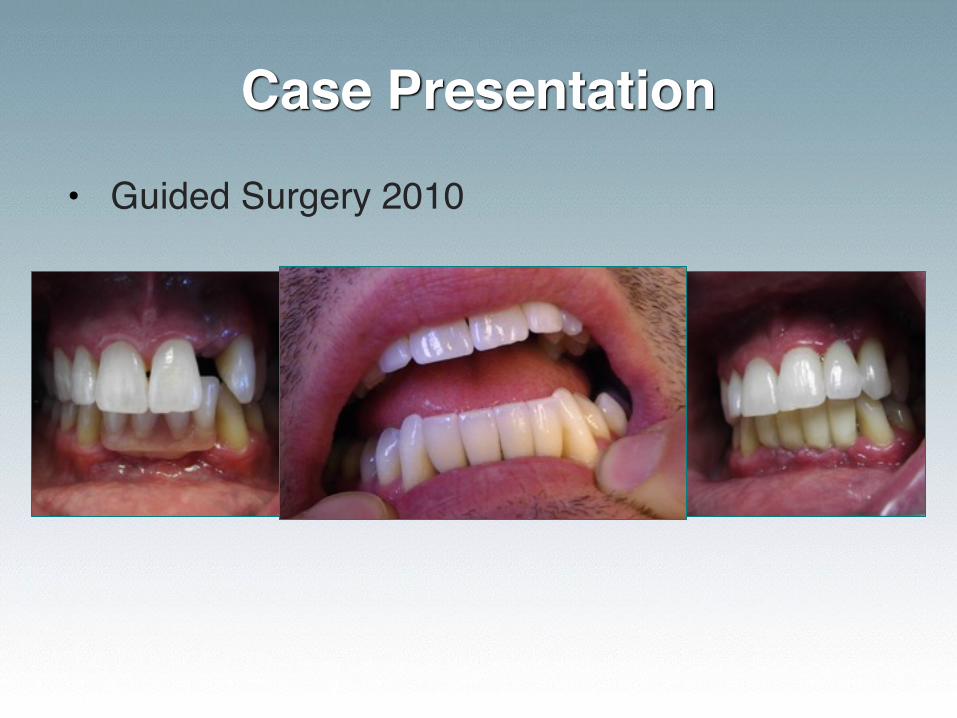
Case Presentation
• Guided Surgery 2010
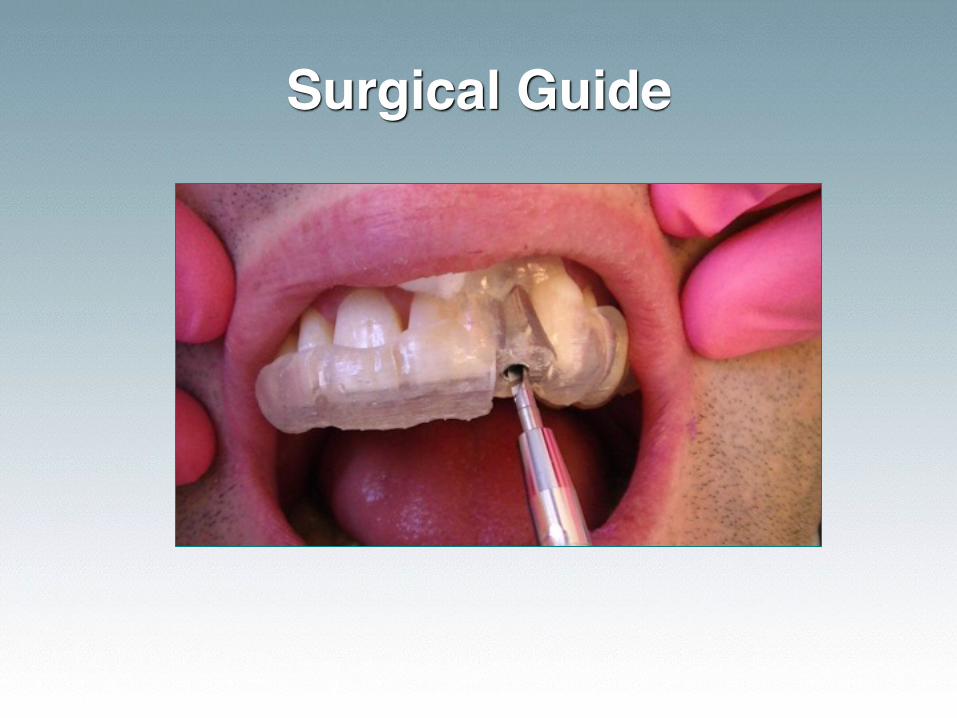
Surgical Guide
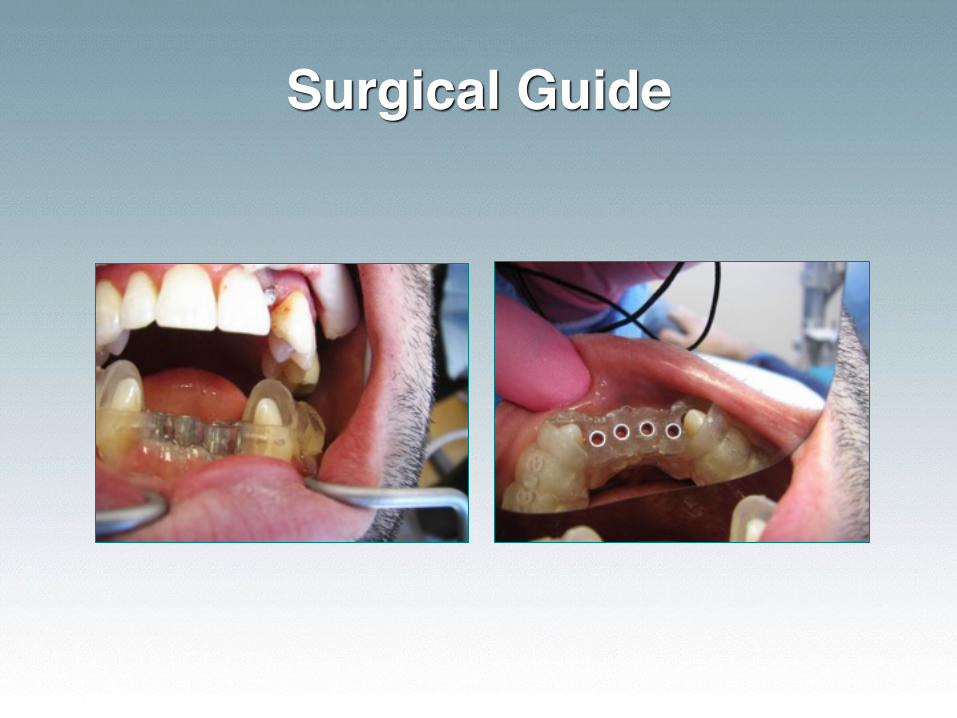
Surgical Guide
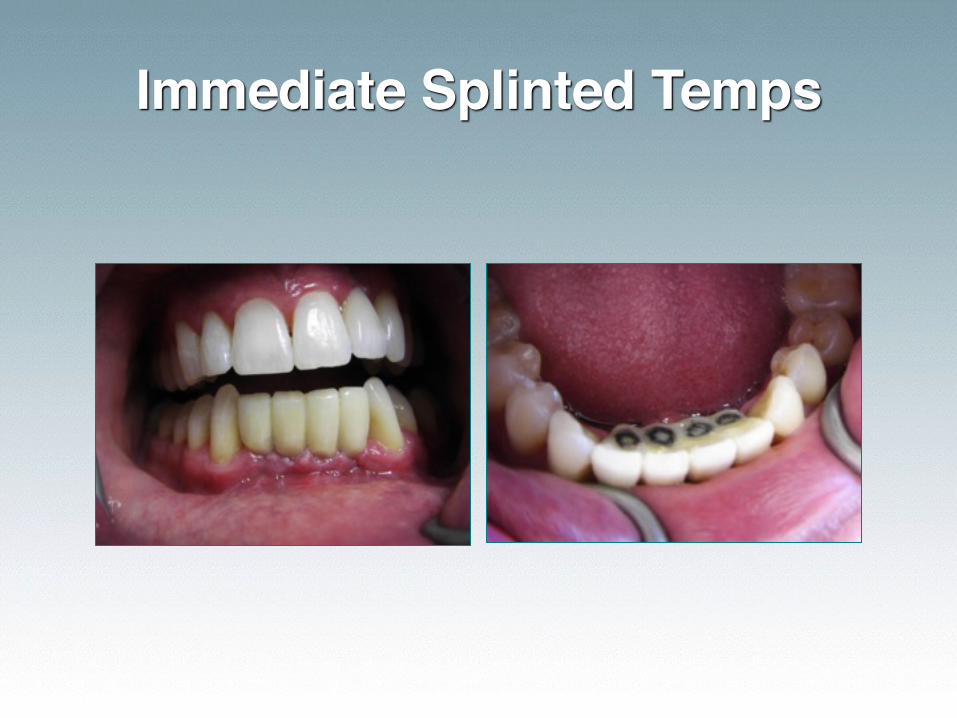
Immediate Splinted Temps
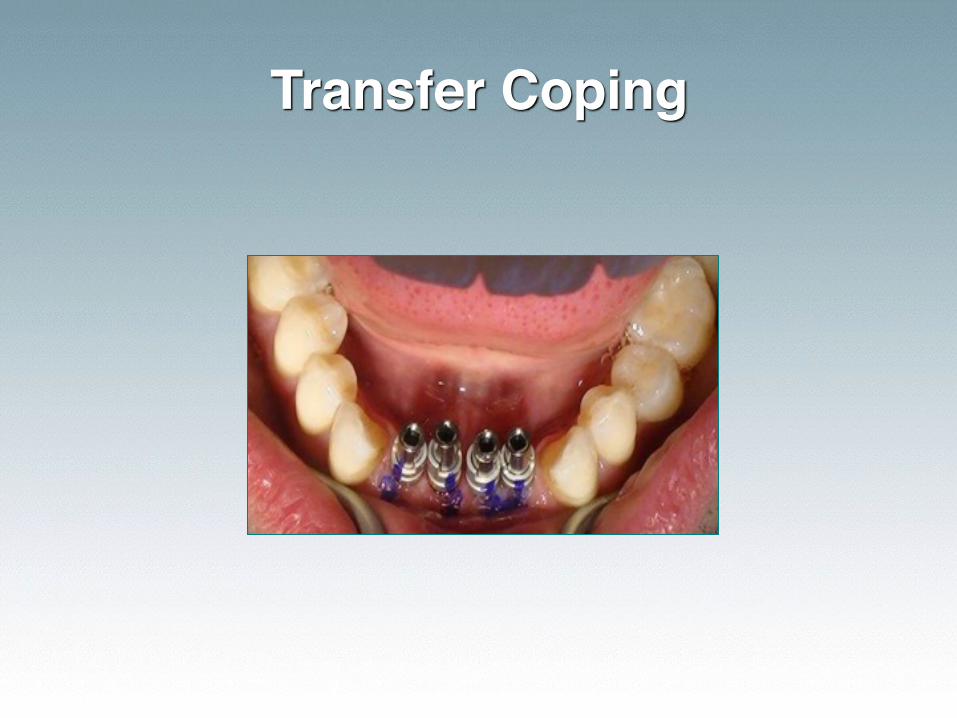
Transfer Coping
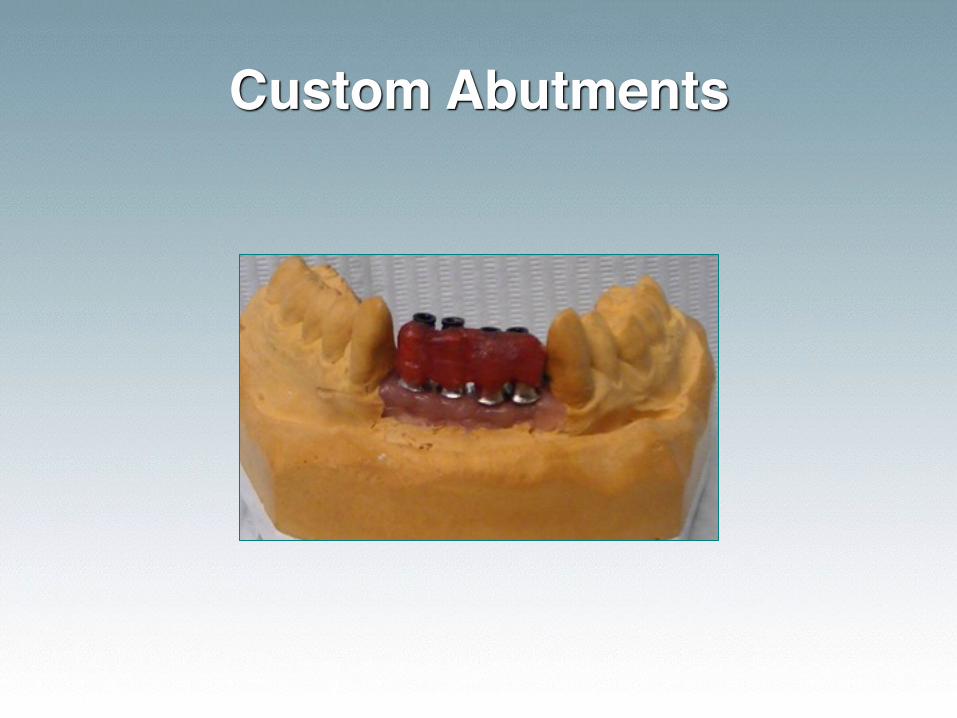
Custom Abutments
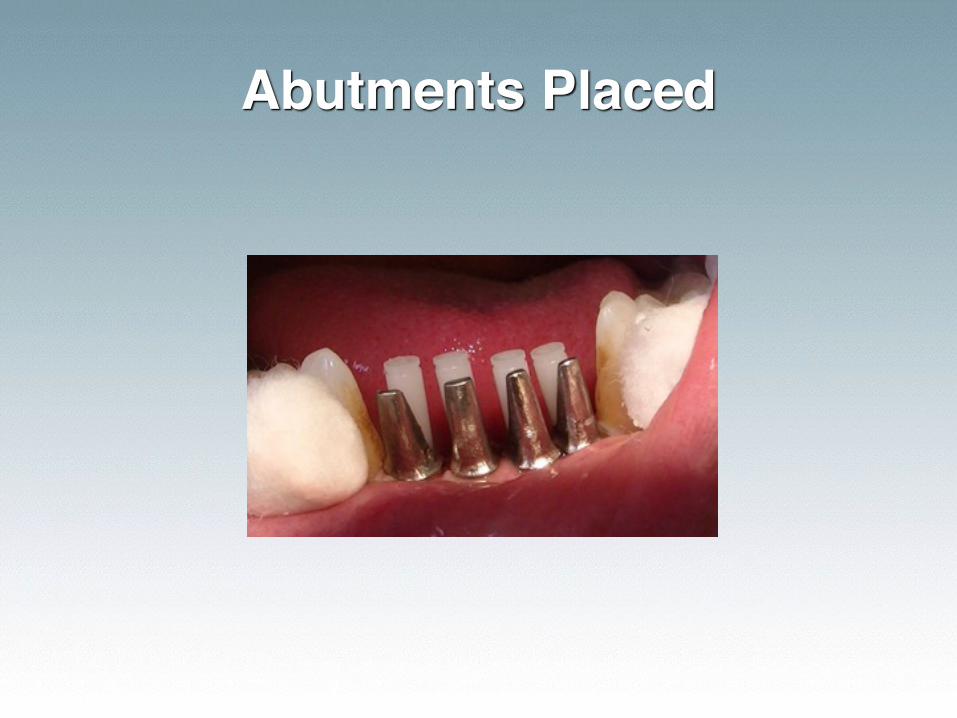
Abutments Placed
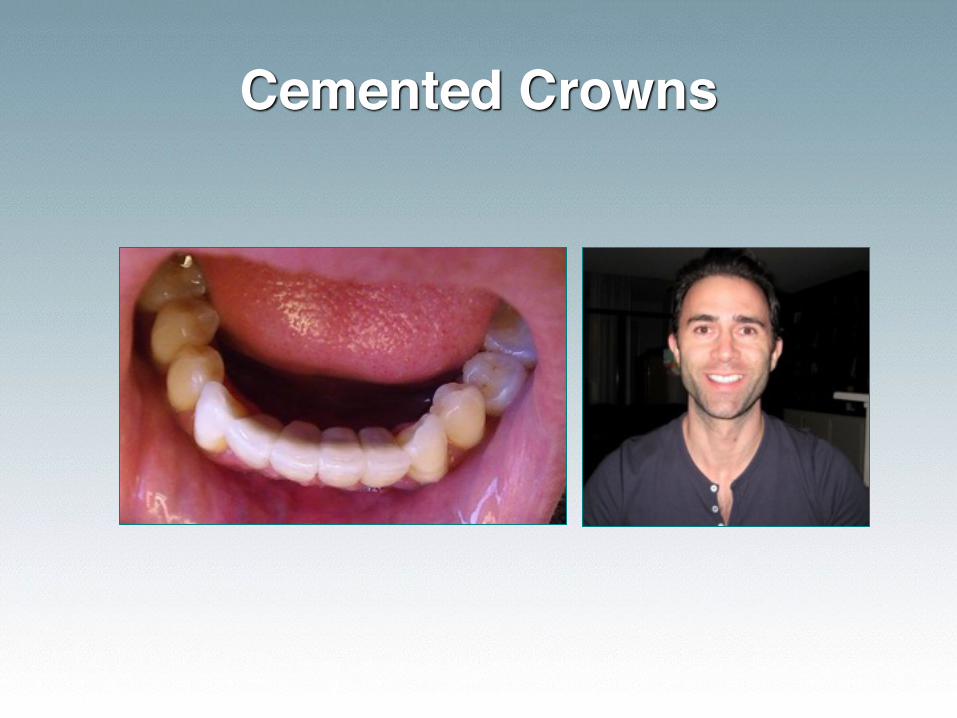
Cemented Crowns
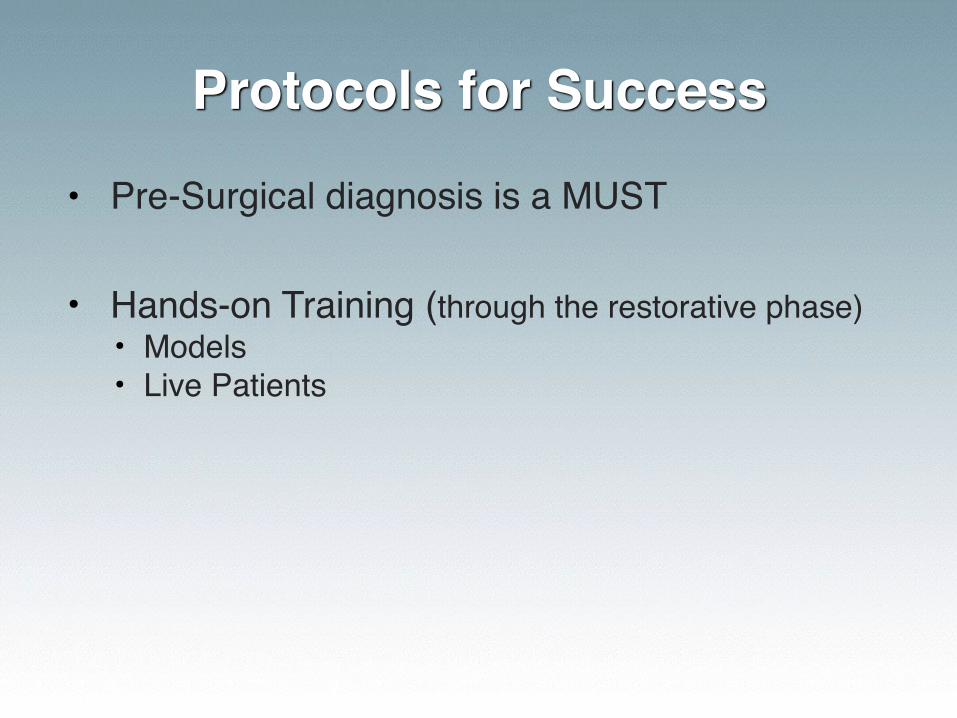
Protocols for Success
• Pre-Surgical diagnosis is a MUST
• Hands-on Training (through the restorative phase)• Models• Live Patients
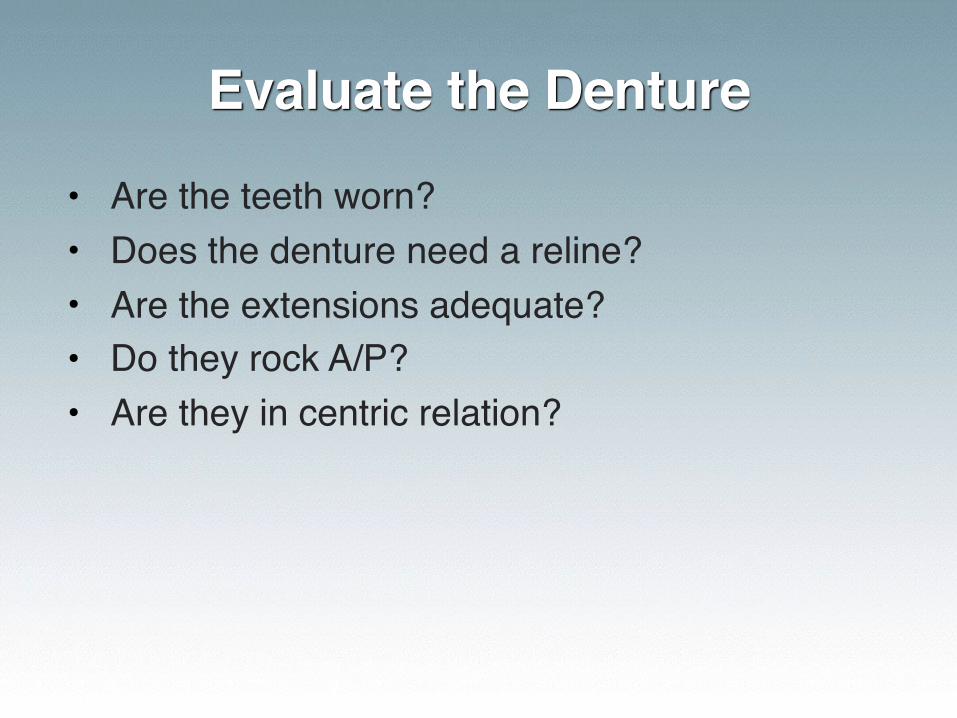
Evaluate the Denture
• Are the teeth worn?• Does the denture need a reline?• Are the extensions adequate?• Do they rock A/P?• Are they in centric relation?
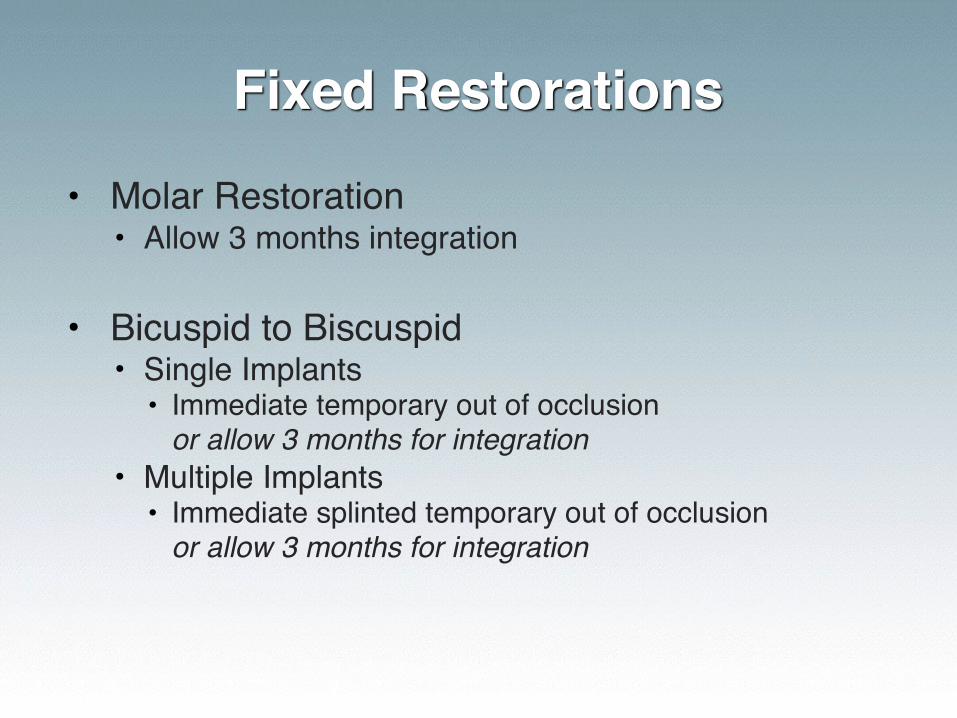
Fixed Restorations
• Molar Restoration• Allow 3 months integration
• Bicuspid to Biscuspid• Single Implants
• Immediate temporary out of occlusion or allow 3 months for integration
• Multiple Implants• Immediate splinted temporary out of occlusion
or allow 3 months for integration

Overdentures
• Chlorhexidine rinse for 1 min• Check that any necessary premeds have been
taken
• Anterior mandibular implants may be loaded immediately if you achieve 20Ncm torque for o-ball & Elypse heads• For LODI implants, 70Ncm torque
• If torque is not reached a soft liner should be used for 3 months to allow integration.
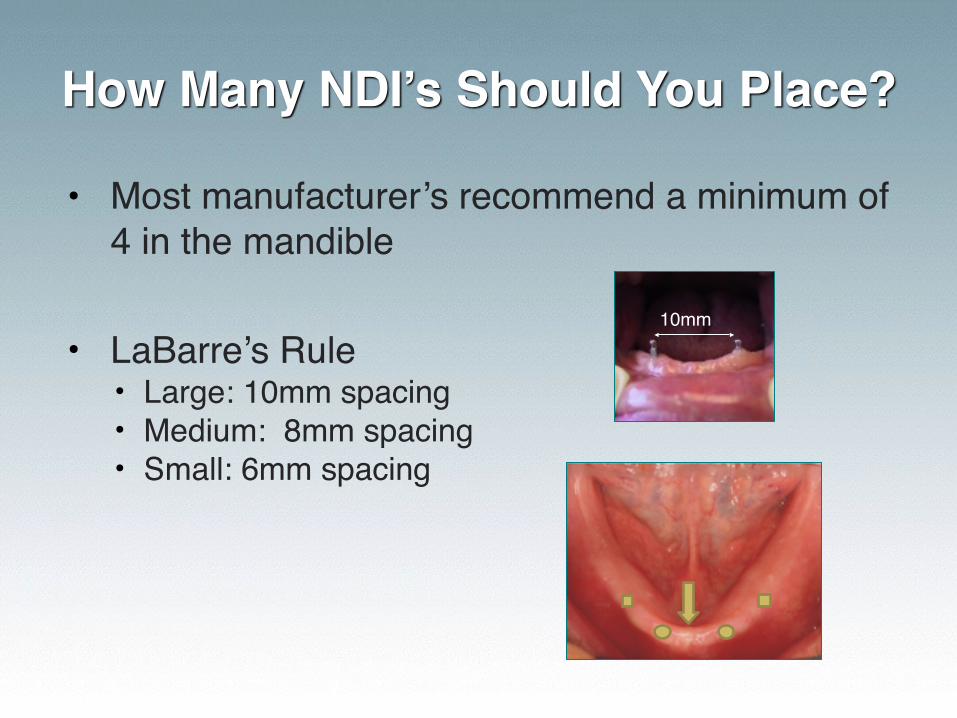
How Many NDI’s Should You Place?
• Most manufacturer’s recommend a minimum of 4 in the mandible
• LaBarre’s Rule• Large: 10mm spacing• Medium: 8mm spacing• Small: 6mm spacing
10mm
“The limits of the impossible can only be defined by going beyond them, into the impossible.”
-A C Clark

Which NDI Do I Choose?
Q 3M MDI – discontinuing product
Q Zest LODI – only for removable overdentures
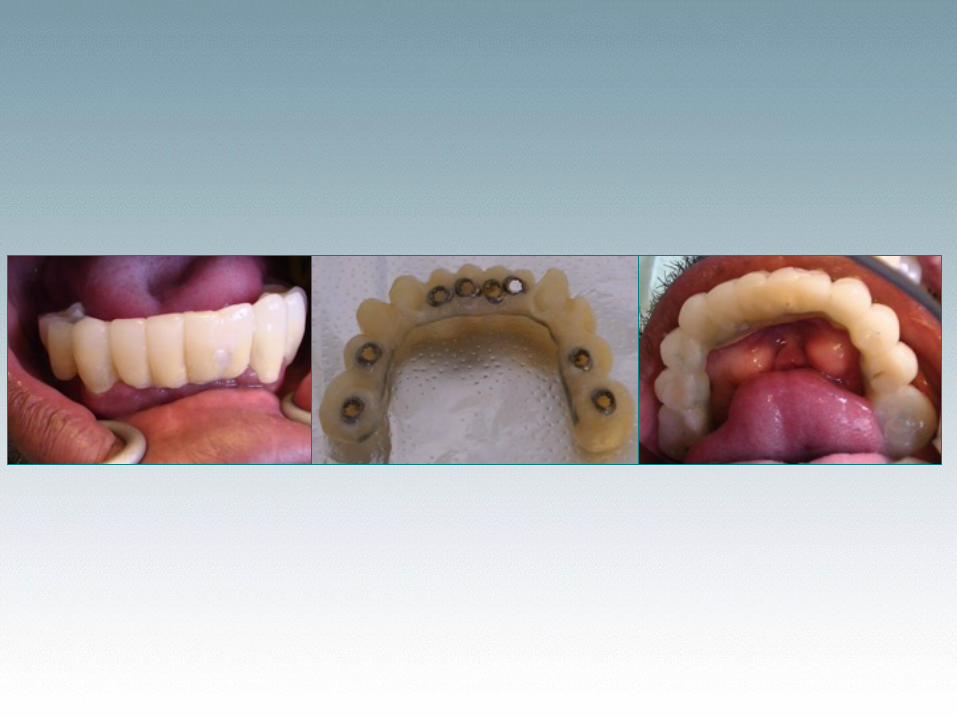
☑ Dentatus ANEW – interchangeable heads for single crown, bridge or overdenture
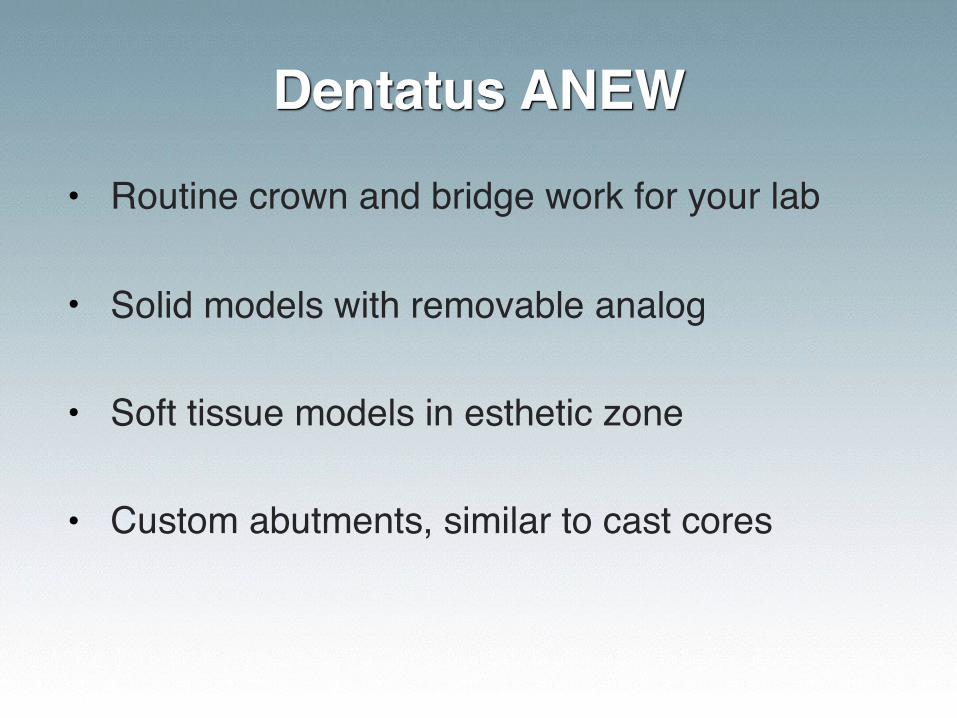
Dentatus ANEW
• Routine crown and bridge work for your lab
• Solid models with removable analog
• Soft tissue models in esthetic zone
• Custom abutments, similar to cast cores
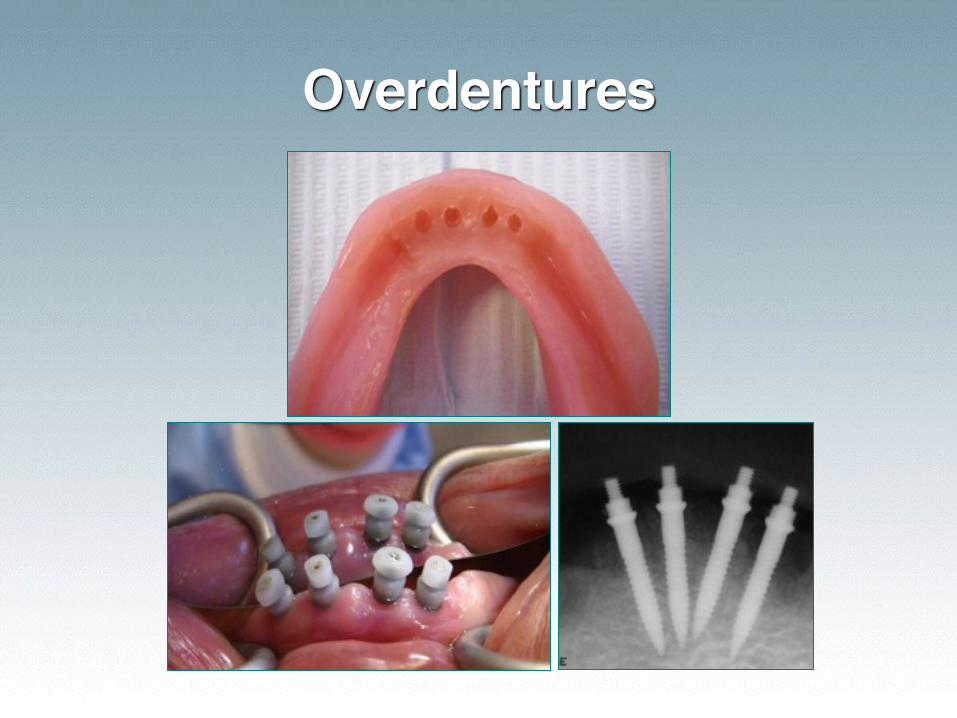
Overdentures

Bridge Work, 2008
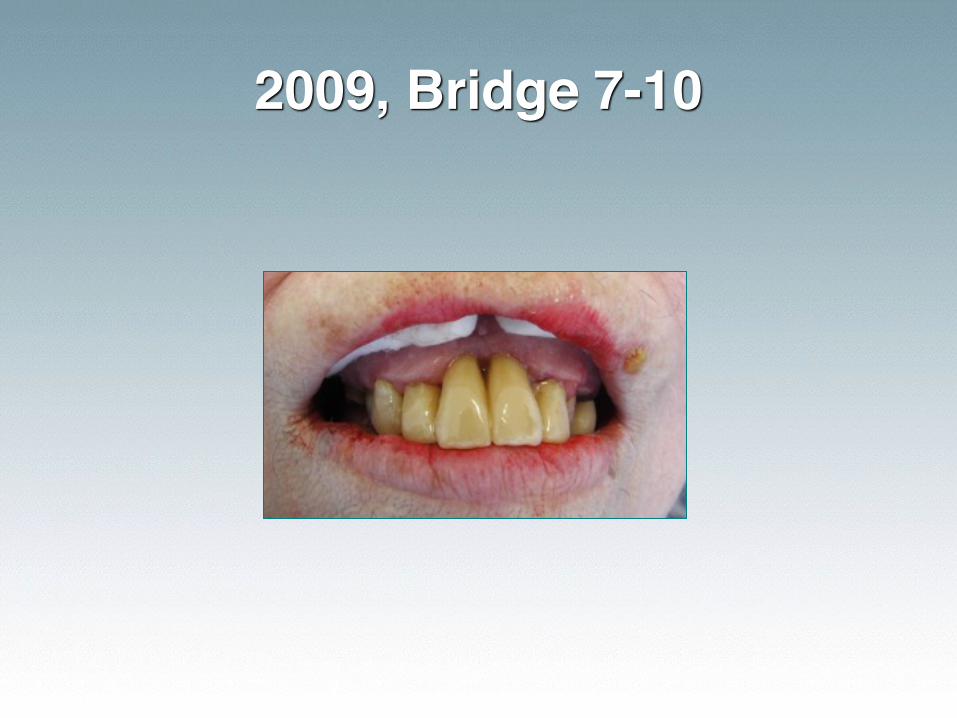
2009, Bridge 7-10
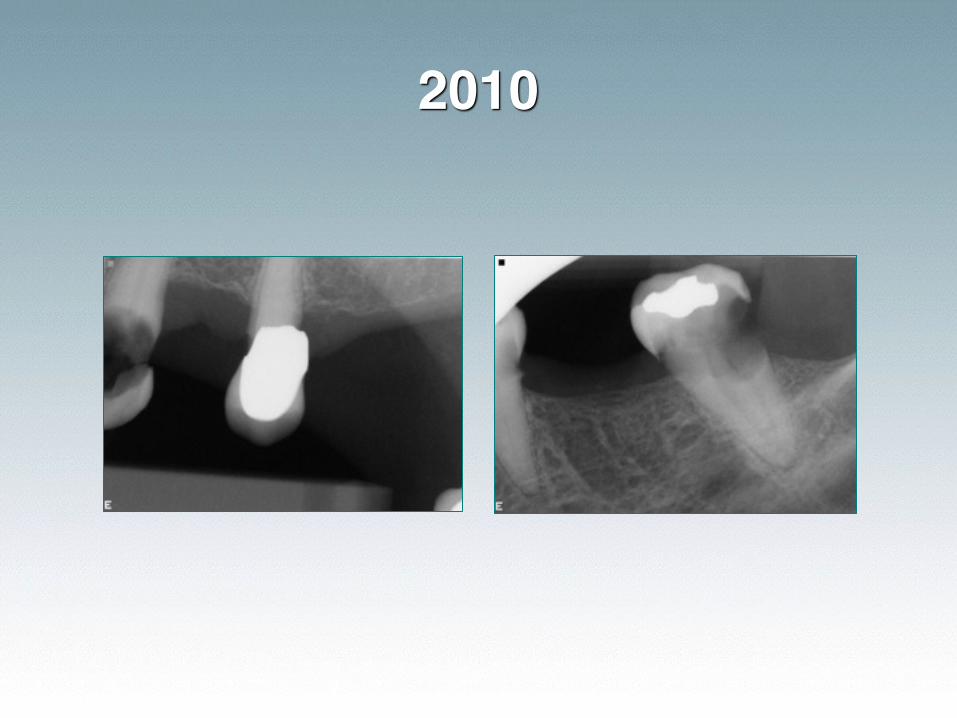
2010
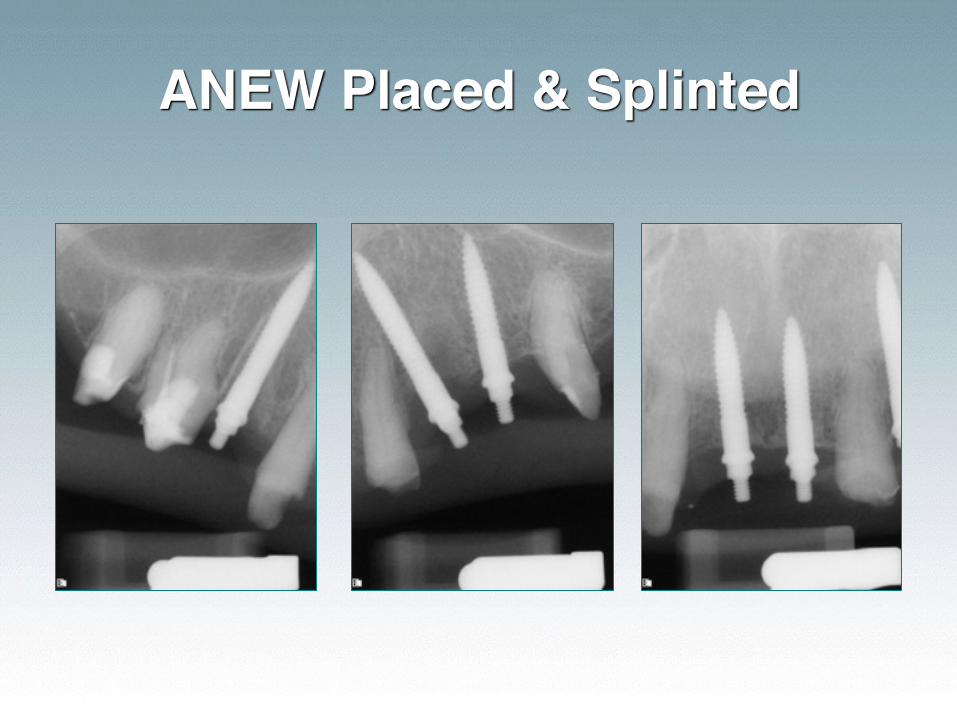
ANEW Placed & Splinted
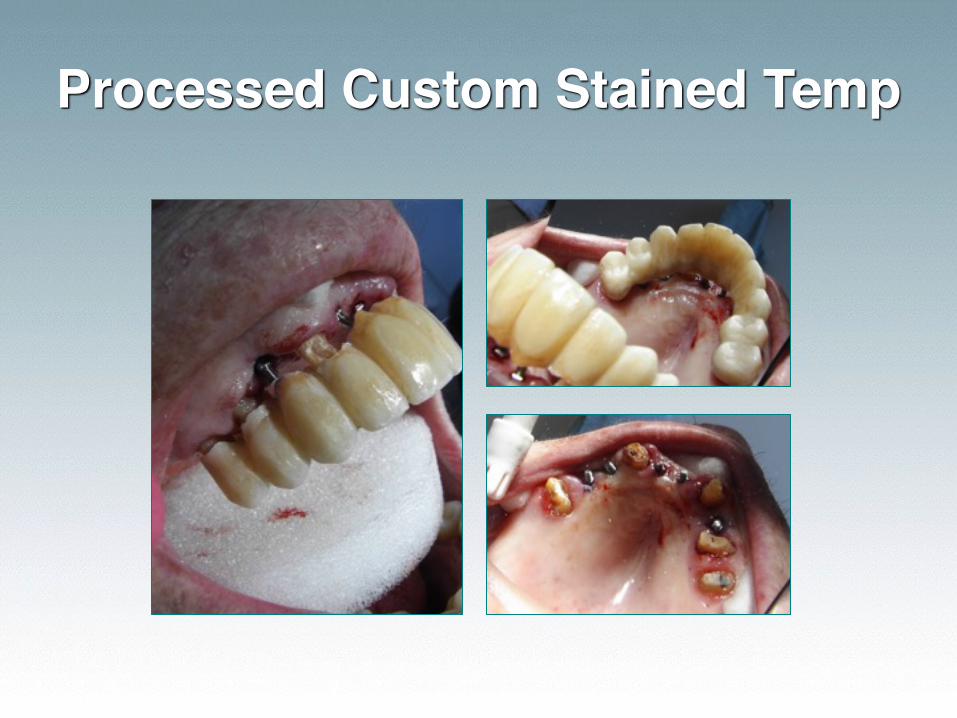
Processed Custom Stained Temp
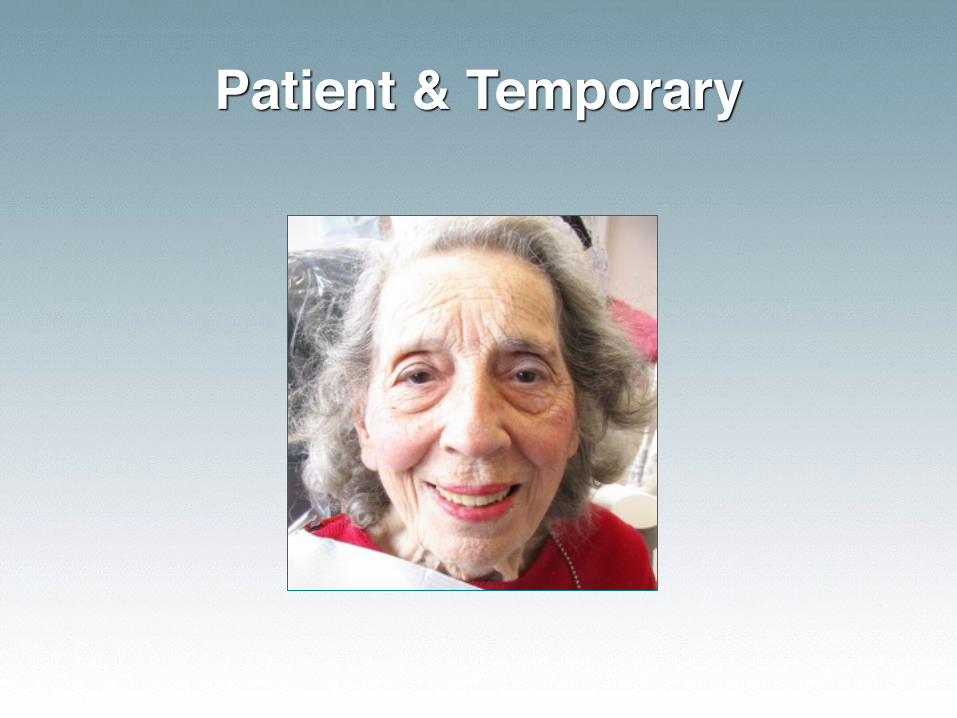
Patient & Temporary
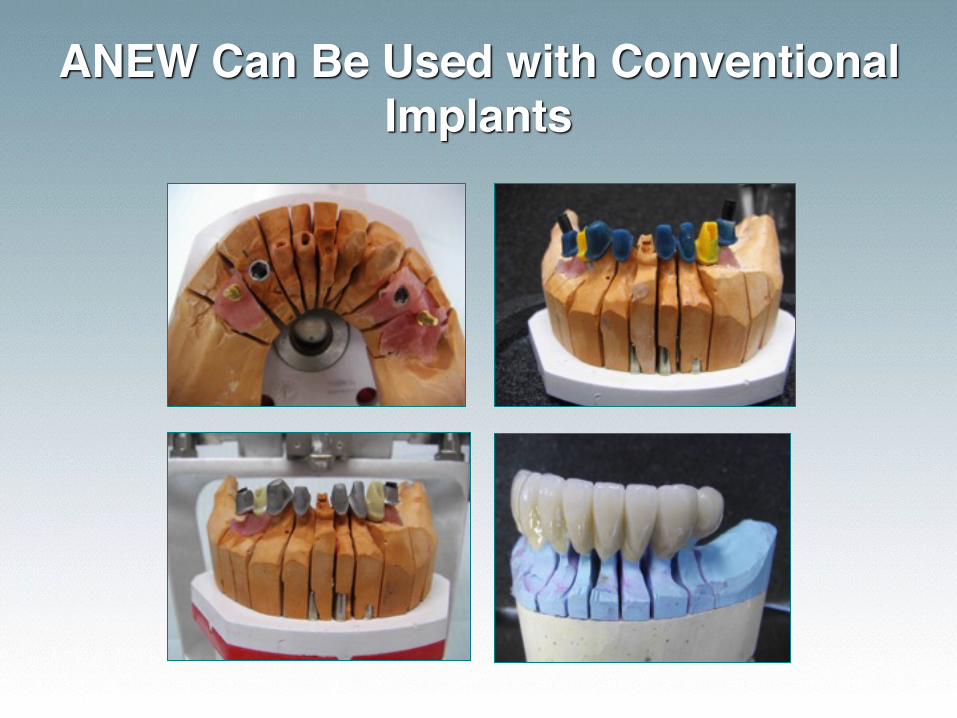
ANEW Can Be Used with Conventional Implants
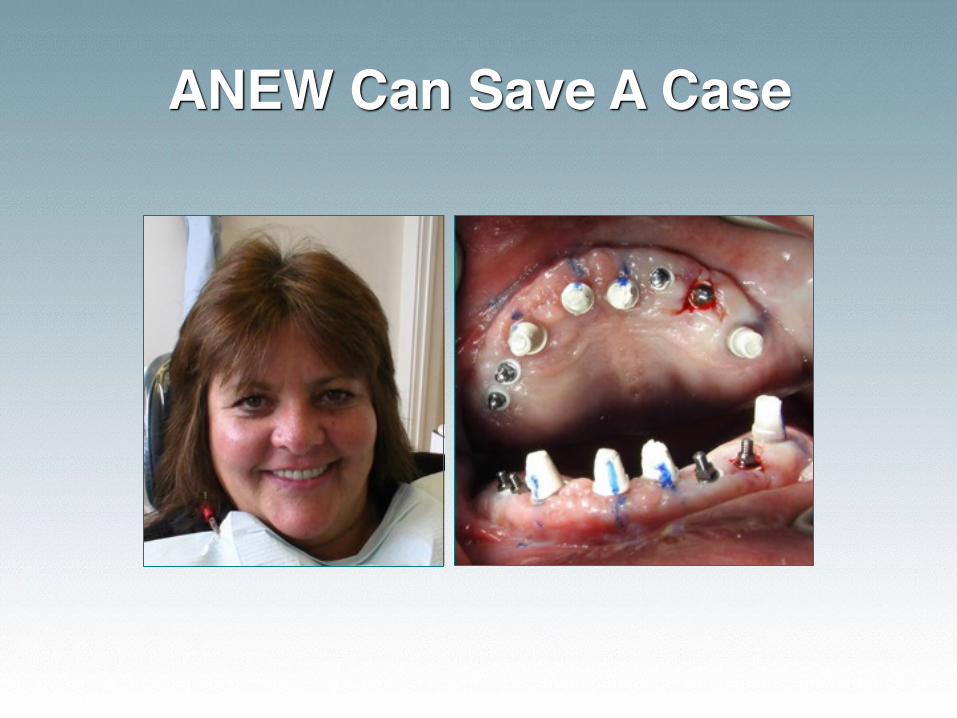
ANEW Can Save A Case
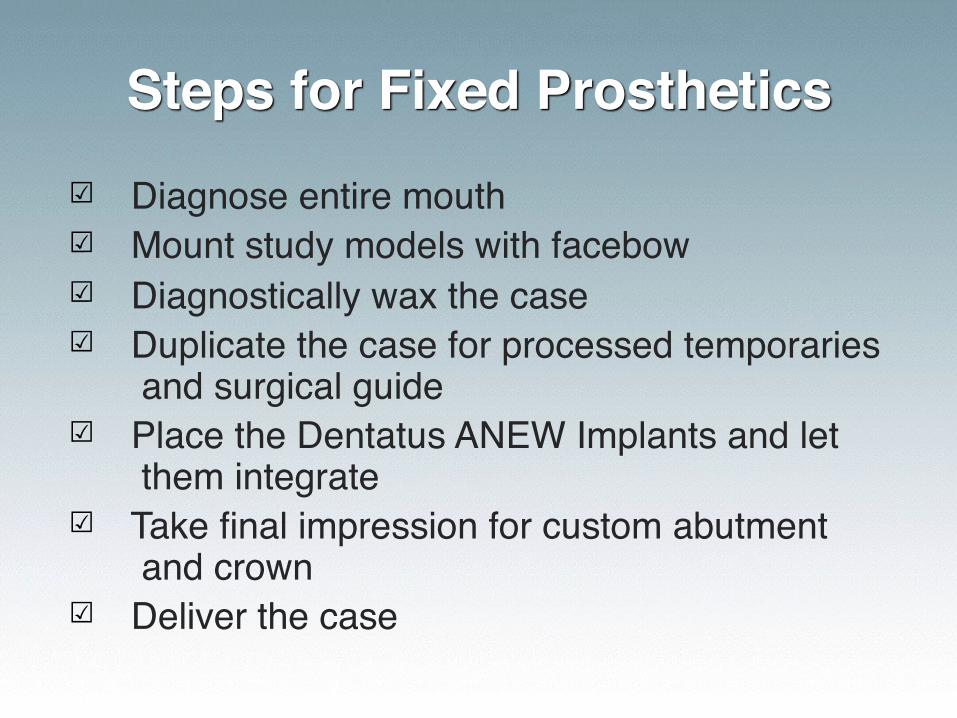
Steps for Fixed Prosthetics☑ Diagnose entire mouth☑ Mount study models with facebow☑ Diagnostically wax the case☑ Duplicate the case for processed temporaries
and surgical guide☑ Place the Dentatus ANEW Implants and let
them integrate☑ Take final impression for custom abutment
and crown☑ Deliver the case
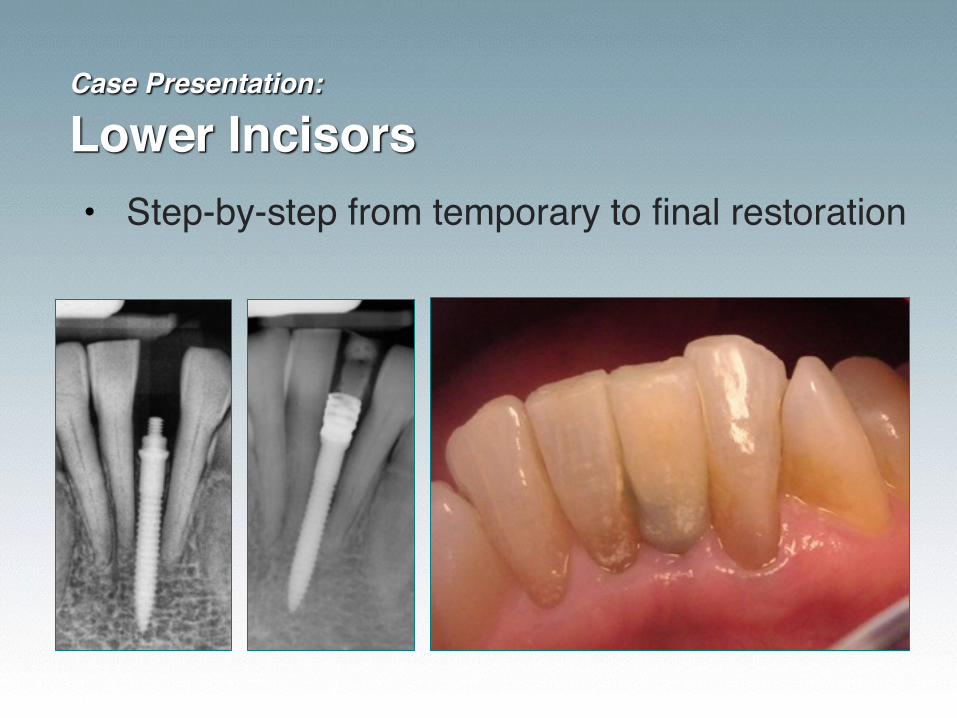
Case Presentation: Lower Incisors• Step-by-step from temporary to final restoration
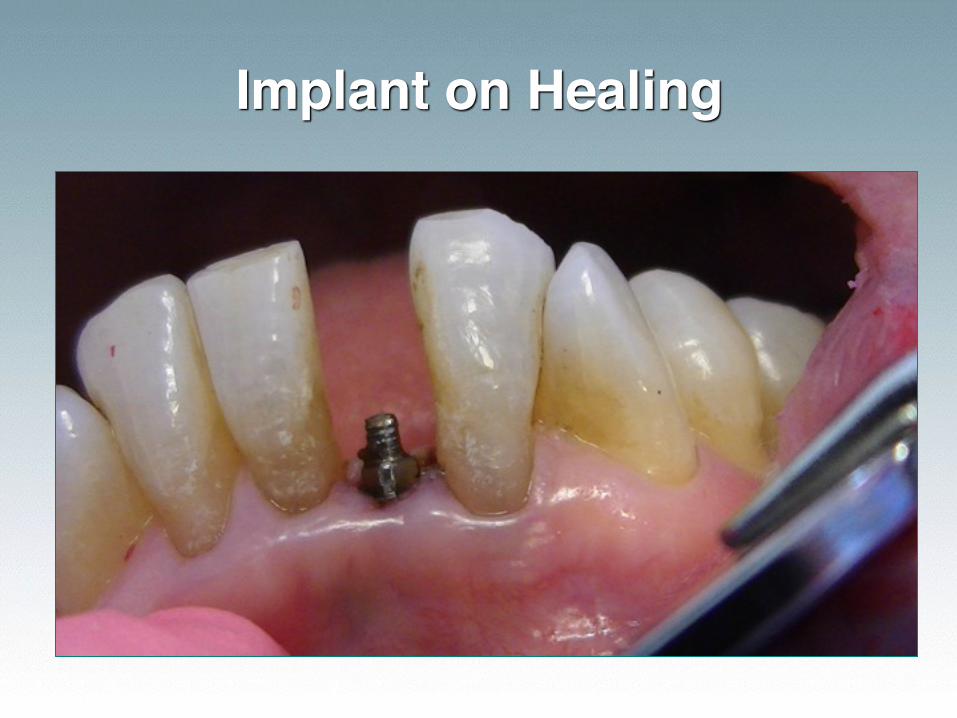
Implant on Healing
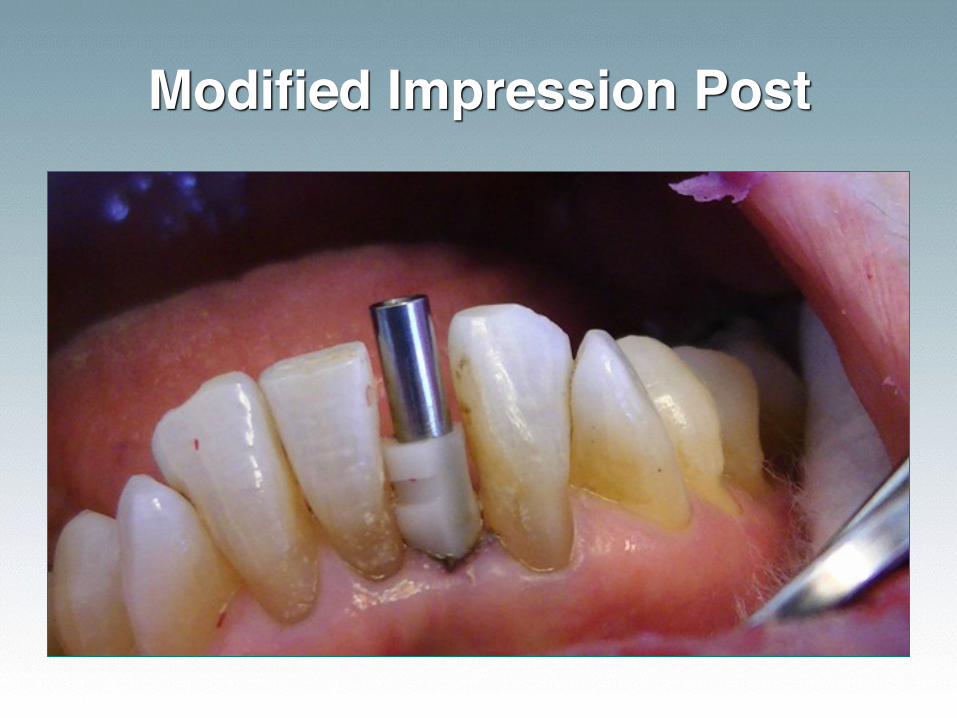
Modified Impression Post
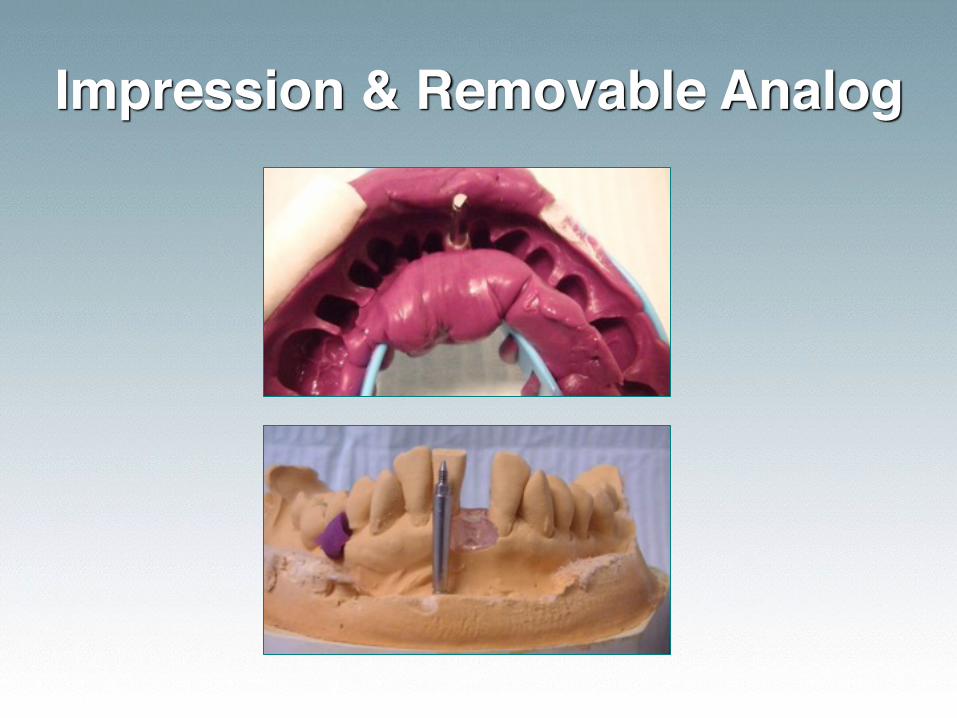
Impression & Removable Analog
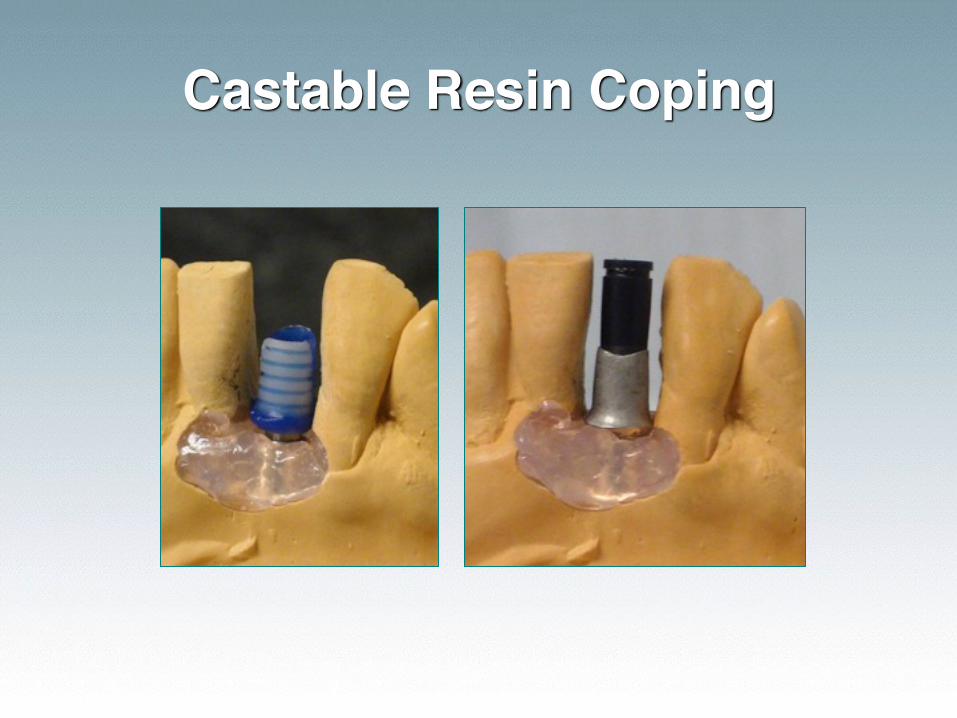
Castable Resin Coping
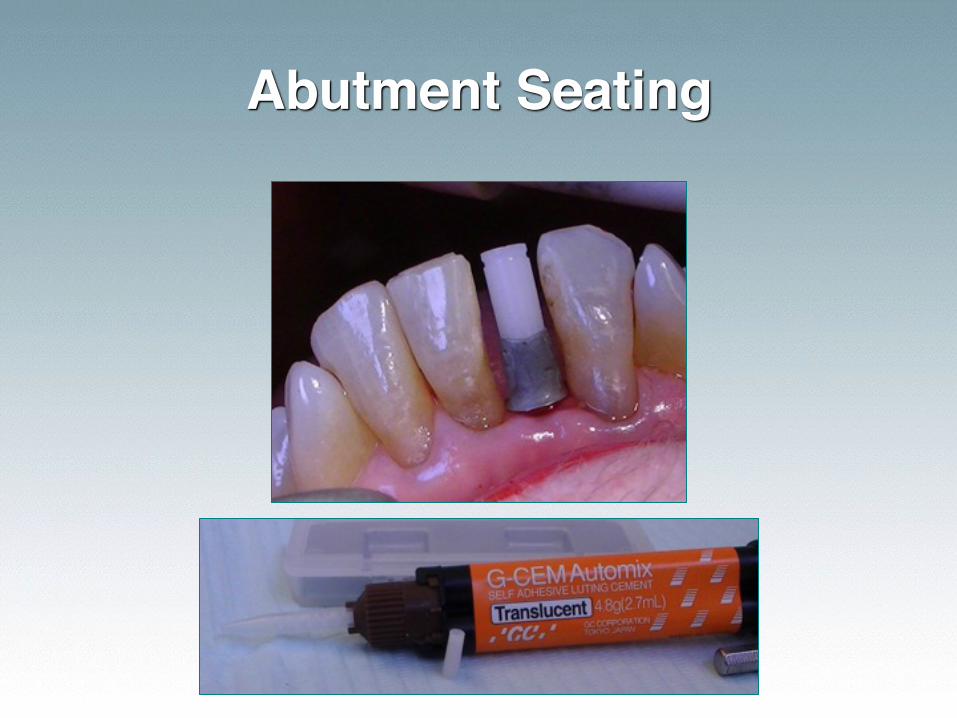
Abutment Seating
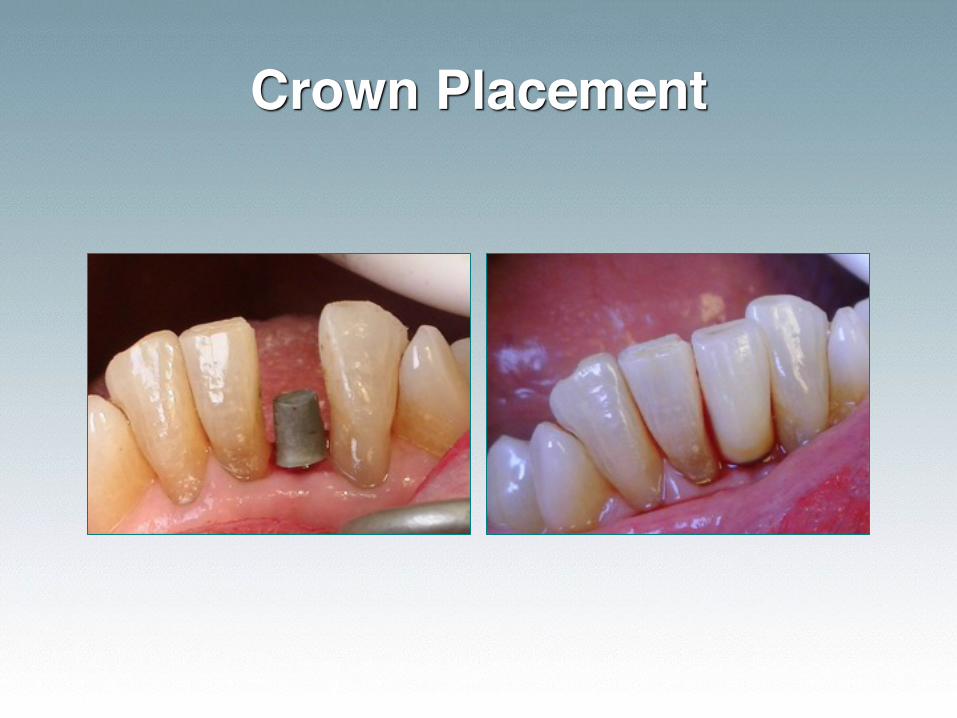
Crown Placement

Case Presentation: Elderly Patients• 91 y.o. with natural dentition
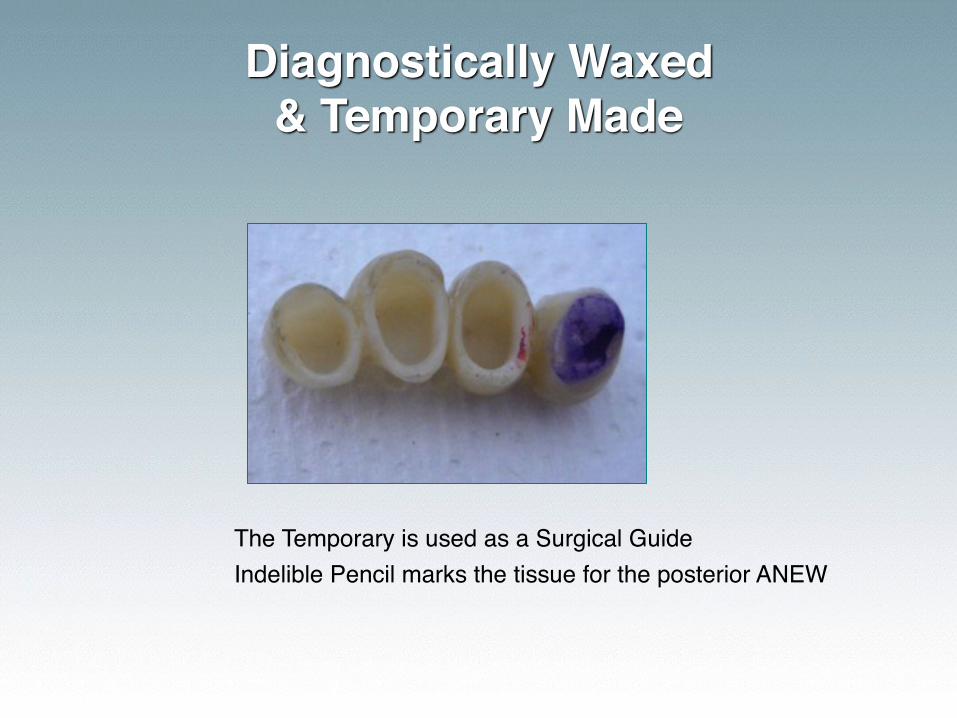
Diagnostically Waxed & Temporary Made
The Temporary is used as a Surgical GuideIndelible Pencil marks the tissue for the posterior ANEW
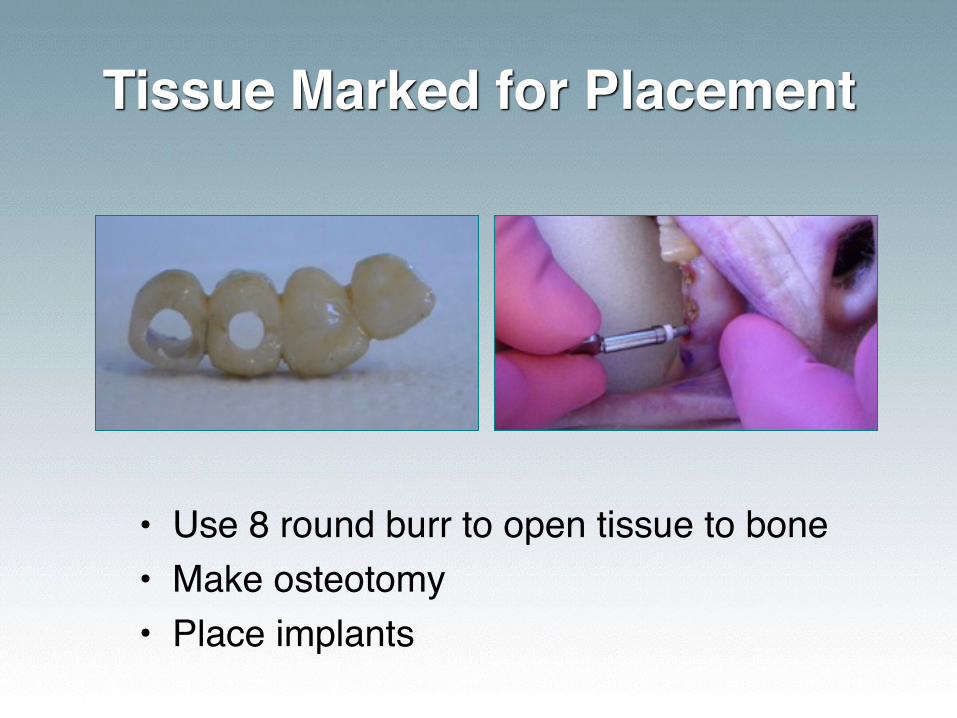
Tissue Marked for Placement
• Use 8 round burr to open tissue to bone• Make osteotomy• Place implants
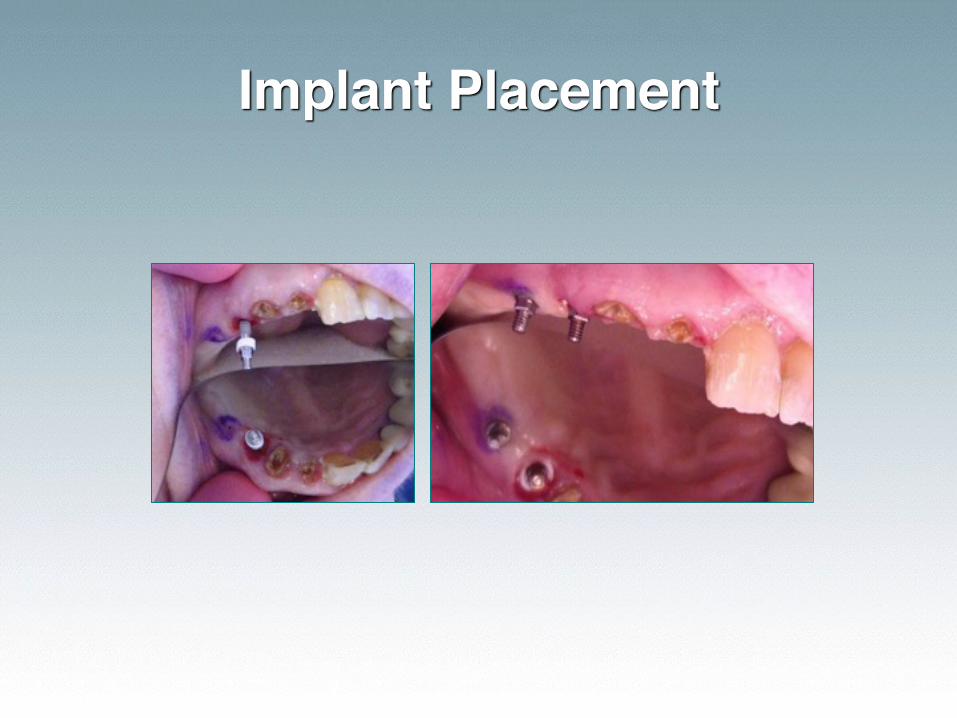
Implant Placement
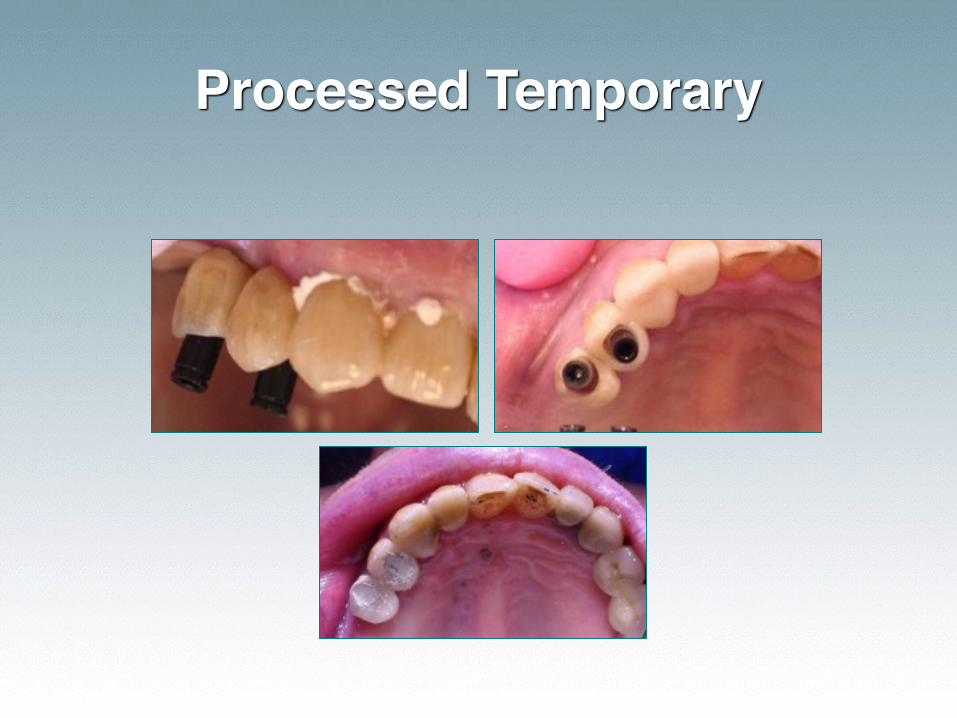
Processed Temporary

3 Mos Later: Final Impression
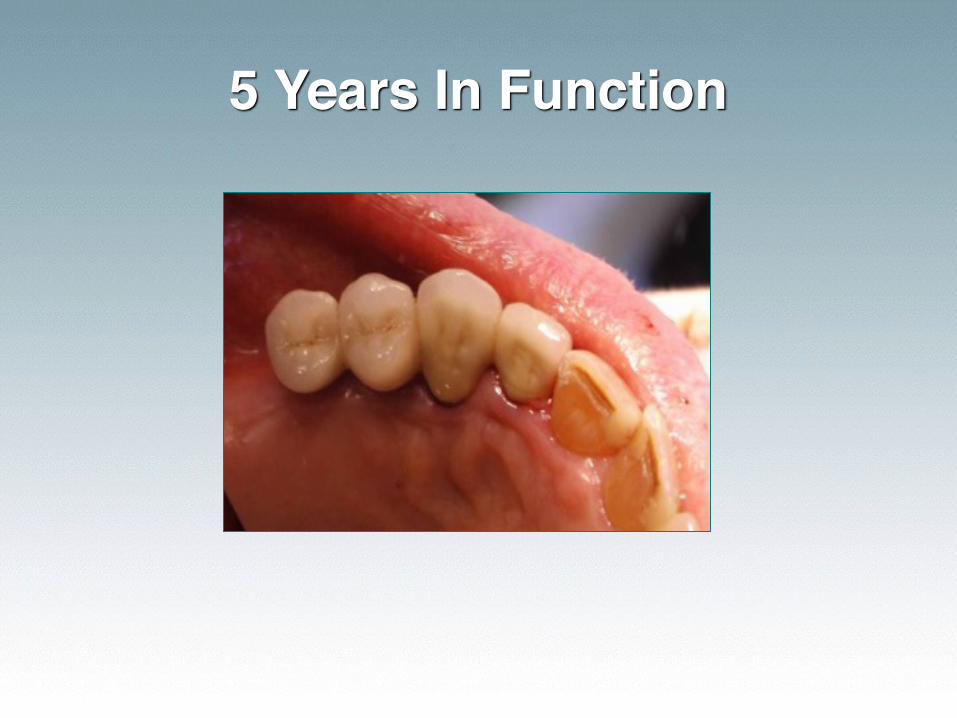
5 Years In Function

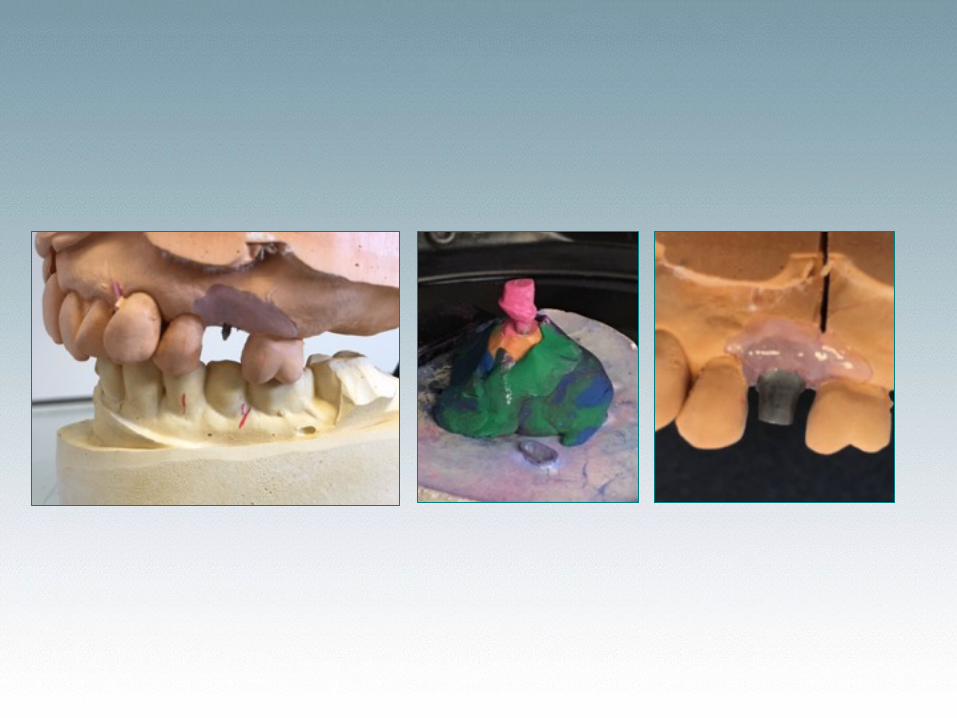
Case Presentation: Replacing a Bicuspid• 85 year old female • Lost bicuspid to vertical fracture. • The area was allowed to heal post extraction for
3 months (1 bone cycle) before placement of the ANEW which was ‘buried’ for 3 months of healing.
• Impressions were taken and the ANEW was restored.
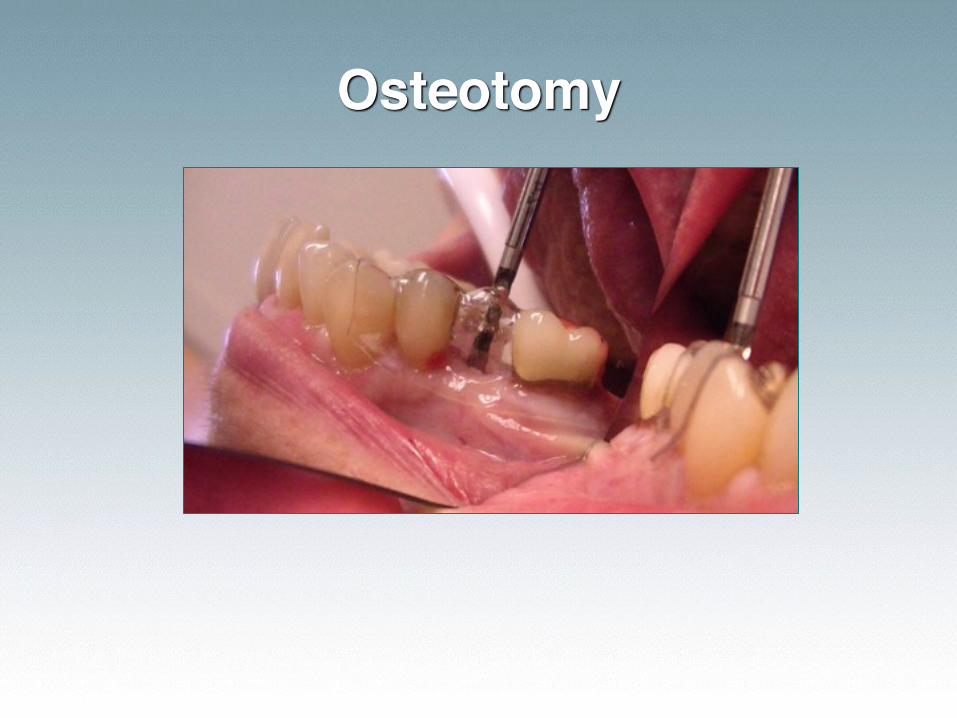
Osteotomy
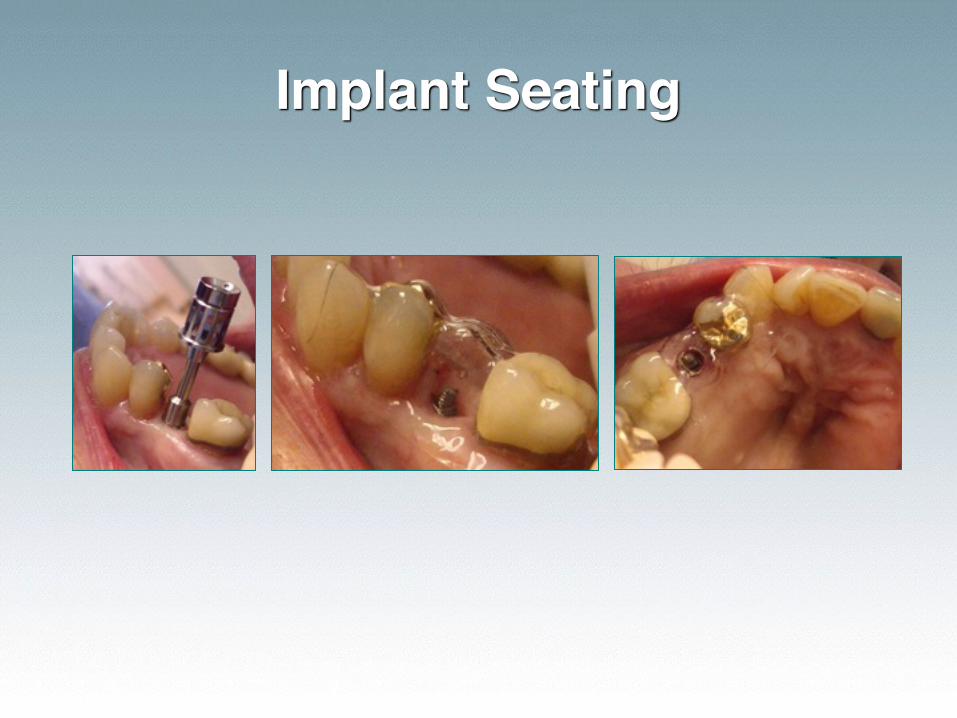
Implant Seating
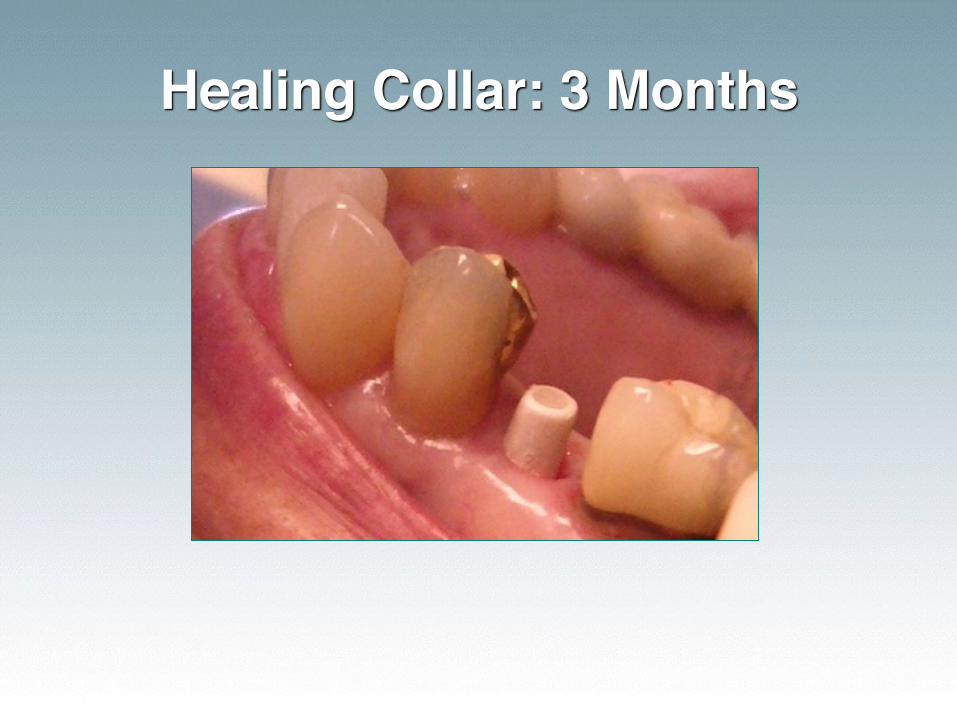
Healing Collar: 3 Months
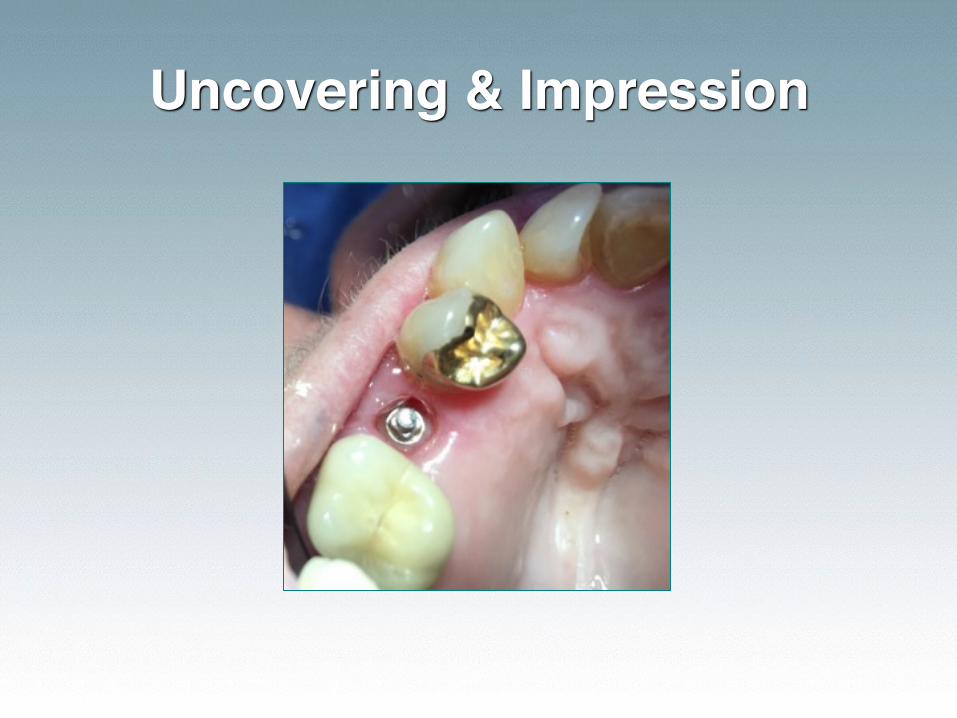
Uncovering & Impression
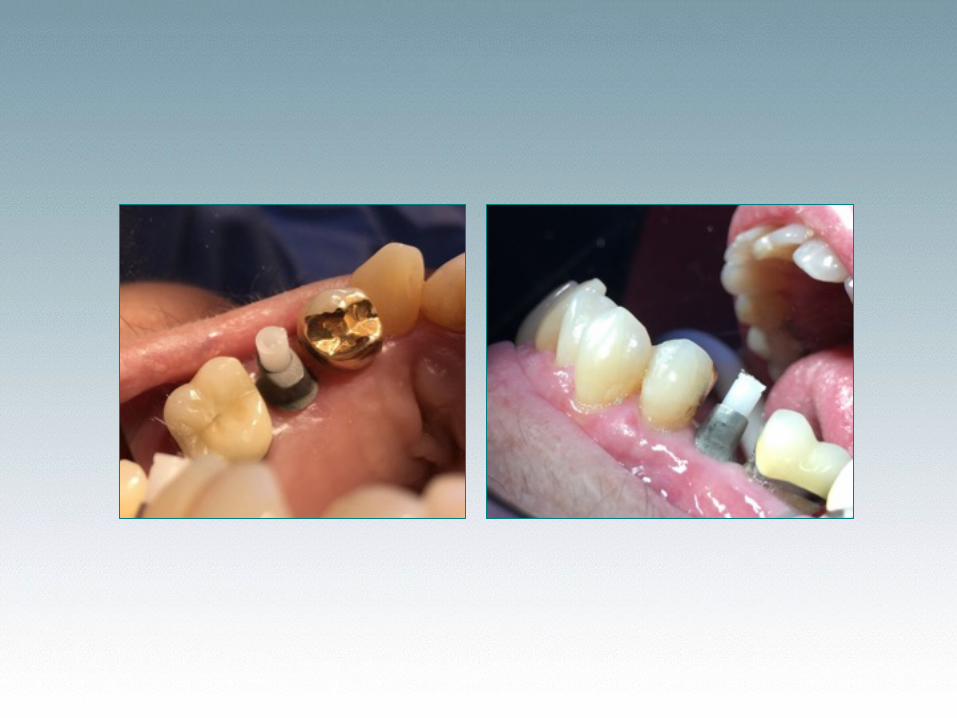
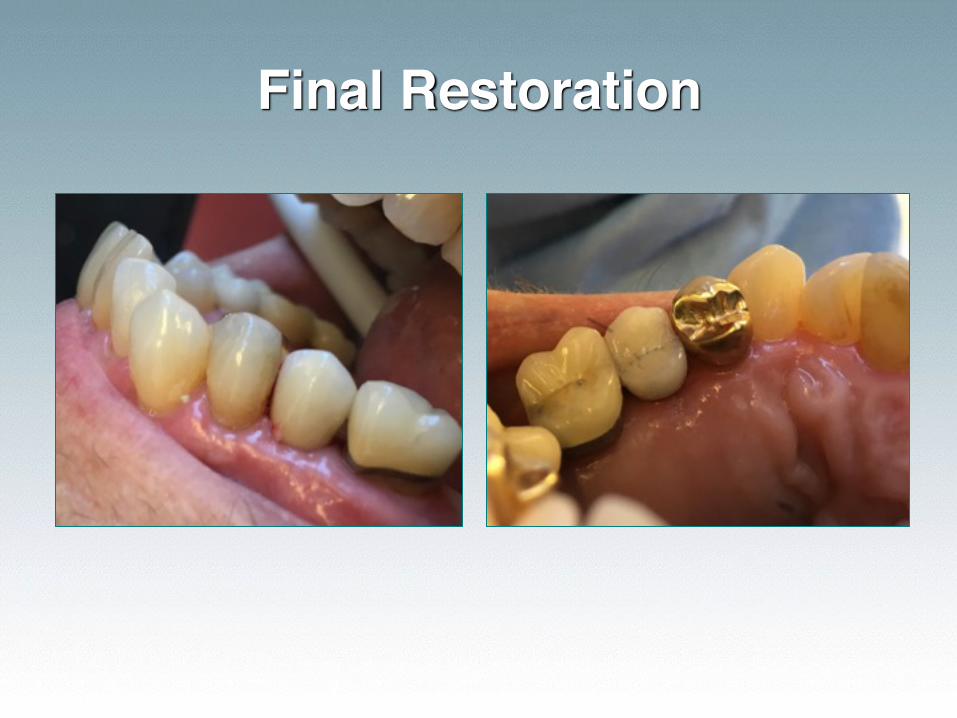
Final Restoration
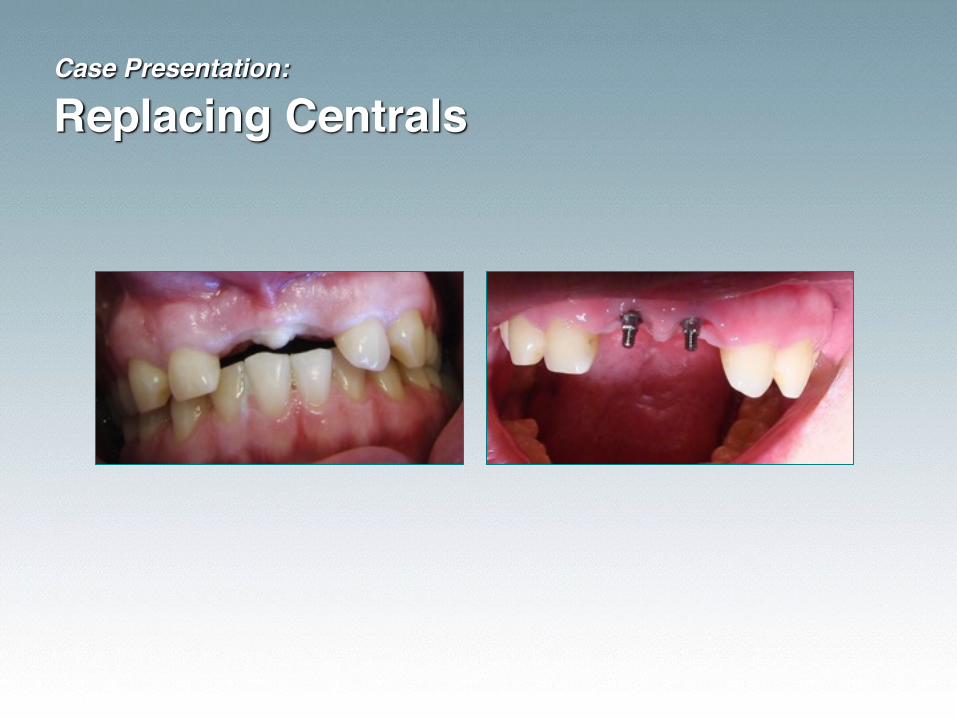
Case Presentation: Replacing Centrals
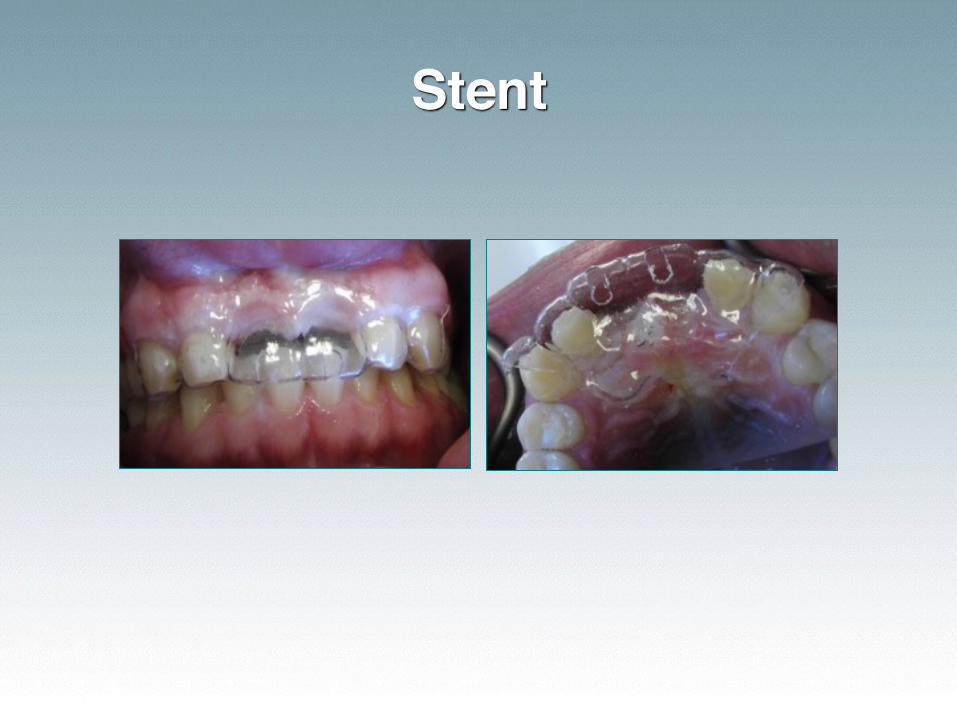
Stent
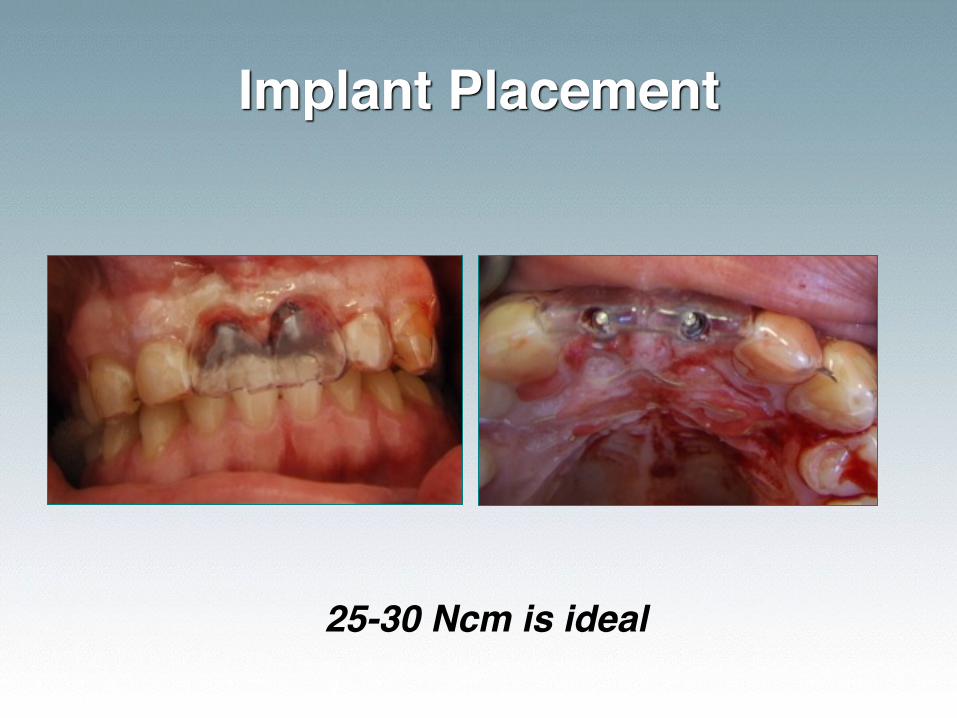
Implant Placement
25-30 Ncm is ideal
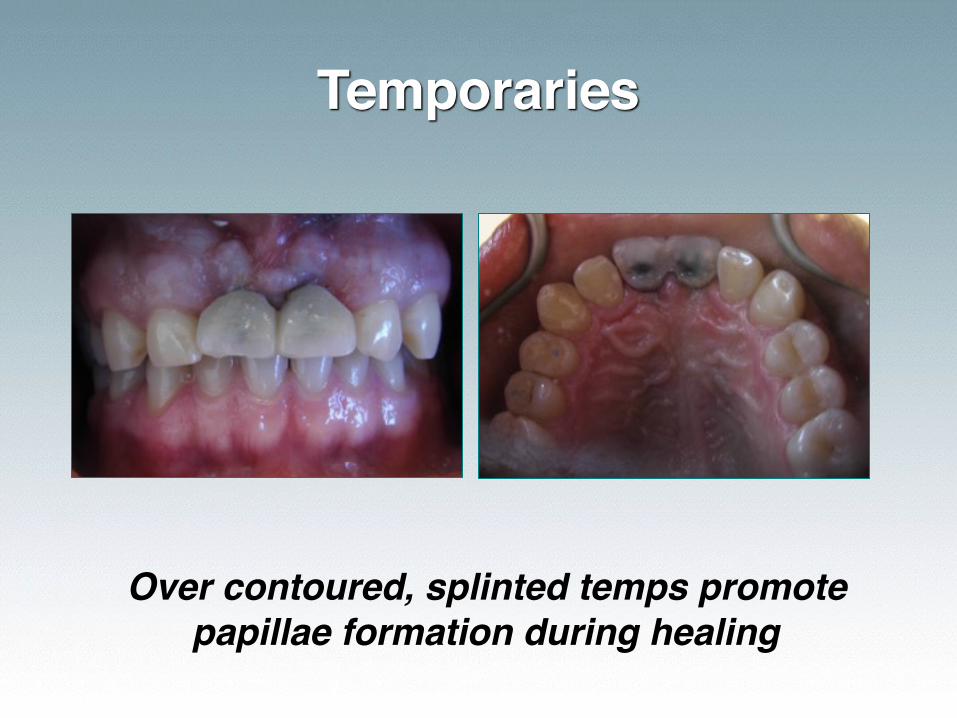
Temporaries
Over contoured, splinted temps promote papillae formation during healing
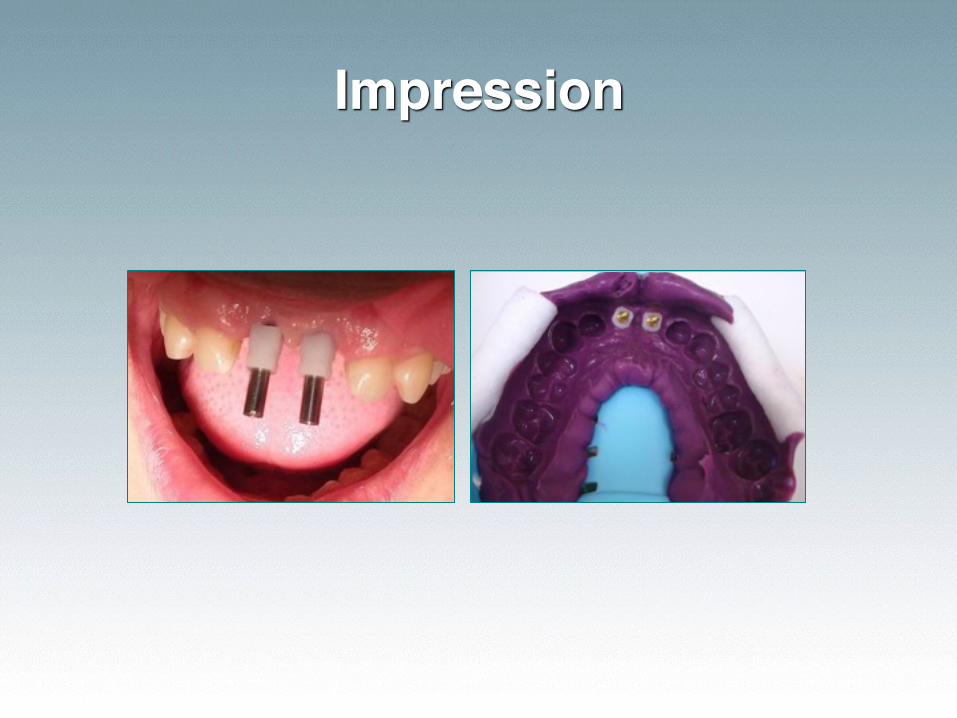
Impression
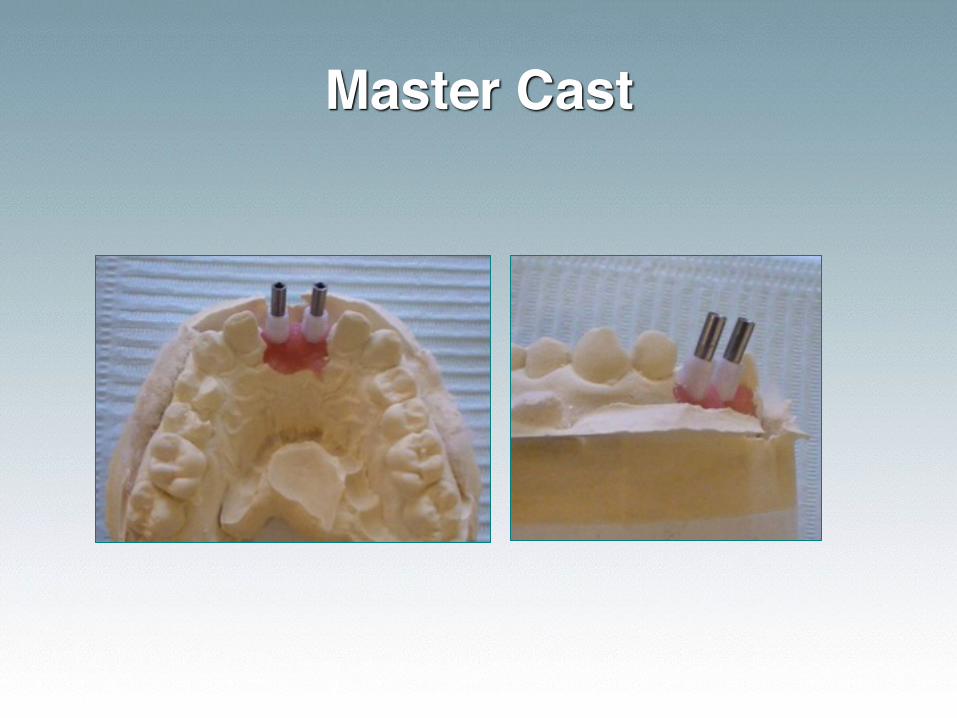
Master Cast
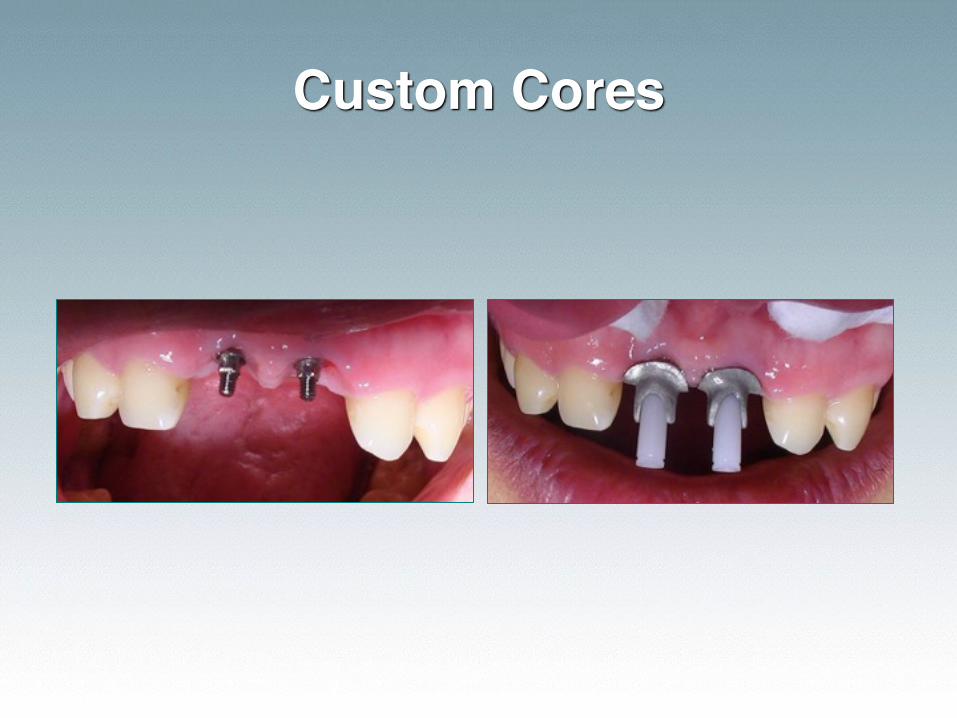
Custom Cores
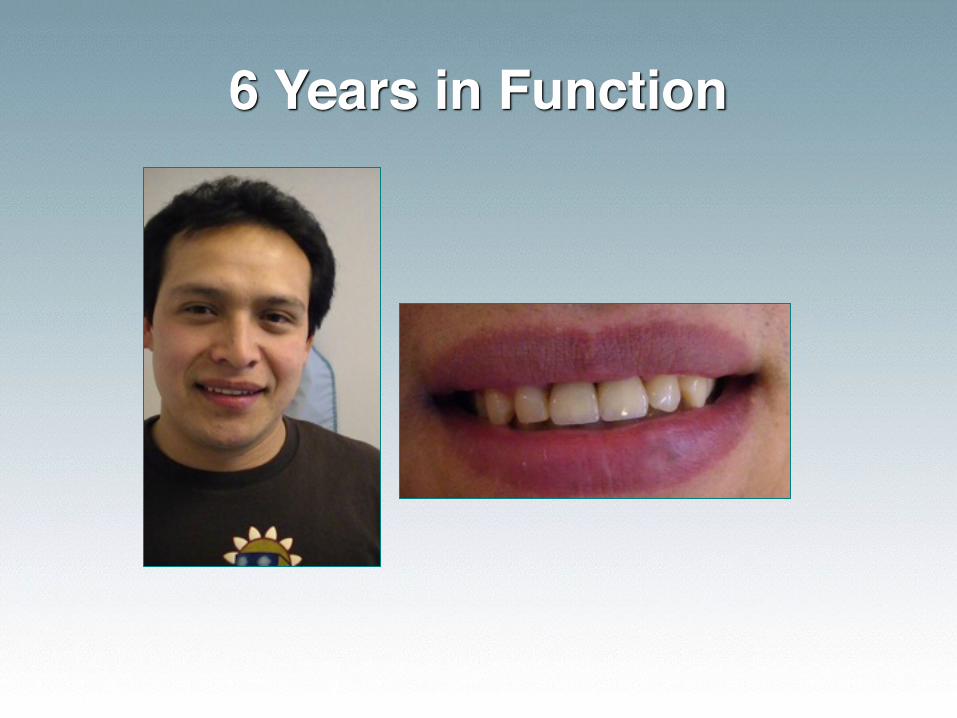
6 Years in Function

“Logic will get you from A to Z, IMAGINATION WILL GET YOU
EVERYWHERE”
- A. Einstein
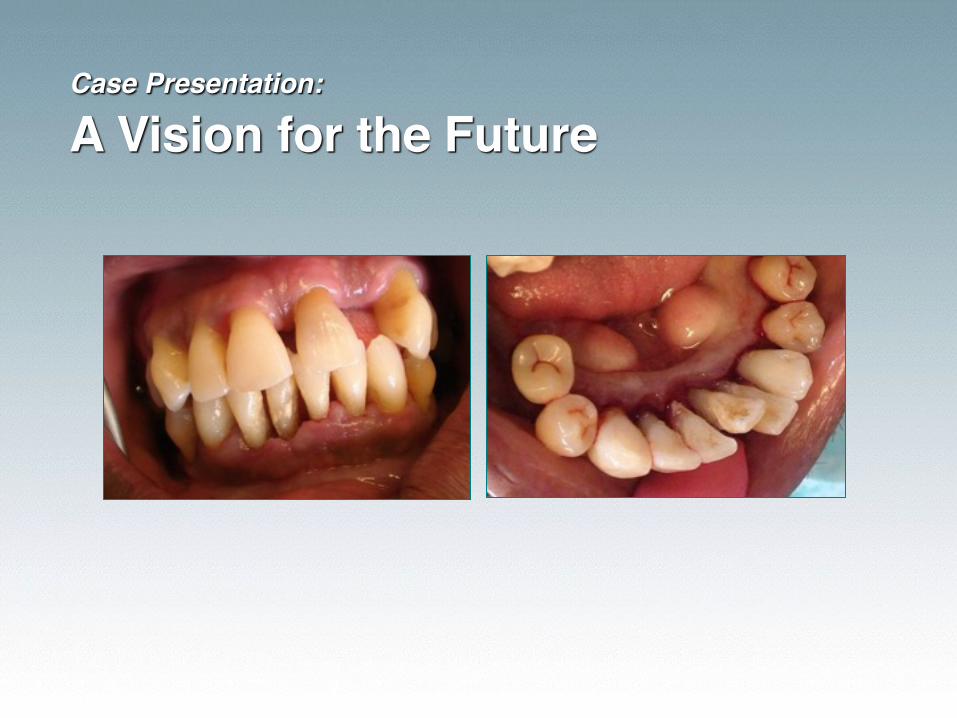
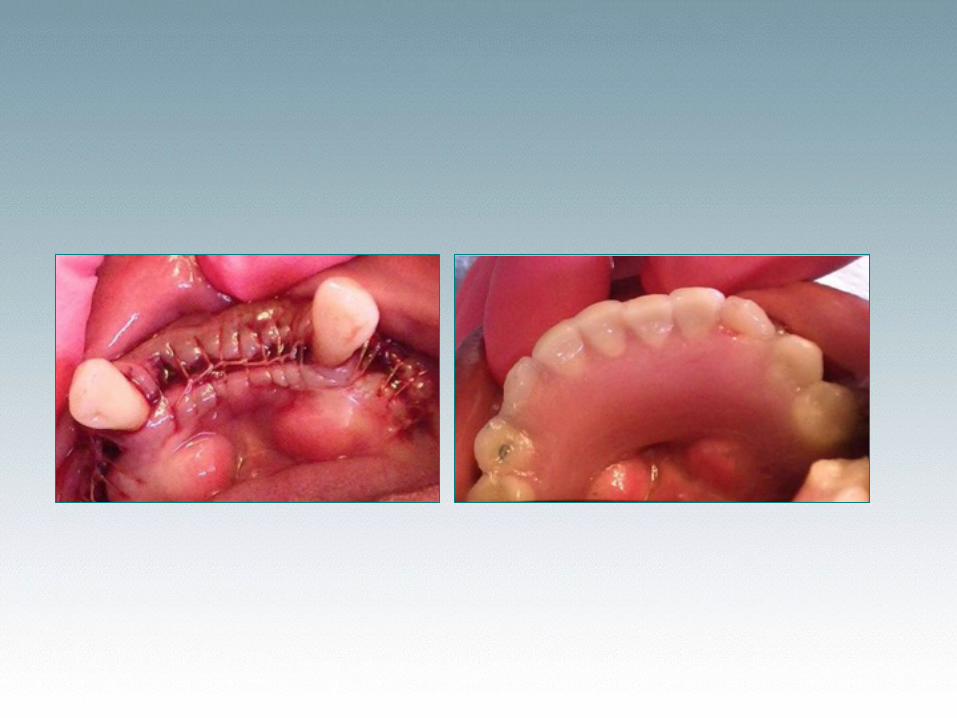
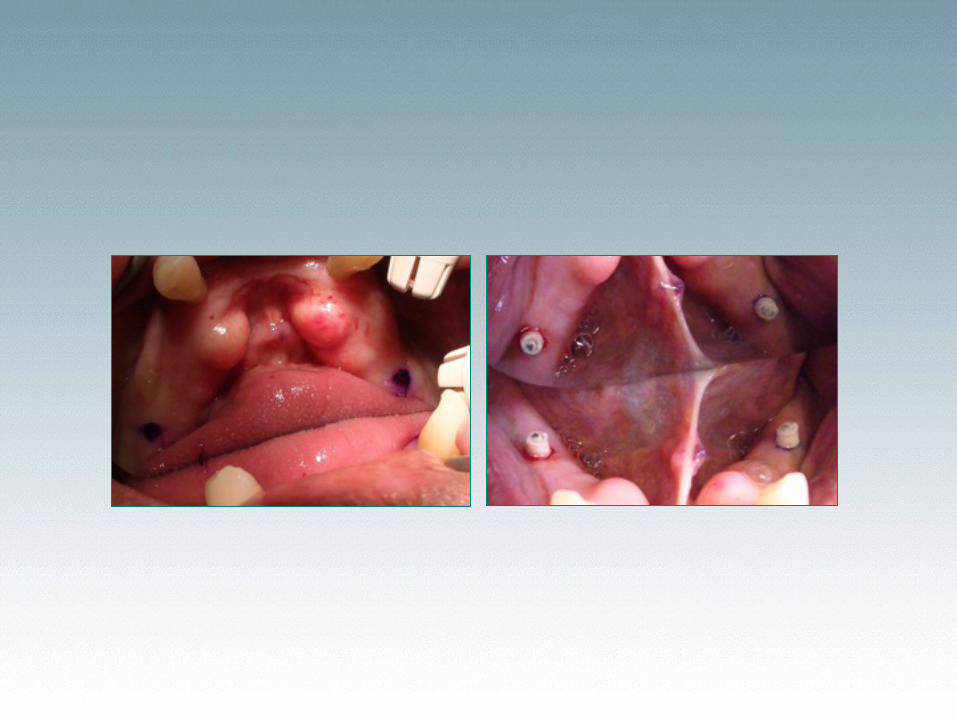
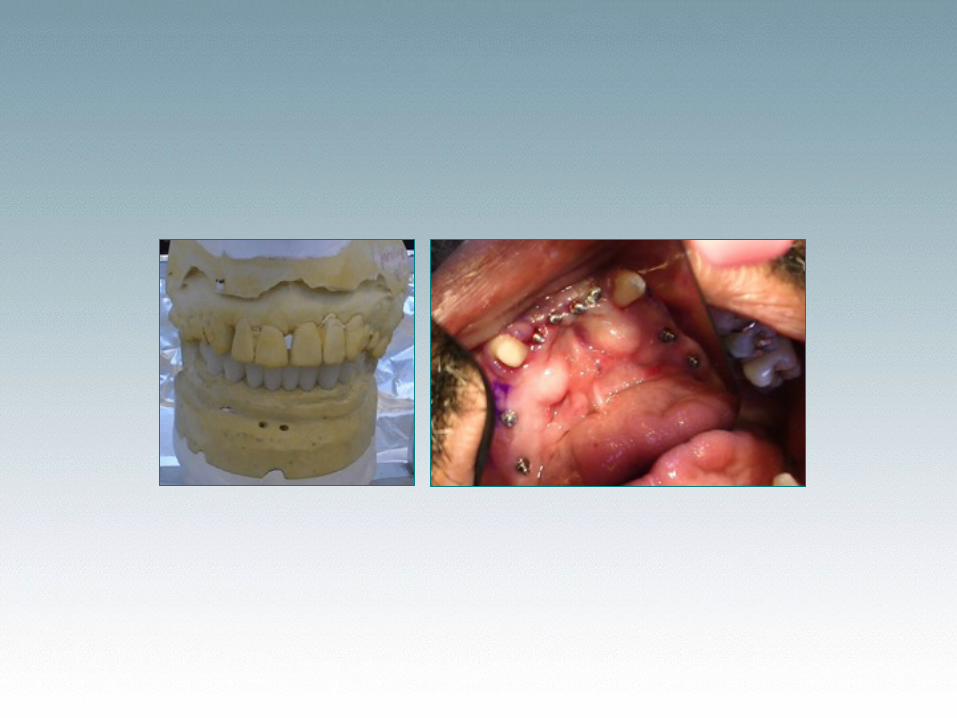
Case Presentation: A Vision for the Future

“Opportunities are never lost because someone will always find them.”

Reinvest in your Education
• Get excellent NDI training on models and live patients
• Learn to do excellent basic endo, perio and oral surgery
• Update your skills in dentures• Be able to survey and design
• Find a lab that delivers quality without compromise
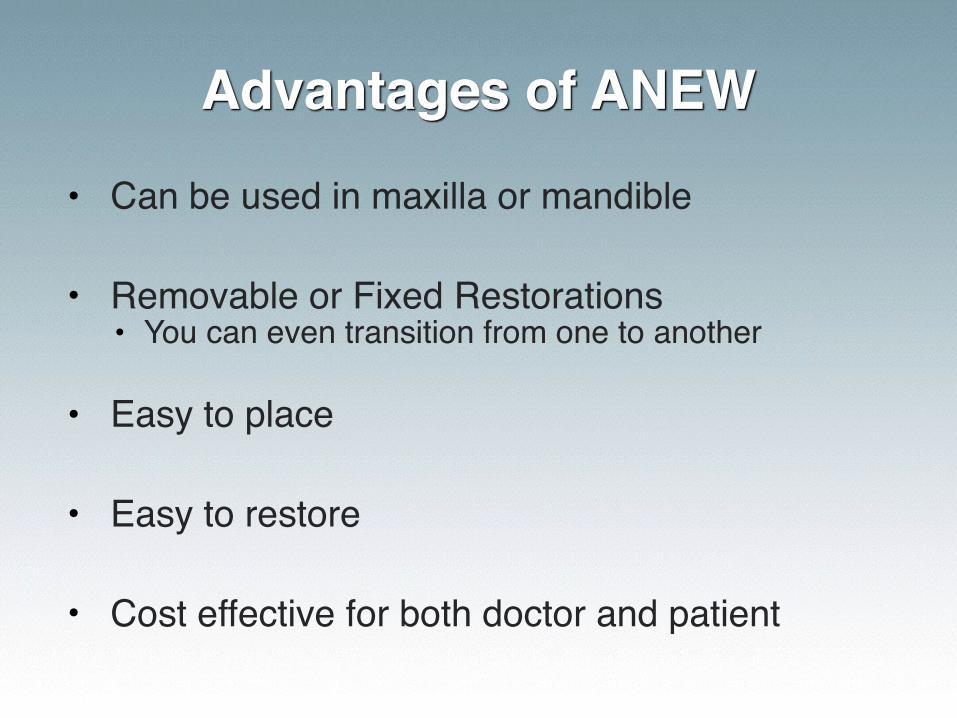
Advantages of ANEW
• Can be used in maxilla or mandible
• Removable or Fixed Restorations• You can even transition from one to another
• Easy to place
• Easy to restore
• Cost effective for both doctor and patient
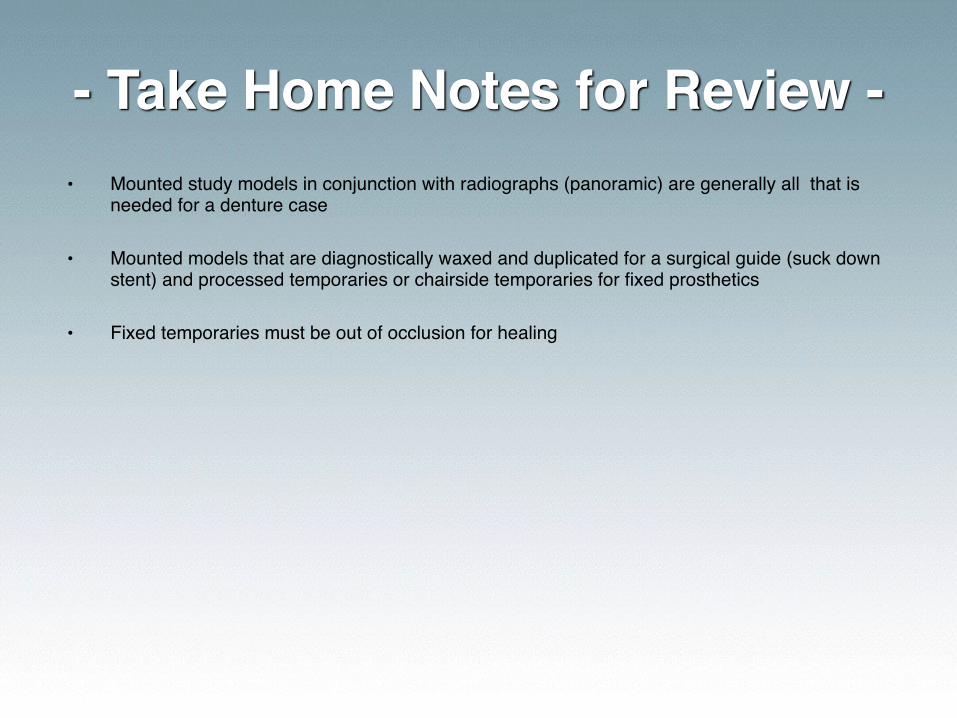
- Take Home Notes for Review -• Mounted study models in conjunction with radiographs (panoramic) are generally all that is
needed for a denture case
• Mounted models that are diagnostically waxed and duplicated for a surgical guide (suck down stent) and processed temporaries or chairside temporaries for fixed prosthetics
• Fixed temporaries must be out of occlusion for healing
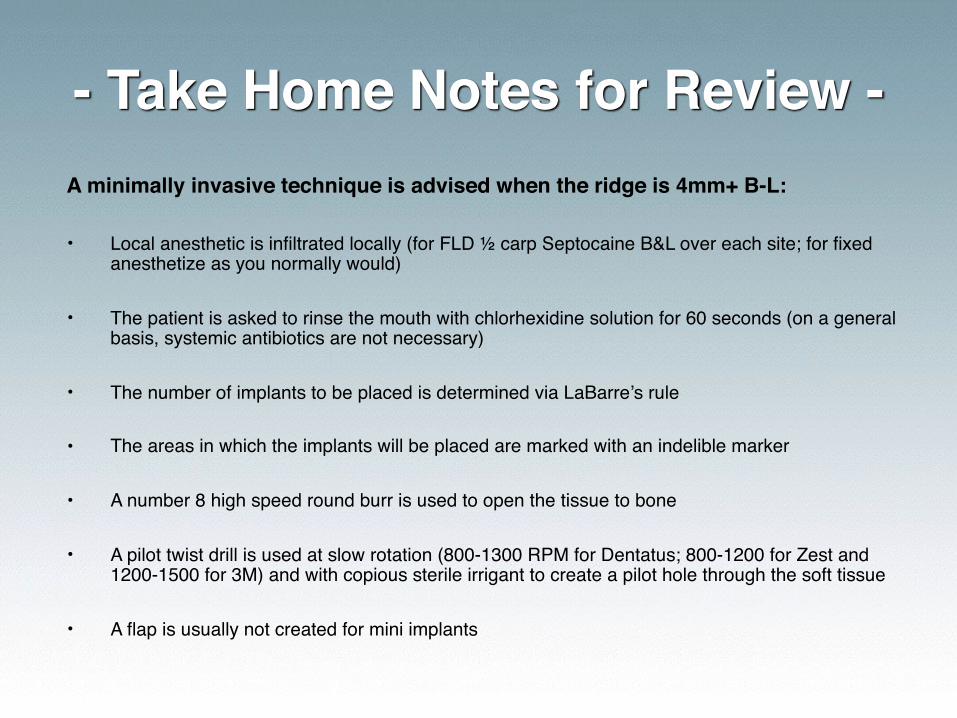
- Take Home Notes for Review -A minimally invasive technique is advised when the ridge is 4mm+ B-L:
• Local anesthetic is infiltrated locally (for FLD ½ carp Septocaine B&L over each site; for fixed anesthetize as you normally would)
• The patient is asked to rinse the mouth with chlorhexidine solution for 60 seconds (on a general basis, systemic antibiotics are not necessary)
• The number of implants to be placed is determined via LaBarre’s rule
• The areas in which the implants will be placed are marked with an indelible marker
• A number 8 high speed round burr is used to open the tissue to bone
• A pilot twist drill is used at slow rotation (800-1300 RPM for Dentatus; 800-1200 for Zest and 1200-1500 for 3M) and with copious sterile irrigant to create a pilot hole through the soft tissue
• A flap is usually not created for mini implants
- Take Home Notes for Review -• The implant is threaded into the pilot opening by a series of hand wrenches. As it engages the
bone, the larger diameter of the implant compresses the bone and creates resistance to torque. The screw portion of the fixture is self-threading in cancellous bone.
• If the torque resistance becomes too great to proceed, the implant is removed and the drill is reintroduced to enlarge or deepen the site.
• If the torque resistance remains minimal, or if the implant threads strip the bone, a wider and/or longer implant can be tried. Alternatively, a new site can be attempted at least 2 mm distant from the original site.
• The implant is rotated to place until all of the threads are embedded in bone and the head projects from the tissue by a suitable amount.
• In the event of a sharp ridge crest, or in those cases where natural teeth have been extracted at the same appointment, it is necessary to reflect a soft tissue flap in order to flatten the alveolar process before placing the implants into the optimized sites.
• After placement of the implants, the prosthesis is fabricated or relined to make immediate use of the implant
- Take Home Notes for Review -• The most useful radiograph for planning mini-implants in the anterior mandible is the
Panorex.
• In situations where ridge is undercut or narrow, I recommend a lateral ceph and an occlusal view of the anterior mandible.
• The Panorex demonstrates mandibular height and bone density. The lateral ceph shows the buccolingual cross sectional shape, which determines angulation of the fixtures near the midline. Tomograms and other computerized radiography are the gold standard, but represent a substantial expense for mini-implants in the anterior mandible.
Special Thanks
The cases presented were constructed by
Geoffrey’s Dental Lab San Francisco, CA
415.841.0163
“Quality without Compromise”