Building production server on docker
24
Buil ding production server on Docker Hiroshi Miura 2015.4.11 第153 回小江戸ら ぐ 4月のオフな集まり
-
Upload
hiroshi-miura -
Category
Technology
-
view
243 -
download
2
Transcript of Building production server on docker
Building producti
on
serve
r on D
ocker
Hiroshi Miura
2015.4.11
第153回小江戸らぐ
4月のオフな集まり

Who am I
Introduction
Methods
Results
Discussion

What is Docker
Introduction
Methods
Results
Discussion
● コンテナを柔軟に使う技術
Dockerfile コンテナイメージ
docker HUB実行環境
docker build
docker push
docker pulldocker run
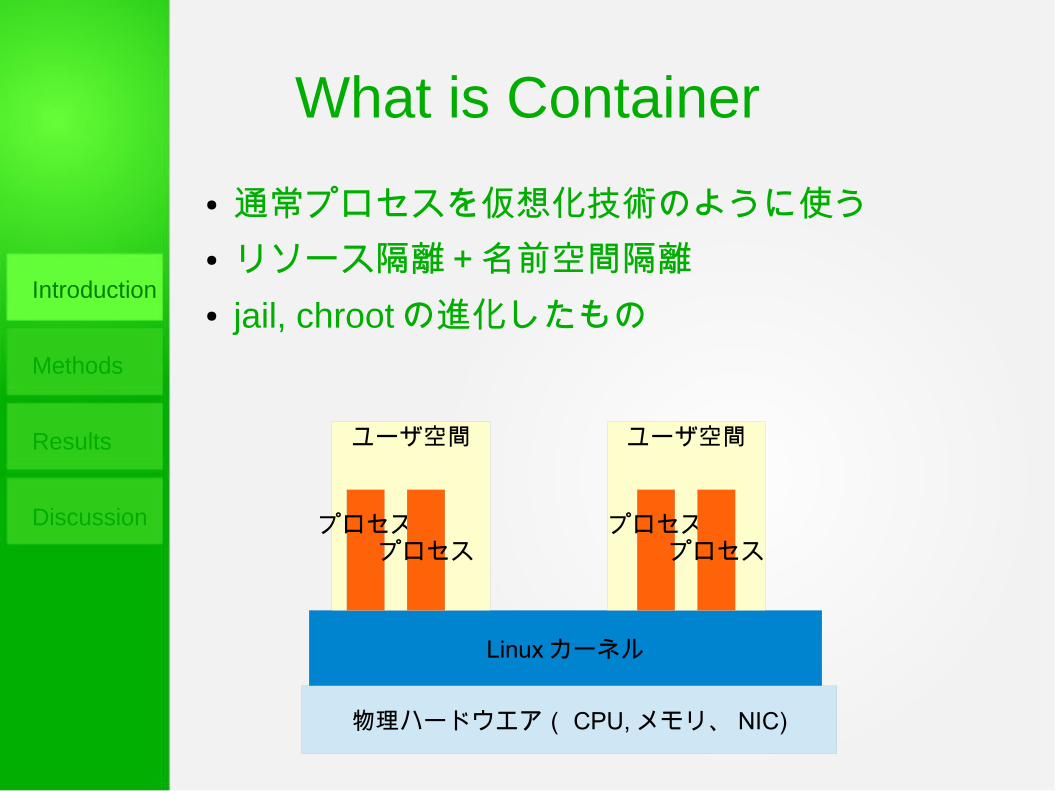
What is Container
Introduction
Methods
Results
Discussion
● 通常プロセスを仮想化技術のように使う● リソース隔離+名前空間隔離● jail, chrootの進化したもの
物理ハードウエア( CPU,メモリ、 NIC)
Linuxカーネル
ユーザ空間 ユーザ空間
プロセスプロセス
プロセスプロセス
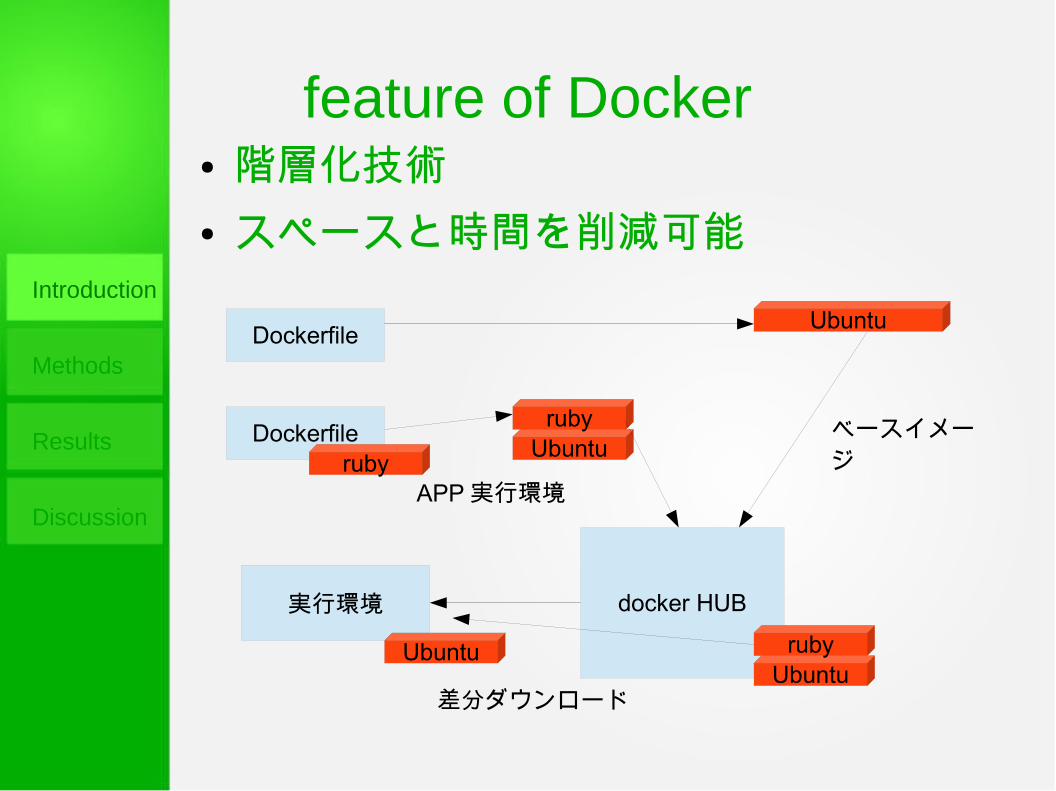
feature of Docker
Introduction
Methods
Results
Discussion
● 階層化技術● スペースと時間を削減可能
Dockerfile
docker HUB実行環境
ベースイメージ
差分ダウンロード
Ubuntu
DockerfileUbuntu
ruby
UbunturubyUbuntu
APP実行環境ruby

Docker install
Introduction
Methods
Results
Discussion
● Docker– http://docs.docker.com/installation/
● Docker-compose– オーケストレーションツール– http://docs.docker.com/compose/install/
$ wget -qO- https://get.docker.com/ | sh
$ curl -L https://github.com/docker/compose/releases/download/1.1.0/docker-compose-`uname -s`-`uname -m` > /usr/local/bin/docker-compose$ chmod +x /usr/local/bin/docker-compose

Dockerつかうだけ
Introduction
Methods
Results
Discussion
● redmineを立ち上げる
– 準備するファイル : docker-compose.yml
$ docker-compose up -d
postgresql: image: sameersbn/postgresql:9.4 environment: - DB_USER=redmine - DB_PASS=phatiphohsukeuwo - DB_NAME=redmine_productionredmine: image: sameersbn/redmine:3.0.1 links: - postgresql:postgresql environment: - DB_USER=redmine - DB_PASS=phatiphohsukeuwo - DB_NAME=redmine_production ports: - "80:80"

Dockerfileの書き方
Introduction
Methods
Results
Discussion
● FROM <ベースイメージ >
● MAINTAINER <作成者 >
● ADD <設定ファイルのテンプレート、インストールスクリプト > <行き先 >
● RUN <コマンド>● RUN<上記で追加したスクリプト>● EXPOSE <ポート番号>● VOLUMES<データ用ディレクトリ>● ENTRYPOINT<実行用コマンド>● CMD<実行引数>

おすすめの書き方
Introduction
Methods
Results
Discussion
● インストールスクリプトは– 共通部、個別部の2段構成
● 複数のコンテナに共通するステージ– 途中段階のベースイメージを作る
● ADD,RUNは乱発しない– それぞれ階層になる
● dockerキャッシュで開発効率化可能。● 段数上限あり
– &&でつなぐ →可読性低下● サイズ削減する処理を最後に追加

実例 :rbenv
Introduction
Methods
Results
Discussion
● rbenv: rubyの実行環境● 共通のテンプレートとして整備する● rubyで作られるアプリの実行基盤となる
● 複数の Rubyバージョンを選択可能に● 必要なバージョンのみで最小サイズ
Ubunturbenv
ruby 2.0
Ubunturbenv
ruby 2.1
Ubunturbenv
ruby 2.2

実例 :rbenv
Introduction
Methods
Results
Discussion
● Githubで Dockerfile
● Docker HUBのリポジトリ– Docker pullするイメージ– TAG
● 自動 BUILD設定– レシピとイメージが1:1を保証– マルウエア等が含まれていないことをソースで確認可能

実例 :rbenv:rubyインストール
Introduction
Methods
Results
Discussion
#!/bin/bash(いろいろ :環境変数設定、ユーザ作成、 gemや Bundleのパス設定) apt-get update apt-get -y install build-essential curl ca-certificates \ gcc g++ make bison libgdbm-dev (いろいろ略)
rbenv install ${RUBY_VER}rbenv global ${RUBY_VER}gem update --system --no-documentgem install bundler --no-rdoc --no-rirbenv rehash
# cleanupapt-get -y remove libgdbm-dev libncursesw5-dev libncurses5-dev \ libreadline6-dev build-essential curl (などなど、開発ファイルのみ)
apt-get cleanapt-get -y autoremove
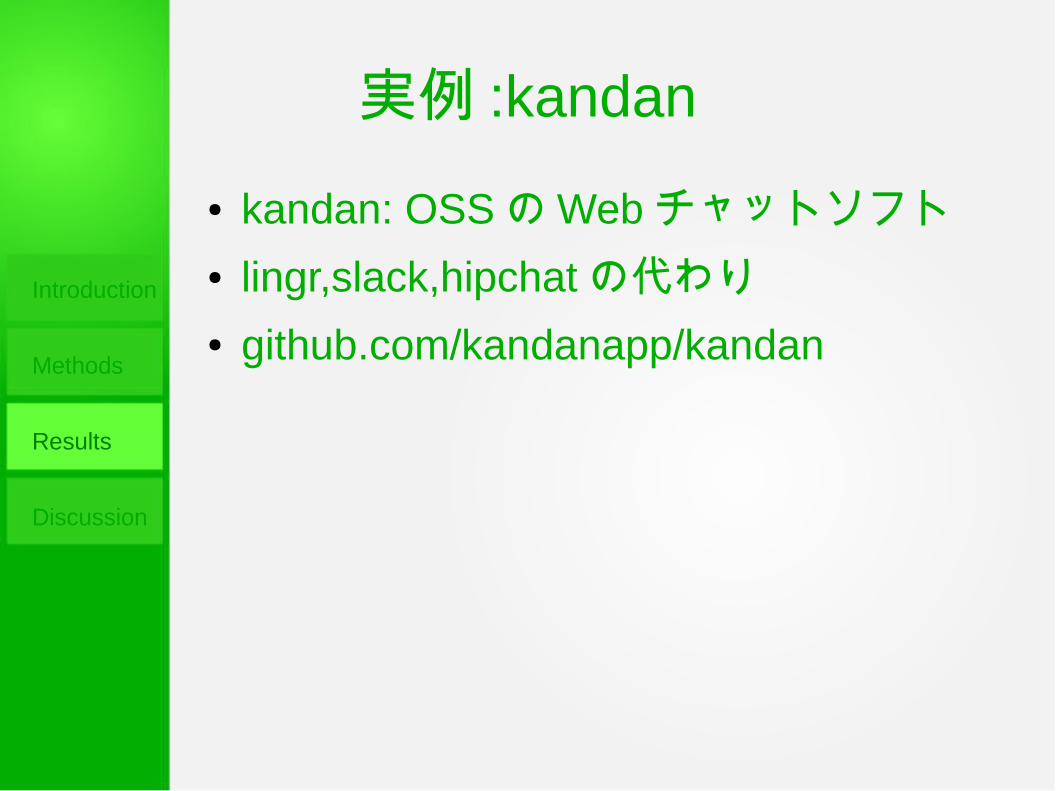
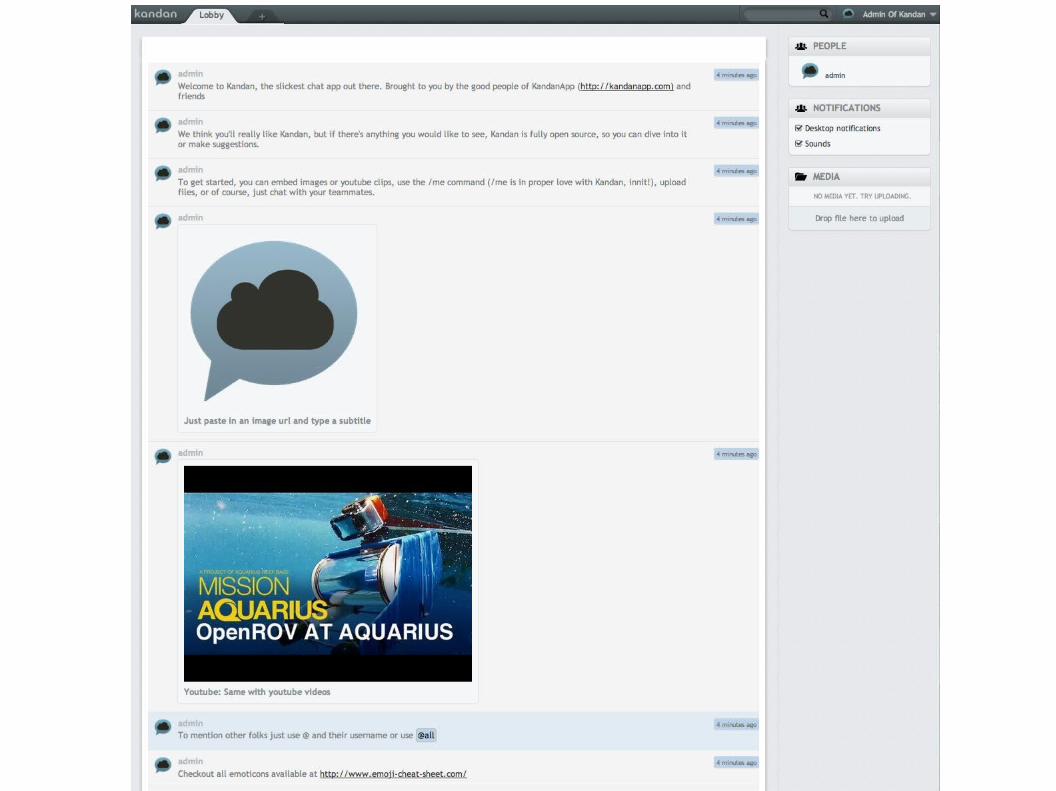
実例 :kandan
Introduction
Methods
Results
Discussion
● kandan: OSSのWebチャットソフト● lingr,slack,hipchatの代わり● github.com/kandanapp/kandan

実例 :kandan
Introduction
Methods
Results
Discussion
● kandan の Dockerfile● インストールスクリプト● 実行スクリプト

kandan: install
Introduction
Methods
Results
Discussion
#!/bin/bash(いろいろ :環境変数設定、ユーザ作成、 gemや Bundleのパス設定)apt-get updateapt-get -y install supervisor build-essential curl unzip git-core gcccurl -sL https://deb.nodesource.com/setup | bash -apt-get -y install nodejs apt-get -y install sqlite3 libmysqlclient18 libmysqlclient-dev libsqlite3-dev
(いろいろ)cat > ${KANDAN_CONF} <<__EOL__[program:kandan]command=${BUNDLE} exec thin start -e productionautostart=trueautorestart=falseusername=${RUN_USER}directory=${INSTALL_DIR}/kandanstdout_logfile=${LOG_DIR}/%(program_name)s.logstderr_logfile=${LOG_DIR}/%(program_name)s.logenvironment=RBENV_ROOT=${RBENV_ROOT}__EOL__
sudo -u ${RUN_USER} -E -H \git clone --depth 1 -b i18n --single-branch https://github.com/miurahr/kandan.git

kandan: install (cont.)
Introduction
Methods
Results
Discussion
# cleanup dev filesapt-get -y remove \ unzip gcc g++ make curl git-core build-essential \ libmysqlclient-dev libsqlite3-dev libpq-dev \ libcurl4-openssl-dev libpcre3-dev libxml2-dev libxslt-dev \ libreadline-gplv2-dev
# clean apt caches and moreapt-get cleanapt-get -y autoremovefind /var/lib/apt/lists/ -type f -exec rm -f {} \;
exit 0

kandan: init
Introduction
Methods
Results
Discussion
cat > ${INSTALL_DIR}/kandan/config/database.yml << __EOL1__production: adapter: mysql2 reconnect: false timeout: 5000 database: ${DB_NAME} host: ${DB_HOST} port: ${DB_PORT} pool: ${DB_POOL} username: ${DB_USER} password: ${DB_PASS}__EOL1__
# start supervisordexec /usr/bin/supervisord -n -c /etc/supervisor/supervisord.conf

kandan: init (cont.)
Introduction
Methods
Results
Discussion
prog="mysqladmin -h ${DB_HOST} -P ${DB_PORT} -u ${DB_USER} \ ${DB_PASS:+-p$DB_PASS} status"
timeout=60 echo -n "Waiting for database server to accept connections" while ! ${prog} >/dev/null 2>&1 do timeout=$(expr $timeout - 1) if [ $timeout -eq 0 ]; then echo -e "\nCould not connect to database server. Aborting..." exit 1 fi echo -n "." sleep 1 done
● コンテナから DBMSを同時に起動した場合に、 DBMSの起動を待つ必要あり

kandan: init (cont.)
Introduction
Methods
Results
Discussion# start supervisordexec /usr/bin/supervisord -n -c /etc/supervisor/supervisord.conf
● 最終的に supervisordでアプリデーモンを起動– コンテナ内には、
kernelや init, upstart,systemdはない
オーケストレーションツール
Introduction
Methods
Results
Discussion
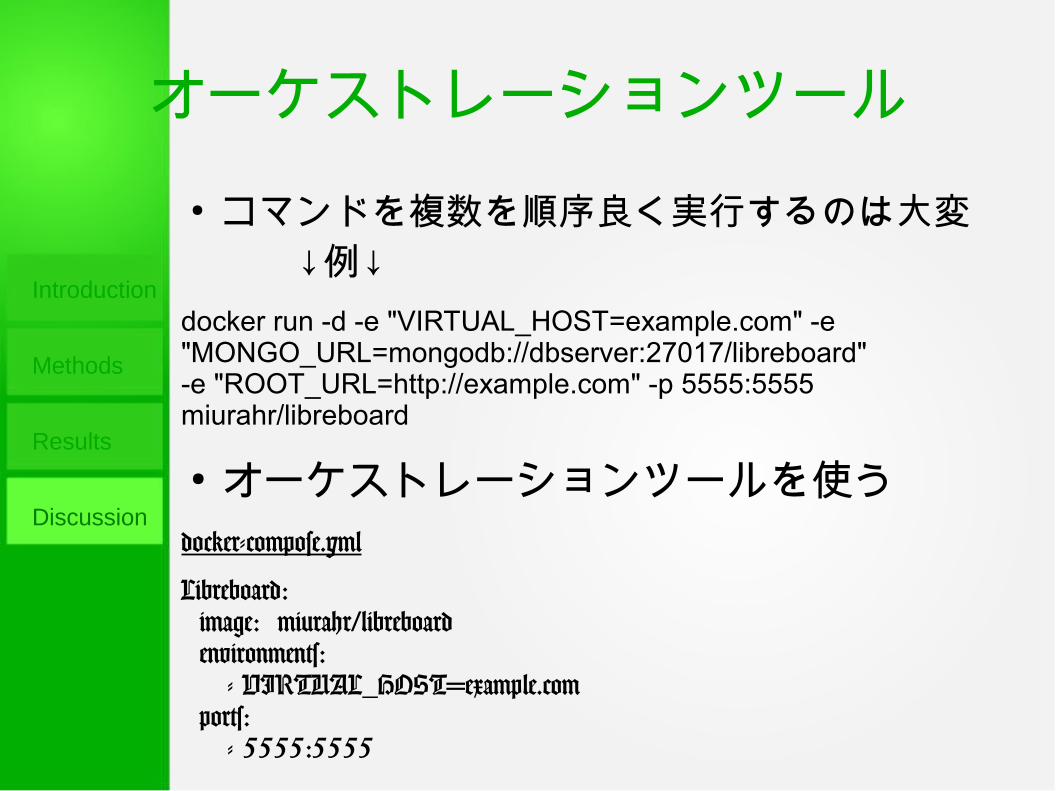
● コマンドを複数を順序良く実行するのは大変 ↓例↓
docker run -d -e "VIRTUAL_HOST=example.com" -e "MONGO_URL=mongodb://dbserver:27017/libreboard" -e "ROOT_URL=http://example.com" -p 5555:5555 miurahr/libreboard
● オーケストレーションツールを使うdocker-compose.yml
Libreboard: image: miurahr/libreboard environments: - VIRTUAL_HOST=example.com ports: - 5555:5555
Acknowledgements
● Kandan: Kadan app project● Hubot: Github.com● Docker, dockerHub: Docker.com
Acknowledgements
● Great docker recipes by Sameer Naik https://github.com/sameersbn

Reference
● Presentation: https://www.slideshare.net/miurahr/building-production-on-docker
● Source:https://github.com/miurahr
● Docker HUB registory:
https://hub.docker.com/u/miurahr/


![Introduction à Docker et utilisation en production /Digital apéro Besançon [10/03/2015]](https://static.fdocument.pub/doc/165x107/55c10b8fbb61eb85348b4641/introduction-a-docker-et-utilisation-en-production-digital-apero-besancon-10032015.jpg)