BENNI Brochure
102
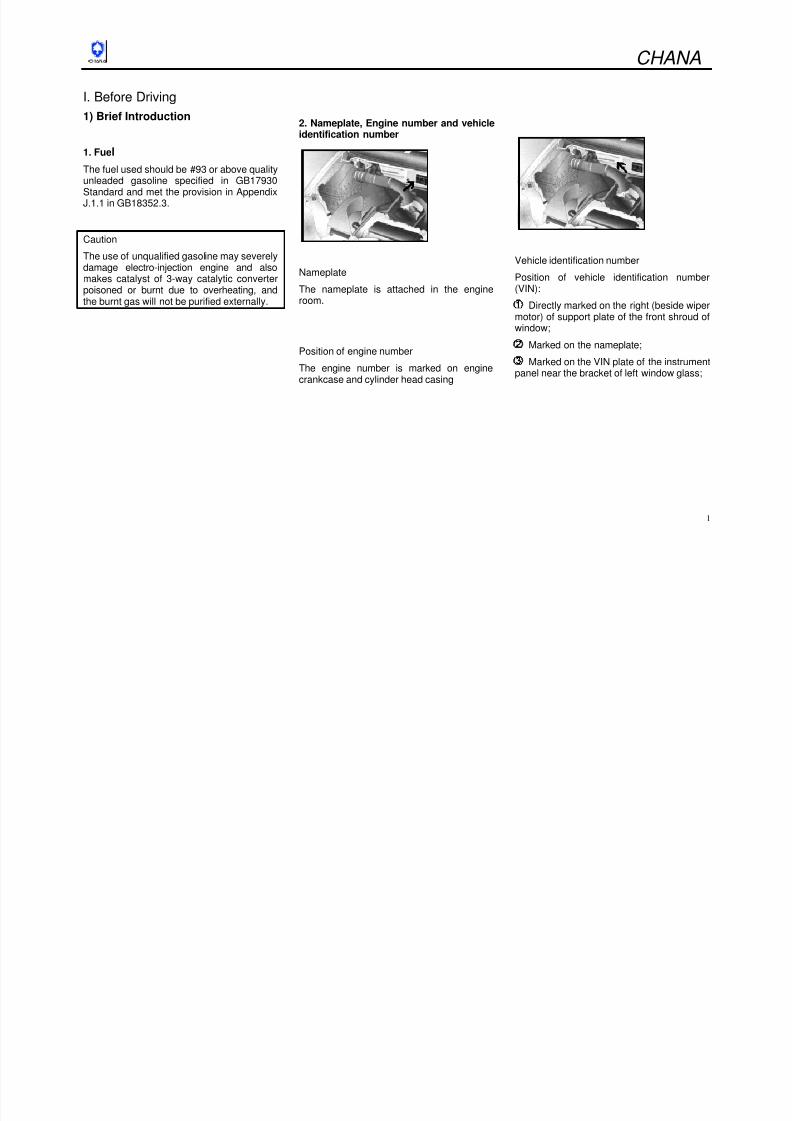
CHANA 1 I. Before Driving 1) Brief Introduction 1. Fuel The fuel used should be #93 or above quality unleaded gasoline specified in GB17930 Standard and met the provision in Appendix J.1.1 in GB18352.3. Caution The use of unqualified gasol ine may severely damage electro-injection engine and also makes catalyst of 3-way catalytic converter poisoned or burnt due to overheating, and the burnt gas will not be purified externally. 2. Nameplate, Engine number and vehicle identification number Nameplate The nameplate is attached in the engine room. Position of engine number The engine number is marked on engine crankcase and cylinder head casing Vehicle identification number Position of vehicle identification number (VIN): Directly marked on the right (beside wiper motor) of support plate of the front shroud of window; Marked on the nameplate; Marked on the VIN plate of the instrument panel near the bracket of left window glass;
-
Upload
amado-valdiviezo-arellano -
Category
Documents
-
view
228 -
download
7
Transcript of BENNI Brochure
8/13/2019 BENNI Brochure
http://slidepdf.com/reader/full/benni-brochure 1/102
CHANA
1
I. Before Driving1) Brief Introduction
1. Fuel
The fuel used should be #93 or above qualityunleaded gasoline specified in GB17930
Standard and met the provision in AppendixJ.1.1 in GB18352.3.
Caution
The use of unqualified gasoline may severelydamage electro-injection engine and alsomakes catalyst of 3-way catalytic converter
poisoned or burnt due to overheating, andthe burnt gas will not be purified externally.
2. Nameplate, Engine number and vehicleidentification number
Nameplate
The nameplate is attached in the engineroom.
Position of engine number
The engine number is marked on enginecrankcase and cylinder head casing
Vehicle identification number
Position of vehicle identification number
(VIN):Directly marked on the right (beside wiper
motor) of support plate of the front shroud ofwindow;
Marked on the nameplate;
Marked on the VIN plate of the instrumentpanel near the bracket of left window glass;
8/13/2019 BENNI Brochure
http://slidepdf.com/reader/full/benni-brochure 2/102
CHANA
2
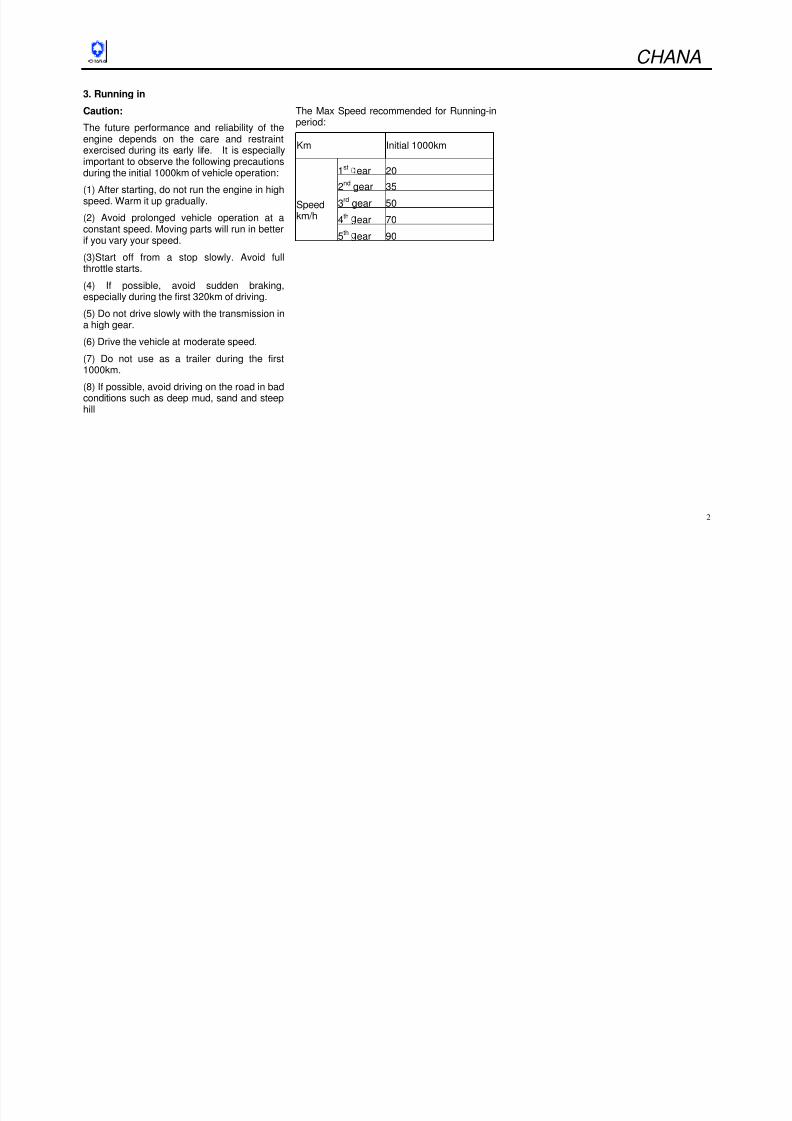
3. Running inCaution:
The future performance and reliability of theengine depends on the care and restraintexercised during its early life. It is especiallyimportant to observe the following precautionsduring the initial 1000km of vehicle operation:
(1) After starting, do not run the engine in highspeed. Warm it up gradually.
(2) Avoid prolonged vehicle operation at aconstant speed. Moving parts will run in betterif you vary your speed.
(3)Start off from a stop slowly. Avoid fullthrottle starts.
(4) If possible, avoid sudden braking,especially during the first 320km of driving.
(5) Do not drive slowly with the transmission ina high gear.
(6) Drive the vehicle at moderate speed.
(7) Do not use as a trailer during the first1000km.
(8) If possible, avoid driving on the road in badconditions such as deep mud, sand and steephill
The Max Speed recommended for Running-inperiod:
Km Initial 1000km
1st ear 20
2nd gear 35
3rd
gear 50
4th ear 70
Speedkm/h
5th ear 90

8/13/2019 BENNI Brochure
http://slidepdf.com/reader/full/benni-brochure 3/102
CHANA
3
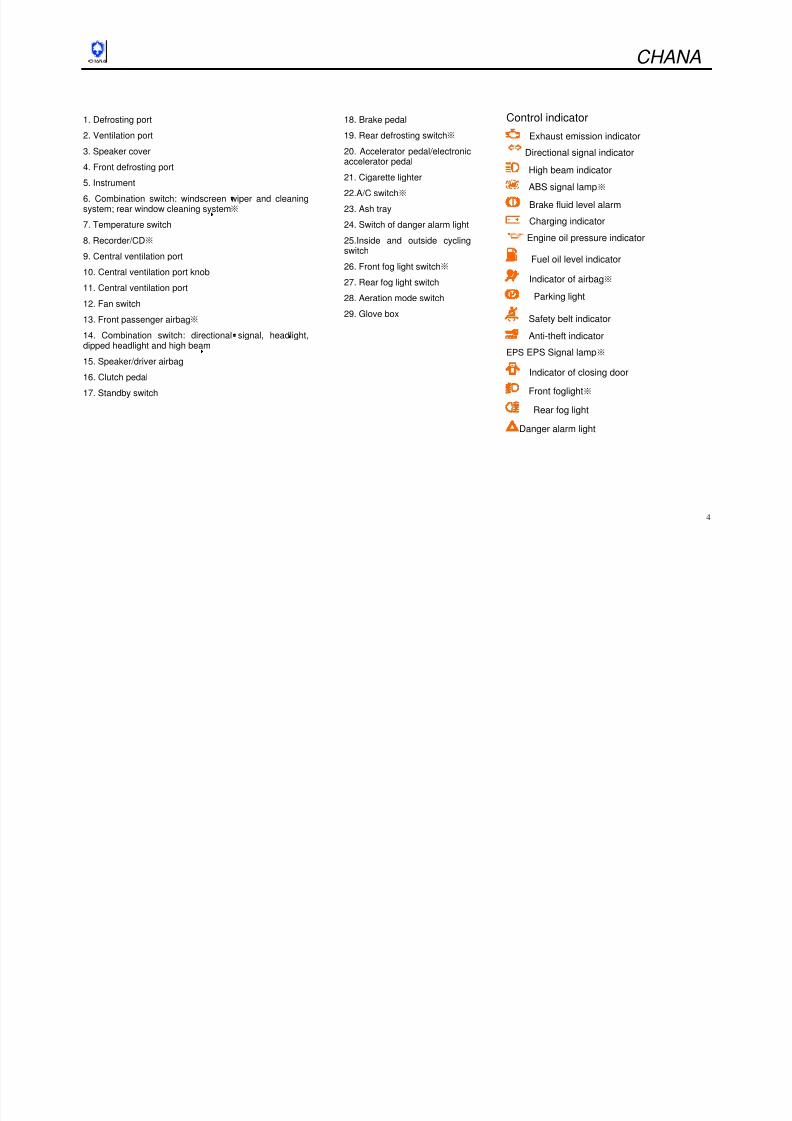
2) Instrument Panel
8/13/2019 BENNI Brochure
http://slidepdf.com/reader/full/benni-brochure 4/102
CHANA
4
1. Defrosting port
2. Ventilation port
3. Speaker cover
4. Front defrosting port
5. Instrument
6. Combination switch: windscreen wiper and cleaningsystem; rear window cleaning system※
7. Temperature switch
8. Recorder/CD※
9. Central ventilation port
10. Central ventilation port knob
11. Central ventilation port
12. Fan switch
13. Front passenger airbag※
14. Combination switch: directional signal, headlight,dipped headlight and high beam
15. Speaker/driver airbag
16. Clutch pedal
17. Standby switch
18. Brake pedal
19. Rear defrosting switch※
20. Accelerator pedal/electronicaccelerator pedal
21. Cigarette lighter
22.A/C switch※ 23. Ash tray
24. Switch of danger alarm light
25.Inside and outside cyclingswitch
26. Front fog light switch※
27. Rear fog light switch
28. Aeration mode switch
29. Glove box
Control indicator
Exhaust emission indicator
Directional signal indicator
High beam indicator
ABS signal lamp※
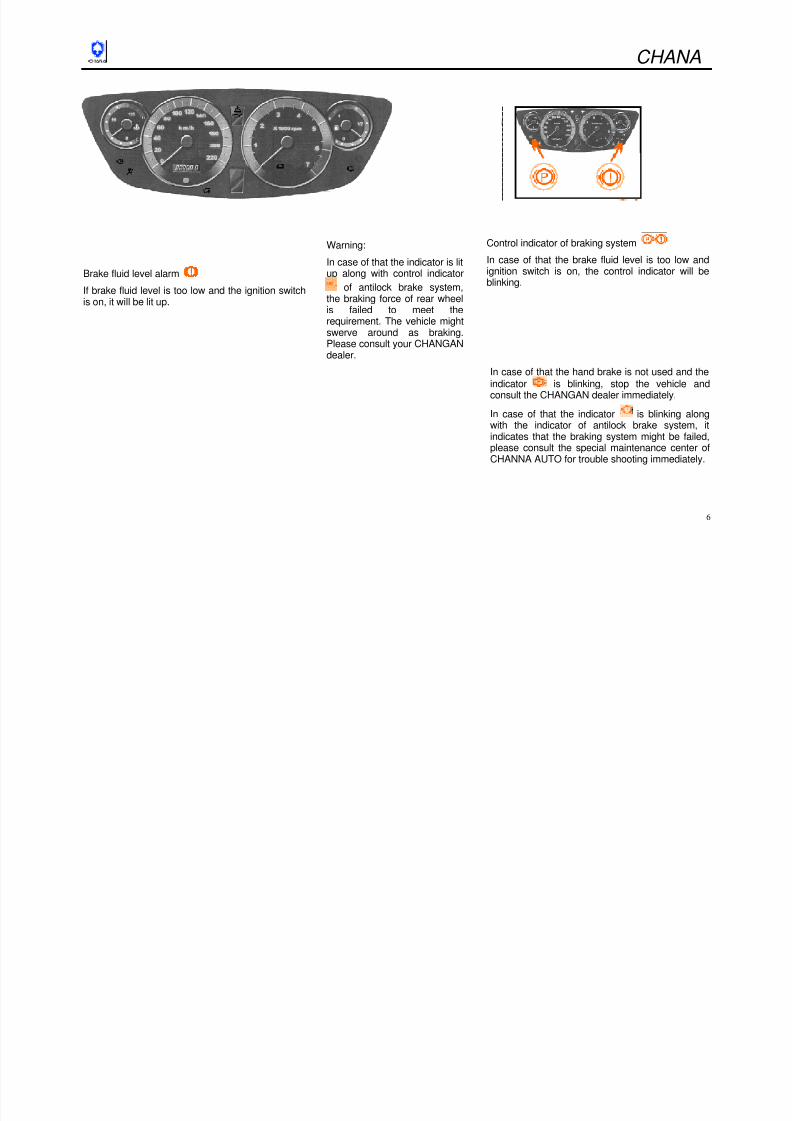
Brake fluid level alarm
Charging indicator
Engine oil pressure indicator
Fuel oil level indicator
Indicator of airbag※
Parking light
Safety belt indicator
Anti-theft indicator
EPS EPS Signal lamp※
Indicator of closing door
Front foglight※
Rear fog light
Danger alarm light
8/13/2019 BENNI Brochure
http://slidepdf.com/reader/full/benni-brochure 5/102
CHANA
- 5 -
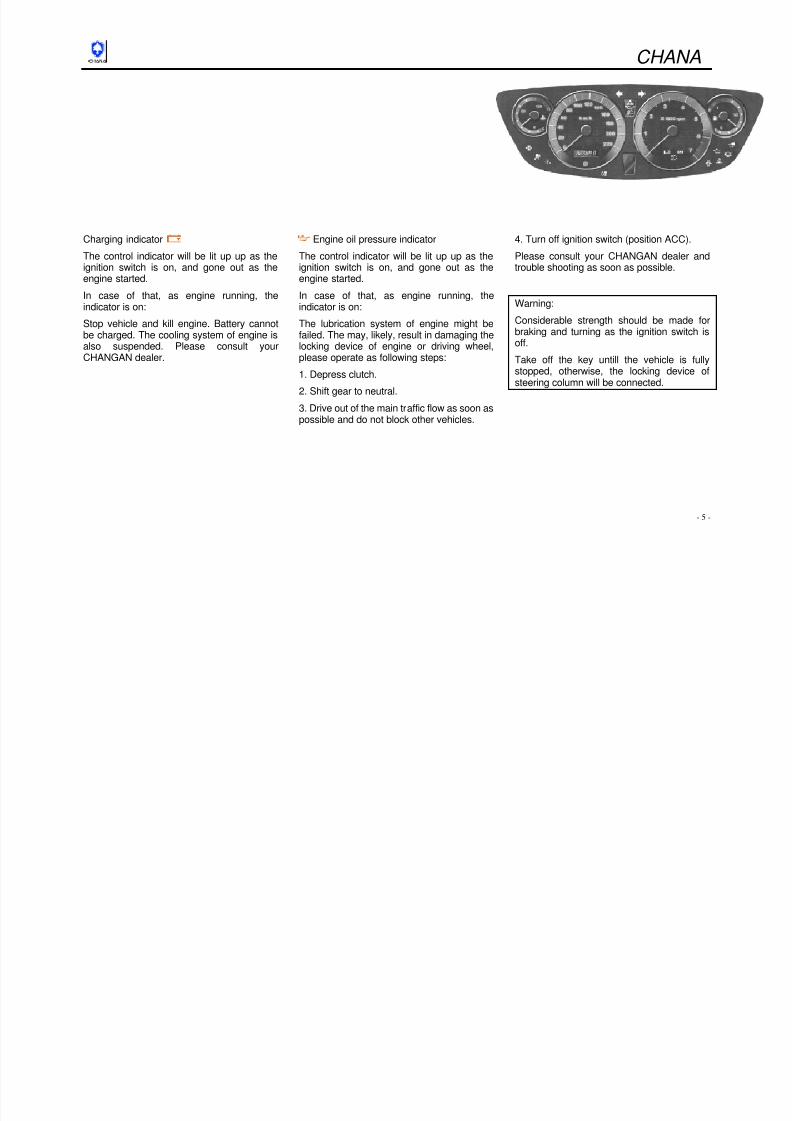
Charging indicator
The control indicator will be lit up up as theignition switch is on, and gone out as theengine started.
In case of that, as engine running, theindicator is on:
Stop vehicle and kill engine. Battery cannotbe charged. The cooling system of engine isalso suspended. Please consult yourCHANGAN dealer.
Engine oil pressure indicator
The control indicator will be lit up up as theignition switch is on, and gone out as theengine started.
In case of that, as engine running, theindicator is on:
The lubrication system of engine might befailed. The may, likely, result in damaging thelocking device of engine or driving wheel,please operate as following steps:
1. Depress clutch.
2. Shift gear to neutral.
3. Drive out of the main traffic flow as soon aspossible and do not block other vehicles.
4. Turn off ignition switch (position ACC).
Please consult your CHANGAN dealer andtrouble shooting as soon as possible.
Warning:
Considerable strength should be made forbraking and turning as the ignition switch isoff.
Take off the key untill the vehicle is fullystopped, otherwise, the locking device ofsteering column will be connected.
8/13/2019 BENNI Brochure
http://slidepdf.com/reader/full/benni-brochure 6/102
8/13/2019 BENNI Brochure
http://slidepdf.com/reader/full/benni-brochure 7/102
CHANA
7
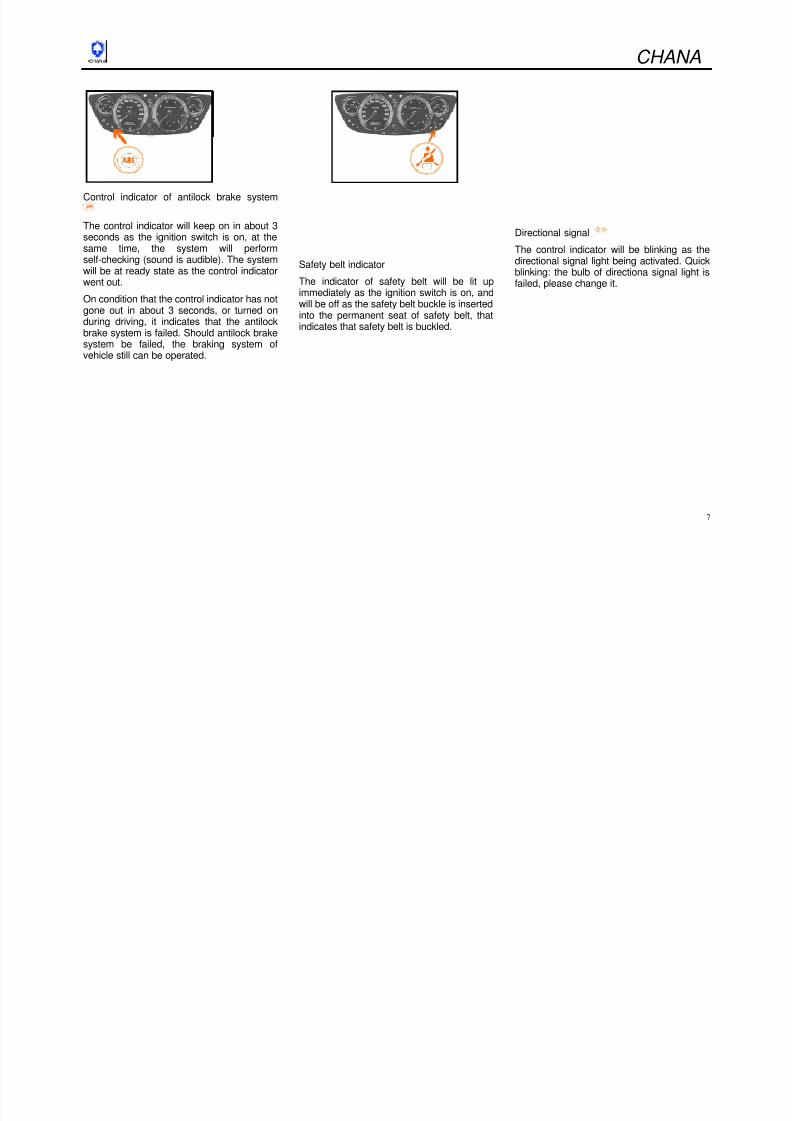
Control indicator of antilock brake system
The control indicator will keep on in about 3seconds as the ignition switch is on, at thesame time, the system will performself-checking (sound is audible). The systemwill be at ready state as the control indicatorwent out.
On condition that the control indicator has notgone out in about 3 seconds, or turned onduring driving, it indicates that the antilockbrake system is failed. Should antilock brakesystem be failed, the braking system ofvehicle still can be operated.
Safety belt indicator
The indicator of safety belt will be lit up
immediately as the ignition switch is on, andwill be off as the safety belt buckle is insertedinto the permanent seat of safety belt, thatindicates that safety belt is buckled.
Directional signal
The control indicator will be blinking as thedirectional signal light being activated. Quickblinking: the bulb of directiona signal light isfailed, please change it.

8/13/2019 BENNI Brochure
http://slidepdf.com/reader/full/benni-brochure 8/102
CHANA
- 8 -
Indicator of closing door
The indicator of closing door will be on as doors(except back door) were not closed and will be offas doors (except back door) were closed.
Indicator of airbag※
It can indicate the operating stateof airbag system, and it will bekeeping blinking for about 5.5seconds as turning on the ignitionswitch. If it is not blinking or notgo out after 5.5 seconds orkeeping on during driving, that
indicates the system or airbagsystem is failed. The airbagsystem cannot be exploded in theevent of accident.
Warning:
The problem should be resolved
as soon as possible, pleasecontact your CHANGAN dealer.
High beam headlight
It will be lit up if being connected.
Electronic control power steering EPS1) ※
The control indicator will be lit on for severalseconds as turning on ignition switch. If it is lit onduring driving, it indicates that it is failed. Thefunction of power steering is no longer valid, you,however, still can keep driving but considerablesteering force should be made. Please consult yourCHANGAN dealer.
1) EPS - electronic power steering system
8/13/2019 BENNI Brochure
http://slidepdf.com/reader/full/benni-brochure 9/102
CHANA
9
EPS
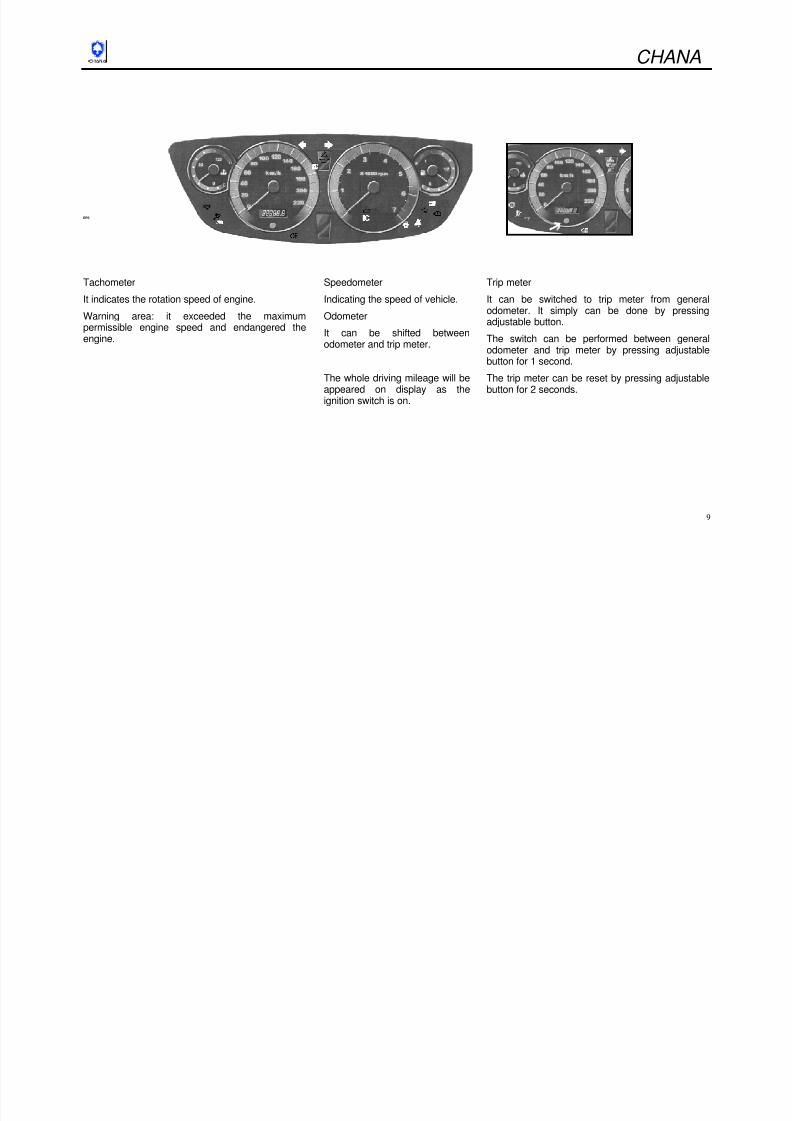
Tachometer
It indicates the rotation speed of engine.
Warning area: it exceeded the maximumpermissible engine speed and endangered theengine.
Speedometer
Indicating the speed of vehicle.
Odometer
It can be shifted betweenodometer and trip meter.
The whole driving mileage will be
appeared on display as theignition switch is on.
Trip meter
It can be switched to trip meter from generalodometer. It simply can be done by pressingadjustable button.
The switch can be performed between generalodometer and trip meter by pressing adjustablebutton for 1 second.
The trip meter can be reset by pressing adjustable
button for 2 seconds.
8/13/2019 BENNI Brochure
http://slidepdf.com/reader/full/benni-brochure 10/102
CHANA
10
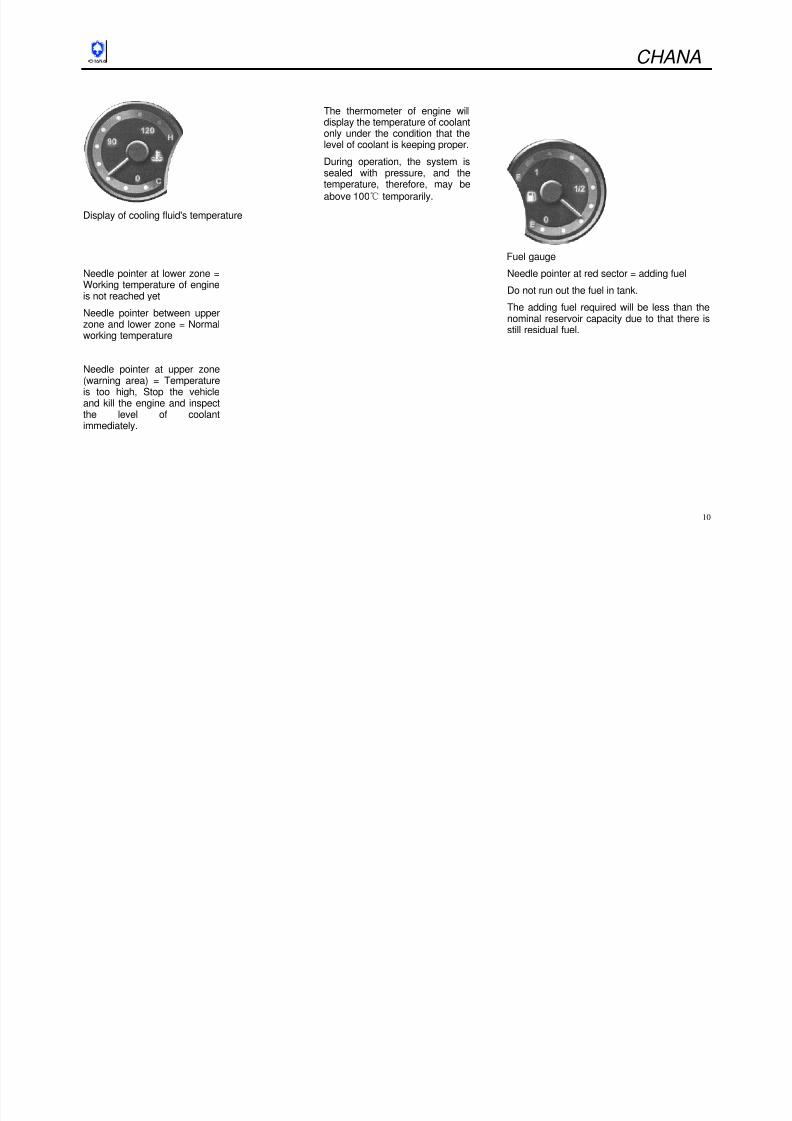
Display of cooling fluid's temperature
The thermometer of engine willdisplay the temperature of coolantonly under the condition that thelevel of coolant is keeping proper.
During operation, the system issealed with pressure, and thetemperature, therefore, may be
above 100℃ temporarily.
Fuel gauge
Needle pointer at lower zone =Working temperature of engine
is not reached yet
Needle pointer between upperzone and lower zone = Normalworking temperature
Needle pointer at upper zone(warning area) = Temperature
is too high, Stop the vehicleand kill the engine and inspectthe level of coolantimmediately.
Needle pointer at red sector = adding fuel
Do not run out the fuel in tank.The adding fuel required will be less than thenominal reservoir capacity due to that there isstill residual fuel.
8/13/2019 BENNI Brochure
http://slidepdf.com/reader/full/benni-brochure 11/102
CHANA
- 11 -
3)Control device and functionExternal lamp
Turn the lighting switch
OFF=Off
= Position lights
=Dipped headlight
= High beam headlight
The tail light and license plate light are lit up at theposition of and .
Reversing light
It will be lit up as reverse gear is engaged and theignition switch is on.
Front foglight※
Pressing = ON
Pressing again = Off
The switch has controlledindicator.
Rear foglight
Pressing = ON
Pressing again = Off
The switch has controlindicator.
Note: 1) The foglight switchonly can be functioned as thecombination switch is at theposition of .
2) The rear foglight switchonly can be functioned as thecombination switch is at the
position of .
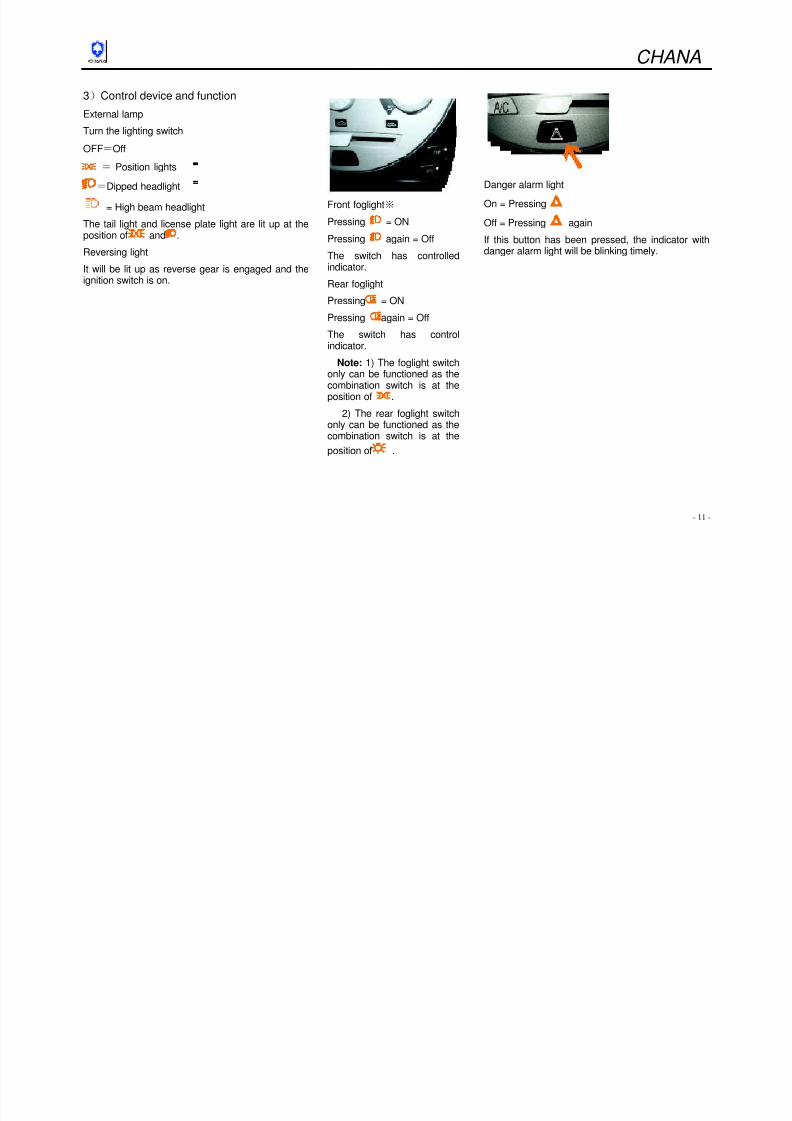
Danger alarm light
On = Pressing
Off = Pressing again
If this button has been pressed, the indicator withdanger alarm light will be blinking timely.
8/13/2019 BENNI Brochure
http://slidepdf.com/reader/full/benni-brochure 12/102
CHANA
- 12 -
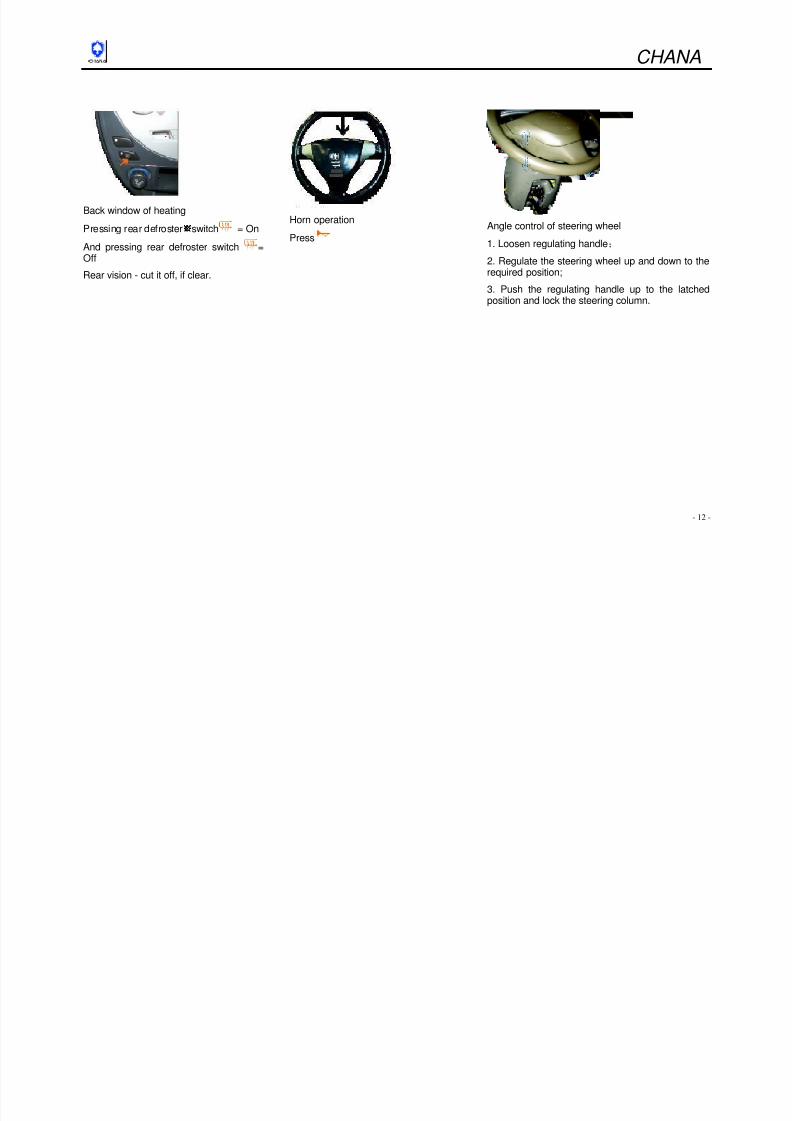
Back window of heating
Pressing rear defroster switch = On
And pressing rear defroster switch =Off
Rear vision - cut it off, if clear.
Horn operation
PressAngle control of steering wheel
1. Loosen regulating handle;
2. Regulate the steering wheel up and down to therequired position;
3. Push the regulating handle up to the latchedposition and lock the steering column.
8/13/2019 BENNI Brochure
http://slidepdf.com/reader/full/benni-brochure 13/102
CHANA
13
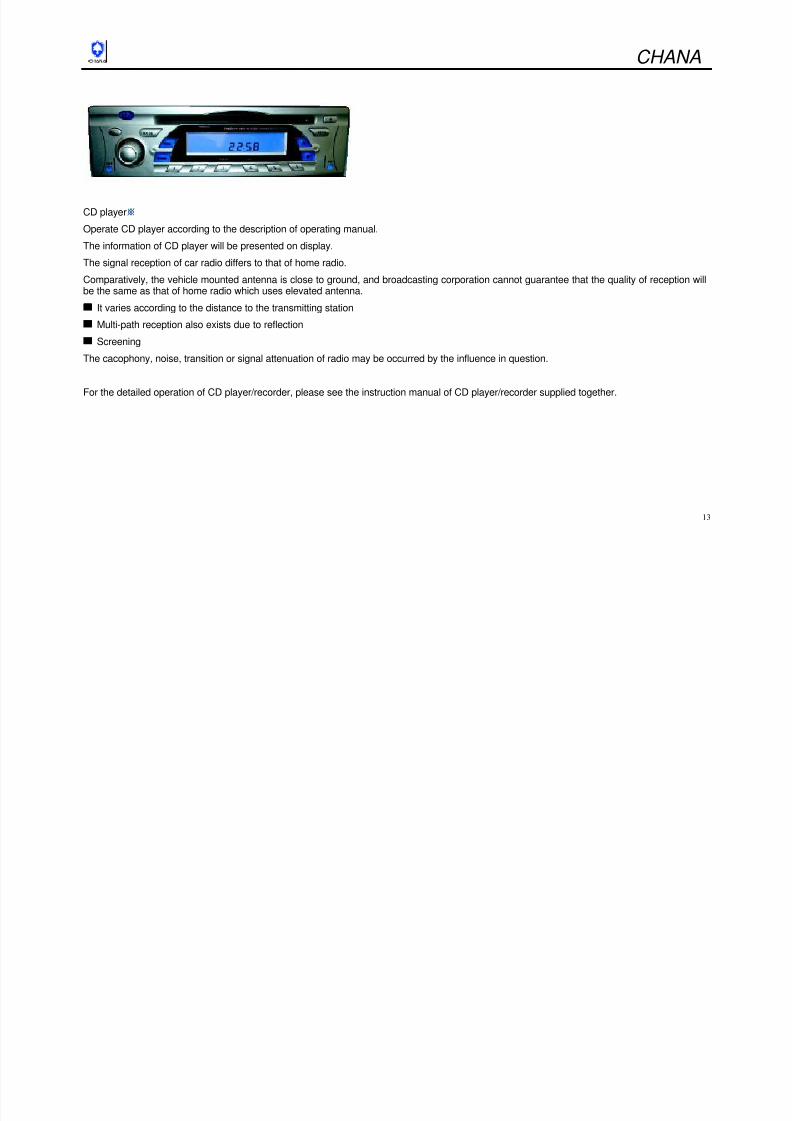
CD player
Operate CD player according to the description of operating manual.
The information of CD player will be presented on display.
The signal reception of car radio differs to that of home radio.
Comparatively, the vehicle mounted antenna is close to ground, and broadcasting corporation cannot guarantee that the quality of reception will
be the same as that of home radio which uses elevated antenna.It varies according to the distance to the transmitting station
Multi-path reception also exists due to reflection
Screening
The cacophony, noise, transition or signal attenuation of radio may be occurred by the influence in question.
For the detailed operation of CD player/recorder, please see the instruction manual of CD player/recorder supplied together.
8/13/2019 BENNI Brochure
http://slidepdf.com/reader/full/benni-brochure 14/102
CHANA
14
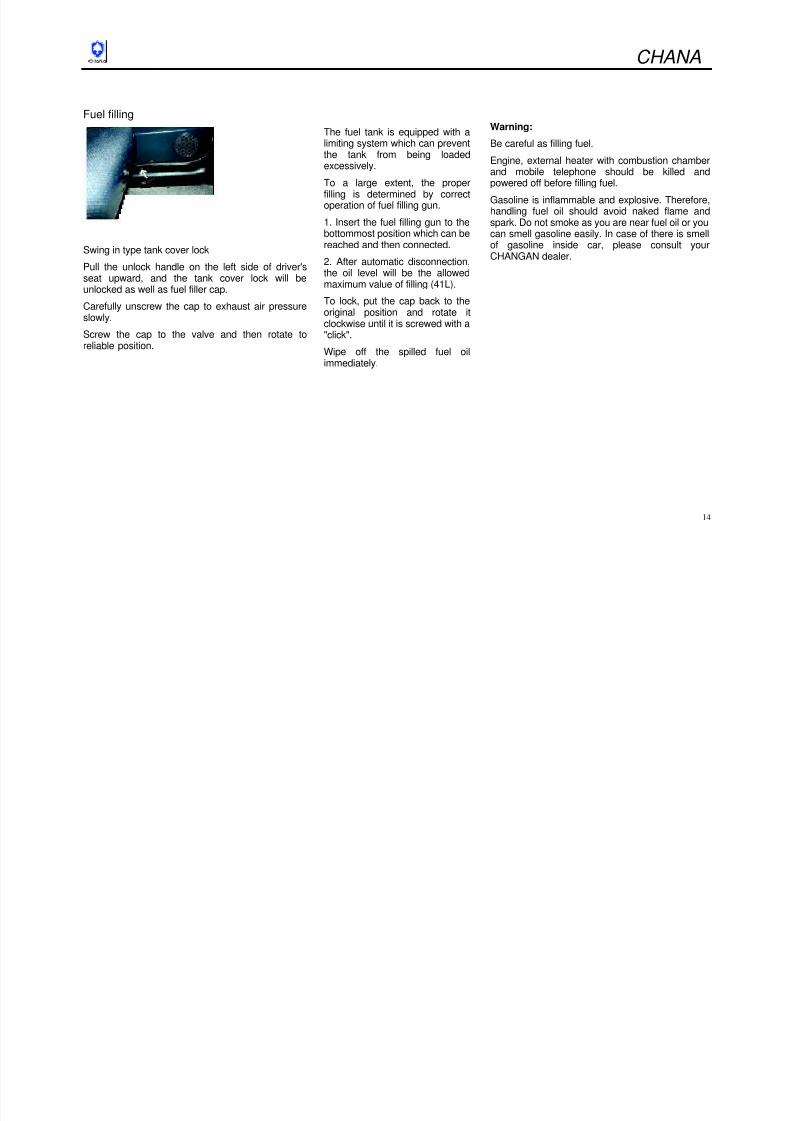
Fuel filling
Swing in type tank cover lock
Pull the unlock handle on the left side of driver'sseat upward, and the tank cover lock will beunlocked as well as fuel filler cap.
Carefully unscrew the cap to exhaust air pressureslowly.
Screw the cap to the valve and then rotate toreliable position.
The fuel tank is equipped with alimiting system which can preventthe tank from being loadedexcessively.
To a large extent, the proper
filling is determined by correctoperation of fuel filling gun.
1. Insert the fuel filling gun to thebottommost position which can bereached and then connected.
2. After automatic disconnection,the oil level will be the allowedmaximum value of filling (41L).
To lock, put the cap back to theoriginal position and rotate itclockwise until it is screwed with a"click".
Wipe off the spilled fuel oilimmediately.
Warning:
Be careful as filling fuel.
Engine, external heater with combustion chamberand mobile telephone should be killed andpowered off before filling fuel.
Gasoline is inflammable and explosive. Therefore,handling fuel oil should avoid naked flame andspark. Do not smoke as you are near fuel oil or youcan smell gasoline easily. In case of there is smellof gasoline inside car, please consult yourCHANGAN dealer.

8/13/2019 BENNI Brochure
http://slidepdf.com/reader/full/benni-brochure 15/102
CHANA
15
Heating and ventilating
Heating and ventilating system
Air mixing system: the indoor air can beregulated by mixing cold air and warm air.
4
Controller of heating and ventilating
Rotary switch:Temperature switch
Clockwise = heat up
Anti-clockwise = cool down
Rotary switch:fan
Wind velocity of 4 gears
Off
4 maxima airflow
The velocity of air flow is controlled by fan,therefore the fan should be turn on during
trip.
8/13/2019 BENNI Brochure
http://slidepdf.com/reader/full/benni-brochure 16/102
CHANA
16
4
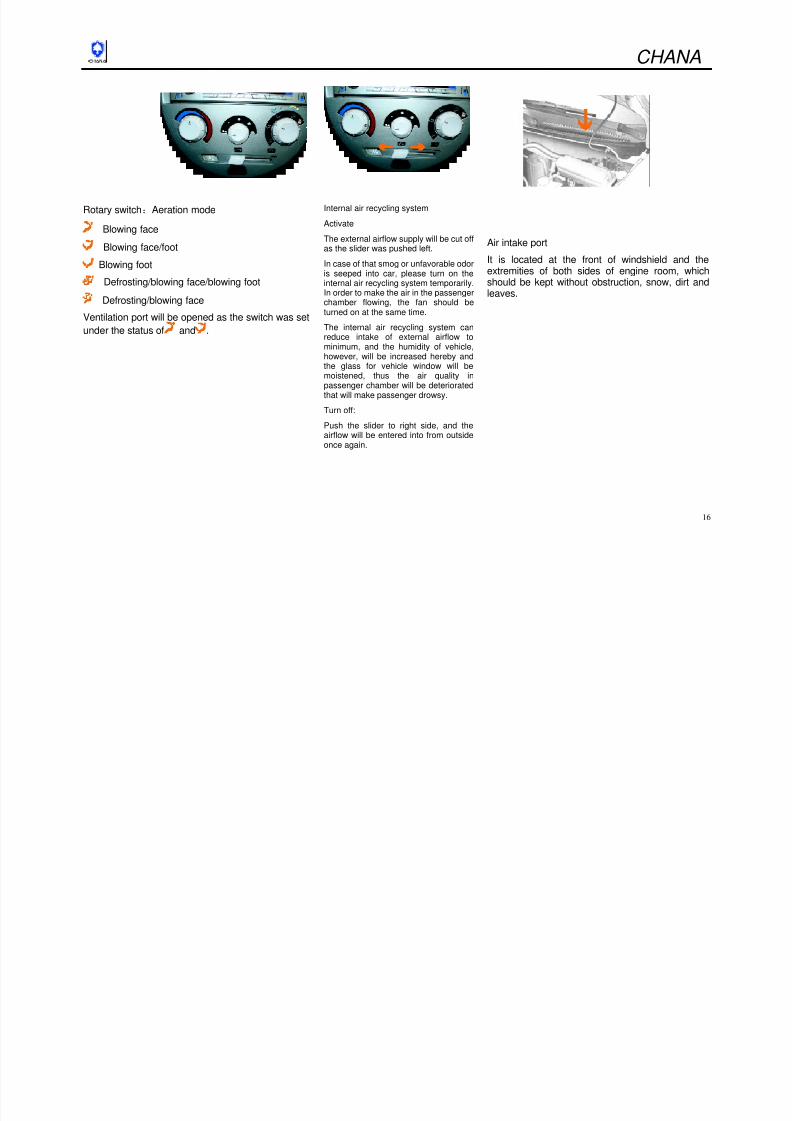
Rotary switch:Aeration mode
Blowing face
Blowing face/foot
Blowing foot
Defrosting/blowing face/blowing foot
Defrosting/blowing face
Ventilation port will be opened as the switch was set
under the status of and .
Internal air recycling system
Activate
The external airflow supply will be cut offas the slider was pushed left.
In case of that smog or unfavorable odoris seeped into car, please turn on theinternal air recycling system temporarily.
In order to make the air in the passengerchamber flowing, the fan should beturned on at the same time.
The internal air recycling system canreduce intake of external airflow tominimum, and the humidity of vehicle,however, will be increased hereby andthe glass for vehicle window will bemoistened, thus the air quality inpassenger chamber will be deteriorated
that will make passenger drowsy.
Turn off:
Push the slider to right side, and theairflow will be entered into from outsideonce again.
Air intake port
It is located at the front of windshield and theextremities of both sides of engine room, whichshould be kept without obstruction, snow, dirt and
leaves.
8/13/2019 BENNI Brochure
http://slidepdf.com/reader/full/benni-brochure 17/102
CHANA
17
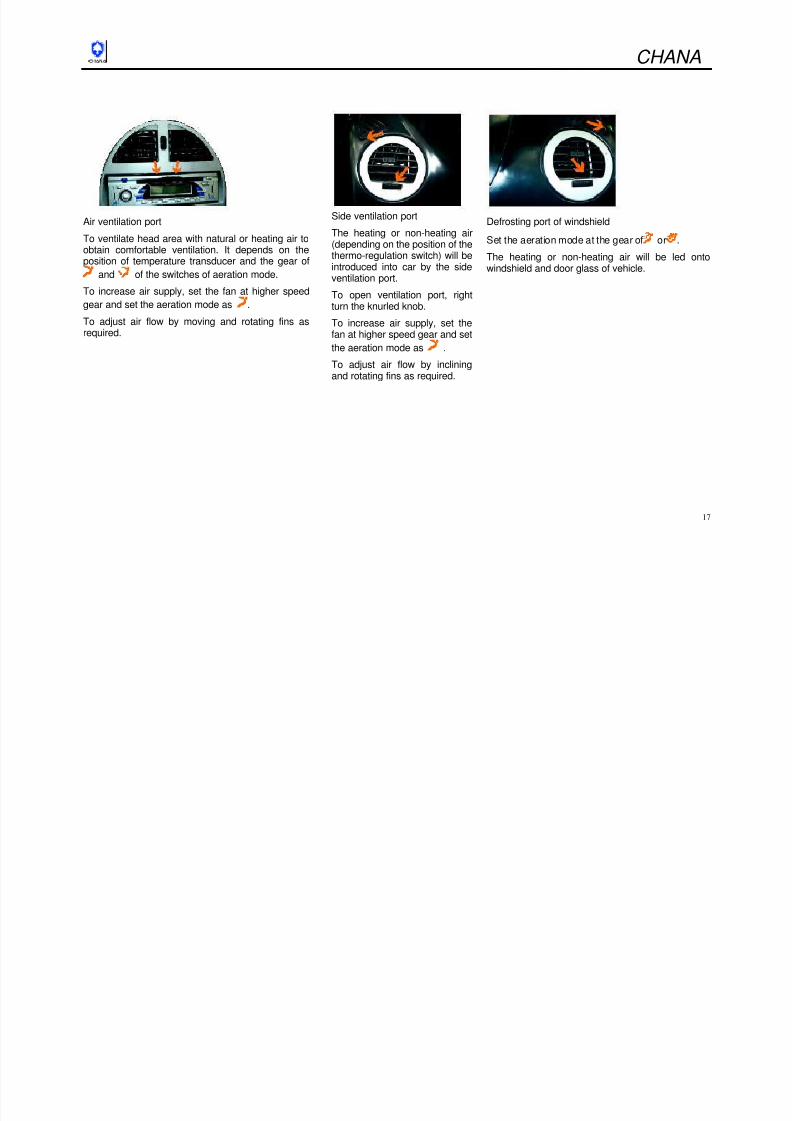
Air ventilation port
To ventilate head area with natural or heating air toobtain comfortable ventilation. It depends on theposition of temperature transducer and the gear of
and of the switches of aeration mode.
To increase air supply, set the fan at higher speedgear and set the aeration mode as .
To adjust air flow by moving and rotating fins asrequired.
Side ventilation port
The heating or non-heating air(depending on the position of thethermo-regulation switch) will beintroduced into car by the sideventilation port.
To open ventilation port, rightturn the knurled knob.
To increase air supply, set thefan at higher speed gear and set
the aeration mode as .
To adjust air flow by incliningand rotating fins as required.
Defrosting port of windshield
Set the aeration mode at the gear of or .
The heating or non-heating air will be led ontowindshield and door glass of vehicle.
8/13/2019 BENNI Brochure
http://slidepdf.com/reader/full/benni-brochure 18/102
CHANA
18
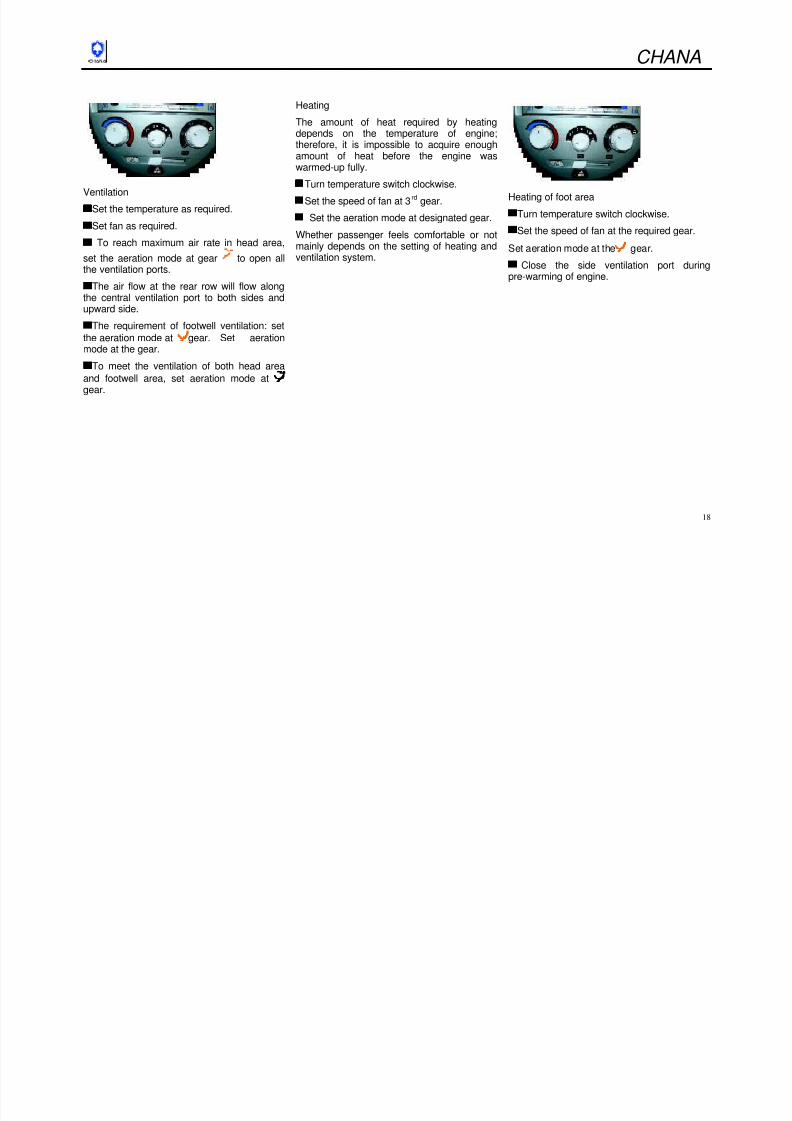
Ventilation
Set the temperature as required.
Set fan as required.
To reach maximum air rate in head area,
set the aeration mode at gear to open allthe ventilation ports.
The air flow at the rear row will flow along
the central ventilation port to both sides andupward side.
The requirement of footwell ventilation: set
the aeration mode at gear. Set aerationmode at the gear.
To meet the ventilation of both head area
and footwell area, set aeration mode at
gear.
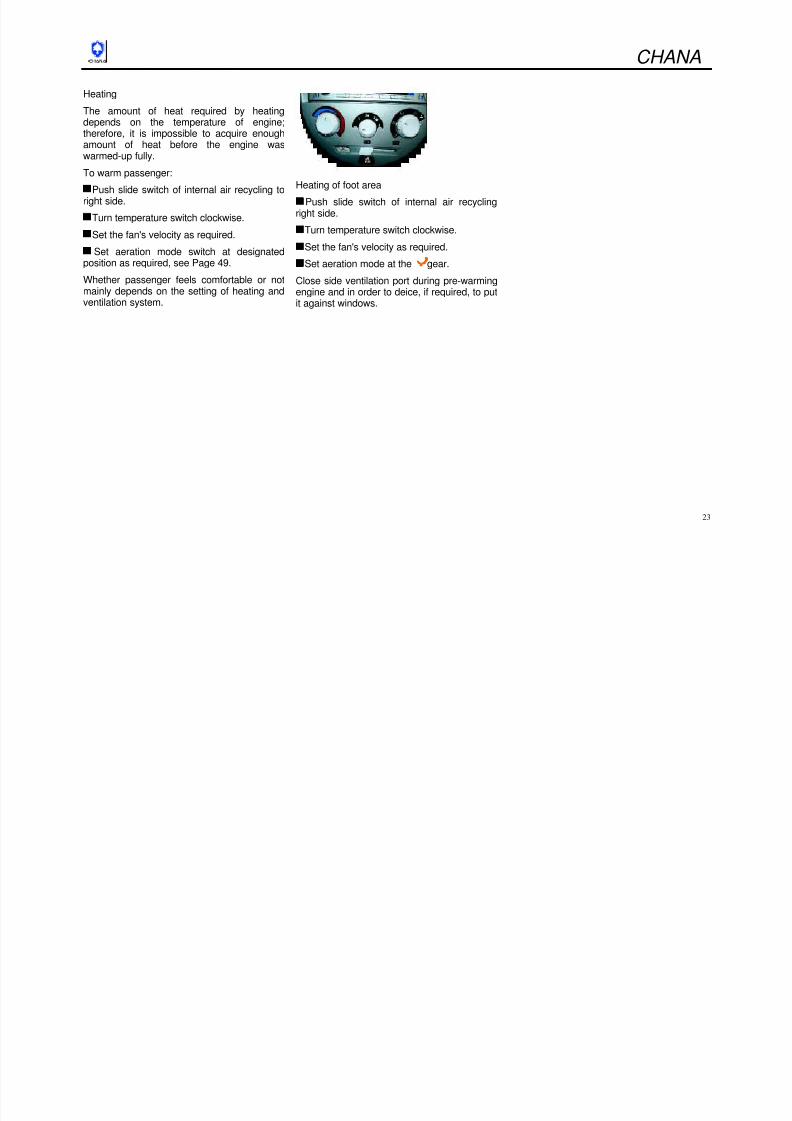
Heating
The amount of heat required by heatingdepends on the temperature of engine;therefore, it is impossible to acquire enoughamount of heat before the engine waswarmed-up fully.
Turn temperature switch clockwise.
Set the speed of fan at 3rd gear.
Set the aeration mode at designated gear.
Whether passenger feels comfortable or notmainly depends on the setting of heating andventilation system.
Heating of foot areaTurn temperature switch clockwise.
Set the speed of fan at the required gear.
Set aeration mode at the gear.
Close the side ventilation port duringpre-warming of engine.
8/13/2019 BENNI Brochure
http://slidepdf.com/reader/full/benni-brochure 19/102
CHANA
19
Defrosting and deicing of glass
Warning:
Should the following explanation be neglected,the glass may be fogged that will attenuatevisibility range and, finally, cause theoccurrence of accident.
Turn temperature switch clockwise.Set the speed of fan at 3
rd gear or 4
th gear.
Set aeration mode at the gear.
To open side ventilation port, align it with theglass of door and window.
Turn on the heating control switch of rearwindows.
To heat up the area of foot at the same time,set aeration mode at gear.
The heating will be normal as engine running.
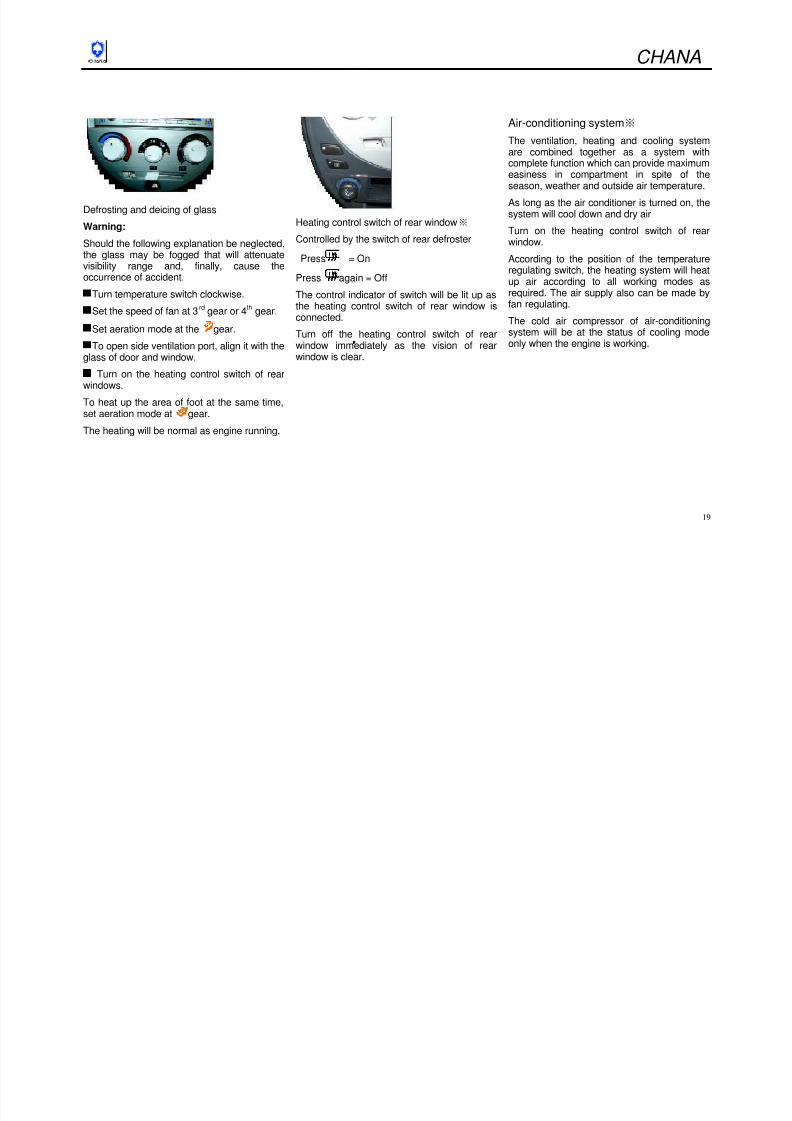
Heating control switch of rear window※
Controlled by the switch of rear defroster
Press = On
Press again = Off
The control indicator of switch will be lit up asthe heating control switch of rear window isconnected.
Turn off the heating control switch of rearwindow immediately as the vision of rearwindow is clear.
Air-conditioning system※
The ventilation, heating and cooling systemare combined together as a system withcomplete function which can provide maximumeasiness in compartment in spite of theseason, weather and outside air temperature.
As long as the air conditioner is turned on, thesystem will cool down and dry air
Turn on the heating control switch of rearwindow.
According to the position of the temperatureregulating switch, the heating system will heatup air according to all working modes as
required. The air supply also can be made byfan regulating.
The cold air compressor of air-conditioningsystem will be at the status of cooling modeonly when the engine is working.
8/13/2019 BENNI Brochure
http://slidepdf.com/reader/full/benni-brochure 20/102
CHANA
20
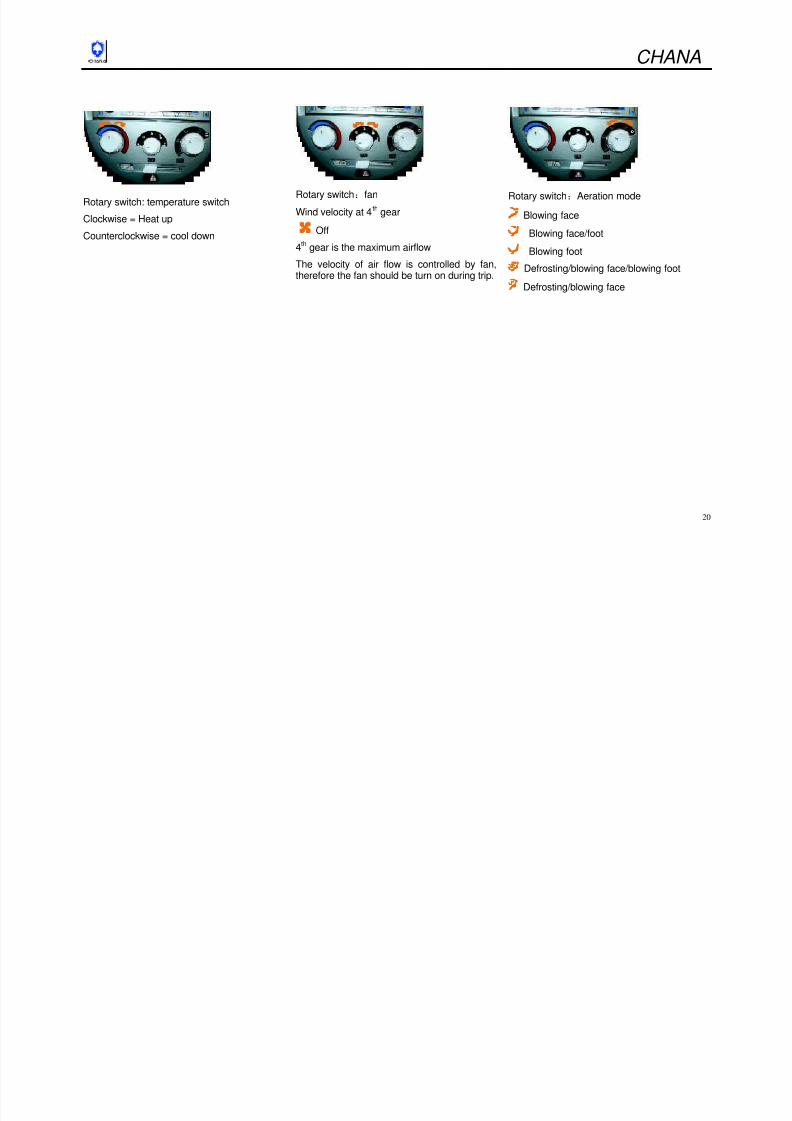
Rotary switch: temperature switch
Clockwise = Heat up
Counterclockwise = cool down
Rotary switch:
fanWind velocity at 4
th gear
Off
4th gear is the maximum airflow
The velocity of air flow is controlled by fan,therefore the fan should be turn on during trip.
Rotary switch:Aeration modeBlowing face
Blowing face/foot
Blowing foot
Defrosting/blowing face/blowing foot
Defrosting/blowing face
8/13/2019 BENNI Brochure
http://slidepdf.com/reader/full/benni-brochure 21/102
CHANA
21
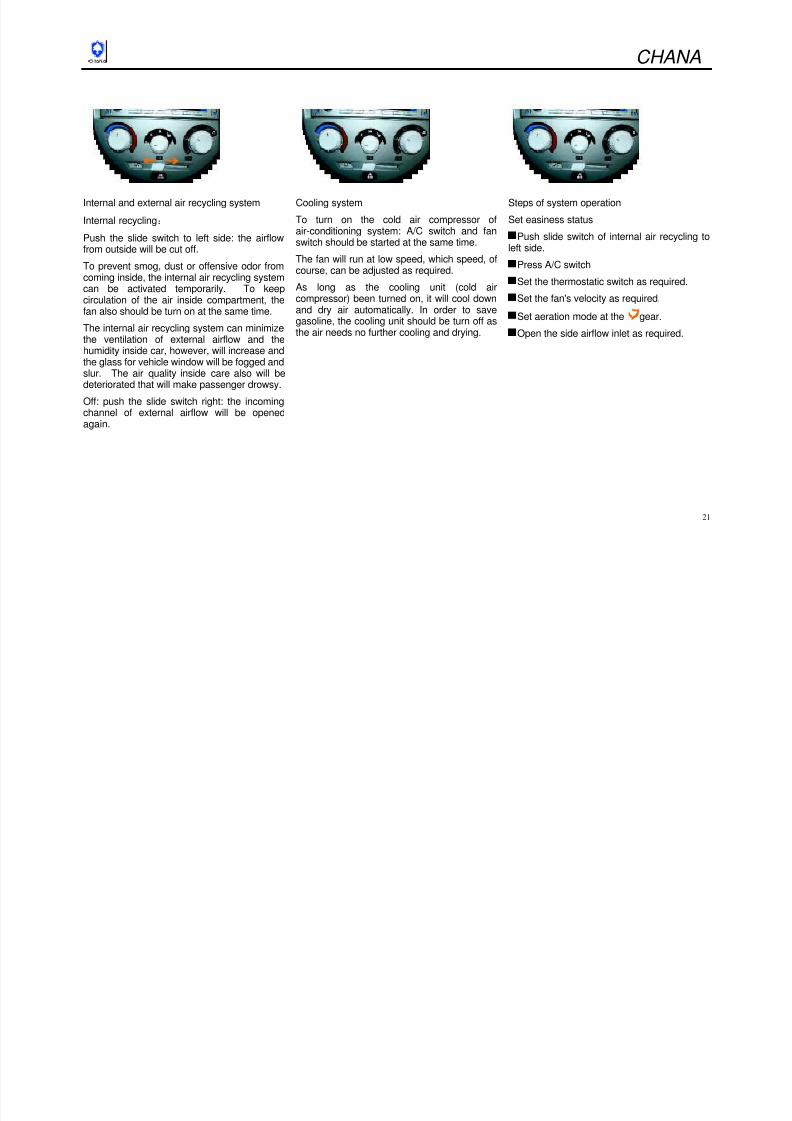
Internal and external air recycling system
Internal recycling:
Push the slide switch to left side: the airflowfrom outside will be cut off.
To prevent smog, dust or offensive odor fromcoming inside, the internal air recycling systemcan be activated temporarily. To keep
circulation of the air inside compartment, thefan also should be turn on at the same time.
The internal air recycling system can minimizethe ventilation of external airflow and thehumidity inside car, however, will increase andthe glass for vehicle window will be fogged andslur. The air quality inside care also will bedeteriorated that will make passenger drowsy.
Off: push the slide switch right: the incomingchannel of external airflow will be openedagain.
Cooling system
To turn on the cold air compressor ofair-conditioning system: A/C switch and fanswitch should be started at the same time.
The fan will run at low speed, which speed, ofcourse, can be adjusted as required.
As long as the cooling unit (cold air
compressor) been turned on, it will cool downand dry air automatically. In order to savegasoline, the cooling unit should be turn off asthe air needs no further cooling and drying.
Steps of system operation
Set easiness status
Push slide switch of internal air recycling toleft side.
Press A/C switch
Set the thermostatic switch as required.
Set the fan's velocity as required.
Set aeration mode at the gear.
Open the side airflow inlet as required.
8/13/2019 BENNI Brochure
http://slidepdf.com/reader/full/benni-brochure 22/102
CHANA
22
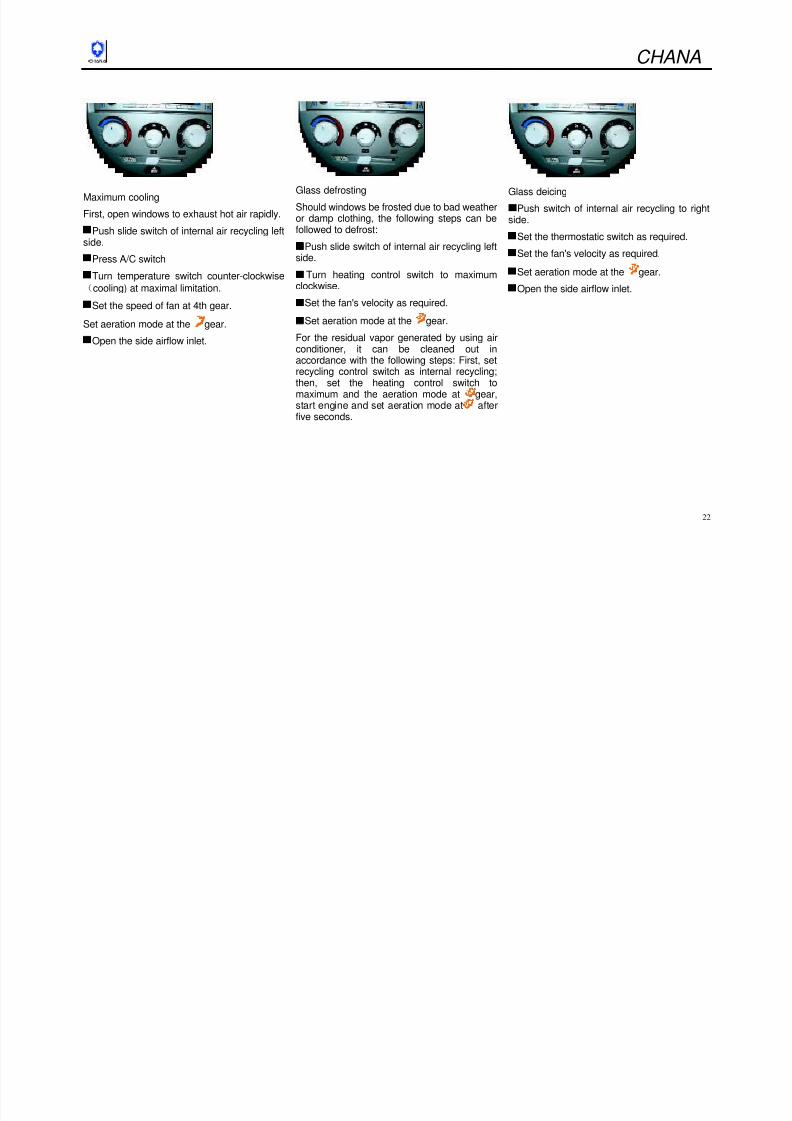
Maximum coolingFirst, open windows to exhaust hot air rapidly.
Push slide switch of internal air recycling leftside.
Press A/C switch
Turn temperature switch counter-clockwise
(cooling) at maximal limitation.
Set the speed of fan at 4th gear.
Set aeration mode at the gear.
Open the side airflow inlet.
Glass defrosting
Should windows be frosted due to bad weatheror damp clothing, the following steps can befollowed to defrost:
Push slide switch of internal air recycling leftside.
Turn heating control switch to maximumclockwise.
Set the fan's velocity as required.
Set aeration mode at the gear.
For the residual vapor generated by using airconditioner, it can be cleaned out inaccordance with the following steps: First, setrecycling control switch as internal recycling;then, set the heating control switch to
maximum and the aeration mode at gear,start engine and set aeration mode at afterfive seconds.
Glass deicing
Push switch of internal air recycling to rightside.
Set the thermostatic switch as required.
Set the fan's velocity as required.
Set aeration mode at the gear.
Open the side airflow inlet.
8/13/2019 BENNI Brochure
http://slidepdf.com/reader/full/benni-brochure 23/102
CHANA
23
Heating
The amount of heat required by heatingdepends on the temperature of engine;therefore, it is impossible to acquire enoughamount of heat before the engine waswarmed-up fully.
To warm passenger:
Push slide switch of internal air recycling to
right side.
Turn temperature switch clockwise.
Set the fan's velocity as required.
Set aeration mode switch at designatedposition as required, see Page 49.
Whether passenger feels comfortable or notmainly depends on the setting of heating andventilation system.
Heating of foot area
Push slide switch of internal air recyclingright side.
Turn temperature switch clockwise.
Set the fan's velocity as required.
Set aeration mode at the gear.
Close side ventilation port during pre-warmingengine and in order to deice, if required, to putit against windows.
8/13/2019 BENNI Brochure
http://slidepdf.com/reader/full/benni-brochure 24/102
CHANA
24
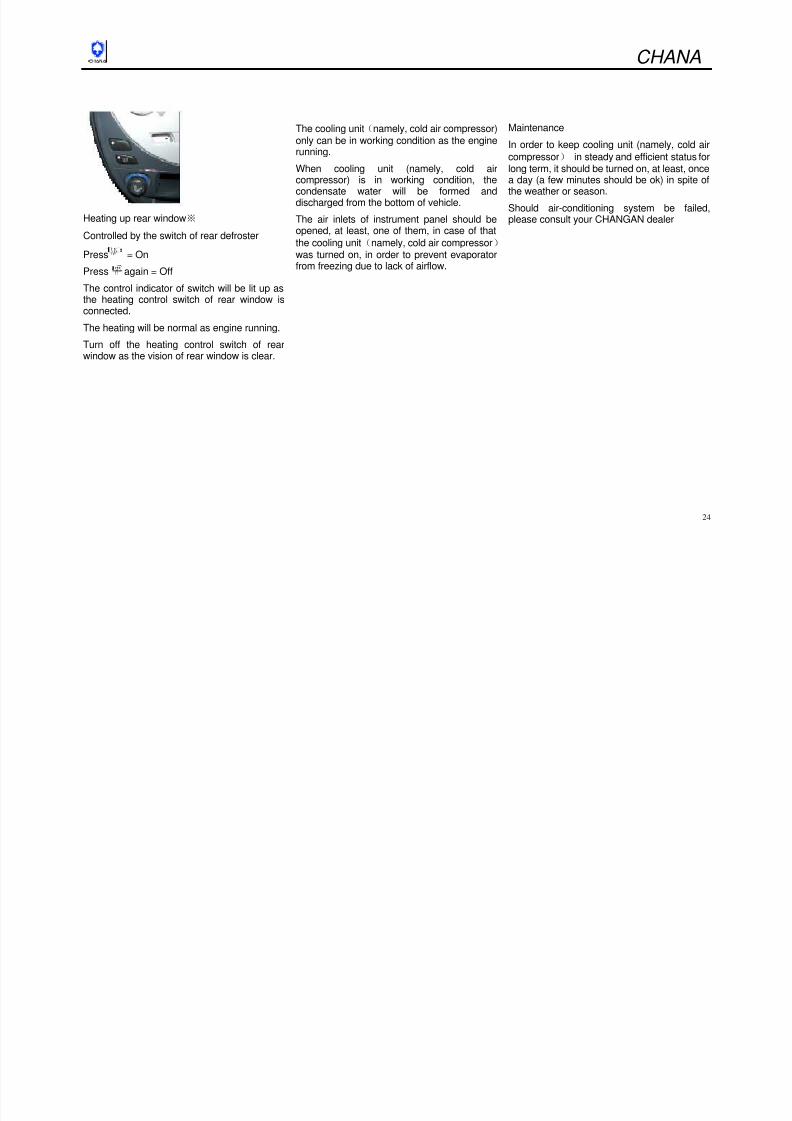
Heating up rear window※
Controlled by the switch of rear defroster
Press = On
Press again = Off
The control indicator of switch will be lit up as
the heating control switch of rear window isconnected.
The heating will be normal as engine running.
Turn off the heating control switch of rearwindow as the vision of rear window is clear.
The cooling unit(namely, cold air compressor)only can be in working condition as the enginerunning.
When cooling unit (namely, cold aircompressor) is in working condition, thecondensate water will be formed and
discharged from the bottom of vehicle.
The air inlets of instrument panel should beopened, at least, one of them, in case of that
the cooling unit(namely, cold air compressor)was turned on, in order to prevent evaporatorfrom freezing due to lack of airflow.
Maintenance
In order to keep cooling unit (namely, cold air
compressor) in steady and efficient status forlong term, it should be turned on, at least, oncea day (a few minutes should be ok) in spite ofthe weather or season.
Should air-conditioning system be failed,please consult your CHANGAN dealer
8/13/2019 BENNI Brochure
http://slidepdf.com/reader/full/benni-brochure 25/102
CHANA
25
Combination switch and others
Operation of Position lights
The position light will be on as the combinationswitch at gear.
Operation of high beam headlight and dippedheadlight
The dipped headlight will be on as the
combination switch at gear.
Push light handle forward, the high beamheadlight will be lit up.
Pull the light handle toward steering wheel, thealternating light will be lit up.
Operation of directional signal lamp
The control rod at stop position
Right turn = Up
Left turn = Down
The control rod will restore its original positionas the steering wheel is stopped. In case ofsmaller steering (such as change driveway),this situation will not happen.
Push the control rod to the front position of theresisting point as changing driveway andrelease it, it will restore its position
8/13/2019 BENNI Brochure
http://slidepdf.com/reader/full/benni-brochure 26/102
CHANA
26
Windscreen wiper
Push combination switch downwardOFF= Off
INT= Interval wiping
LO= Low speed
HI= High speed
Operation of cleaning system of windshield
Washer will spray water when pulling controlrod to the direction of steering wheel, the wiperwill wipe water for several times.
Operation of rear window wiper and cleaning
systemRun wiper: put the combination switch at ON.
Off wiper: put the combination switch at OFF.
Cleaning system:push the control rod forwardand hold

8/13/2019 BENNI Brochure
http://slidepdf.com/reader/full/benni-brochure 27/102
CHANA
27
Regulation of the internal rearview mirror
Turning rearview mirror
Turn the control rod mounted under rearviewmirror to avoid glare during night driving.
Regulation of external rearview mirror
Setting lever at the left or right side of driver
Move the setting lever to regulate the angle ofexternal rearview mirror.
Cigarette lighter
The cogarette lighter can be used as theignition switch at the position of "ACC". Presscigarette lighter, it will be automaticallydisconnected after the heating wire beingheated and will be ejected and ready ascigarette lighter.
8/13/2019 BENNI Brochure
http://slidepdf.com/reader/full/benni-brochure 28/102
CHANA
28
Ashtray
It only can be used for ash but inflammablewaste.
Warning:
If not doing so, it may result in injury orendangering life.
Open:
Open ashtray.
Dump
Push the cover of ashtray and pull it out.
Sun visor
Pull it down or pull it down and turn it to sidethat can prevent eyes from being exposed inintensive sunshine.
Door control indicator
It will be lit up if the door is open.
1. It is door control status when the switch is inthe middle: the light will be on as the dooropened;
2.It is off position as the switch at the positionof "OFF";
3. It is ON position as the switch at the position
of "ON";
Instrument lighting
The instrument light will be on as the lightingswitch at the position of .
8/13/2019 BENNI Brochure
http://slidepdf.com/reader/full/benni-brochure 29/102
CHANA
29
Manual transmission
= Neutral
R= Reverse gear
1 to 5 = first gear to fifth gear
Reverse gear: stop the vehicle and put thegear at neutral, and push the control rod rightside in 2 seconds to make the gear engaged.
Should the gears not be engaged together andcontrol rod at neutral, depress the clutch pedalonce again and repeat the selection of velocity
gear. Brake
The brake should be seized firmly. Especiallyhand brake on slope.
The mechanical hand brake has function onthe brake of rear wheels, as pulling control rodof hand brake, the brake of rear wheels will beengaged and functioned as braking.
The hand brake can be released by raising thecontrol rod slightly and pressing the ratchbutton to lay down control rod completely.
8/13/2019 BENNI Brochure
http://slidepdf.com/reader/full/benni-brochure 30/102
CHANA
30
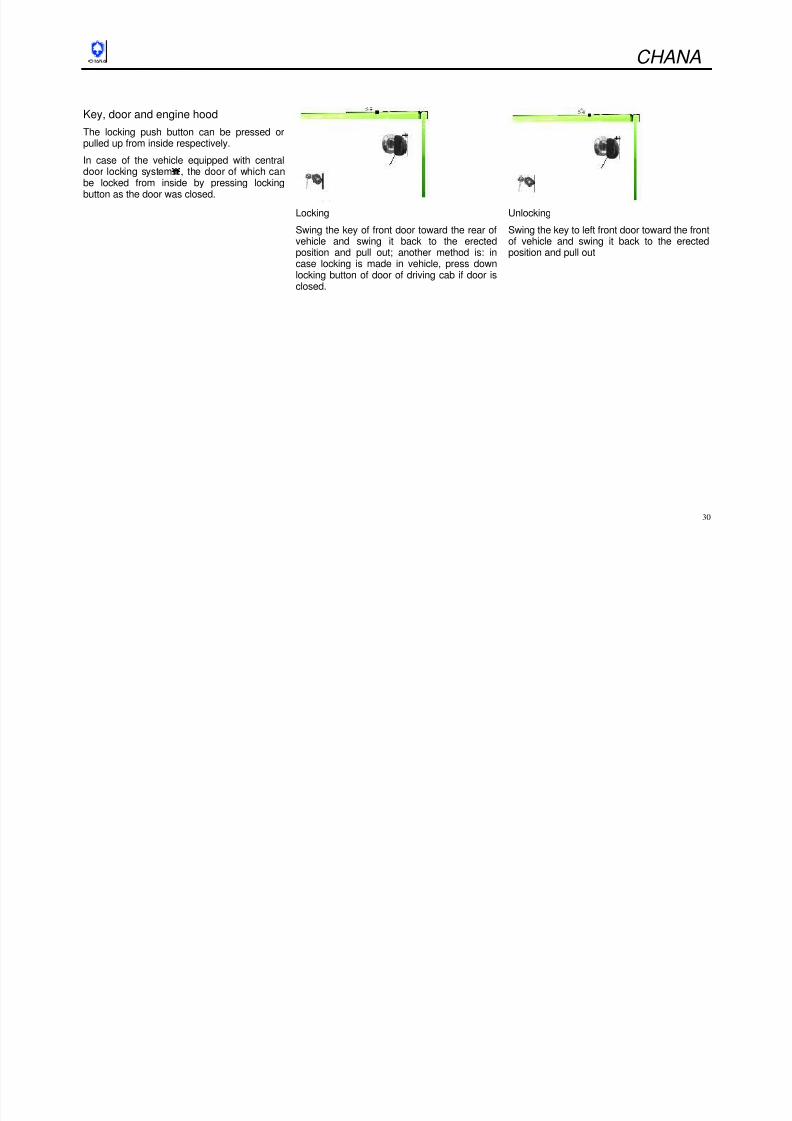
Key, door and engine hood
The locking push button can be pressed orpulled up from inside respectively.
In case of the vehicle equipped with centraldoor locking system , the door of which canbe locked from inside by pressing lockingbutton as the door was closed.
Locking
Swing the key of front door toward the rear ofvehicle and swing it back to the erectedposition and pull out; another method is: incase locking is made in vehicle, press downlocking button of door of driving cab if door isclosed.
Unlocking
Swing the key to left front door toward the frontof vehicle and swing it back to the erectedposition and pull out
8/13/2019 BENNI Brochure
http://slidepdf.com/reader/full/benni-brochure 31/102
CHANA
31
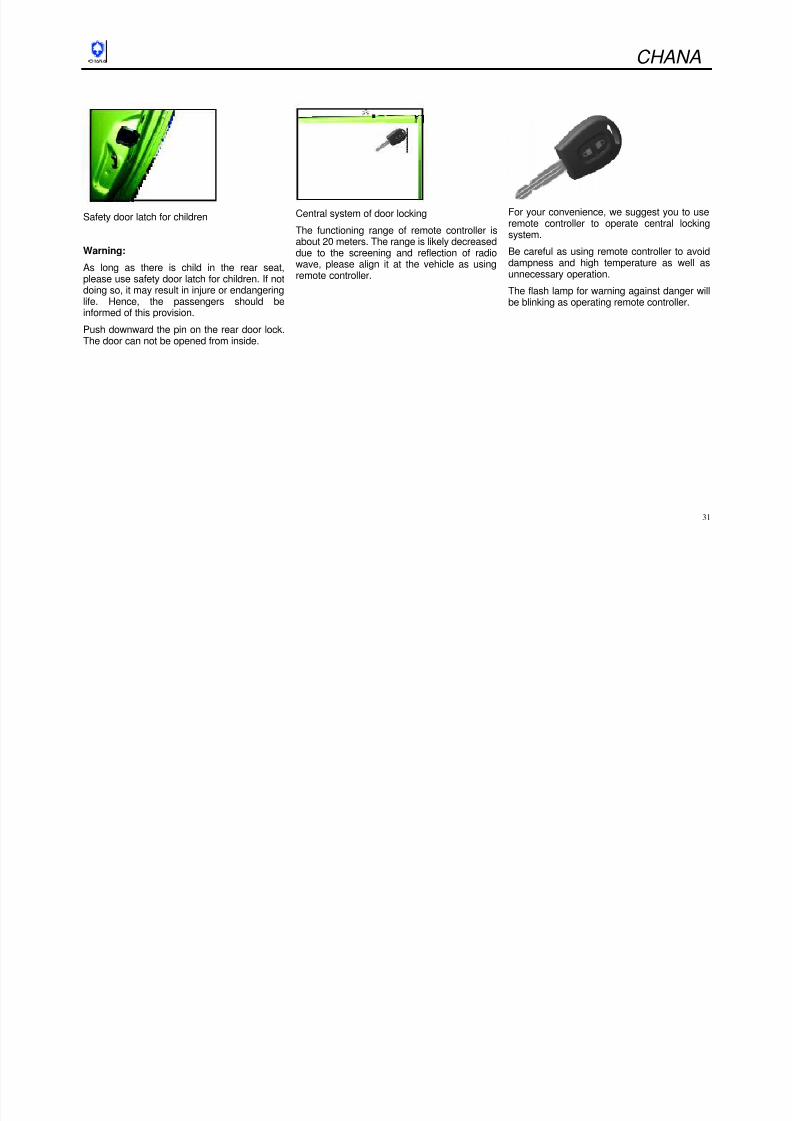
Safety door latch for children
Warning:
As long as there is child in the rear seat,please use safety door latch for children. If notdoing so, it may result in injure or endangering
life. Hence, the passengers should beinformed of this provision.
Push downward the pin on the rear door lock.The door can not be opened from inside.
Central system of door locking
The functioning range of remote controller isabout 20 meters. The range is likely decreaseddue to the screening and reflection of radiowave, please align it at the vehicle as usingremote controller.
For your convenience, we suggest you to useremote controller to operate central lockingsystem.
Be careful as using remote controller to avoiddampness and high temperature as well asunnecessary operation.
The flash lamp for warning against danger will
be blinking as operating remote controller.
8/13/2019 BENNI Brochure
http://slidepdf.com/reader/full/benni-brochure 32/102
CHANA
32
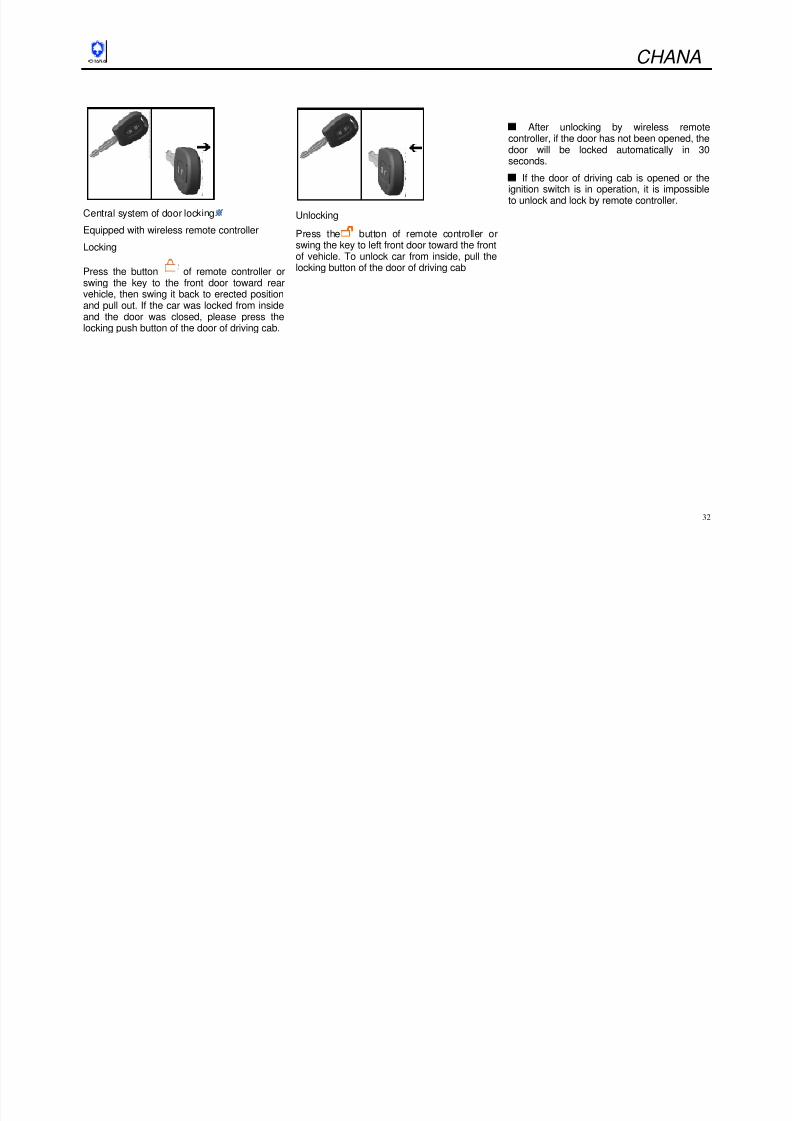
Central system of door locking
Equipped with wireless remote controller
Locking
Press the button of remote controller orswing the key to the front door toward rearvehicle, then swing it back to erected positionand pull out. If the car was locked from insideand the door was closed, please press thelocking push button of the door of driving cab.
Unlocking
Press the button of remote controller orswing the key to left front door toward the frontof vehicle. To unlock car from inside, pull thelocking button of the door of driving cab
After unlocking by wireless remotecontroller, if the door has not been opened, thedoor will be locked automatically in 30seconds.
If the door of driving cab is opened or theignition switch is in operation, it is impossible
to unlock and lock by remote controller.
8/13/2019 BENNI Brochure
http://slidepdf.com/reader/full/benni-brochure 33/102
CHANA
33
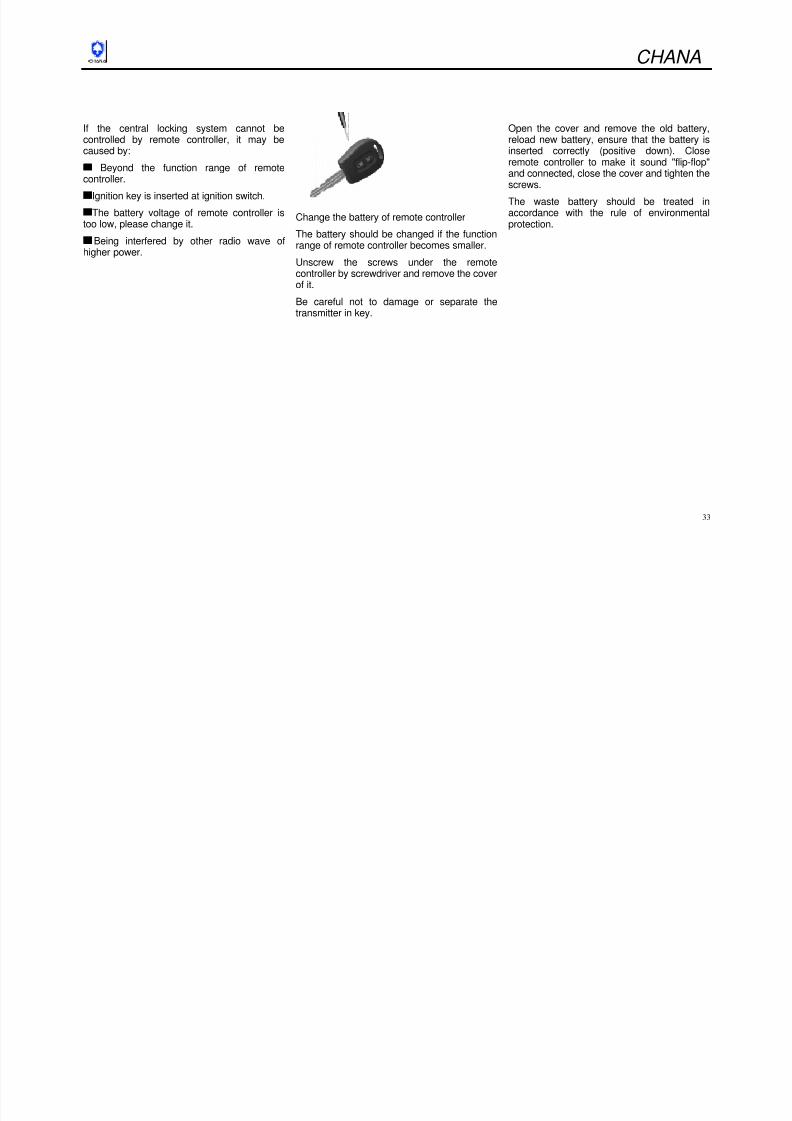
If the central locking system cannot becontrolled by remote controller, it may becaused by:
Beyond the function range of remotecontroller.
Ignition key is inserted at ignition switch.
The battery voltage of remote controller istoo low, please change it.
Being interfered by other radio wave ofhigher power.
Change the battery of remote controller
The battery should be changed if the functionrange of remote controller becomes smaller.
Unscrew the screws under the remotecontroller by screwdriver and remove the coverof it.
Be careful not to damage or separate thetransmitter in key.
Open the cover and remove the old battery,reload new battery, ensure that the battery isinserted correctly (positive down). Closeremote controller to make it sound "flip-flop"and connected, close the cover and tighten thescrews.
The waste battery should be treated inaccordance with the rule of environmentalprotection.
8/13/2019 BENNI Brochure
http://slidepdf.com/reader/full/benni-brochure 34/102
CHANA
34
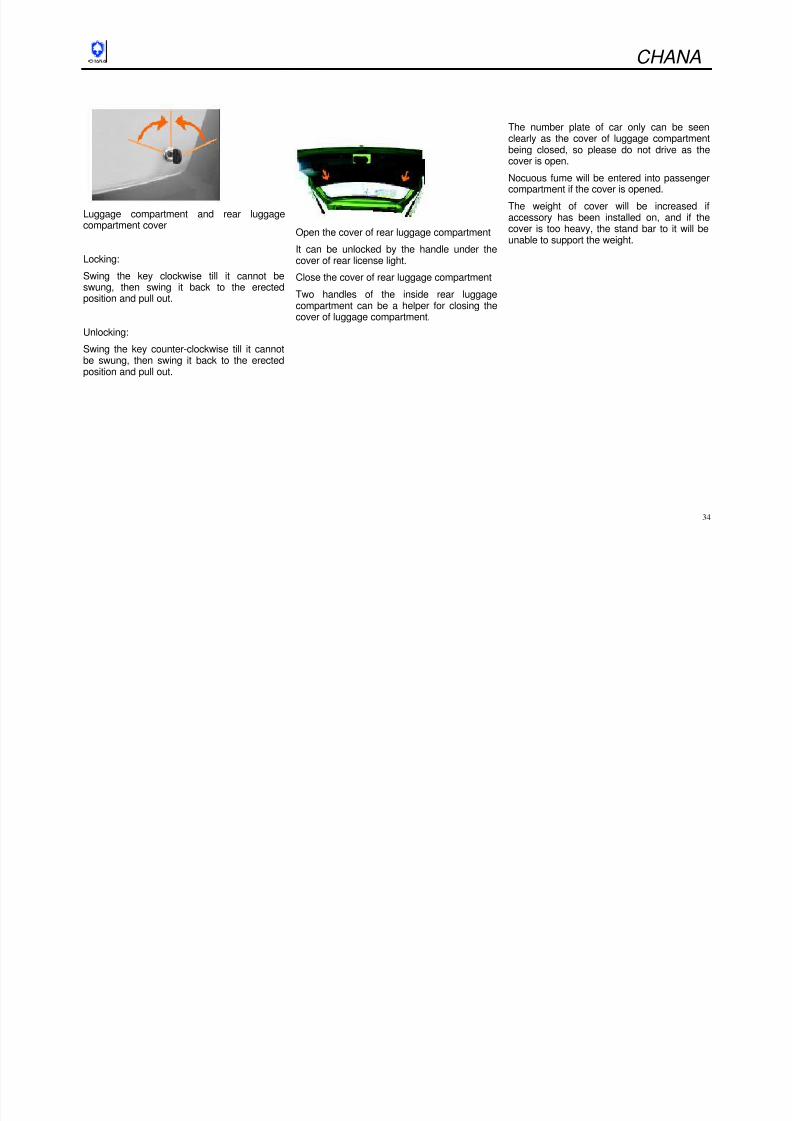
Luggage compartment and rear luggagecompartment cover
Locking:
Swing the key clockwise till it cannot beswung, then swing it back to the erected
position and pull out.
Unlocking:
Swing the key counter-clockwise till it cannotbe swung, then swing it back to the erectedposition and pull out.
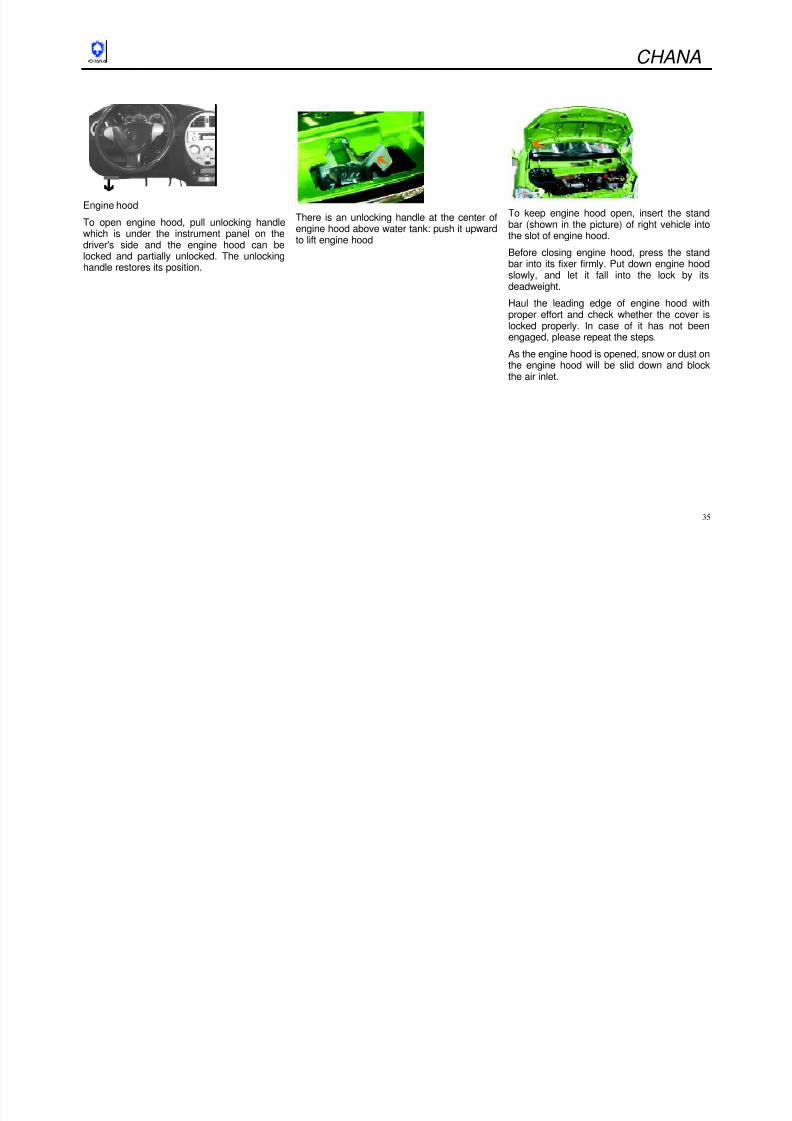
Open the cover of rear luggage compartment
It can be unlocked by the handle under thecover of rear license light.
Close the cover of rear luggage compartment
Two handles of the inside rear luggagecompartment can be a helper for closing thecover of luggage compartment.
The number plate of car only can be seenclearly as the cover of luggage compartmentbeing closed, so please do not drive as thecover is open.
Nocuous fume will be entered into passengercompartment if the cover is opened.
The weight of cover will be increased ifaccessory has been installed on, and if thecover is too heavy, the stand bar to it will beunable to support the weight.
8/13/2019 BENNI Brochure
http://slidepdf.com/reader/full/benni-brochure 35/102
CHANA
35
Engine hood
To open engine hood, pull unlocking handlewhich is under the instrument panel on thedriver's side and the engine hood can belocked and partially unlocked. The unlockinghandle restores its position.
There is an unlocking handle at the center ofengine hood above water tank: push it upwardto lift engine hood
To keep engine hood open, insert the standbar (shown in the picture) of right vehicle intothe slot of engine hood.
Before closing engine hood, press the standbar into its fixer firmly. Put down engine hoodslowly, and let it fall into the lock by itsdeadweight.
Haul the leading edge of engine hood withproper effort and check whether the cover islocked properly. In case of it has not beenengaged, please repeat the steps.
As the engine hood is opened, snow or dust onthe engine hood will be slid down and blockthe air inlet.
8/13/2019 BENNI Brochure
http://slidepdf.com/reader/full/benni-brochure 36/102
CHANA
36
Be careful to operate electric window,otherwise people may be injured; especiallychildren, and the objects may be clipped.
The passenger should be informed of how tooperate windows of car properly in advance.
As closing windows, it should be ensure thatthere is nothing will be likely clipped.
To prevent unauthorized operation, the drivershould pull out ignition key as leaving car.
Windows of car
It can be controlled by turning rocking lever.
Electric window of front and rear doors
The window of driver's side can be controlledby the outside switch of the handle of driver'sside-door, and the front passenger's door iscontrolled by inside switch and the switch ofhandle of the door of front passenger's.
To open or close windows off and on, move orpress the switch transitorily; to completelyopen or close window, pull or press the switchupward or downward till the window is fullyopened or closed.
8/13/2019 BENNI Brochure
http://slidepdf.com/reader/full/benni-brochure 37/102
CHANA
37
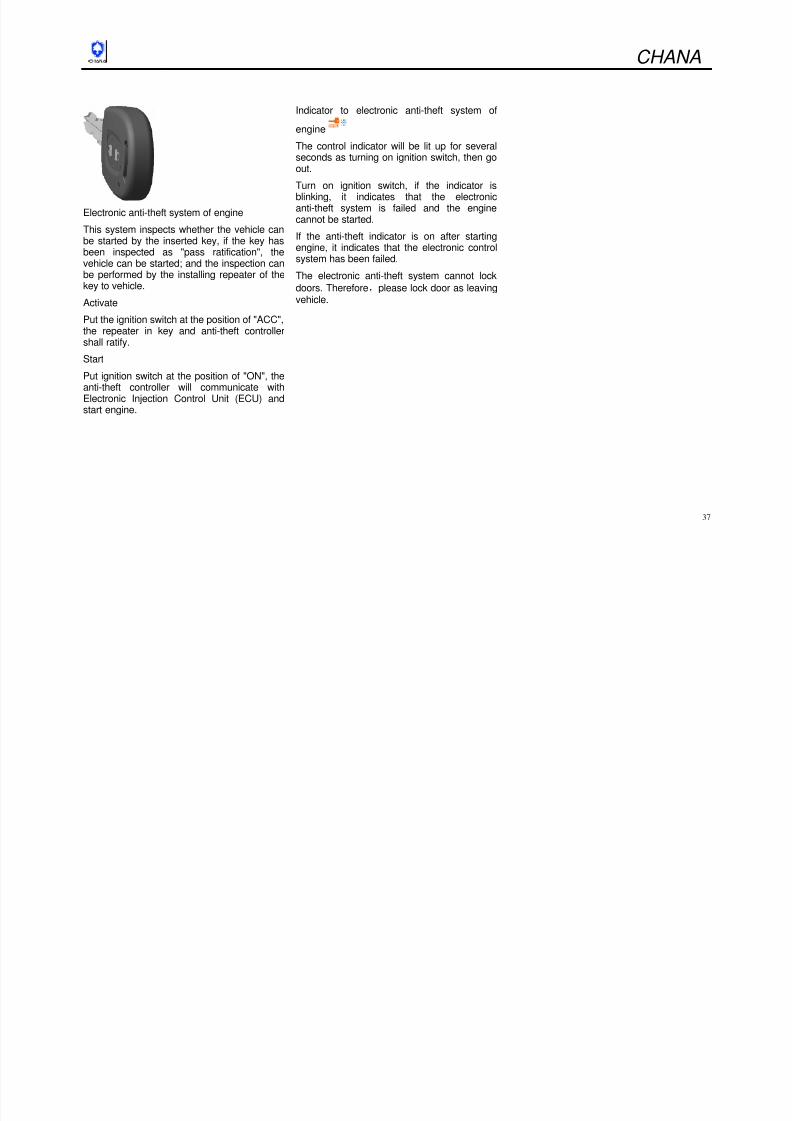
Electronic anti-theft system of engine
This system inspects whether the vehicle canbe started by the inserted key, if the key hasbeen inspected as "pass ratification", thevehicle can be started; and the inspection canbe performed by the installing repeater of thekey to vehicle.
Activate
Put the ignition switch at the position of "ACC",the repeater in key and anti-theft controllershall ratify.
Start
Put ignition switch at the position of "ON", theanti-theft controller will communicate with
Electronic Injection Control Unit (ECU) andstart engine.
Indicator to electronic anti-theft system of
engine
The control indicator will be lit up for severalseconds as turning on ignition switch, then goout.
Turn on ignition switch, if the indicator isblinking, it indicates that the electronicanti-theft system is failed and the enginecannot be started.
If the anti-theft indicator is on after startingengine, it indicates that the electronic controlsystem has been failed.
The electronic anti-theft system cannot lock
doors. Therefore,please lock door as leaving
vehicle.
CHANA
8/13/2019 BENNI Brochure
http://slidepdf.com/reader/full/benni-brochure 38/102
CHANA
38
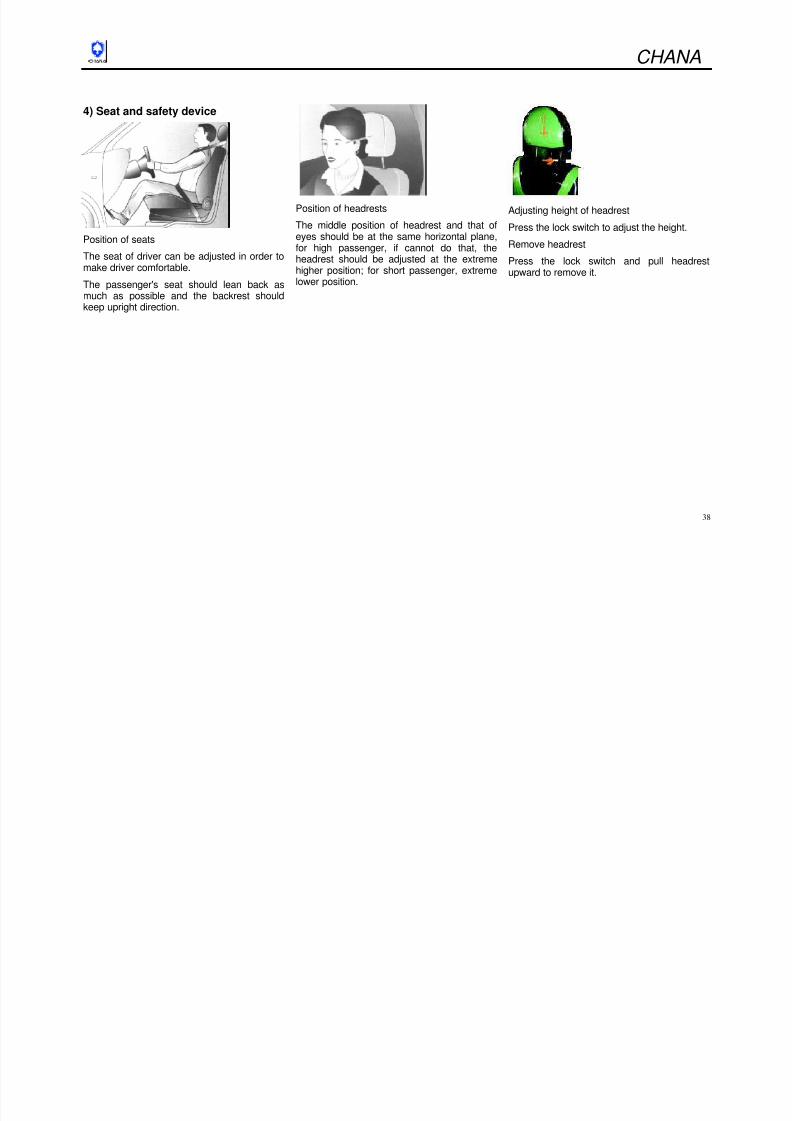
4) Seat and safety device
Position of seats
The seat of driver can be adjusted in order tomake driver comfortable.
The passenger's seat should lean back asmuch as possible and the backrest shouldkeep upright direction.
Position of headrests
The middle position of headrest and that ofeyes should be at the same horizontal plane,for high passenger, if cannot do that, theheadrest should be adjusted at the extremehigher position; for short passenger, extremelower position.
Adjusting height of headrest
Press the lock switch to adjust the height.
Remove headrest
Press the lock switch and pull headrestupward to remove it.
CHANA
8/13/2019 BENNI Brochure
http://slidepdf.com/reader/full/benni-brochure 39/102
CHANA
39
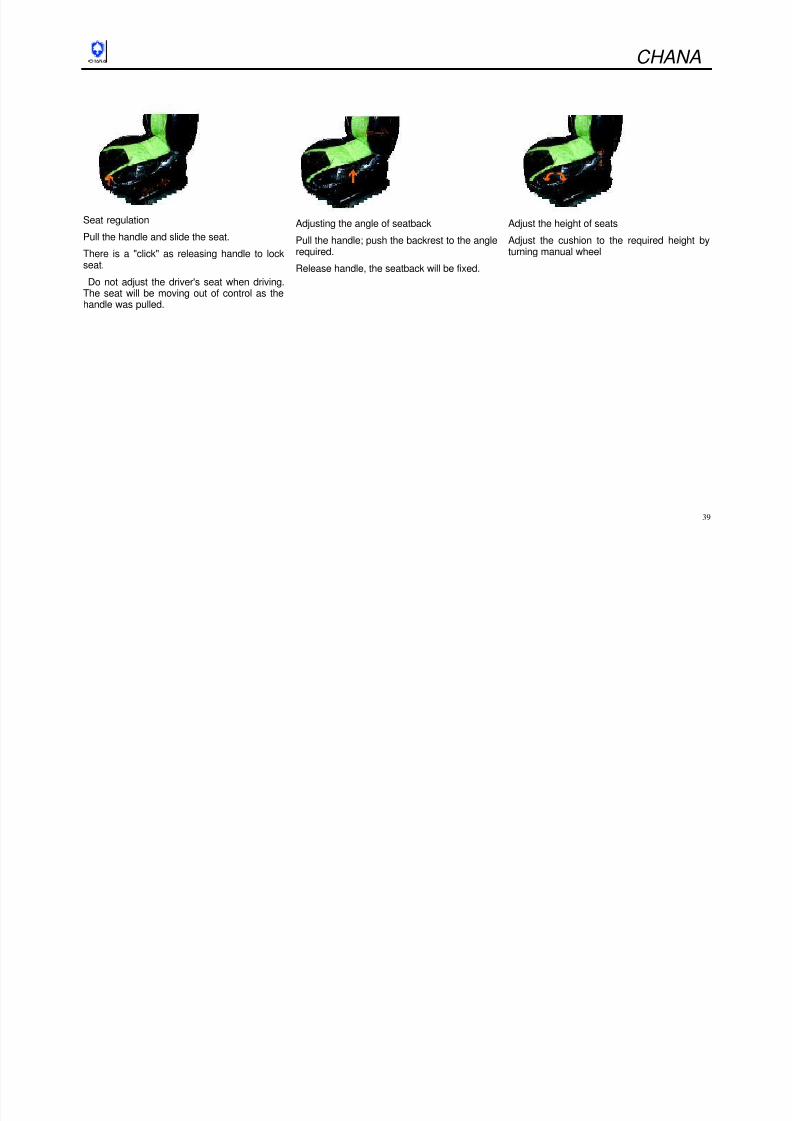
Seat regulation
Pull the handle and slide the seat.
There is a "click" as releasing handle to lockseat.
Do not adjust the driver's seat when driving.The seat will be moving out of control as the
handle was pulled.
Adjusting the angle of seatback
Pull the handle; push the backrest to the anglerequired.
Release handle, the seatback will be fixed.
Adjust the height of seats
Adjust the cushion to the required height byturning manual wheel
CHANA
8/13/2019 BENNI Brochure
http://slidepdf.com/reader/full/benni-brochure 40/102
CHANA
40
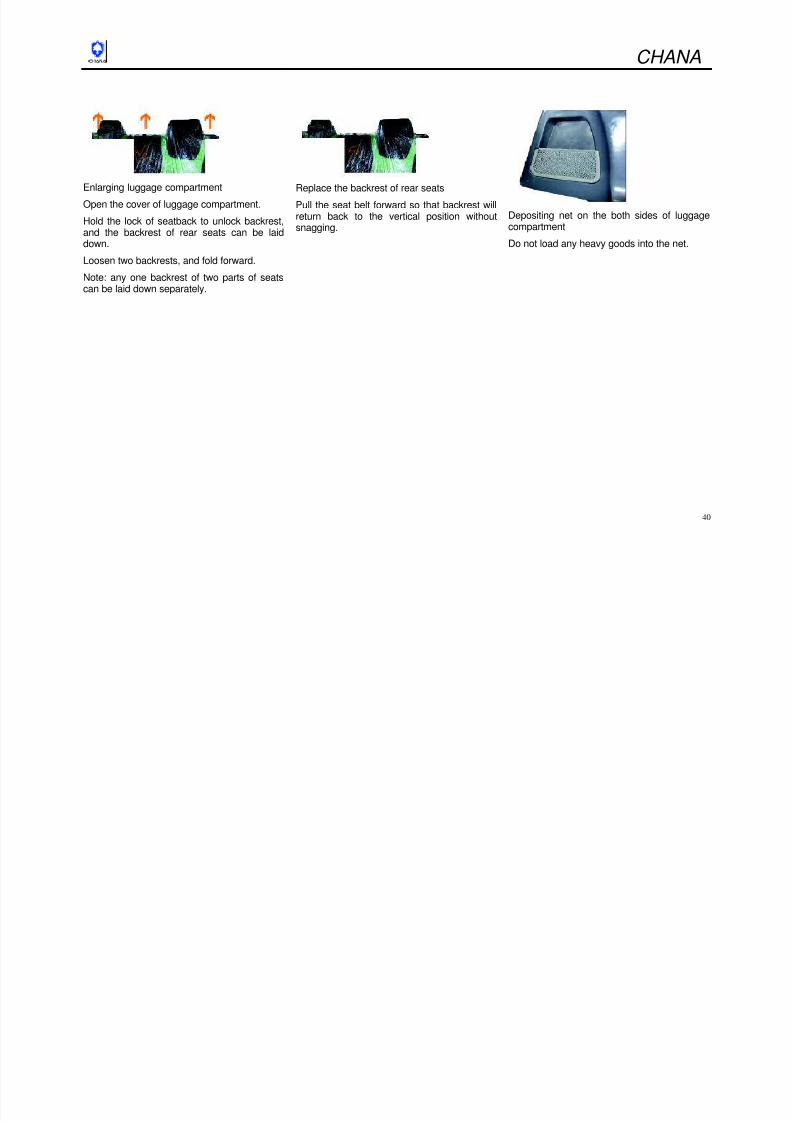
Enlarging luggage compartment
Open the cover of luggage compartment.
Hold the lock of seatback to unlock backrest,and the backrest of rear seats can be laiddown.
Loosen two backrests, and fold forward.
Note: any one backrest of two parts of seatscan be laid down separately.
Replace the backrest of rear seats
Pull the seat belt forward so that backrest willreturn back to the vertical position withoutsnagging.
Depositing net on the both sides of luggagecompartment
Do not load any heavy goods into the net.
CHANA

8/13/2019 BENNI Brochure
http://slidepdf.com/reader/full/benni-brochure 41/102
CHANA
41
Safety system
Protection system
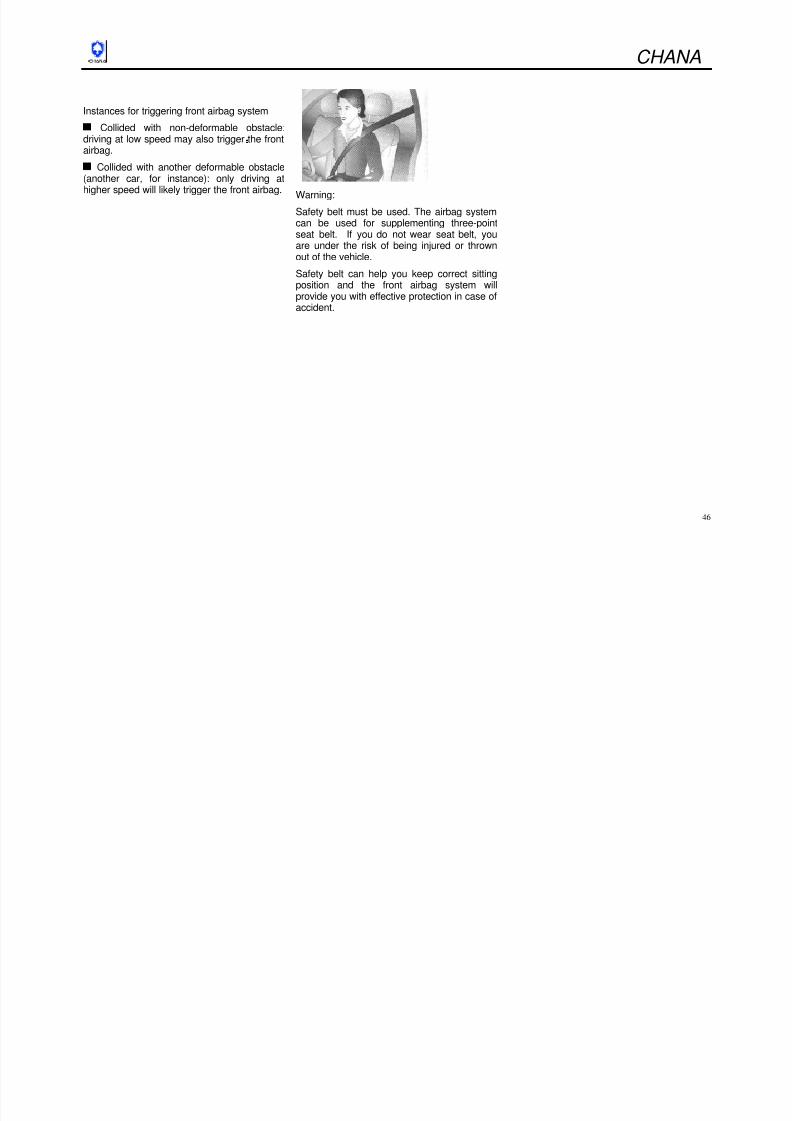
Safety belt
Airbag system of the seats of driver and assistantdriver
The airbag system can be used to supplementthree-point seat belt. In the event of seriousaccident, the airbag will be exploded and formed asafety air cushion for passengers
Wearing of safety belt
The seats of front row and rear row have equippedwith safety belt, the safety belts of front row andoutside of rear row are three-point safety belt, andthe middle of rear row is two-point safety belt.
Cross pelvis
Fixed at buttock
Use of three-point safety belt
Pull the buckle of safety belt to put the belt throughshoulder and pelvis, then locked to the holder until a"click" is heard.
CHANA
8/13/2019 BENNI Brochure
http://slidepdf.com/reader/full/benni-brochure 42/102
CHANA
42
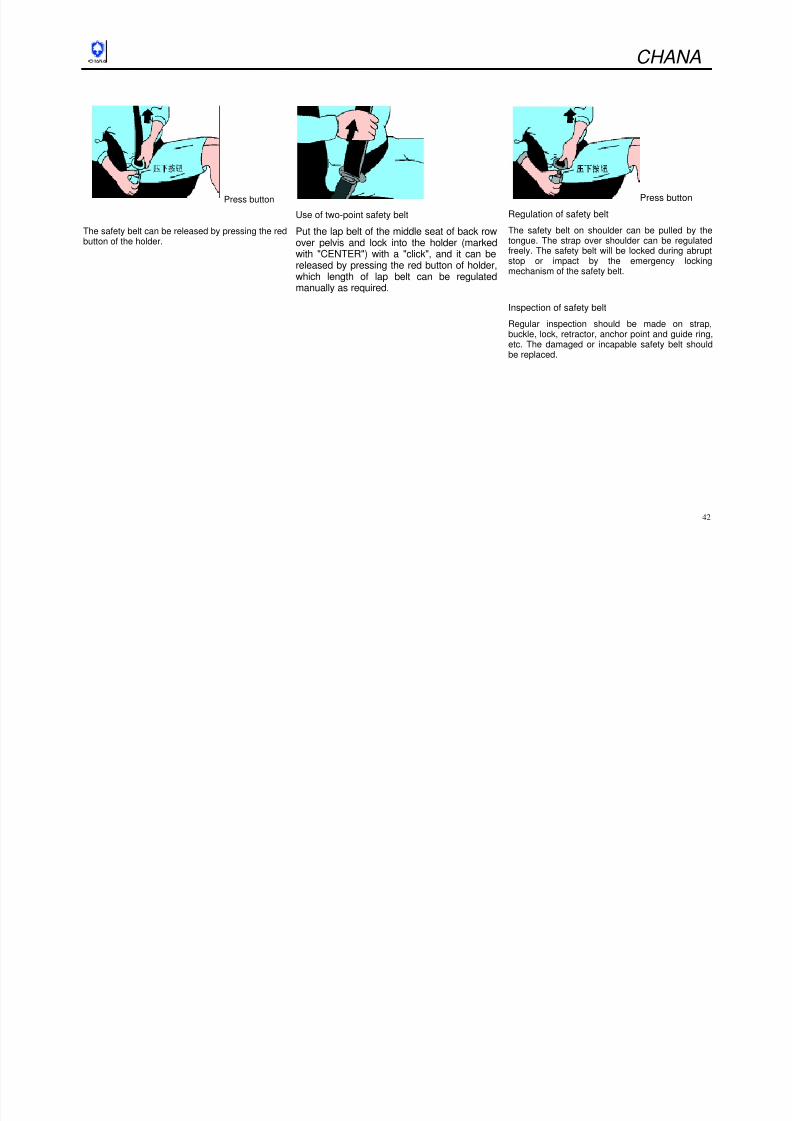
Press button
The safety belt can be released by pressing the redbutton of the holder.
Use of two-point safety belt
Put the lap belt of the middle seat of back rowover pelvis and lock into the holder (markedwith "CENTER") with a "click", and it can bereleased by pressing the red button of holder,which length of lap belt can be regulatedmanually as required.
Press button
Regulation of safety belt
The safety belt on shoulder can be pulled by thetongue. The strap over shoulder can be regulatedfreely. The safety belt will be locked during abruptstop or impact by the emergency lockingmechanism of the safety belt.
Inspection of safety belt
Regular inspection should be made on strap,buckle, lock, retractor, anchor point and guide ring,etc. The damaged or incapable safety belt shouldbe replaced.
CHANA
8/13/2019 BENNI Brochure
http://slidepdf.com/reader/full/benni-brochure 43/102
CHANA
43
Warning:
The seat belt must be put on and fastened whendriving.
No matter air bag equipped or not, the seat belt is toprotect people against collision coming from frontdirection after proper wearing. Thus the seat belt ofdriver and passengers sitting at first-row seat must beput on when driving as this will minimize injury ordeath.
Passenger must not sit in cargo area; otherwise thepassengers will be severely injured when accidenthappens.
Position the lower belt across your pelvis instead of atwaist. The shoulder belt shall be put on the shoulderand shall not be slided to arm.
When wearing seat belt, it must not be twisted andshall comfort passenger after adjustment as per
individual requirement. The improper wearing of seatbelt will not provide safety protection to driver andpassengers
Warning:
Be sure that the seat belt buckle is inserted intorelative buckle catch.
Seat belt must not be tied on article containing hardobject or frangible object. Otherwise injury may beworsened when accident happens.
It must be prohibited that same seat belt is worn bytwo or more passengers. When child or infant is held in
someone's arm, the seat belt shall not be put on kids.Otherwise the injury may be extremely serious whenaccident happens.
When pregnant woman is in bus, the seat belt shall beput on as per medical advisor's instruction.
The seat belt shall be regularly inspected for wearingor damage. If seat belt is severely worn, polluted ordamaged, it must be replaced immediately.
Warning:
When driving, the infant and child who are not properlyconstrained shall not be put on seat.
All used seat belt must be replaced after collisionhappens and the unused seat belt when collisionhappens can be still used to ensure safety ofpassengers. The damaged seat belt must be replaced.
Avoid contamination of seat belt by oil or chemical
product. The polluted seat belt by oil or chemicalproduct must be cleaned with neutral soap and then tobe cleaned again with water.
No modifications or additions shall be made by theuser to seat belt to avoid malfunctioning of seat beltwhen accident happens.
CHANA
8/13/2019 BENNI Brochure
http://slidepdf.com/reader/full/benni-brochure 44/102
CHANA
44
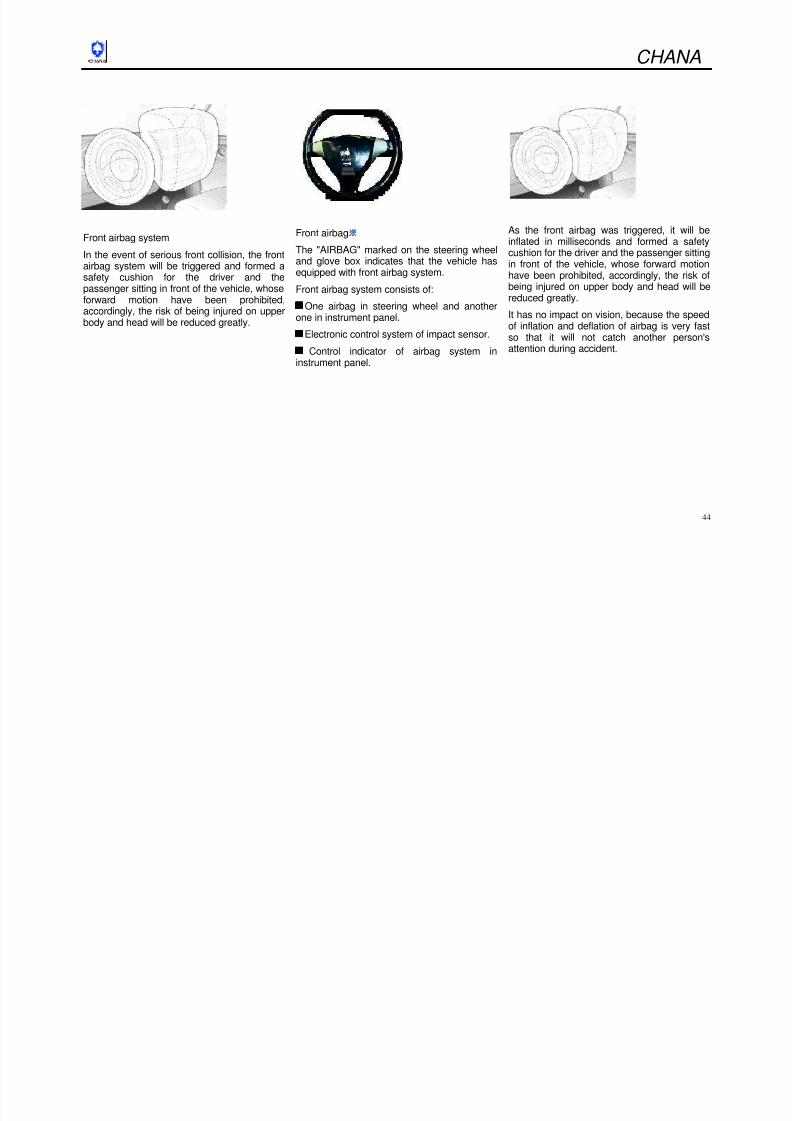
Front airbag system
In the event of serious front collision, the frontairbag system will be triggered and formed asafety cushion for the driver and thepassenger sitting in front of the vehicle, whose
forward motion have been prohibited,accordingly, the risk of being injured on upperbody and head will be reduced greatly.
Front airbag
The "AIRBAG" marked on the steering wheeland glove box indicates that the vehicle hasequipped with front airbag system.
Front airbag system consists of:
One airbag in steering wheel and anotherone in instrument panel.
Electronic control system of impact sensor.
Control indicator of airbag system ininstrument panel.
As the front airbag was triggered, it will beinflated in milliseconds and formed a safetycushion for the driver and the passenger sittingin front of the vehicle, whose forward motionhave been prohibited, accordingly, the risk ofbeing injured on upper body and head will be
reduced greatly.It has no impact on vision, because the speedof inflation and deflation of airbag is very fastso that it will not catch another person'sattention during accident.
CHANA
8/13/2019 BENNI Brochure
http://slidepdf.com/reader/full/benni-brochure 45/102
CHANA
45
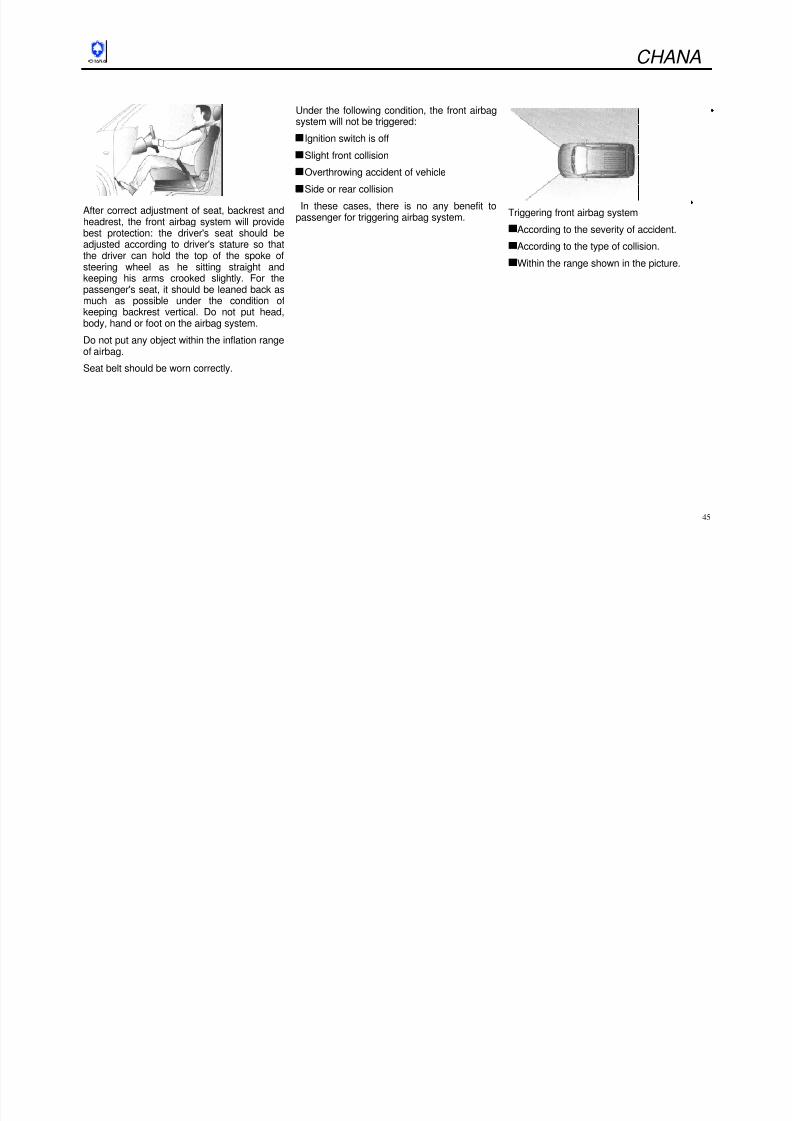
After correct adjustment of seat, backrest andheadrest, the front airbag system will providebest protection: the driver's seat should beadjusted according to driver's stature so thatthe driver can hold the top of the spoke ofsteering wheel as he sitting straight andkeeping his arms crooked slightly. For thepassenger's seat, it should be leaned back as
much as possible under the condition ofkeeping backrest vertical. Do not put head,body, hand or foot on the airbag system.
Do not put any object within the inflation rangeof airbag.
Seat belt should be worn correctly.
Under the following condition, the front airbagsystem will not be triggered:
Ignition switch is off
Slight front collision
Overthrowing accident of vehicle
Side or rear collision
In these cases, there is no any benefit topassenger for triggering airbag system. Triggering front airbag system
According to the severity of accident.
According to the type of collision.
Within the range shown in the picture.
CHANA
8/13/2019 BENNI Brochure
http://slidepdf.com/reader/full/benni-brochure 46/102
CHANA
46
Instances for triggering front airbag system
Collided with non-deformable obstacle:driving at low speed may also trigger the frontairbag.
Collided with another deformable obstacle(another car, for instance): only driving athigher speed will likely trigger the front airbag.
Warning:
Safety belt must be used. The airbag systemcan be used for supplementing three-pointseat belt. If you do not wear seat belt, youare under the risk of being injured or thrownout of the vehicle.
Safety belt can help you keep correct sittingposition and the front airbag system willprovide you with effective protection in case ofaccident.
CHANA
8/13/2019 BENNI Brochure
http://slidepdf.com/reader/full/benni-brochure 47/102
CHANA
47
Do not make accessory and other objectsfixed or rotated in the inflation area of airbag,in case of that they will cause injury as theairbag system is triggered.
Do not put any objects between airbagsystem and passenger inside vehicle in caseof being injured.
The electronically controlled airbag systemand safety belt retractor are located at centralcontrol console. In order to preventmalfunction, do not put any magnetic objectnear the console.
Do not stick any object onto steering wheel,instrument panel and front seat back near theairbag or cover them with other materials orcover them with other materials.
The steering wheel, instrument panel andbackrest of front seats only can be cleaned bydry cloth or internal decoration detergent otherthan detergent of corrosive action.
Based on the severity and collision type ofaccident, the relationship between systems isindependent as the airbag system wastriggered.
Each airbag only can be triggered once,once triggered should be changed at once.Please consult your CHANGAN dealer.
The speed, direction and the deformation ofvehicle and the property of collision object willdetermine the severity of accident and thetriggering of airbag. The extent of damage ofvehicle and the cost of repair cannot serve asthe standard of triggering airbag system.
Do not make any reconstruction on the partsof airbag system due to that will causenonconformity of driving.
On condition that they were operatedincorrectly, these system may be triggeredabruptly and cause injury.
The steering wheel, instrument panel, frontseats and seat belts only can be removed byyour CHANGAN dealer.
CHANA
8/13/2019 BENNI Brochure
http://slidepdf.com/reader/full/benni-brochure 48/102
48
II. Start and drive
1) Start
Ignition switch
LOCK=Ignition off, steering wheel locked
ACC=Steering wheel unlocked, auxiliaryfacilities connected
ON =Ignition on
START Start-(transmission at neutral)
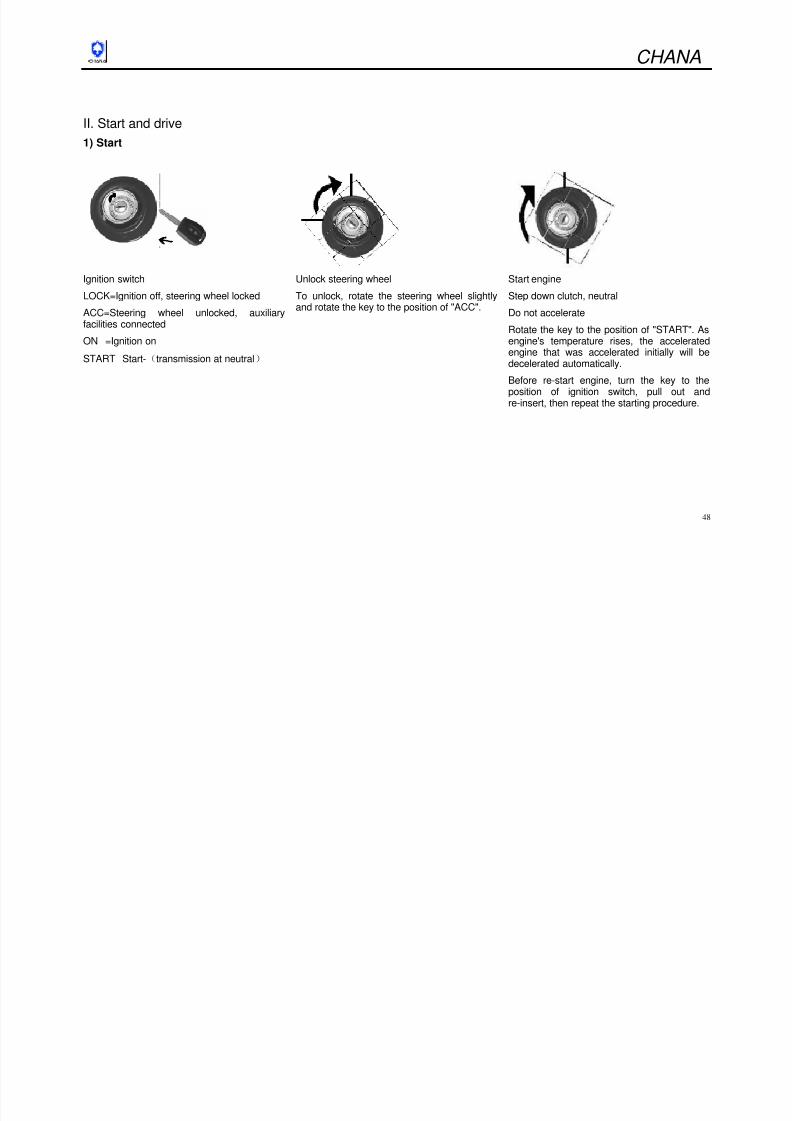
Unlock steering wheel
To unlock, rotate the steering wheel slightly
and rotate the key to the position of "ACC".
Start engine
Step down clutch, neutral
Do not accelerate
Rotate the key to the position of "START". Asengine's temperature rises, the acceleratedengine that was accelerated initially will bedecelerated automatically.
Before re-start engine, turn the key to theposition of ignition switch, pull out and
re-insert, then repeat the starting procedure.
CHANA

8/13/2019 BENNI Brochure
http://slidepdf.com/reader/full/benni-brochure 49/102
49
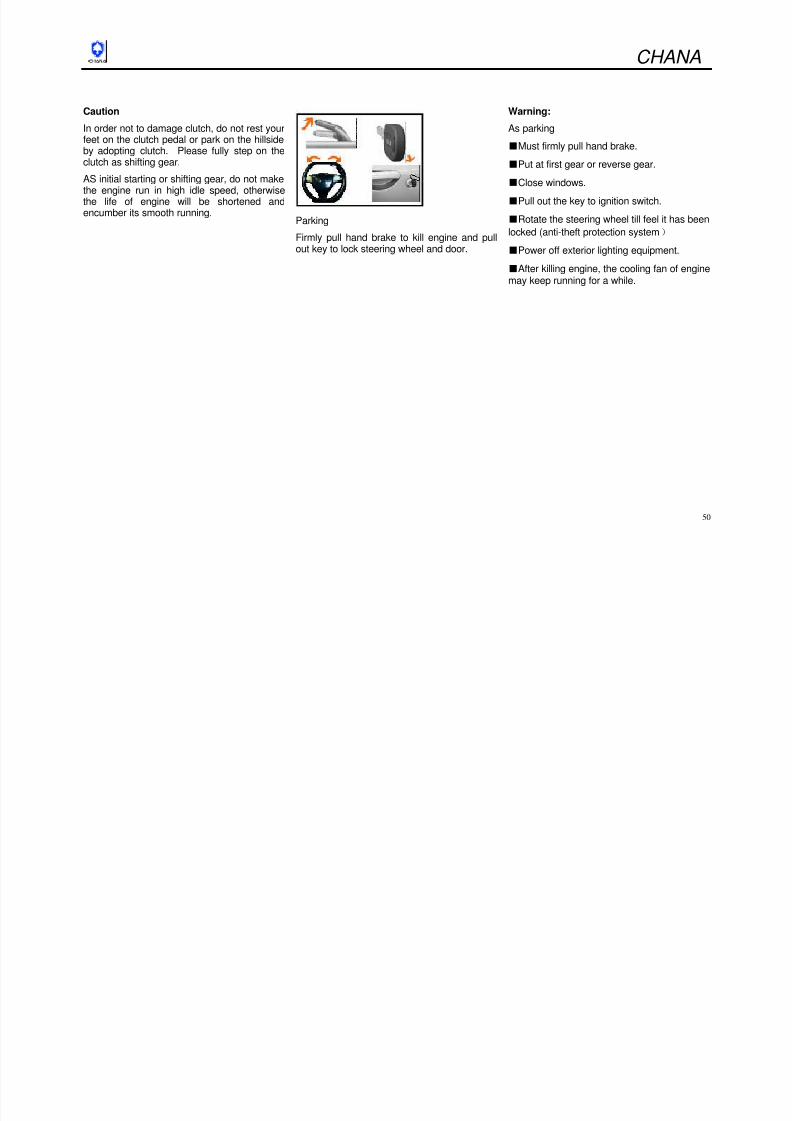
2) Driving
Initial starting
As initial starting, depress the clutch and shifttransmission into gear 1, then release parkingbrake, and gradually release clutch pedal, stepon accelerator pedal gradually duringreleasing clutch pedal and you can hear thevariation of the sound of engine.
Warning:
As driving, safety belt should be worn even ifthere is airbag in the front row, because it canrestrain passenger correctly anytime.
Do not drive after taking alcohol or narcotic,they have strong influence on the safety ofdriving and increased the possibility of injury todriver and others.
Avoid driving as fatigue, ill, exciting or underexcessive pressure.
Releasing hand brake
Lift up the control rod slightly, and press thelocking push button, put down the control rodcompletely.
Use of transmission
Synchronizer has been adopted for all forwardgear that can ensure stable and easy gearshift. Before gear shift, the clutch pedal shouldbe depressed completely.
Warning:
Before going down long slope or steep slope,
the speed of vehicle should be deceleratedand the transmission should be switched tolow speed gear. Engine braking should beused. Avoid using braking system for longdistance braking; otherwise it will result inoverheat of brake and invalidate the brake.
As driving on the slippery road, the speedshould be decelerated before shifting to low
speed gear, excessively or abruptly changingof engine speed will possibly cause track slipand lose control over vehicle.
The vehicle should be stopped stably beforereversing.
8/13/2019 BENNI Brochure
http://slidepdf.com/reader/full/benni-brochure 50/102
CHANA
8/13/2019 BENNI Brochure
http://slidepdf.com/reader/full/benni-brochure 51/102
51
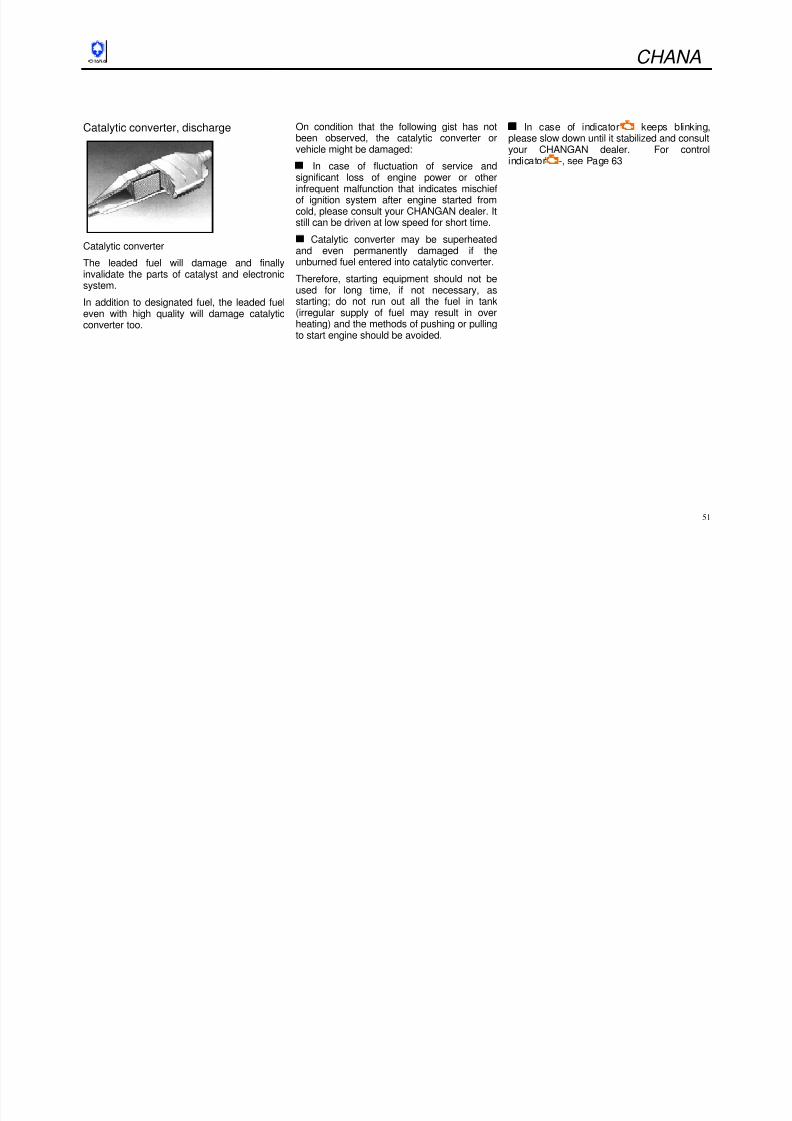
Catalytic converter, discharge
Catalytic converter
The leaded fuel will damage and finallyinvalidate the parts of catalyst and electronicsystem.
In addition to designated fuel, the leaded fueleven with high quality will damage catalyticconverter too.
On condition that the following gist has notbeen observed, the catalytic converter orvehicle might be damaged:
In case of fluctuation of service andsignificant loss of engine power or otherinfrequent malfunction that indicates mischiefof ignition system after engine started fromcold, please consult your CHANGAN dealer. Itstill can be driven at low speed for short time.
Catalytic converter may be superheatedand even permanently damaged if theunburned fuel entered into catalytic converter.
Therefore, starting equipment should not beused for long time, if not necessary, as
starting; do not run out all the fuel in tank(irregular supply of fuel may result in overheating) and the methods of pushing or pullingto start engine should be avoided.
In case of indicator keeps blinking,please slow down until it stabilized and consultyour CHANGAN dealer. For controlindicator -, see Page 63
CHANA
8/13/2019 BENNI Brochure
http://slidepdf.com/reader/full/benni-brochure 52/102
52
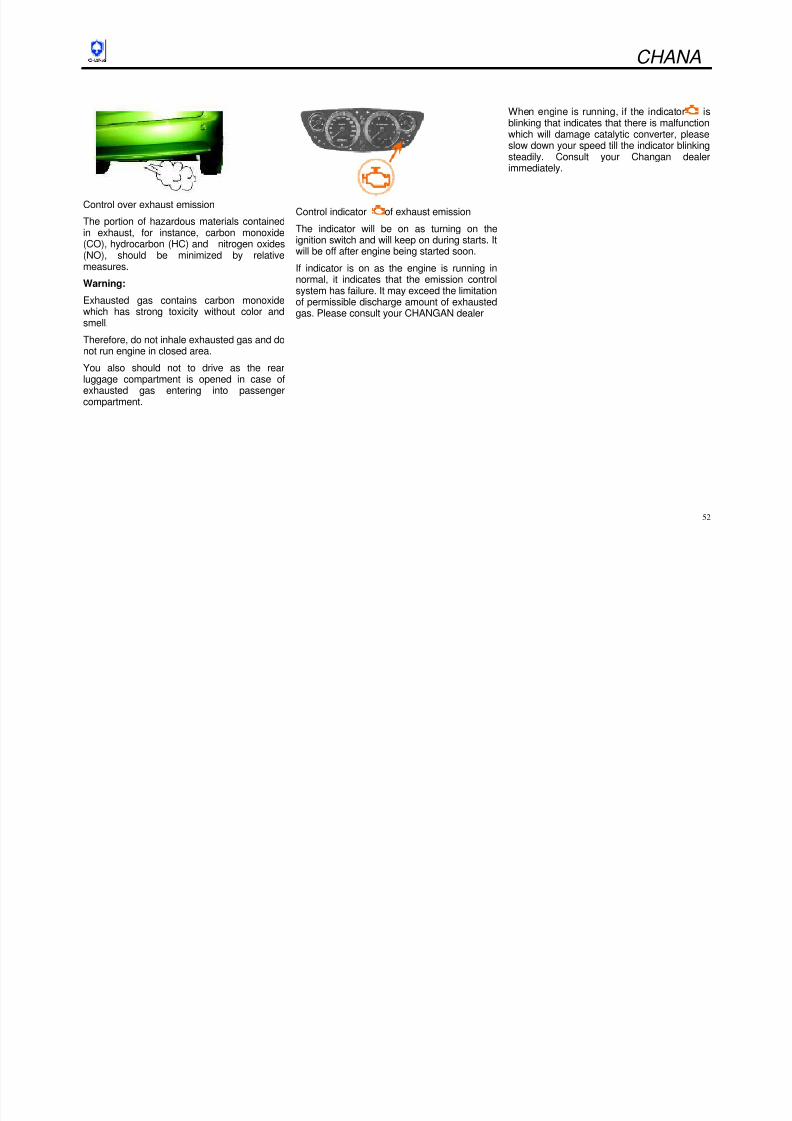
Control over exhaust emissionThe portion of hazardous materials containedin exhaust, for instance, carbon monoxide(CO), hydrocarbon (HC) and nitrogen oxides(NO), should be minimized by relativemeasures.
Warning:
Exhausted gas contains carbon monoxidewhich has strong toxicity without color andsmell.
Therefore, do not inhale exhausted gas and donot run engine in closed area.
You also should not to drive as the rearluggage compartment is opened in case ofexhausted gas entering into passenger
compartment.
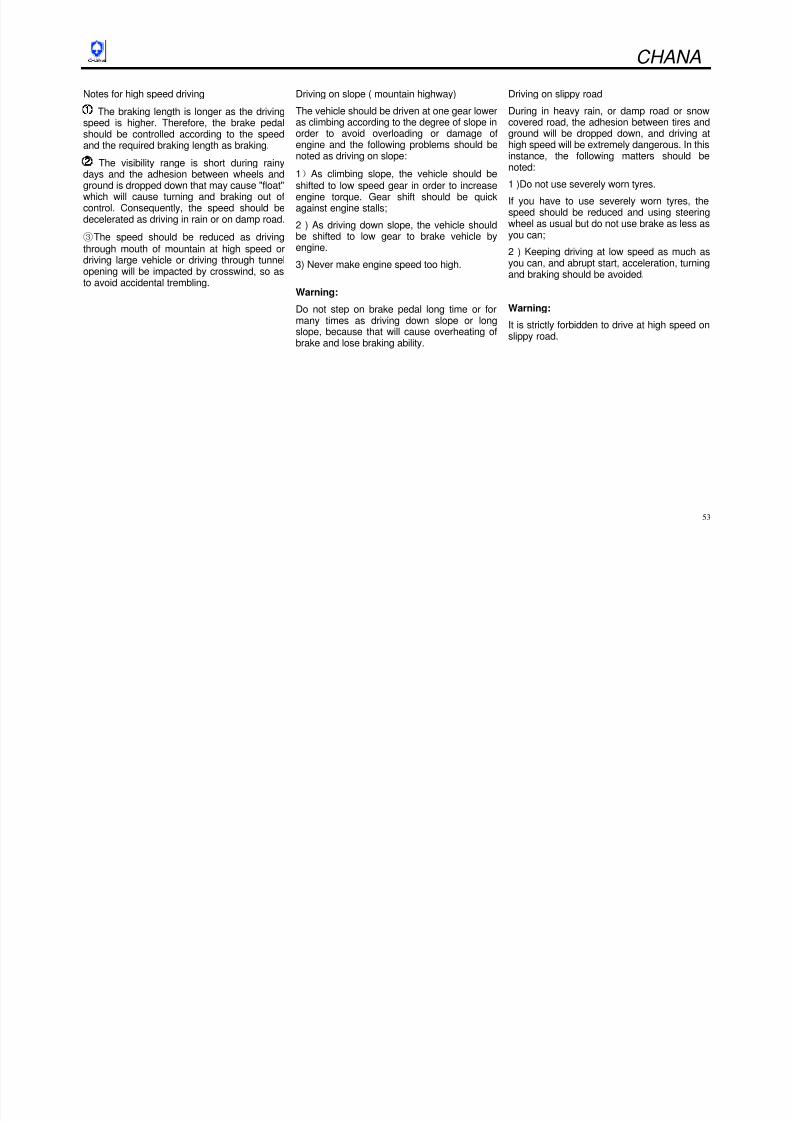
Control indicator of exhaust emission
The indicator will be on as turning on theignition switch and will keep on during starts. Itwill be off after engine being started soon.
If indicator is on as the engine is running innormal, it indicates that the emission controlsystem has failure. It may exceed the limitation
of permissible discharge amount of exhaustedgas. Please consult your CHANGAN dealer
When engine is running, if the indicator isblinking that indicates that there is malfunctionwhich will damage catalytic converter, pleaseslow down your speed till the indicator blinkingsteadily. Consult your Changan dealerimmediately.
CHANA
8/13/2019 BENNI Brochure
http://slidepdf.com/reader/full/benni-brochure 53/102
53
Notes for high speed driving
The braking length is longer as the drivingspeed is higher. Therefore, the brake pedalshould be controlled according to the speedand the required braking length as braking.
The visibility range is short during rainydays and the adhesion between wheels andground is dropped down that may cause "float"which will cause turning and braking out of
control. Consequently, the speed should bedecelerated as driving in rain or on damp road.
③The speed should be reduced as drivingthrough mouth of mountain at high speed ordriving large vehicle or driving through tunnelopening will be impacted by crosswind, so asto avoid accidental trembling.
Driving on slope ( mountain highway)
The vehicle should be driven at one gear loweras climbing according to the degree of slope inorder to avoid overloading or damage ofengine and the following problems should benoted as driving on slope:
1)As climbing slope, the vehicle should beshifted to low speed gear in order to increaseengine torque. Gear shift should be quick
against engine stalls;
2 ) As driving down slope, the vehicle shouldbe shifted to low gear to brake vehicle byengine.
3) Never make engine speed too high.
Warning:
Do not step on brake pedal long time or formany times as driving down slope or longslope, because that will cause overheating ofbrake and lose braking ability.
Driving on slippy road
During in heavy rain, or damp road or snowcovered road, the adhesion between tires andground will be dropped down, and driving athigh speed will be extremely dangerous. In thisinstance, the following matters should benoted:
1 )Do not use severely worn tyres.
If you have to use severely worn tyres, thespeed should be reduced and using steeringwheel as usual but do not use brake as less asyou can;
2 ) Keeping driving at low speed as much asyou can, and abrupt start, acceleration, turningand braking should be avoided.
Warning:
It is strictly forbidden to drive at high speed onslippy road.
CHANA
8/13/2019 BENNI Brochure
http://slidepdf.com/reader/full/benni-brochure 54/102
54
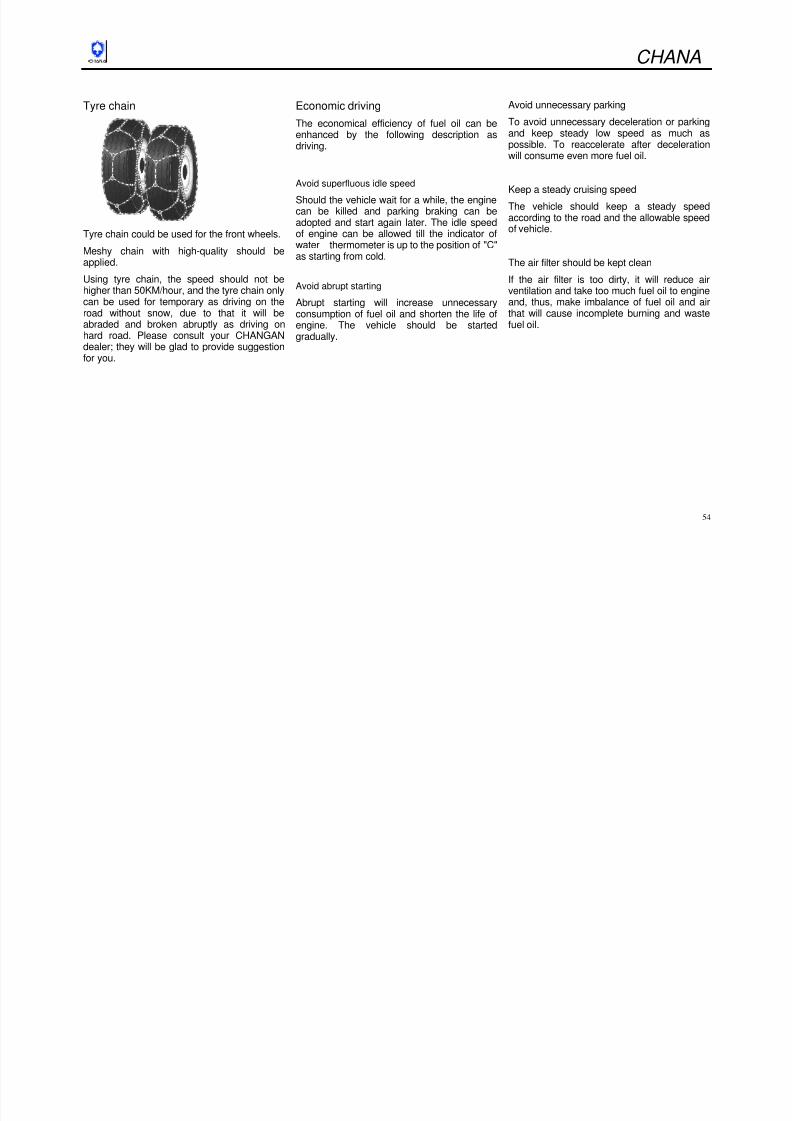
Tyre chain
Tyre chain could be used for the front wheels.
Meshy chain with high-quality should beapplied.
Using tyre chain, the speed should not behigher than 50KM/hour, and the tyre chain only
can be used for temporary as driving on theroad without snow, due to that it will beabraded and broken abruptly as driving onhard road. Please consult your CHANGANdealer; they will be glad to provide suggestionfor you.
Economic drivingThe economical efficiency of fuel oil can beenhanced by the following description asdriving.
Avoid superfluous idle speed
Should the vehicle wait for a while, the enginecan be killed and parking braking can beadopted and start again later. The idle speedof engine can be allowed till the indicator ofwater thermometer is up to the position of "C"as starting from cold.
Avoid abrupt starting
Abrupt starting will increase unnecessaryconsumption of fuel oil and shorten the life ofengine. The vehicle should be startedgradually.
Avoid unnecessary parkingTo avoid unnecessary deceleration or parkingand keep steady low speed as much aspossible. To reaccelerate after decelerationwill consume even more fuel oil.
Keep a steady cruising speed
The vehicle should keep a steady speedaccording to the road and the allowable speedof vehicle.
The air filter should be kept clean
If the air filter is too dirty, it will reduce airventilation and take too much fuel oil to engine
and, thus, make imbalance of fuel oil and airthat will cause incomplete burning and wastefuel oil.
8/13/2019 BENNI Brochure
http://slidepdf.com/reader/full/benni-brochure 55/102
CHANA
8/13/2019 BENNI Brochure
http://slidepdf.com/reader/full/benni-brochure 56/102
56
Braking system
For ensuring traffic safety, brake is animportant factor.
In order to improve effectiveness, if notnecessary, do not brake with full strength asrunning in the first 200 km after the newbraking pad being installed.
The consumption of brake should not exceed afixed limitation; therefore, it is vital for ensuringtraffic safety to maintain it in accordance withthe specification of the Manual of Maintenance
regularly. 。
To replace the worn brake pad, please consultyour CHANGAN dealer.
The worn braking pad will creak, pleasereplace it as soon as possible. Please consultyour CHANGAN dealer.
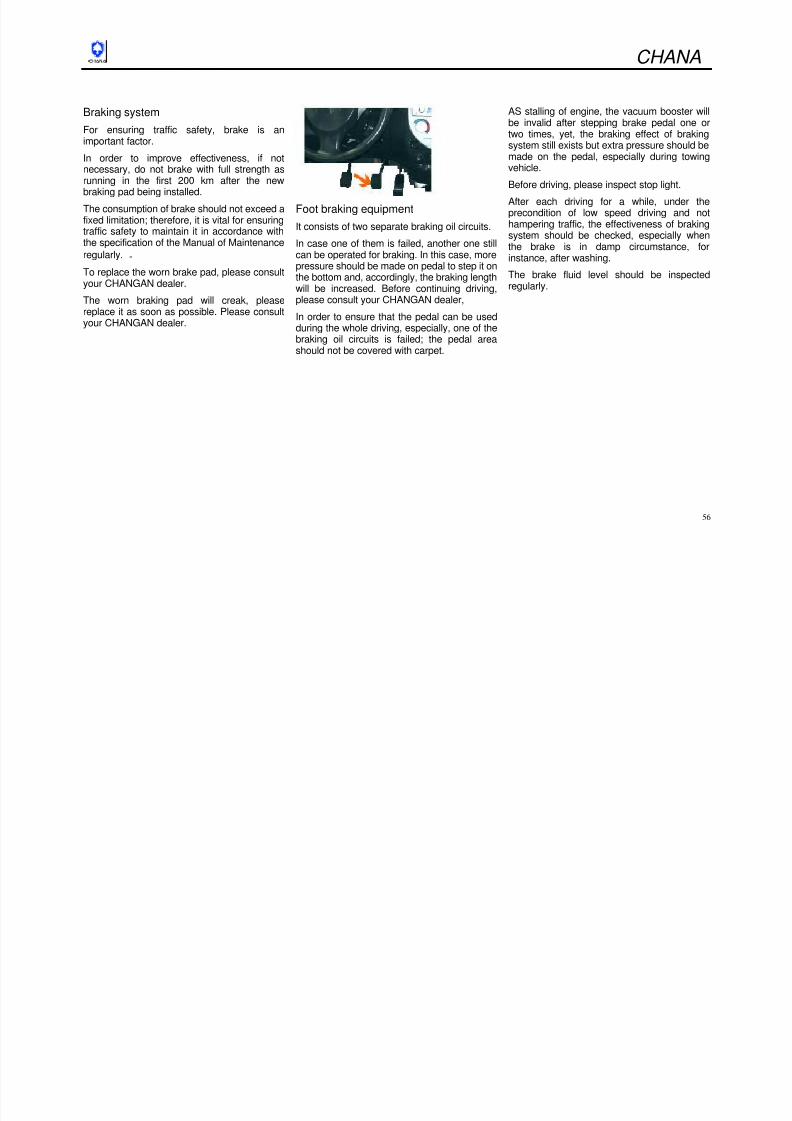
Foot braking equipmentIt consists of two separate braking oil circuits.
In case one of them is failed, another one stillcan be operated for braking. In this case, morepressure should be made on pedal to step it onthe bottom and, accordingly, the braking lengthwill be increased. Before continuing driving,please consult your CHANGAN dealer,
In order to ensure that the pedal can be usedduring the whole driving, especially, one of thebraking oil circuits is failed; the pedal areashould not be covered with carpet.
AS stalling of engine, the vacuum booster willbe invalid after stepping brake pedal one ortwo times, yet, the braking effect of brakingsystem still exists but extra pressure should bemade on the pedal, especially during towingvehicle.
Before driving, please inspect stop light.
After each driving for a while, under theprecondition of low speed driving and nothampering traffic, the effectiveness of brakingsystem should be checked, especially whenthe brake is in damp circumstance, forinstance, after washing.
The brake fluid level should be inspectedregularly.
CHANA
8/13/2019 BENNI Brochure
http://slidepdf.com/reader/full/benni-brochure 57/102
57
Antilock brake system※
Antilock brake system(ABS) continuouslymonitors the braking system of vehicle, nomatter what the status of road and theadhesion of tyres, it can prevent wheel fromlockup. As any tendency of locking wheels, itwill start to control the brake fluid pressure ofsub-pump. Even if make abrupt braking asdriving at track curve, the driving direction ofvehicle still will be under control.
As antilock brake system functioning, you canfeel the trembling of brake pedal and noisegenerated by regulating process.
Warning:
In order to reach best braking effect, pleasekeep the brake pedal being stepped during thewhole braking and do not reduce the forceexerted on the pedal against the trembling ofpedal.
Do not hold any idea of driving with venture forhaving this special safety device
Warning:
In case of antilock brake system is failed, thewheels will be locked and the vehicle will likelyturn around abruptly as emergent braking.
Should antilock brake system be failed, pleaseslow down the speed and drive carefully and
resolve the trouble as soon as possible.
CHANA
8/13/2019 BENNI Brochure
http://slidepdf.com/reader/full/benni-brochure 58/102
58
3))))Emergency repair
Various lights
Warning:
The newly extinguished light is very hot, andonly can be replaced after cooling down.
Halogen lamp is filled with pressed halide gas,
if being broken or fallen onto floor; it will beexploded, so particular should be given on it.
It will be very hot during lighting or newlyextinguished that will injury skin or cause fire,therefore, it should be taken with clean softcloth after cooling down.
Should the bulb be burnt out frequently, itindicates that the electric circuit has problem
and should inspected by your CHANGANdealer.
Replacement of bulb
Turn off respective light switch beforereplacing.
Please take the base of the new bulb and donot contact the bulb directly with your hands,otherwise, the reflector of it will be blurred. Thedirty bulb can be cleaned by flannelette withalcohol or liquor. The parameters marked onthe bottom of the new bulb and that of thereplaced bulb should be the same. Do notexceed the power marked on the holder ofbulb.
The beam-focusing of head lighting
It is suggested that the beam-focusing of headlighting should be performed by your
CHANGAN dealer who is equipped withspecial equipments.
Dipped headlight and high beam headlight
1. Open engine hood, put up stand bar.
2. Separate the connector and the base ofbulb.
3. Loosen off the boot of head lighting.
4. Move spring clip to the side and rotate itdown to separate it and fixing lug.
5. Remove the bulb from the bracket ofreflector.
6. As installing new bulb, connect the fixing lugof lamp holder to the buckle of reflector, anddo not touch the glass.
7. Connect the spring clip to install the hood ofhead light to its position, and close the cover,
insert the connector to the base of bulb
8/13/2019 BENNI Brochure
http://slidepdf.com/reader/full/benni-brochure 59/102
CHANA
8/13/2019 BENNI Brochure
http://slidepdf.com/reader/full/benni-brochure 60/102
60
License light1. Insert the screwdriver to the right of licenselight vertically, and turn clockwise to removespring. Raise the lights' package on the rightand uplift it.
2. Press down the raised tongue and openthe "housing".
3. Press the bulb into bracket gently andremove it by turning counter-wise.
4. Press the new bulb into the bracket gently,and turn it counter-clockwise to connect, donot contact the glass.
5. Turn off license light and insert it into itsposition.
Interior lightClose the door of care or pressing on thecontact switch before removing in order not tosupply power to the light.
1. Push the lampshade aside and remove it.
2. Press the bulb toward the direction ofpinchcock and remove.
3. Insert new bulb,do not contact glass.
4. Put the lampshade back to its position.
Fuse (protective fuse)
The fuse should be deemed as damaged as itmelted. The problem should be resolvedbefore replacing new fuse. As replacing,please use the qualified fittings manufacturedby the spare complement manufacturer ofCHANA AUTOMOBILE.
Warning:
The burnt out protective fuse should bereplaced with the one of same specification(same color), other metal should not beallowed; otherwise, it will damage electricalequipment and even cause fire. Should theprotective fuse of same specification newlyreplaced burnt out immediately; it indicates
that there is failure and should be inspectedcarefully
CHANA
8/13/2019 BENNI Brochure
http://slidepdf.com/reader/full/benni-brochure 61/102
62
Fuse box
There are two fuse boxes inside thevehicle: one is under the instrument panelin the passenger compartment on the
side of driver, and another one is on theleft of engine compartment.
Open the fuse box in the passengercompartment and press the buckle of thecover to remove the cover. The setting
serial number of fuse is marked on thecover.
Before replacing fuse, turn out respectiveswitches and ignition switch.
Only the fuse of specified specificationcan be installed, and each fuse is markedwith nominal current, which also can bedistinguished by the color of fuse.
CHANA
8/13/2019 BENNI Brochure
http://slidepdf.com/reader/full/benni-brochure 62/102
63
Fuse box in the passenger compartment
No. Load Nominal current No. Load Nominal current
1. Instrument, EPS 、ABS control
unit
15A 14.Foglight 20A
2 Control unit of airbag 15A 15 Relay of high and dimmed beam 10A
3 Reversing light, directional signal 15A 16 Electronic anti-theft system 10A4. Window glass wiper 15A 17. Stop light 15A
Cleaning system of window glass30A 18. Electric horn
Hazard warning flasher
15A
5. Left electric window 30A 19. Cigarette lighter, Sound system 15A
6. Right electric window 30A
7. Rear defroster 15A8. Heating motor 25A
9 Interior light and stereo set 15A
10 Headlamp 10A
11 Left headlamp 15A
12 Right headlamp 15AA
13 Central system of door locking 20A
CHANA
8/13/2019 BENNI Brochure
http://slidepdf.com/reader/full/benni-brochure 63/102
64
Fuse box in engine compartment
To open, press the buckle on the side to openthe cover.
Fuse box in engine compartmentNO. Load Nominal current
1. Lighting system 60A
2. EPS system 30A
3. Ignition switch 60A
4. Radiator fan 30A
5. ABS system 60A
6. Generator 80A
7. Main relay 20A
8. Air conditioner 10A
9. ECU 10A
CHANA
8/13/2019 BENNI Brochure
http://slidepdf.com/reader/full/benni-brochure 64/102
65
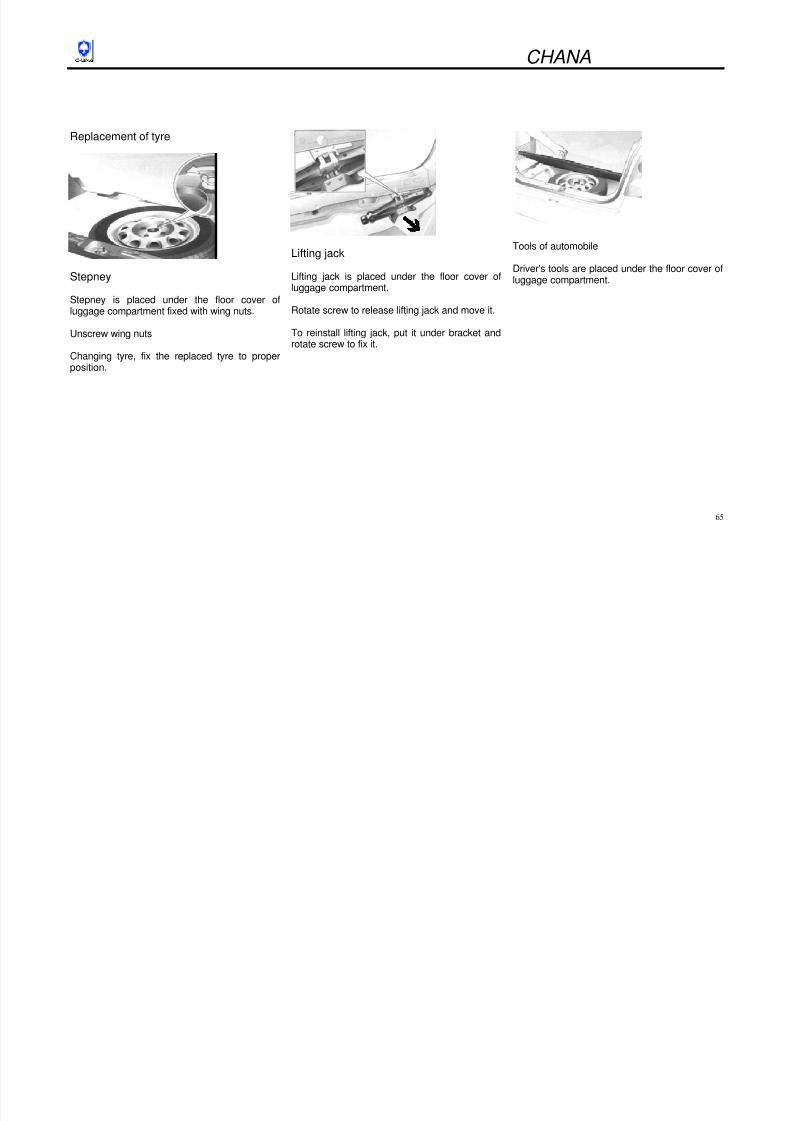
Replacement of tyre
Stepney
Stepney is placed under the floor cover of
luggage compartment fixed with wing nuts.
Unscrew wing nuts
Changing tyre, fix the replaced tyre to properposition.
Lifting jack
Lifting jack is placed under the floor cover ofluggage compartment.
Rotate screw to release lifting jack and move it.
To reinstall lifting jack, put it under bracket androtate screw to fix it.
Tools of automobile
Driver's tools are placed under the floor cover ofluggage compartment.
8/13/2019 BENNI Brochure
http://slidepdf.com/reader/full/benni-brochure 65/102
CHANA

8/13/2019 BENNI Brochure
http://slidepdf.com/reader/full/benni-brochure 66/102
67
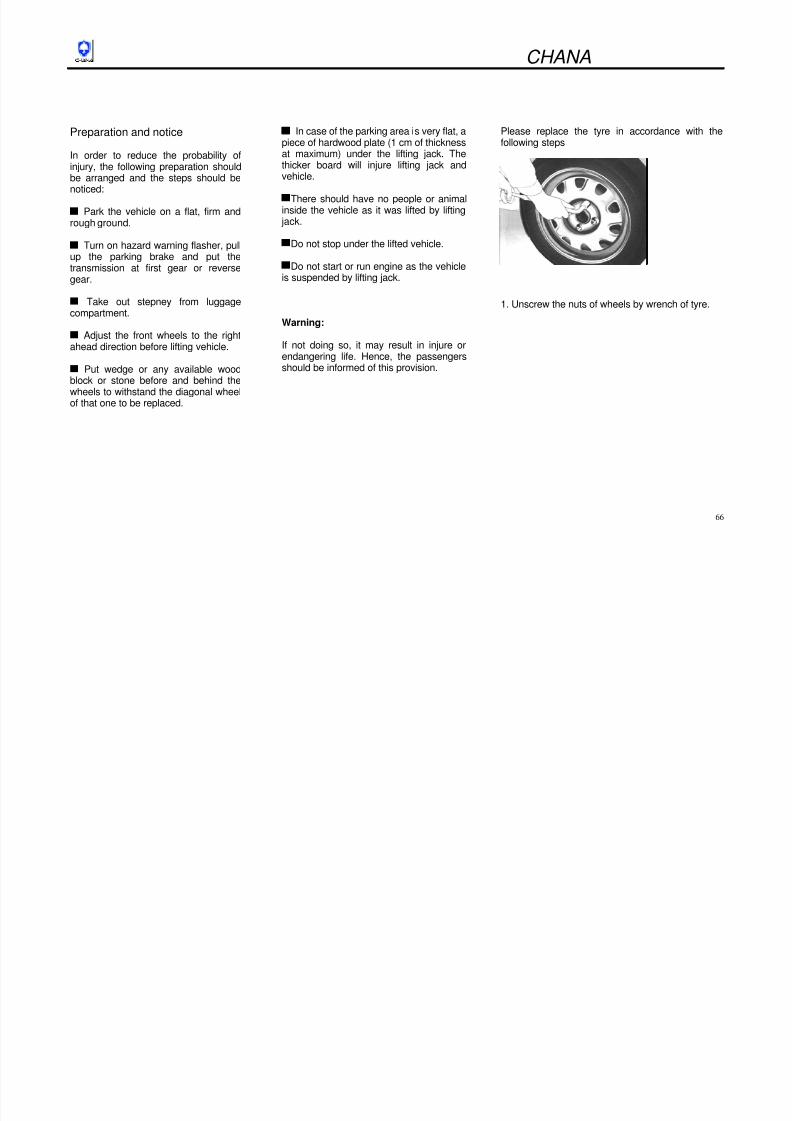
2. At the front and rear lifting position of thebottom of vehicle.
3. Before installation, rotate the screw of lifting jack with hand to adjust the top of it to therequired height.
The pedestal of lifting jack should contact theplane of the lifting position directly. Should thepoint of contact be moved during lifting vehicle,the lifting jack should be reinstalled.
4. Connect the crank to the hole of screw and liftthe vehicle by rotating crank.
CHANA
8/13/2019 BENNI Brochure
http://slidepdf.com/reader/full/benni-brochure 67/102
68
5. Unscrew the nuts of wheels and put themto the place where is not easy to becontaminated.
6. Reinstall nuts and tighten them slightly.
7. Put down the vehicle.
8. Screw the nuts of wheels in the sequence
of cross.
9. Put the replaced wheel, tools and warningsign in the luggage compartment.
10. Inspect the torque of nuts of new wheelswith the wrench of tyre and, if necessary,correct them.
11 . Replace the bad tyre.
Jumper start
Warning:
Should the battery be frozen, do not startvehicle by lapping start, otherwise it will makebattery exploded or broken.
In starting by lapping, the lapping wire and
hands should be far away from belt pulley, beltand fan.
The battery generates inflammable hydrogenand it should be away from fire, and do notsmoke near the battery.
In case of the rescue battery in another vehicle,the both vehicles cannot be contacted andshould keep a certain distance.
In case of the battery is often short of powerand the reason of that has not been found,please contact your Changan dealer forinspection.
In order not to damage people, automobile and
battery, the following explanation should beobserved. Any question, please contact yourChangan dealer.
Do not start with quick charger
That can prevent electronic units from beingdamaged.
Do not start by pushing or pulling
Do not start vehicle by pushing or pullingbecause that your vehicle is equipped with
catalytic converter.
Start engine with jumper
You can start a vehicle without electricity bya jumper and the battery of another vehicle.
Caution
Doing this must be very careful. Should thefollowing indication not be observed, it willcause explosion of battery and resulteventually in personal injury and damage tothe electronic systems of two vehicles.
8/13/2019 BENNI Brochure
http://slidepdf.com/reader/full/benni-brochure 68/102
CHANA
8/13/2019 BENNI Brochure
http://slidepdf.com/reader/full/benni-brochure 69/102
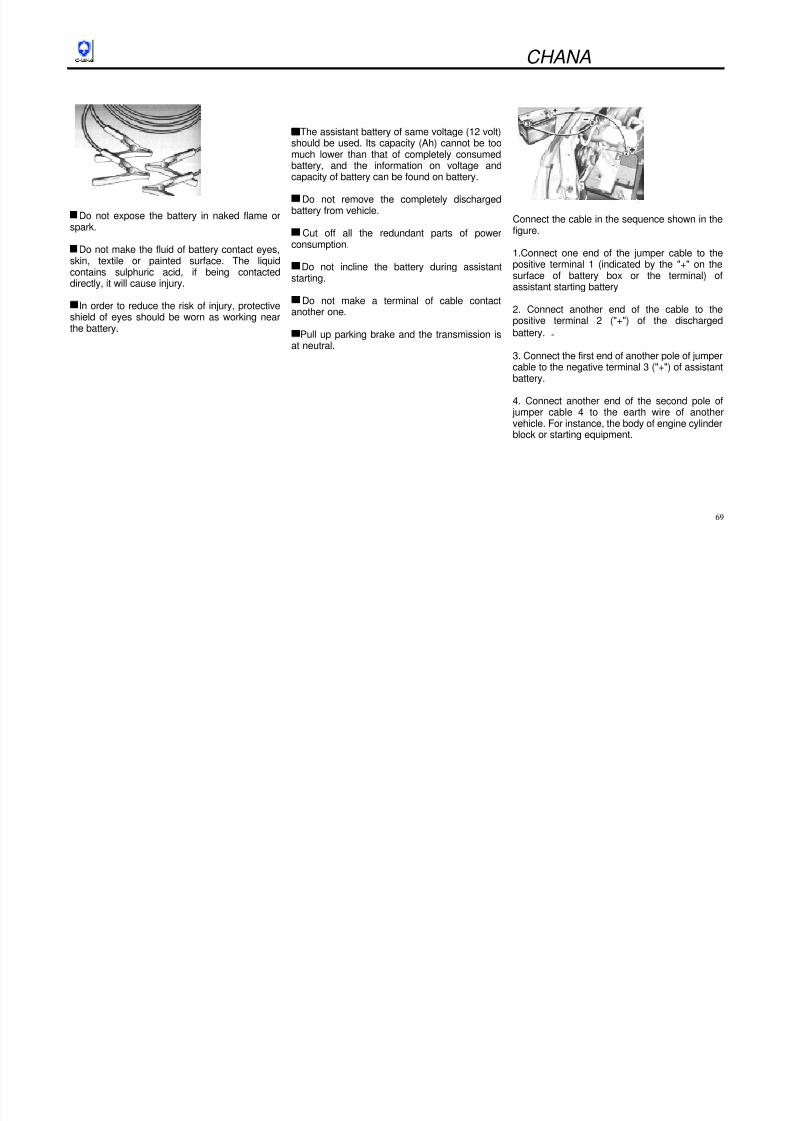
70
Do not connect the cable to the negativeterminal of battery.
The connecting points should keep away frombattery as much as possible.
Please note the route of cable to ensure thatthey will not contact the rotating parts in enginecompartment.
The engine of the vehicle which is allowed toprovide assistant starting runs during starting.The vehicle without electricity should beattempted to start at the interval of a minute. Andit should not last for more than 15 seconds, afterstarting, and keeping the cable connected tomake two engine idle running for about 3minutes.
In order to avoid over-voltage of electronicsystem, before disconnecting cable, a current
consumer(such as light, heating rear window) ofvehicle which accepts assistant starting shouldbe connected.
As disconnecting cable, remove cable in the
sequence reverse to that of connecting.
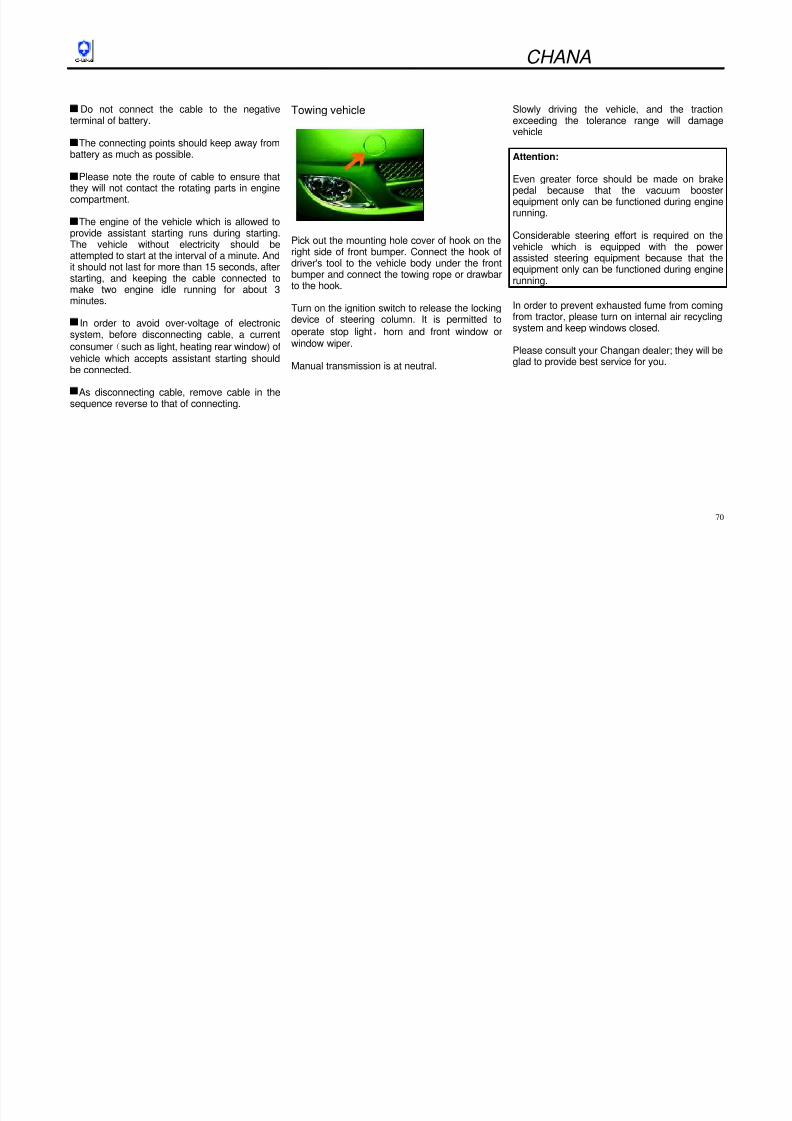
Towing vehicle
Pick out the mounting hole cover of hook on theright side of front bumper. Connect the hook ofdriver's tool to the vehicle body under the frontbumper and connect the towing rope or drawbarto the hook.
Turn on the ignition switch to release the lockingdevice of steering column. It is permitted to
operate stop light,horn and front window orwindow wiper.
Manual transmission is at neutral.
Slowly driving the vehicle, and the tractionexceeding the tolerance range will damagevehicle
Attention:
Even greater force should be made on brakepedal because that the vacuum boosterequipment only can be functioned during engine
running.
Considerable steering effort is required on thevehicle which is equipped with the powerassisted steering equipment because that theequipment only can be functioned during enginerunning.
In order to prevent exhausted fume from comingfrom tractor, please turn on internal air recyclingsystem and keep windows closed.
Please consult your Changan dealer; they will beglad to provide best service for you.

8/13/2019 BENNI Brochure
http://slidepdf.com/reader/full/benni-brochure 70/102
CHANA
8/13/2019 BENNI Brochure
http://slidepdf.com/reader/full/benni-brochure 71/102
72
2 ) On condition that the indication of waterthermometer does not drop:
Turn off engine and inspect the belt and beltpulley of water pump whether they are damagedand slippery.
Inspect whether the water level of water reservoiris below the lower limit and whether the radiator,
water pump, water pipe are leaking. In case ofany leakage, do not run engine before troubleshooting.
In case of any leakage, the coolant should beadded as required.
Warning:
If there is leakage of vapor, the vehicle should bedriven to the safe place and kill the engine andmake it cool down. Do not open the enginecompartment when there is still vapor. When thevapor cannot be seen or heard, open the cover toobserve whether the radiator is still boiling and do
not open it until it is cool down.In order to avoid personal injury, hands, tools andtextile should be away from the radiator fan and airconditioner fan.
CHANA
8/13/2019 BENNI Brochure
http://slidepdf.com/reader/full/benni-brochure 72/102
73
III. Service
1) Maintenance
The maintenance of vehicle should be performedwith plan, to strengthen inspection and adjustment,carry out trouble shooting and eliminate hiddentroubles. The vehicle should be kept in goodcondition and safe operation.
The maintenance of vehicle can be divided intoroutine maintenance and Routine maintenance,and the latter one can be divided into Grade I, IIand III.
(i) Safety notice of Routinemaintenance
Please take particular care onsafety when you inspect andmaintain the vehicle againstaccident. Please give extra attentionto the following situations:
1. Do not start engine in garage andother places where startingengine is forbidden;
2. Under the situation of necessaryto start engine for maintenance, itmust pull hand brake up fully andput transmission at neutral;
3 . Do not touch ignition wire and
other components of ignitionsystem after starting and runningengine;
4. Do not approach the running fanor belt with hands, clothing, toolsor other objects as enginerunning;
5.Do not contact heat elimination
parts, such as manifold pipe ofengine, high-pressure pipe of airconditioner and muffler, etc, lestbeing scalded;
6. Do not smoke near gasoline orbattery and avoid fire lest causingburning;
7. Do not lay down under the chassis as thevehicle was suspended by the lifting jack;
8. Do not connect wrong poles of battery lestcausing accidental short circuit;
9. Keep children and other animals away fromgasoline, engine oil and coolant and place
them correctly; do not dump them onto groundand into sewer;
10. As cleaning and maintaining vehicle, youshould prevent water from coming into controlunit;
11. The electronic injection control systemadopts high-pressure oil feed that keeps highpressure fuel oil in oil circuit even if the engine
is not running. The replacement of oil pipeand fuel filter should be performed byspecialized staff in a place with favorableventilation;
12. The limiting screw of throttle body ofelectronic injection control system is setproperly as manufacturing and not allowed tochange its position by the user;
CHANA
8/13/2019 BENNI Brochure
http://slidepdf.com/reader/full/benni-brochure 73/102
74
13. As maintaining, such as thermal state analogy ofmalfunction and other maintaining operation whichmay raise temperature, do not make the
temperature of electronic control unit exceed 80℃;
14. ECU should be removed before electric welding onvehicle;
15. The equipment which may generate radiointerference should not be installed near "ECU"lest being interfered;
16. Do not remove electric control unit "ECU",transducer or other sensing components as theignition key is at the position of "ON" no matterwhether the engine is running or not;
17. As break cylinder testing, do not remove ignitionhigh voltage line but plug of oil injection nozzle inshort time as far as possible lest fuel oil enteringinto three way catalyst converter for secondaryburning and damage three way catalyst converter;
18. As changing throttle, ECU, battery orother reason which cause power downof ECU, the ignition key should beturned to the gear of "ON" and off in 20seconds and electronic injection controlsystem initialization will be completed in30 seconds as restarting engine.
19. Gasoline deterioration should beavoided because that the generatedcolloid will injure the spray nozzle of oilpump.
Caution
The maximum duration of continuousresting for vehicle should not be morethan 3 months as there is fuel in the tank.
CHANA
8/13/2019 BENNI Brochure
http://slidepdf.com/reader/full/benni-brochure 74/102
75
(ii) Routine maintenance
The Routine maintenance of vehicle is theroutine work which should be performed bythe driver daily. The primary content ofroutine maintenance is three-inspections,namely, to inspect the safety mechanismand the connection of each part of vehiclebefore driving, during driving and afterdriving; four-cleanings, namely to keepengine oil, air, fuel filter and battery clean;four-anti-leakings, namely, to preventwater leakage, oil leakage, gas leakageand electrical leakage.
Hereunder will emphasize on theintroduction of several inspections and findproblems by inspection and adopt
corresponding measures in time.
III. Regular maintenance
1.The time and item of regular maintenance
The following two charts take running km ormonths as the standard to determine the timeof maintenance. Each inspection, adjustment,lubrication and other maintenance should beperformed strictly according to the time
specified in the charts.
Attention:
It is recommended that the maintenance
items with the mark of ※should be performedby your Changan dealer . For the items
without ※, it can be maintained by user inaccordance with the specification in each
section. For the items without ※, if youconsider that it cannot be performed byyourself, please ask your Changan dealer todo it for you.
In case of replacing parts, it is suggested thatthe products of CHANA and supported plants
of CHANA should be used to ensure thequality.
Symbol for regular maintenance
G Stand for change
R Stand for it should be lubricated
X Stand for it should be tightened tospecified torque
J Stand for inspectionT Stand for adjustment
CHANA
8/13/2019 BENNI Brochure
http://slidepdf.com/reader/full/benni-brochure 75/102
76
1 The term and item of regular maintenance
km(×1000)
10 20 30 40 50 60 70 80Interval: This interval should be judged by odometer reading ormonths, whichever comes first.
Item
months 6 12 18 24 30 36 42 48
Engine
1. Fan (Water pump, compressor) drive belt(tension, wear, etc.)
- J.T.G - G - J.T.G - G
*2. Camshaft timing belt (tension, wear,damage)
- J.T.G - J.T.G - J.T.G - J.T.G
*3. Valve Clearance - J.T - J.T - J.T - J.T
*4. Engine Bolt (cylinder head, manifoldfastener)
- X - X - X - X
5. Oil filter G G G G G G G G
6. Engine Oil Replace every 5000km
7. Engine coolant Refill at any time
*8. Coolant system hoses and connection(leakage, damage, etc)
- J.T.G - J.T.G - J.T.G - J.T.G
9. Exhaust system (except three-way catalyticconverter)
- J.T.G - J.T.G - J.T.G - J.T.G
*10. Injector
*11. Throttle body Assy
Recommend to clean every 20000km (according to the use of vehicle)
CHANA
km10 20 30 40 50 60 70 80
Interval: This interval should bej d d b d di
8/13/2019 BENNI Brochure
http://slidepdf.com/reader/full/benni-brochure 76/102
77
(×1000)10 20 30 40 50 60 70 80
judged by odometer reading or
months, whichever comes first. Item months 6 12 18 24 30 36 42 48
Ignition system
*12. Ignition coil (damage, deformation) - J.T.G - J.T.G - J.T.G - J.T.G
*13. Spark plug G G G G G G G G
Fuel system
On cement or asphaltroad Clean every 10000km, replace every 40000km14. Air filter
On unpaved road Clean every 2500km, replace 40000km
*15. Fuel tank, fuel lines and connectors, pipeclip
- J.T.G - J.T.G - - J.T.G
*16.Fuel filter G G G G G G G G
Crankcase emission control
*17. Crankcase venilation hose andconnections
J.T.G - J.T.G - J.T.G - J.T.G -

8/13/2019 BENNI Brochure
http://slidepdf.com/reader/full/benni-brochure 77/102
CHANA
8/13/2019 BENNI Brochure
http://slidepdf.com/reader/full/benni-brochure 78/102
79
km(×1000) 10 20 30 40 50 60 70 80Interval: This interval should be judged byodometer reading or months,whichever comes first.
Item months 6 12 18 24 30 36 42 48
*25. Front: Brake discs and pads (wear) J.T.G J.T.G J.T.G J.T.G J.T.G J.T.G J.T.G J.T.G
*26. Rear: Brake drums and shoes (wear) J.T.G J.T.G J.T.G J.T.G J.T.G J.T.G J.T.G J.T.G
*27. Brake hoses and pipes (leakage,damage)
J.T.G J.T.G J.T.G J.T.G J.T.G J.T.G J.T.G J.T.G
28. Tire(abnormal wear and pressure, etc.) J.T.G J.T.G J.T.G J.T.G J.T.G J.T.G J.T.G J.T.G
29. Wheel and Wheel nut(damage, tightness) J.T.G J.T.G J.T.G J.T.G J.T.G J.T.G J.T.G J.T.G
*30. Bolt and nut(tightness) - X - X - X - X
*31. Steering system(clearance, tightness) J.TG J.TG J.T.G J.T.G J.T.G J.T.G J.T.G J.T.G
Cooling system
*32. Coolant Add coolant if needed
*33. Cooling system J.T J.T J.T.G J.T J.T J.T J.T J.T.G
CHANA
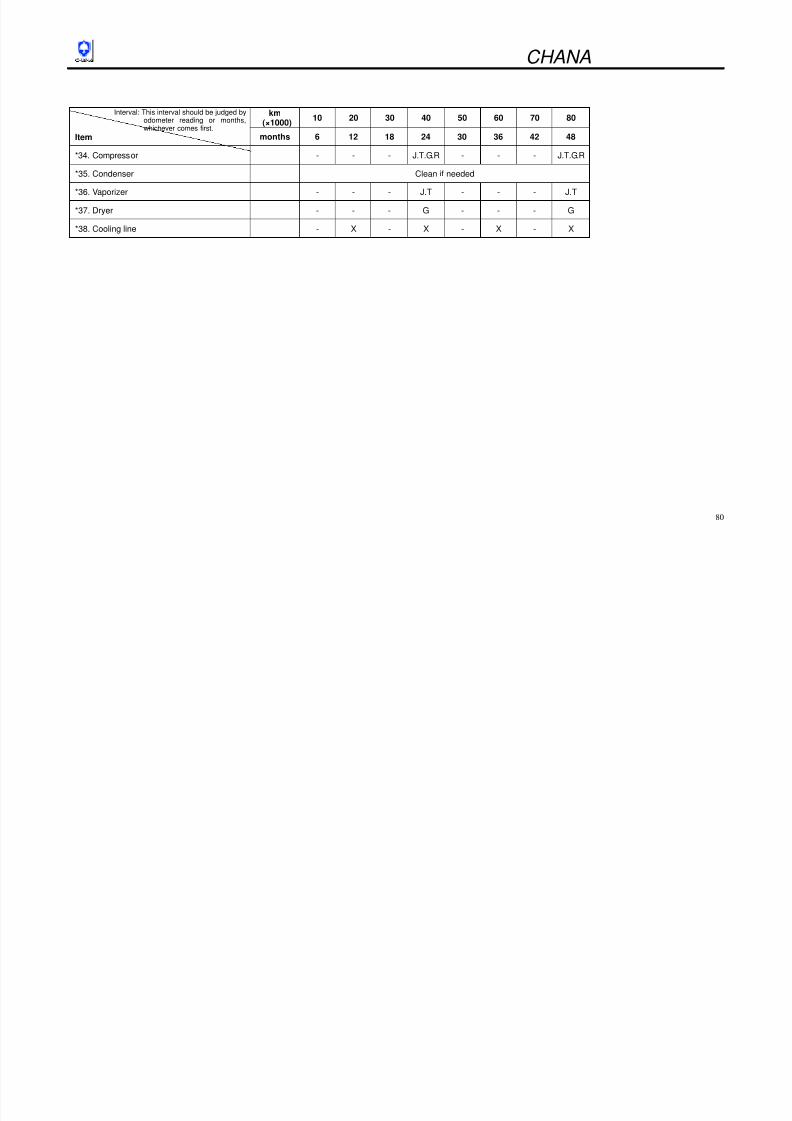
8/13/2019 BENNI Brochure
http://slidepdf.com/reader/full/benni-brochure 79/102
80
km(×1000) 10 20 30 40 50 60 70 80Interval: This interval should be judged by
odometer reading or months,whichever comes first.
Item months 6 12 18 24 30 36 42 48
*34. Compressor - - - J.T.G.R - - - J.T.G.R
*35. Condenser Clean if needed
*36. Vaporizer - - - J.T - - - J.T
*37. Dryer - - - G - - - G
*38. Cooling line - X - X - X - X
CHANA
8/13/2019 BENNI Brochure
http://slidepdf.com/reader/full/benni-brochure 80/102
81
(2) Maintenance under the severe driving conditionShould you vehicle be driven often under severecondition, please maintain it as the following chart
A Repeated short range
B Driving on the rough and muddy road
C Driving on dusty road
D Driving on the extremely cold or salty or alkaline
road
E Repeated short range in extremely cold weather
CHANA
Maintenance under the severe driving condition
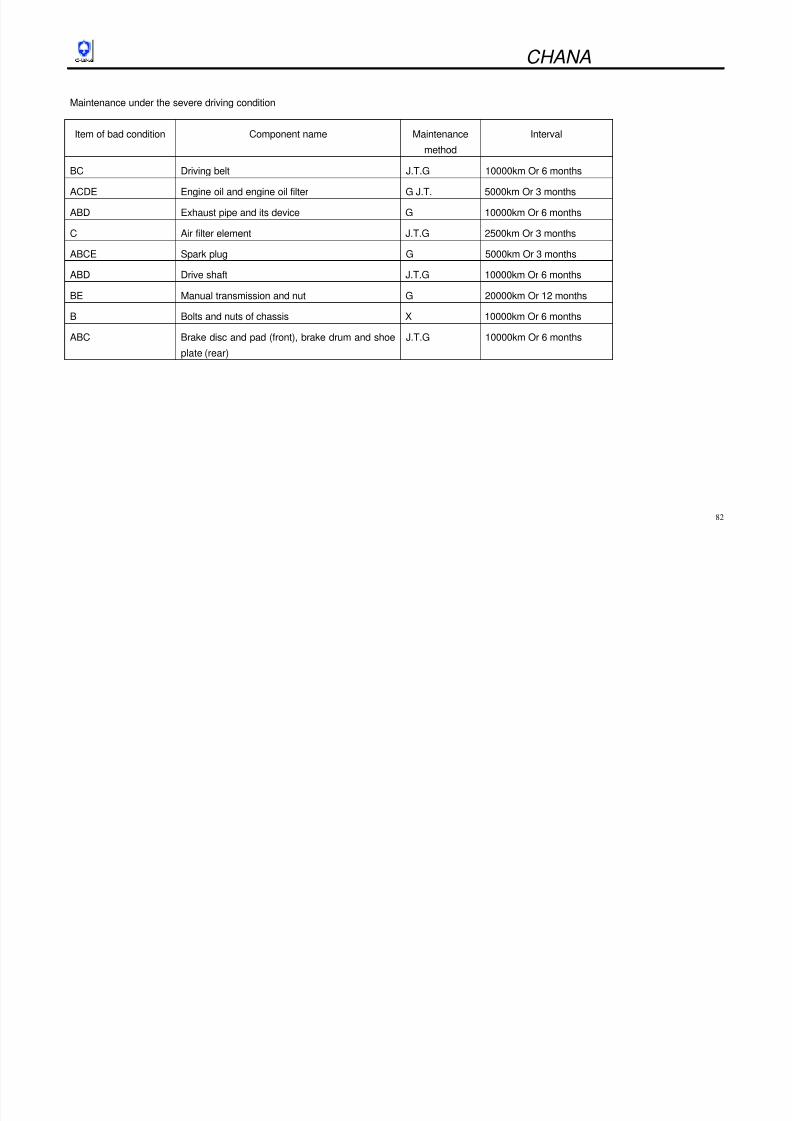
8/13/2019 BENNI Brochure
http://slidepdf.com/reader/full/benni-brochure 81/102
82
Item of bad condition Component name Maintenance
method
Interval
BC Driving belt J.T.G 10000km Or 6 months
ACDE Engine oil and engine oil filter G J.T. 5000km Or 3 months
ABD Exhaust pipe and its device G 10000km Or 6 months
C Air filter element J.T.G 2500km Or 3 months
ABCE Spark plug G 5000km Or 3 months
ABD Drive shaft J.T.G 10000km Or 6 months
BE Manual transmission and nut G 20000km Or 12 months
B Bolts and nuts of chassis X 10000km Or 6 months
ABC Brake disc and pad (front), brake drum and shoe
plate (rear)
J.T.G 10000km Or 6 months
CHANA
8/13/2019 BENNI Brochure
http://slidepdf.com/reader/full/benni-brochure 82/102
83
2.Contents of regular maintenance
①Instrument and indicator
Turn ignition switch to the position of "ON" andinspect each indicator whether being lit up and thefuel gauge should be in normal. Inspect eachindicator and water thermometer after starting engine,they should be in normal. As driving, inspect
odometer, which should be in normal.
②All the lights
Turn on each switch to inspect whether eachheadlight and small light and other lights can be lit up.Step on the brake pedal to inspect whether stop lightcan be lit up. Put transmission at "Reverse Gear" toinspect whether reversing light can be lit up as well aswhether each light is clean and damaged.
③Horn, directional signal, wiperand washer
Inspect whether they are workingproperly.
④Door lock
Inspect whether the function ofdoor lock is normal.
⑤Rearview mirror(internal and
external)
Inspect whether they can provide
favorable rear view as sitting onthe driving seat and adjust them ifnecessary.
⑥License plate
Inspect whether the license plateis smeared or damaged, loosen,and whether the writing is clear.
⑦Suspension
Driving to a flat ground to inspect whether the vehicleis inclined, if yes, the parts of suspension should beinspected or replaced.
⑧Color of exhausted gas
Too white or too black exhausted gas indicates thatthere is failure, and should be inspected andmaintained. White fume in cold weather indicatescondensation.
CHANA
8/13/2019 BENNI Brochure
http://slidepdf.com/reader/full/benni-brochure 83/102
84
Driving belt
For these inspections, the vehicle must besuspended by lifting jack (the usage of lifting jack,please see Chapter 6 "Emergency Repair"), if youcould not fix the vehicle, these inspection should beperformed by your Changan dealer.
Warning:
As the engine is running, do not close to the belt withhands, hair, clothing and tools even if the fan is notrunning, in case of that it could be running abruptlywithout any early warning.
Fan belt
The loosened fan belt wouldimpact the generator voltage andresult in superheating and unduewear of belt. As inspecting, pressthe belt with prescribed force andit should be 6-8 mm sinking.
Compressor belt
As inspecting, press the belt withprescribed force and it should be8-11 mm sinking. It should beensured that it has not beendamaged. Should it be replacedor adjusted, please ask yourChangan dealer to perform.
Adjustment and replacement of belt
1) Kill the engine;
2) Loosen the three bolts for fixing motor;
3) As straining belt, push the generator outward andscrew the bolts tightly till the tension of beltmeets the requirement;
4) As replacing belt, loosen binding bolt and push
engine inward, take off belt and replace it, thenadjust it in accordance with the method oftightening belt.
CHANA
⑩Engine lubricating oil and oil filter Filling engine oil Warning:
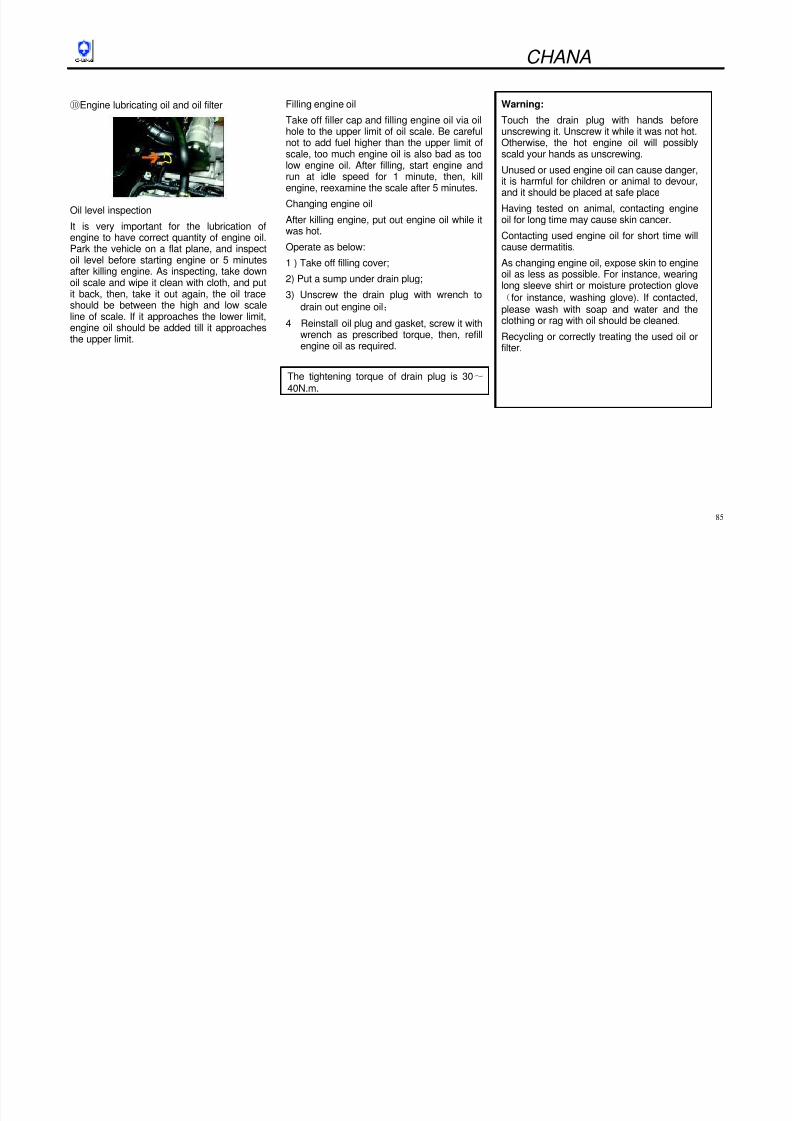
8/13/2019 BENNI Brochure
http://slidepdf.com/reader/full/benni-brochure 84/102
85
Oil level inspectionIt is very important for the lubrication ofengine to have correct quantity of engine oil.Park the vehicle on a flat plane, and inspectoil level before starting engine or 5 minutesafter killing engine. As inspecting, take downoil scale and wipe it clean with cloth, and putit back, then, take it out again, the oil traceshould be between the high and low scaleline of scale. If it approaches the lower limit,engine oil should be added till it approachesthe upper limit.
Take off filler cap and filling engine oil via oilhole to the upper limit of oil scale. Be carefulnot to add fuel higher than the upper limit ofscale, too much engine oil is also bad as toolow engine oil. After filling, start engine andrun at idle speed for 1 minute, then, killengine, reexamine the scale after 5 minutes.
Changing engine oil
After killing engine, put out engine oil while itwas hot.
Operate as below:
1 ) Take off filling cover;
2) Put a sump under drain plug;
3) Unscrew the drain plug with wrench to
drain out engine oil;
4 Reinstall oil plug and gasket, screw it withwrench as prescribed torque, then, refillengine oil as required.
The tightening torque of drain plug is 30~40N.m.
Touch the drain plug with hands beforeunscrewing it. Unscrew it while it was not hot.Otherwise, the hot engine oil will possiblyscald your hands as unscrewing.
Unused or used engine oil can cause danger,it is harmful for children or animal to devour,and it should be placed at safe place
Having tested on animal, contacting engineoil for long time may cause skin cancer.
Contacting used engine oil for short time willcause dermatitis.
As changing engine oil, expose skin to engineoil as less as possible. For instance, wearinglong sleeve shirt or moisture protection glove
(for instance, washing glove). If contacted,
please wash with soap and water and theclothing or rag with oil should be cleaned.
Recycling or correctly treating the used oil orfilter.
CHANA
8/13/2019 BENNI Brochure
http://slidepdf.com/reader/full/benni-brochure 85/102
86
Replacement of engine oil filter
1)Unscrew engine oil filter with specialwrench for it and take it off. Wipe theinstallation surface with clean rag.
2)Apply a little engine oil around the rubbergasket of new filter, rotate the filter byhands till gasket and installationsurface contacts.
3)Turn a certain distance (or specifiedtorque) from the point of contact asrequired by special wrench.
Specified torque
Rotate 3/4 turn or 12~16N.m
Caution:
Screw the filter correctly; it is veryimportant to identify whether the gasket offilter and installation surface contact.
In order to prevent leakage of filter, itshould be tightened but not too tight.
In case of that you could not change it,please ask your Changan dealer to do so
○11 Gear oil
Oil level inspection
The following steps should be followed forinspecting oil level:
1) Park the vehicle on the level ground andpull up hand brake;
2) Demount plug of oil filler; 3) Put your finger into the oil filler to feel the
level of oil;
4) Screw the filling plug.
Warning:
After driving, the oil temperature of wheelwill be very high; you would better to feelthe temperature of drain plug beforeunscrewing it and unscrew it while it is not
hot. Otherwise, the hot engine oil willpossibly scald your hands as unscrewing.
Changing gear oil
The following steps should be followed forchanging oil:
1) Demount plug of oil filler;
2) Demount the drain plug, and screw theplug back after draining away the oil;
3) Fill the oil which consistency and brand
meets the season via the oil filler to theunder part of oil filler;
4) Screw the plug of oil filler and tighten itwith required torque.
Caution::::
As twisting the oil plug, please usesealant with the designation of GY210 toprevent leaking.
CHANA
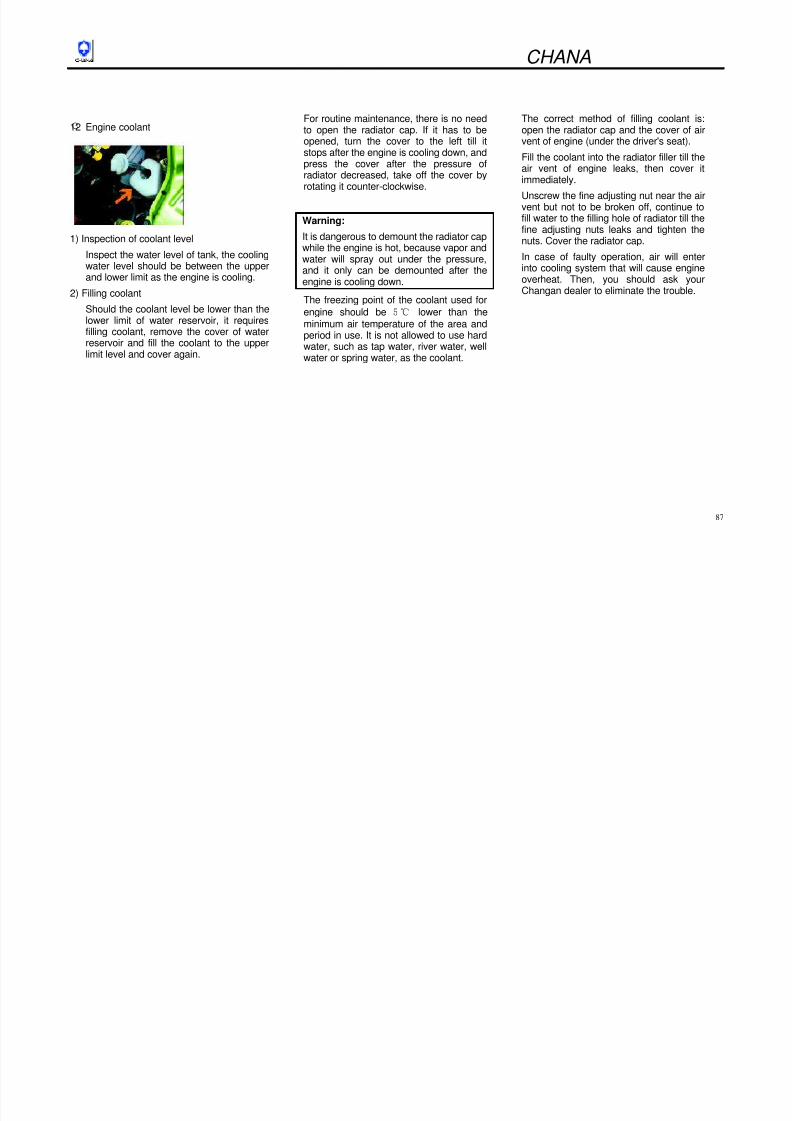
8/13/2019 BENNI Brochure
http://slidepdf.com/reader/full/benni-brochure 86/102
87
○12 Engine coolant
1) Inspection of coolant level
Inspect the water level of tank, the coolingwater level should be between the upperand lower limit as the engine is cooling.
2) Filling coolant
Should the coolant level be lower than thelower limit of water reservoir, it requiresfilling coolant, remove the cover of waterreservoir and fill the coolant to the upperlimit level and cover again.
For routine maintenance, there is no needto open the radiator cap. If it has to beopened, turn the cover to the left till itstops after the engine is cooling down, andpress the cover after the pressure ofradiator decreased, take off the cover byrotating it counter-clockwise.
Warning:
It is dangerous to demount the radiator capwhile the engine is hot, because vapor andwater will spray out under the pressure,and it only can be demounted after theengine is cooling down.
The freezing point of the coolant used for
engine should be 5℃ lower than theminimum air temperature of the area andperiod in use. It is not allowed to use hardwater, such as tap water, river water, wellwater or spring water, as the coolant.
The correct method of filling coolant is:open the radiator cap and the cover of airvent of engine (under the driver's seat).
Fill the coolant into the radiator filler till theair vent of engine leaks, then cover itimmediately.
Unscrew the fine adjusting nut near the airvent but not to be broken off, continue to
fill water to the filling hole of radiator till thefine adjusting nuts leaks and tighten thenuts. Cover the radiator cap.
In case of faulty operation, air will enterinto cooling system that will cause engineoverheat. Then, you should ask yourChangan dealer to eliminate the trouble.
CHANA
8/13/2019 BENNI Brochure
http://slidepdf.com/reader/full/benni-brochure 87/102
88
○13 Detergent of windshield
The reservoir of the windshield washerand rear windshield washer is no the rightof the engine compartment (view from thefront of vehicle).
Warning:
Do not use anti-freeze fluid in the tank ofwindshield detergent, if it being sprayedon the glass it will have strong impact onthe visual field and may damage thepaint coating of vehicle.
If there is no water in the reservoir of
detergent solution, do not run it,otherwise the motor may be damaged.
Please use the detergent solutionmanufactured by the supportedmanufacturer of CHANA.
○14 Air filter
If the air filter was blocked by dust, theresisting force of air suction will beincreased that will cause decrease ofpower output and increase of fuelconsumption, and it should be cleaned orreplaced the filtering element.
Cleaning air filter
Take off the cover of air filter and take outthe filtering element of it; if it is dry andneeds to be clean, you can usecompressed air to blow the dust frominside.
○15 Spark plug
As spark plug deposited with carbon, itcannot generate powerful spark and itshould be cleaned out the carbondeposition by steel wire and the spark plug
gap should be adjusted as 0.7-0.8mm.
Attention:
In case of ignition failure (for instance,starting difficulty, engine misfire) afterinstallation of high tension ignition coil,the cause is not only limited to the sparkplug but maybe also the aging of
sparking coil. 。After replacing of sparkplug and the malfunction still exists,please contact your Changan dealer toinspect the sparking coil and ignitionsystem.
CHANA
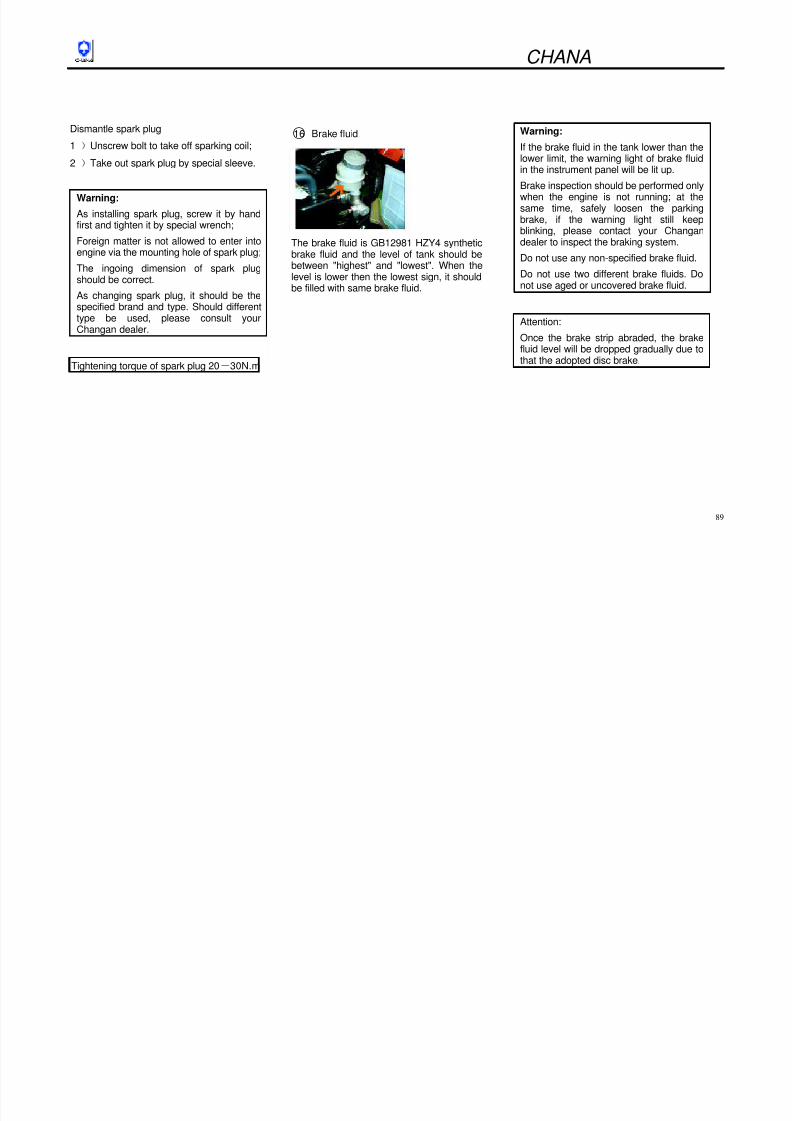
8/13/2019 BENNI Brochure
http://slidepdf.com/reader/full/benni-brochure 88/102
89
Dismantle spark plug
1 )Unscrew bolt to take off sparking coil;
2 )Take out spark plug by special sleeve.
Warning:
As installing spark plug, screw it by handfirst and tighten it by special wrench;
Foreign matter is not allowed to enter intoengine via the mounting hole of spark plug;
The ingoing dimension of spark plugshould be correct.
As changing spark plug, it should be thespecified brand and type. Should differenttype be used, please consult yourChangan dealer.
Tightening torque of spark plug 20-30N.m
○16 Brake fluid
The brake fluid is GB12981 HZY4 syntheticbrake fluid and the level of tank should bebetween "highest" and "lowest". When thelevel is lower then the lowest sign, it shouldbe filled with same brake fluid.
Warning:
If the brake fluid in the tank lower than thelower limit, the warning light of brake fluidin the instrument panel will be lit up.
Brake inspection should be performed onlywhen the engine is not running; at thesame time, safely loosen the parking
brake, if the warning light still keepblinking, please contact your Changandealer to inspect the braking system.
Do not use any non-specified brake fluid.
Do not use two different brake fluids. Donot use aged or uncovered brake fluid.
Attention:
Once the brake strip abraded, the brakefluid level will be dropped gradually due tothat the adopted disc brake.
CHANA
○17 Brake pedal ○18 Clutch pedal ○19 Tyre

8/13/2019 BENNI Brochure
http://slidepdf.com/reader/full/benni-brochure 89/102
90
There is should have no less than 95 mmbetween pedal and front wall when the brakepedal is stepped to the bottom, with the force
about 294N(30kg)stepping on the brake pedal.
Under the following situation, it should beexamined and repaired in time.
(1) Insufficient brakeage.
(2) Imbalance of braking (uneven brakingforce).
(3)Pedal stroke is too long.
(4) Retarded braking.
(5)With braking noise.
(6) Pedal jumping as it was stepped.
The clutch pedal free travel is 15-25 mm, tooshort or too long of the travel is unsuited and itshould be adjusted.
Too low tyre pressure will wear tyre unduly thatwill make driving difficulty and increasing fuelconsumption; too high tyre pressure will makevehicle trembling severely and decrease thebalance that will wear the middle of tyreseverely.
The tyre pressure can be inspected by pressuregauge.
Caution:
As inflating tyre, you should inspect thetyre pressure as inflating it slowly till itreaches the specified air pressure.
It is not allowed to use tyre of differentspecification and type.
CHANA
The following inspection should be Warning:
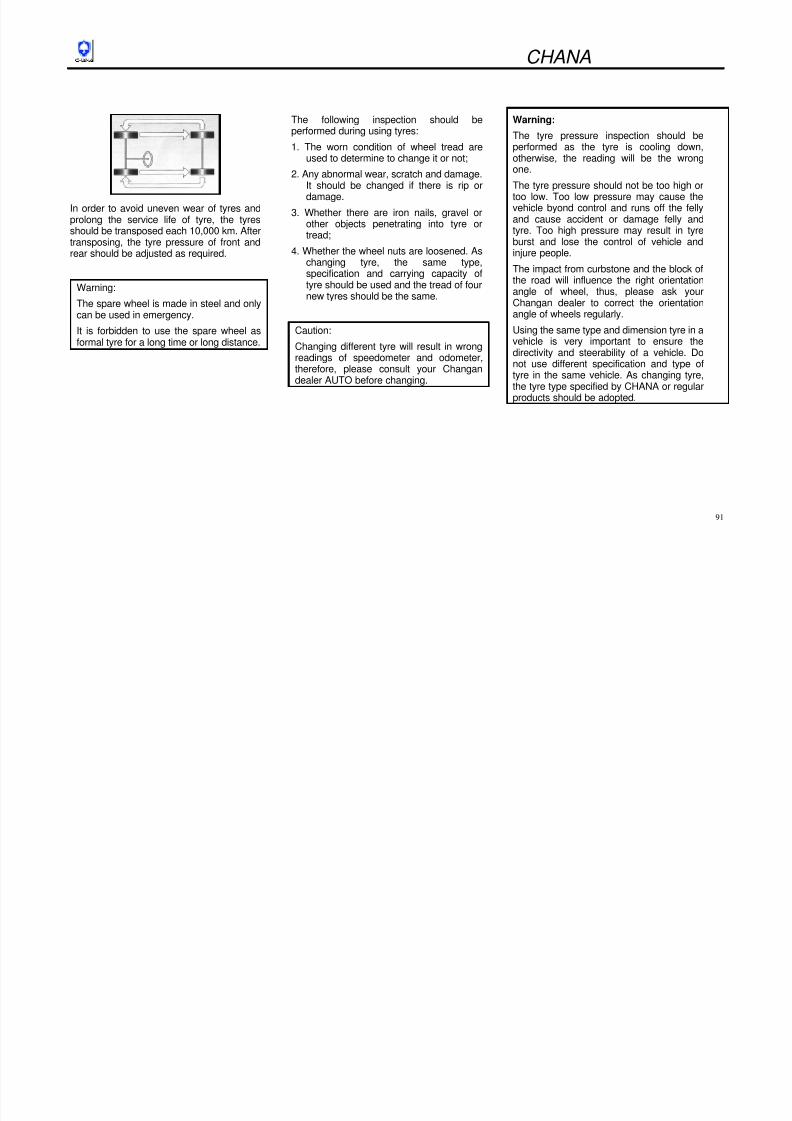
8/13/2019 BENNI Brochure
http://slidepdf.com/reader/full/benni-brochure 90/102
91
In order to avoid uneven wear of tyres and
prolong the service life of tyre, the tyresshould be transposed each 10,000 km. Aftertransposing, the tyre pressure of front andrear should be adjusted as required.
Warning:
The spare wheel is made in steel and only
can be used in emergency.
It is forbidden to use the spare wheel asformal tyre for a long time or long distance.
The following inspection should beperformed during using tyres:
1. The worn condition of wheel tread areused to determine to change it or not;
2. Any abnormal wear, scratch and damage.It should be changed if there is rip ordamage.
3. Whether there are iron nails, gravel orother objects penetrating into tyre ortread;
4. Whether the wheel nuts are loosened. Aschanging tyre, the same type,specification and carrying capacity oftyre should be used and the tread of fournew tyres should be the same.
Caution:
Changing different tyre will result in wrongreadings of speedometer and odometer,therefore, please consult your Changandealer AUTO before changing.
Warning:
The tyre pressure inspection should beperformed as the tyre is cooling down,otherwise, the reading will be the wrongone.
The tyre pressure should not be too high ortoo low. Too low pressure may cause thevehicle byond control and runs off the felly
and cause accident or damage felly andtyre. Too high pressure may result in tyreburst and lose the control of vehicle andinjure people.
The impact from curbstone and the block ofthe road will influence the right orientationangle of wheel, thus, please ask yourChangan dealer to correct the orientation
angle of wheels regularly.Using the same type and dimension tyre in avehicle is very important to ensure thedirectivity and steerability of a vehicle. Donot use different specification and type oftyre in the same vehicle. As changing tyre,the tyre type specified by CHANA or regularproducts should be adopted.
CHANA
○20 Battery ○21 Wiper
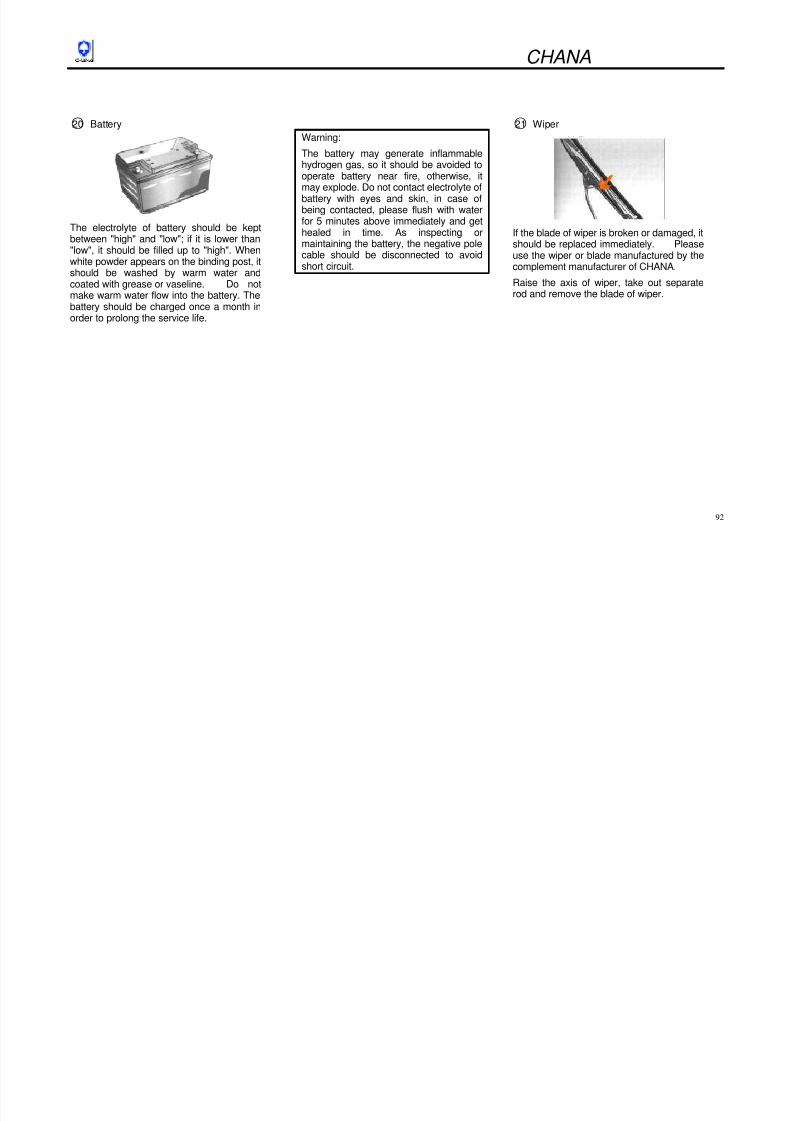
8/13/2019 BENNI Brochure
http://slidepdf.com/reader/full/benni-brochure 91/102
92
○20 Battery
The electrolyte of battery should be keptbetween "high" and "low"; if it is lower than"low", it should be filled up to "high". Whenwhite powder appears on the binding post, itshould be washed by warm water andcoated with grease or vaseline. Do notmake warm water flow into the battery. Thebattery should be charged once a month inorder to prolong the service life.
Warning:
The battery may generate inflammablehydrogen gas, so it should be avoided tooperate battery near fire, otherwise, itmay explode. Do not contact electrolyte ofbattery with eyes and skin, in case ofbeing contacted, please flush with waterfor 5 minutes above immediately and gethealed in time. As inspecting ormaintaining the battery, the negative polecable should be disconnected to avoidshort circuit.
○21 Wiper
If the blade of wiper is broken or damaged, itshould be replaced immediately. Pleaseuse the wiper or blade manufactured by thecomplement manufacturer of CHANA.
Raise the axis of wiper, take out separaterod and remove the blade of wiper.
CHANA
○22 Brake
8/13/2019 BENNI Brochure
http://slidepdf.com/reader/full/benni-brochure 92/102
93
○22 Brake
When the parking brake is locked, the numberof ratch can be seen should be between 4 to 9.In this scope, when the brake cannot belocked or unlocked completely, please askyour Changan dealer to inspect.
○23 Steering wheel
Rotate the steering wheel from left to rightslowly till feel slight resisting force, measurethe rotated distance, which should betweenthe specified value; on the flat and broadground, rotate the steering wheel right and leftto learn whether it is handy and stable,
without noise of "click".Play of steering wheel: 0-30 mm.
If the play of steering wheel is beyond thescope or any other malfunction, please askyour Changan dealer to inspect and adjust.
Measures for anticorrosion
1) In order to prevent your vehicle beingeroded, we list some reason of thatwith explanation for your reference:
Salt, dirt, moisture and chemicalsaccumulated on the chassis or carriage
where is unable to be cleaned.Scaling off of paint or other injuries aswell as minor accident, friction of stoneblock and sand.
2) Environmental condition for the erosion ofvehicle:
Salt, chemical substances, sea breeze orindustrial pollution will accelerate theerosion of metalwork.
High humidity, especially when the humidity
is at the condensation point, will acceleratethe erosion.
For some part of the vehicle, if it is in aenvironment with high humidity, even otherparts is very dry, it still will erode vehicle.
In high moisture environment, if the airpermeability of a certain part of vehicle isnot good that will also accelerate the
erosion of that part.
CHANA
Warning:
The detergent used for vehicle should be
3) How to prevent vehicle from beingeroded:
Th b t ti i m th d f
The moisture, dust and silt mayaccelerate erosion. It should beinspected often to ensure the indoor
8/13/2019 BENNI Brochure
http://slidepdf.com/reader/full/benni-brochure 93/102
94
gneutral one instead of acid or alkali one.
As using, please refer the notice andrequirements of manufacturer.
After cleaning, it should be washed bywater.
The information in question indicates that itis very important to keep vehicle clean anddry as far as possible; once damaged,please repair the painted surface of vehicleimmediately.
The best anticorrosion method for yourvehicle is to keep it clean and dry.
Before cleaning vehicle, please read thesection of cleaning vehicle.
4) Cleaning the dirt on the vehicle
The paint coating of vehicle may beinjured by dirt, such as salt, chemicalsubstances, asphalt, myron, excrementof birds, industry radiation and dust,which should be cleaned as soon aspossible. If it is hard to clean, neutraldetergent instead of acid or alkali onecan be used. Then, washed by water. Asusing detergent, please follow theinstruction manual of manufacturer.
If the surface of your vehicle beingdamaged or the paint coating is flakedout, it should be repaired immediately toprevent metal from being exposed in air.
inspected often to ensure the indoorcleanness and dryness of vehicle; it iseven more necessary to keep clean anddry while driving in bad weather.
As loading and unloading somecorrosive materials, such as chemicals,fertilizer, alkaline, acid and salt, it shouldbe loaded into special container; in case
of leakage, it should be cleanedimmediately.
Do not park your car in the place ofdamp and bad ventilation. Do not cleanvehicle inside garage.
Do not paint priming paint and paint coatfor preventive cause on or aroundexhaust system lest causing fire.
CHANA
Cleaning the interior decoration Cleaning vehicle
8/13/2019 BENNI Brochure
http://slidepdf.com/reader/full/benni-brochure 94/102
95
g
Attention:
As cleaning vehicle, do not use inflammablesubstances, such as spray paint, gasoline,benzene, etc, as well as household detergent withstrong alkali, such as bleacher.
1)The cleanness of interior ornaments
Ethylene rosin ornaments
Use water and some soap or soft detergent, soaksponage or soft cloth in the solution, wipe theethylene rosin and keep for several minutes, thenrepeat wiping by clean with soft cloth and water till itis clean.
Cleaning fiber material
Clean the dust by dust collector, wipe the dirty partby the clean cloth with warm soap solution, andwash by clear water.
Cleaning seat belt
Use warm soap solution and clearwater to clean safety belt, do not usebleacher or dye.
Cleaning Ethylene rosin cushion
The general dirt can be cleaned bywater or warm water and soap solution,and brush may serve as a helper.
Cleaning carpet
Clean the dust and silt of carpet bydust collector. Clean the dirty part by
warm soap solution and clean it withclear water.
g1)Cleaning
Warning:
Do not clean or wax vehicle while the engine isrunning.
As cleaning bottom plate and fender guard,please put on gloves and long sleeves toprotect your hands and arms.
After cleaning, please check whether thebraking is normal before driving.
It is very important to keep the cleanness ofvehicle and not being contaminated, otherwise,the paint coating will be faded away or some
parts will be eroded.
CHANA
2)The following points should be noticedas cleaning:
Warning: 3) Waxingf
8/13/2019 BENNI Brochure
http://slidepdf.com/reader/full/benni-brochure 95/102
96
as cleaning:
Flush the silt and crumb in thefloorboard and wheel by high pressurewater.
Warning:
Do not wash plastic component with thevapor and water which temperature
exceeds 80℃.
As flushing the exterior surface ofvehicle, soft cloth instead of hard objectshould be used lest injuring the surface
of vehicle.As cleaning vehicle, you should dipdetergent continuously to wipe thesurface of the vehicle.
As using detergent for vehicle, pleasenotice the operating instruction ofmanufacturer and it is forbidden to usehousehold rinsing agent.
Once the dirt was cleaned, please wash
it with clear water.After cleaning, wipe the residual water
by soft cloth and make it dry naturally.
Please scrutinize the paint coating of thevehicle, if there are any scratches,please repair the surface as follow:
a) Clean and dry the damaged surface;
b) Brush the scratch with the same paintgently;
c)Make it dry naturally.
After cleaning, it is suggested to wax andspray polishing agent to protect and beautifyyour vehicle.
Please use high quality wax and polishingagent.
As using wax and polishing agent, pleasenotice the operating instruction ofmanufacturer.
CHANA
2) Technical ParameterOutline dimension
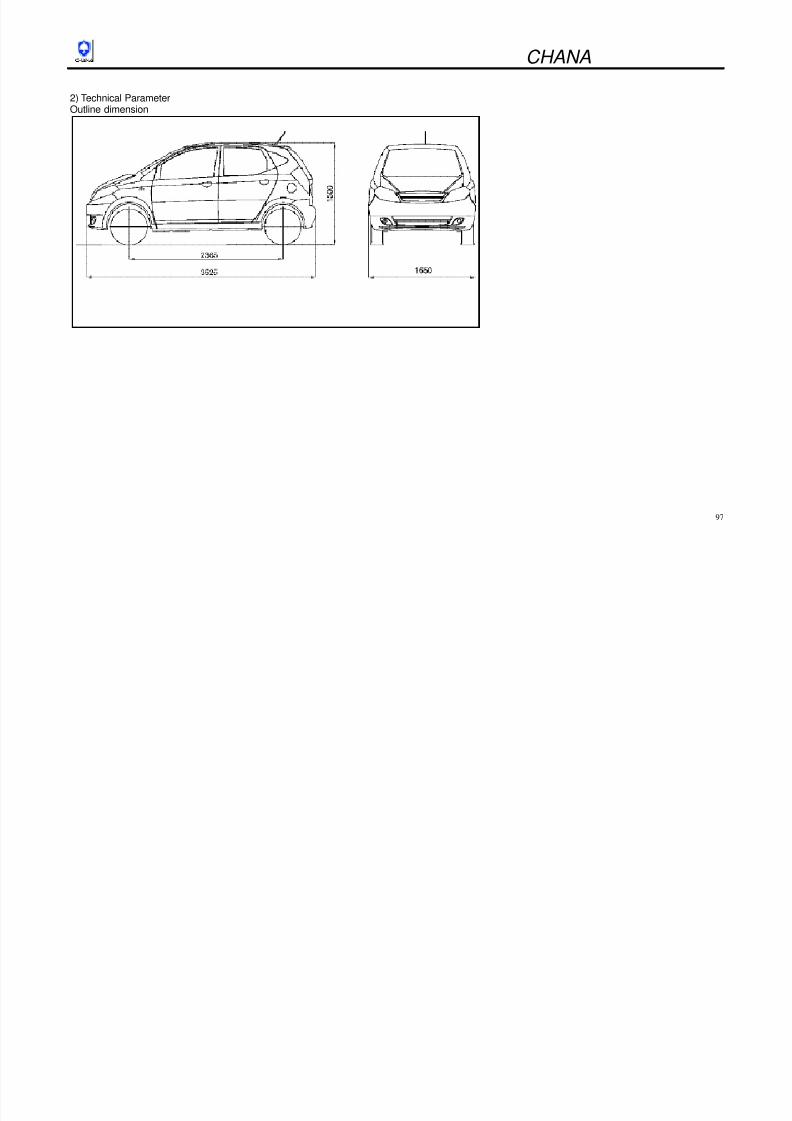
8/13/2019 BENNI Brochure
http://slidepdf.com/reader/full/benni-brochure 96/102
97
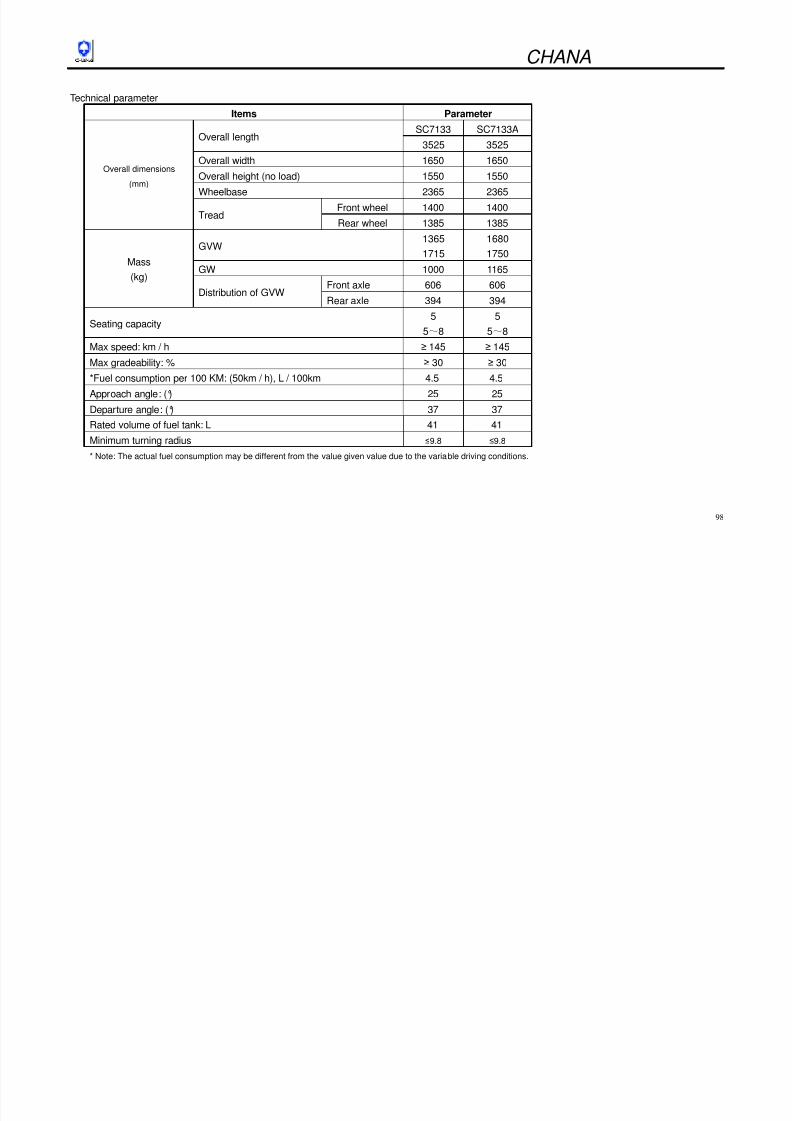
8/13/2019 BENNI Brochure
http://slidepdf.com/reader/full/benni-brochure 97/102
CHANA
parameterItems
SC7133 SC7133AMin ground clearance (no load): mm ≥155 ≥155
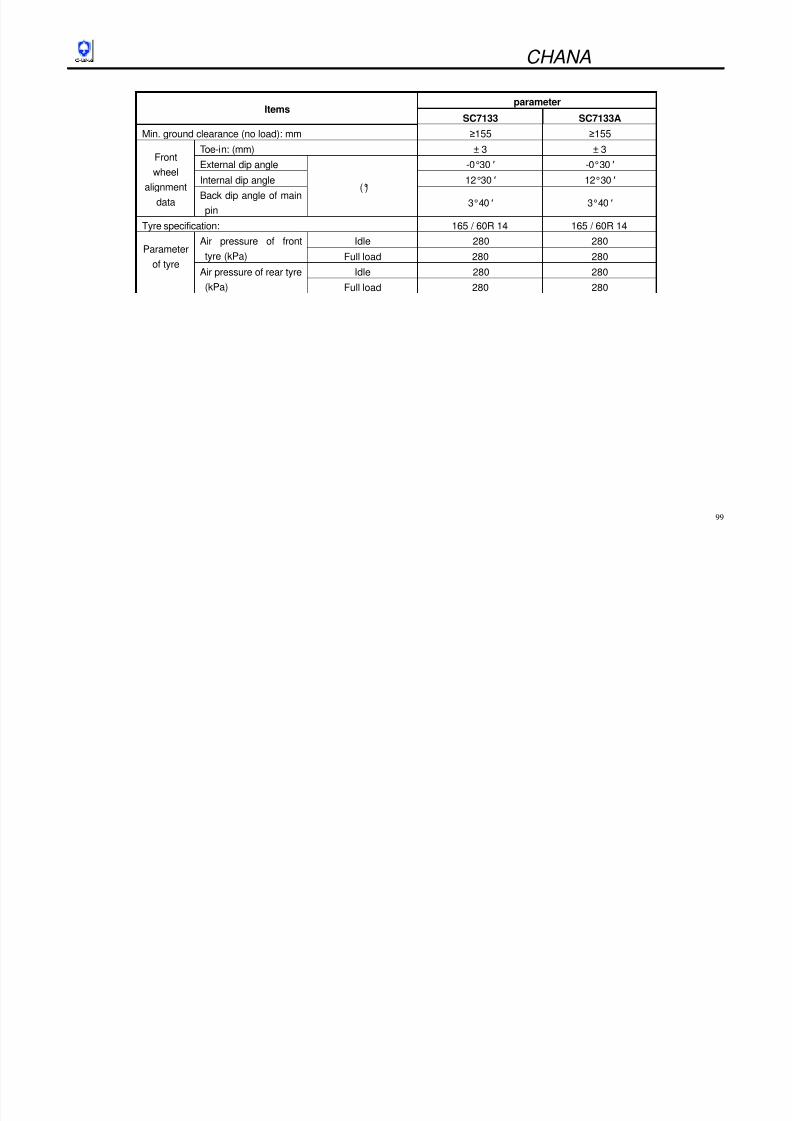
8/13/2019 BENNI Brochure
http://slidepdf.com/reader/full/benni-brochure 98/102
99
Min. ground clearance (no load): mm ≥155 ≥155
Toe-in: (mm) ± 3 ± 3
External dip angle -0°30 ′ -0°30 ′
Internal dip angle 12°30 ′ 12°30 ′
Front
wheel
alignment
dataBack dip angle of main
pin
(°)
3°40 ′ 3°40 ′
Tyre specification: 165 / 60R 14 165 / 60R 14
Idle 280 280Air pressure of front
tyre (kPa) Full load 280 280
Idle 280 280
Parameter
of tyreAir pressure of rear tyre
(kPa) Full load 280 280
CHANA
Engine parameters
ParameterItem
SC7133 SC7133A
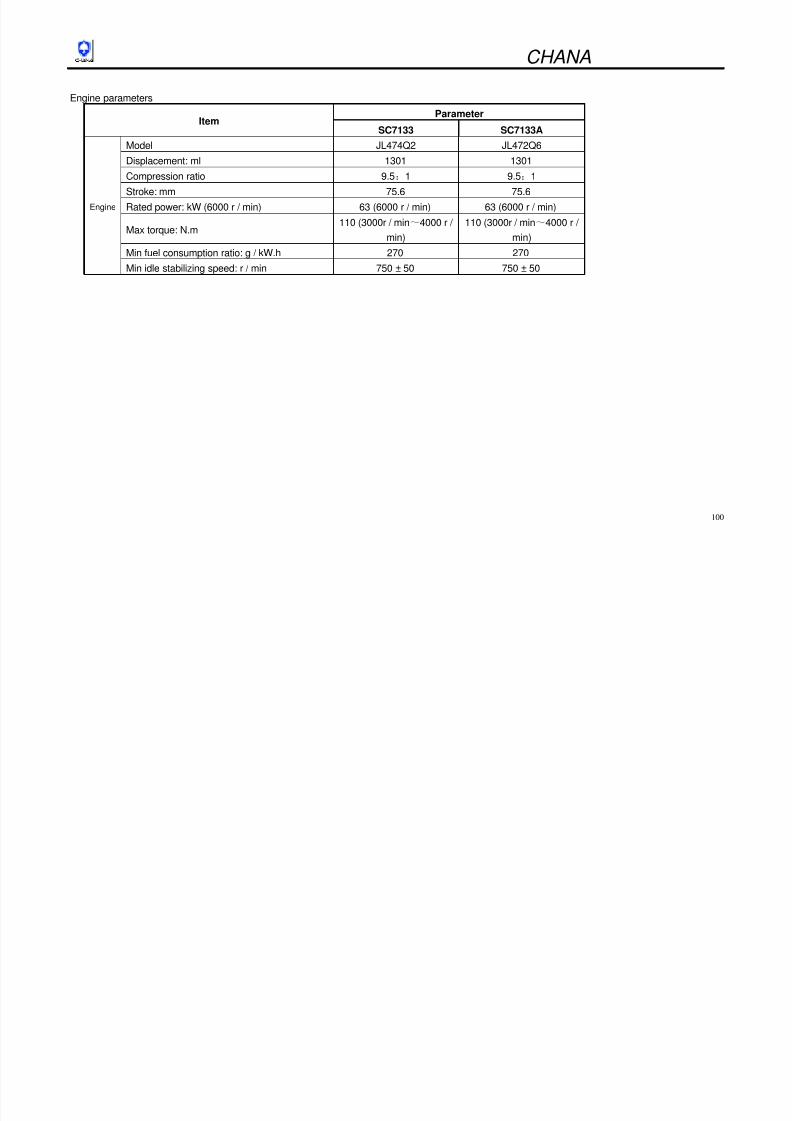
8/13/2019 BENNI Brochure
http://slidepdf.com/reader/full/benni-brochure 99/102
100
Model JL474Q2 JL472Q6
Displacement: ml 1301 1301
Compression ratio 9.5:1 9.5:1
Stroke: mm 75.6 75.6
Rated power: kW (6000 r / min) 63 (6000 r / min) 63 (6000 r / min)
Max torque: N.m110 (3000r / min~4000 r /
min)
110 (3000r / min~4000 r /
min)
Min fuel consumption ratio: g / kW.h 270 270
Engine
Min idle stabilizing speed: r / min 750 ± 50 750 ± 50
CHANA
Parameters of cooling system
Items Parameter
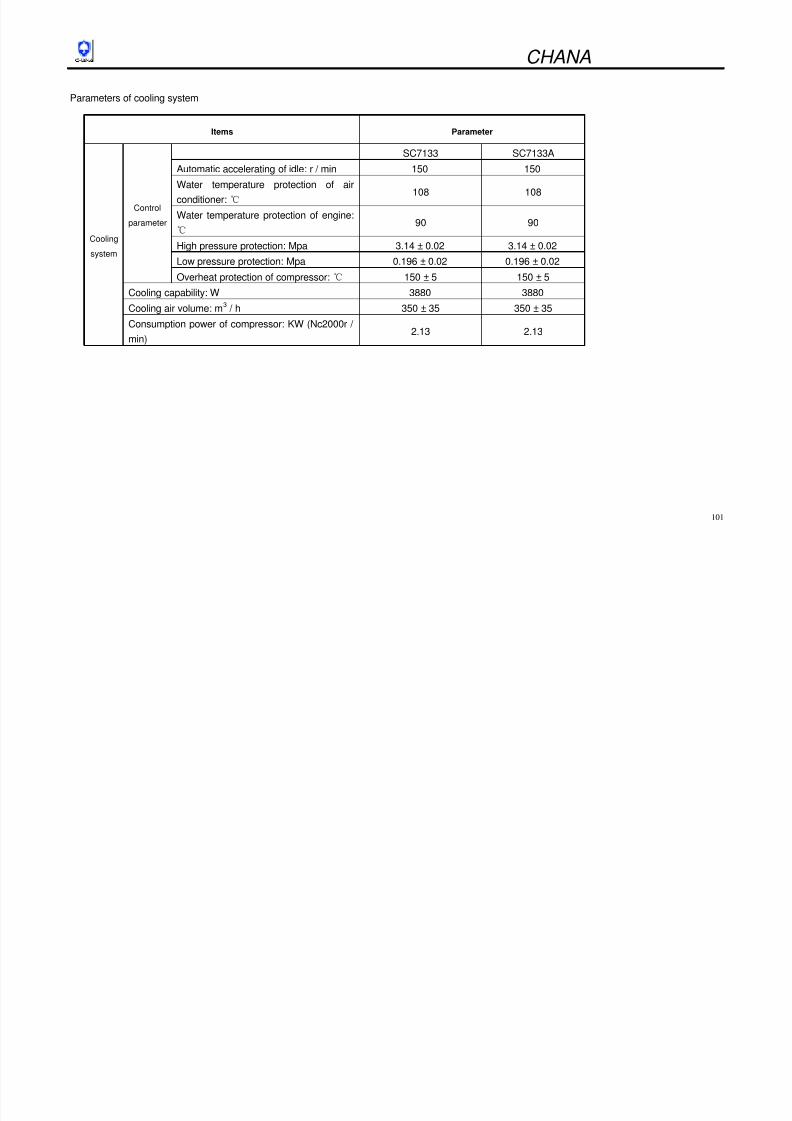
8/13/2019 BENNI Brochure
http://slidepdf.com/reader/full/benni-brochure 100/102
101
SC7133 SC7133A
Automatic accelerating of idle: r / min 150 150
Water temperature protection of air
conditioner: ℃ 108 108
Water temperature protection of engine:℃
90 90
High pressure protection: Mpa 3.14 ± 0.02 3.14 ± 0.02
Low pressure protection: Mpa 0.196 ± 0.02 0.196 ± 0.02
Control
parameter
Overheat protection of compressor:℃ 150 ± 5 150 ± 5
Cooling capability: W 3880 3880
Cooling air volume: m3 / h
350 ± 35 350 ± 35
Cooling
system
Consumption power of compressor: KW (Nc2000r /
min)2.13 2.13

8/13/2019 BENNI Brochure
http://slidepdf.com/reader/full/benni-brochure 101/102
CHANA
2....Wearable parts List
Name Type Specification QuantitySpark Plug K7RTC 4
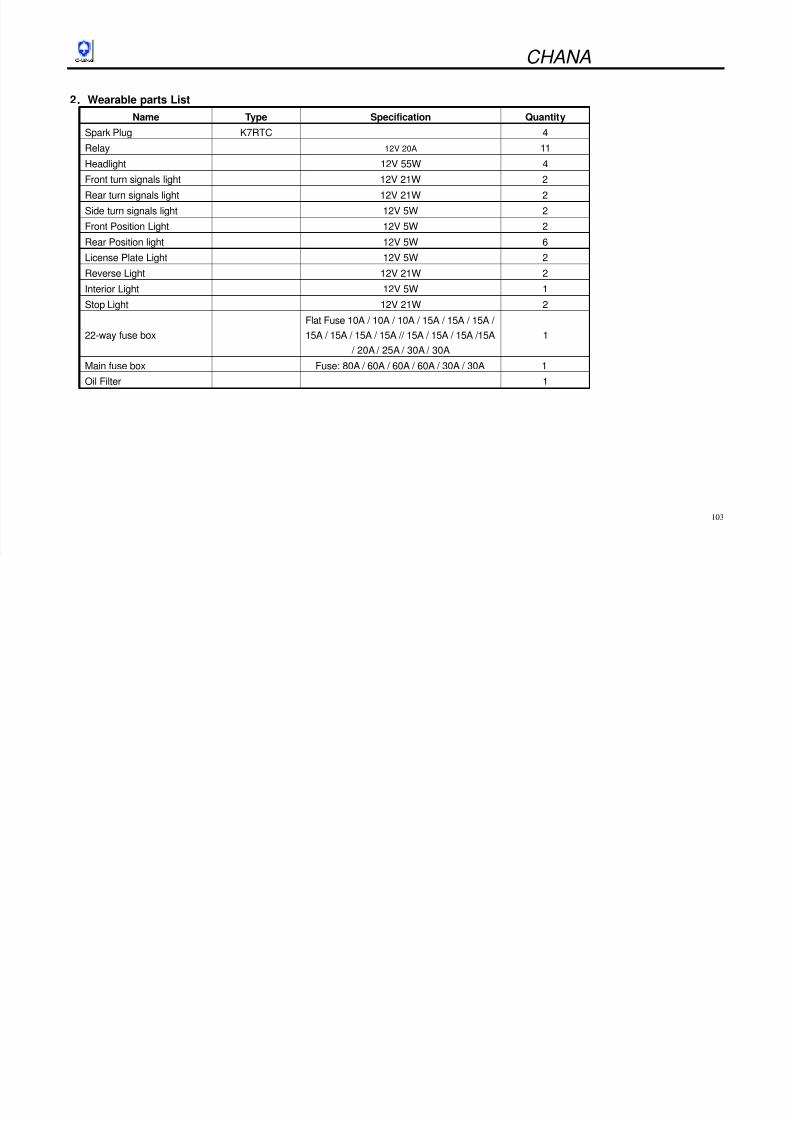
8/13/2019 BENNI Brochure
http://slidepdf.com/reader/full/benni-brochure 102/102
103
Relay 12V 20A 11
Headlight 12V 55W 4
Front turn signals light 12V 21W 2
Rear turn signals light 12V 21W 2
Side turn signals light 12V 5W 2
Front Position Light 12V 5W 2
Rear Position light 12V 5W 6
License Plate Light 12V 5W 2
Reverse Light 12V 21W 2
Interior Light 12V 5W 1
Stop Light 12V 21W 2
22-way fuse box
Flat Fuse 10A / 10A / 10A / 15A / 15A / 15A /
15A / 15A / 15A / 15A // 15A / 15A / 15A /15A
/ 20A / 25A / 30A / 30A
1
Main fuse box Fuse: 80A / 60A / 60A / 60A / 30A / 30A 1
Oil Filter 1